
Many people share their videos as they were recorded. Post-processing is considered a bit too complicated. In addition, good software for that operation is often expensive. Do you recognize that? Then you should give Olive Video Editor a try. It is free and has advanced functions in a user-friendly jacket. The Olive Video Editor also contains no advertising, is non-destructive and is super fast.
Tip 01: Install
You download the Olive Video Editor here. The website contains versions for Windows 7 and higher, one for macOS 10.12 and higher and one for Linux. With Windows you can choose from two portable editions and two classic installers (all in both 32 and 64 bit). The installation program for Windows is only 34.6 MB. That is a modest video editor. The installed program takes 110 MB. When you open the program, you enter a charcoal-dark working environment. The opening message indicates that it is an alpha version. click on OK and you can get started.
Alpha
An alpha version is software that is still under development. This means that the application may still contain imperfections. The software worked smoothly with us. We did notice that the help files and tutorials are not yet ready. The latter is no problem, because you can still get started with this workshop. The Olive Video Editor saves automatically. That is handy, especially in an alpha version. If something goes wrong, you can restart the program and continue working on where you left off.
Tip 02: Import media
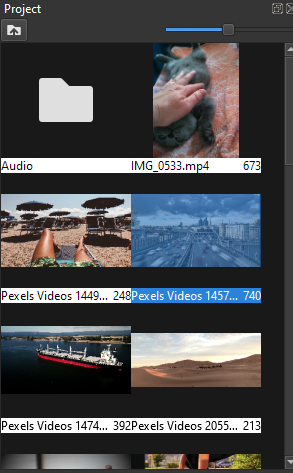
We make a film that consists of film clips, photos and music. The various media components are brought in via the menu File / Import. All imported files appear in the upper left of the panel Project to stand. You can control the size of the thumbnails with a slider. The project section is likely to become a mess. To keep it organized, you create with File / New / Folder separate folders, for example for video, audio and photos. Then you drag the files into the correct folders, such as the videos in the folder Video. You can, of course, create the folders that make sense to you. In each folder you create with the right mouse button and New / Folder subfolders. To navigate to a higher level, use the button with the arrow pointing up.
Tip 03: Timeline
Drag the video clip with which you want to start the movie onto the timeline. The numbers at the top indicate the number of frames. On the left you see a number of buttons with which you can edit the clips on the timeline. A clip consists of two purple bars. The top bar is the image, the bottom is the sound. To work accurately, you can zoom in on the timeline. You can do this by clicking on the button with the magnifying glass, or you can use the Ctrl key in combination with the mouse wheel. While you are busy, you will get a preview in the Sequence Viewer, top right.

You can always go back on your steps, because Olive Video Editor is a non-destructive program
Tip 04: Panels
You can drag and close each panel with the buttons at the top right of the relevant screen. To open a closed window again, use the menu Window and then select the name of the panel that you want to see. If you no longer know what the working environment originally looked like, you go with Window / Reset to Default everything back as it was in the beginning. To prevent the windows from being confused while you are working, record the working environment with Window / Lock Panels.

Tip 05: Split image and sound
If you want to place music under the video, it is wise to remove the original background noise. For this you first have to separate the video and the audio. Right-click on the combined video / audio bar in the timeline. Choose the assignment in the context menu Link / Unlink. With this you disconnect sound and image. Then select the bottom track. Select the assignment with the right mouse button Delete. You can always go back on your steps, because the Olive Video Editor is a non-destructive program. This means that it does not affect the media files that you have imported.

Tip 06: Trimming
You usually have to shorten fragments. This is very simple: drag the right or left side of the video bar to where the clip should start or end. As you do this, you read how many frames are left and how many frames you cut away. Because the Olive Video Editor works non-destructively, you can always extend the clip again. It is also possible to split a fragment. To do this, drag the red play button to where the cut should be. You right click on the red link and choose the assignment Split. You can also use the razor for this, the so-called Razor Tool which you find in the button bar on the left.

Placing clips is just a matter of dragging and dropping
Tip 07: Transitions
Placing clips is just a matter of dragging and dropping. You can easily change the order by dragging a bar to another position. Applying transitions is also a piece of cake. You right click on the clip where the transition should come and use the command Add Default Transition. The Olive Video Editor has a preference for the Cross Dissolvetransition, a soft transition at the beginning and the end of the clip. You can use the mouse pointer to grab the side of such a transition and drag it to make it longer or shorter. When you select a transition, you see it at the top of the panel Video Effects the length expressed in frames. Click on the orange number to accurately determine the length to a frame. At the moment there is only one transition for the video track and there are three for the sound.

Tip 08: Video effects
You can of course release effects on the clips. Then don’t forget to first select the clip that you want to edit. Then click in the panel Video Effects on the top left button Add Video Effect. Here you can choose an effect from six sections. There are highlights, such as in the section Keying. Here you can select a background color that masks the editor. With that you can apply a green key and make an even green background disappear. Then drag the clip over a new background. This makes it seem as if the person you filmed is in a new environment. Also in the section Stylize find nice effects such as Toonify with which you create a cartoon effect. In some clips Volumetric Light also very nice, where it looks like you are putting a super strong lamp on a part of the film. In the Effectswindow you control the settings of the effects that you have chosen.
Render
With the effects in the section Render are some functions that add text to a clip. We mean the effects Rich Text, Solid and Timecode. With this you place text, a colored area or a time code on the image. Choose you for Timecode, then the frame numbers appear on the video images. This can be useful when mounting. Once the editing is done, remove the check mark for this effect.

Tip 09: Text
You also have to be in the category for titles and text Render from Effects to be. Select there Rich Text. In the box Text give the text shape and color. Here you will also find the function Padding, that is the space between the text and the border. Position the text by the value Position drag the mouse pointer left or right. The text in the preview window then follows horizontally or vertically. It is even possible to scroll the text over the image with the option Auto Scroll. To make the text easier to read, you can place a shadow behind the letters.

Tip 10: Speed and more
Right-click on a video clip and choose Speed / Duration. Here you can read the frame rate that is 24 frames per second. With the option Reverse turn the playback direction of a clip. Water disappears back into the tap and an omelet drops back into an egg. You can also adjust the speed of the clip here. By default it is on 100%. For example, to slow down the speed 60% in. If you want to double the speed, choose 200%. An interesting option is Maintain Audio Pitch. This slows or speeds up the audio, but the pitch remains the same. If we apply this option to a film clip by a Spanish guitarist, the music sounds slower, but the sounds remain as clear as they are.

Tip 11: Traces in layers
Instead of adding the different clips one after the other, it is also possible to drag the clips to a higher or lower track. The images are superimposed in layers. At each layer you can arrange coverage in the institution Opacity of the panel Video Effects. When you reach the top rail you only have coverage 50% , the clip can be seen semi-transparent over the underlying clip. If you check the box Transform checked, it is possible to shrink the top clip and drag it somewhere in a corner, so that you can view both clips at the same time. You can do that manually or you use the values Scale and Position in the panel Video Effects. It is even possible to tilt the top video so that it is rotated.

Sliders
All values in the panels can be adjusted by entering numbers. That is often only a matter of guessing and missing. It is more convenient to click on the orange number and hold down the mouse button. You can use this to drag the mouse pointer to the left or right and adjust the values infinitely. If you do it this way, a double arrow appears above the number to indicate that you have an invisible slider.

Tip 12: Sound
To provide background music for the editing, use the again Importfunction to download the audio file. Then drag the audio file onto the timeline. Again it is possible to place different audio files one after the other. You can also partially place them on different tracks on top of each other: that is how the music flows into each other. You adjust the length of an audio track in the same way as with a video clip: you drag the beginning and / or the end. To gently put the music in and let it fade out at the end, right click on the audio bar and choose Add Custom Transition. You can see that at the top of the Video Effects have changed to Audio Effects. With the bottom sliders you can control the fade-in and fade-out. You can adjust the volume at the same time. Also the sound option Pan is interesting. By default it has the value 0. If you make that setting negative, the sound will be stronger through the left speaker. Put the pan setting on 100, the sound will only be heard through the right speaker. That way you can let the sound run from one side to the other.

Slide show in less than a minute
We talked about editing video and audio files, but with the Olive Video Editor you can do more. You can make a slideshow of photos very quickly and export them as a video file. We tried this: in less than one minute we made a slideshow of 33 photos that blended together. We imported the photo files at the same time. Then we selected everything and dragged the images from the project box onto the timeline. We then pressed the shift key and selected the even numbers, so the second photo, the fourth and so on. We dragged the selection to a higher track. We selected all the photos on the timeline and chose the command with the right mouse button Add Default Transition. While all photos were still selected, we extended the transition from one photo clip. This command was applied to all selected photos. You extend the transition by dragging the final transition a little to the right with the mouse pointer. Then you drag the start transition a little to the left. Ready!

The project is saved in the ove format, which produces very small files
Tip 13: Export
While you work, save the project in the ove format. This results in a very small file of only a few tens of kilobytes. The Olive Video Editor only saves the edits you have made to the media files. Use the command to export the file to a standard video format File / Export. You then get a wide selection of export options. The program selects the MPEG-4 video format as standard with a frame rate of 30 frames per second. Other formats such as avi, QuickTime, mpeg-2, Matroska-mkv and Windows Media are also no problem. It is even possible to export the video to a gif or an animated png file.
