A photo is rarely what you want it to be. Optimization work is needed to get the picture right. With PhotoScape X you can easily edit and improve photos (in batch). And much more is possible: you can, for example, make a photo collage, provide photos with fun decorations and text and create animations. Let’s start with the editor.
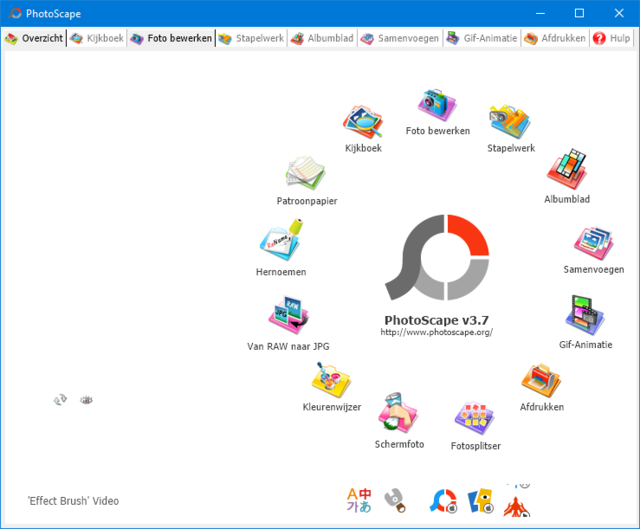
PhotoScape has been around for many years and now there are even two versions available, both (also at the same time) under Windows 10 to turn. PhotoScape 3.7 is suitable for Windows XP and higher, PhotoScape X (currently 4.1.1) is available for both Windows 10 and MacOS. In terms of functionality, the two differ little from each other, but the programs look completely different. PhotoScape 3.7 looks a bit old-fashioned, while PhotoScape X looks modern and attractive with the black interface.
So we go for the latter (thanks to reader Jannes van der Laan for this tip). We stick to the free version of PhotoScape X. It already has countless possibilities and a step up to the pro version is quickly done, at least if you want to pay 40 euros for it. In this article, we’ll focus on the built-in editor.
Boot up
You will find download links for both programs here. The link to PhotoScape X for Windows 10 goes to the Microsoft Store. A few mouse clicks away is the photo tool waiting for you. When you press the logo button at the top left, you will see an overview with fifty links to short screencasts in which a different function is explained each time. You will find even more screencasts (about eighty) here.
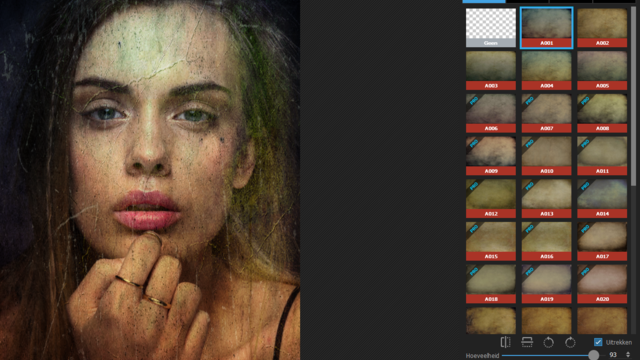
Immediately next to the logo button is the tab Display. This will open a file browser and as soon as you open a folder with images here, you will see your photos in thumbnail view in the right pane. You can control the display size with a slider at the bottom. With the buttons at the top right you can choose from other views.
If you right-click one or more photos, some useful options will immediately appear, such as Enlarge / reduce, Rotate, Metadata (delete) and edit. With this last option you place the photos in the Editor: The tab we’ll be focusing on in the rest of this article.
Reconnaissance
Let’s explore the editor interface first. Here too you will find the file browser: the thumbnail photos appear at the bottom and the selected photo ends up in the middle window for further editing. You can also quickly scroll through your photo folder via the arrow buttons at the top.
PhotoScape can display and edit raw photos, but can only save them in the classic formats: jpeg, png, gif, bmp, tiff and webp. You can save edited photos via the button Save, bottom right. You can also use this window Save project if you want to edit the photo further later.
At the bottom left you will find some buttons with which you can adjust the photo display, such as the zoom factor or an auxiliary grid. Very handy are the buttons at the bottom right. Once you’ve made an edit on a photo, you can always undo it here and go back to the original in one go, or quickly switch between the edited and original photo.

Tool box
In most photo editors you can’t miss the toolbox. In PhotoScape it is somewhat hidden and the tools only come into view as soon as you enter at the top right Tools clicks. The tools Bucket and Clone stamp appear to be reserved for the pro version, but don’t let that spoil the fun. There are fifteen other tools you can get started with, such as Quick retouch brush (you can remove an imperfection with a mouse click), Correct red-eye and Adjust color.
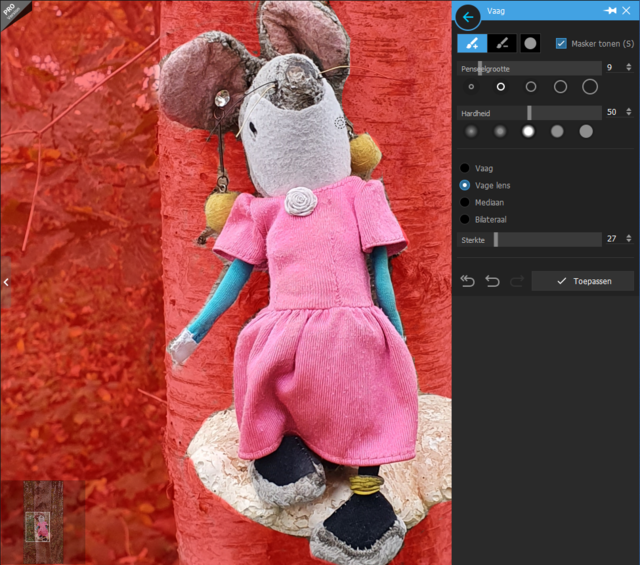
As an example, we will limit ourselves to a tool that allows you to keep a specific part in focus and blur the rest of the photo. Open for this Tools and choose Vague. You now see four blurring techniques: Vague, Blurred lens, Median and Bilateral. You can determine the strength of this with the lower slider.
You still have to indicate to which photo parts you want to apply that blur. To do this, click on the brush Add (+) and after you set the hardness, shape and size of the brush, you can draw the blur area on your photo. Made a mistake? With the button Subtraction (-) you remove the offending part again. Check the box Mask if you want this red blur mask permanently in view. If everything looks good, confirm with the button To apply.
Effects
Every creative photo editor also provides a number of effects and that is certainly no different with PhotoScape X. Click the button at the top edit and in the right window go to Effects. You will see thirty icons, only two of which are reserved for the pro edition. The effect is of course different each time, but the underlying effect is quite similar, which makes it user-friendly.
As soon as you get an effect (such as Crayon), this continues throughout the photo. Hold the button Compare to see the photo with and without effect, or press the button with the two circles to see the difference permanently in the image. The vertical dividing line can always be dragged with the mouse.
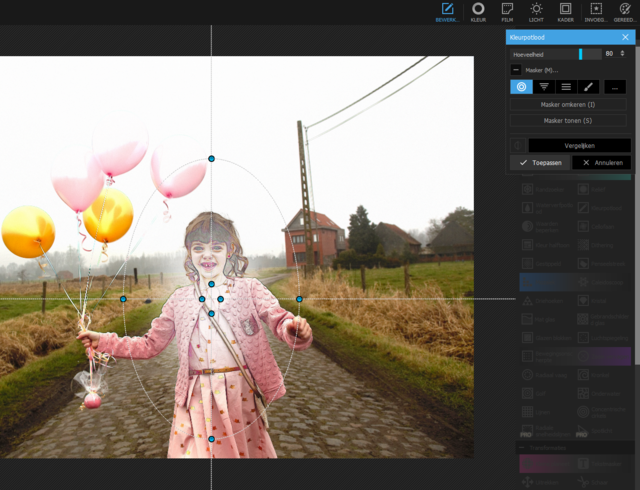
To soften the effect, all you need to do is move the Amount slider to the left, but you can also limit the effect to a specific part of your photo. To do this, click on the plus button Mask and you can very well determine for yourself on which part the effect may continue or not. To determine the mask, you use the brush mode by default, but other mask modes are possible. To do this, select one of the available modes via the buttons at the top. Through Mask mode (1) for example, you can quickly make this mask circular and just drag the blue handles.
Even more effects
Anyone who thought that PhotoScape X was finished with the 28 copies from the effects panel, did not look around properly. Bee edit you will find many more options, both with the part Modifications (22 in the free version) as with Transformations (ten in the free version).
And we are far from there yet. Via the button Colorat the top, a window opens in which you can set a dozen or more color effects and such an amount extra via the button More. Here too, you can use the masks that are now known to indicate exactly where these effects can continue.
Over to the button Movie, which in turn contains eight sections. Suppose you want to give your photos an old look, without having to lapse into that eternal sepia. Then you have various options, which you can possibly combine. Open the rubric Old pictures and select one of the five available effects. Also in the sections Dirty and Extras you will find various effects that give your photo a somewhat appeared or damaged look. With each of these effects you will find a control panel at the bottom with which you can adjust the result to your own liking.
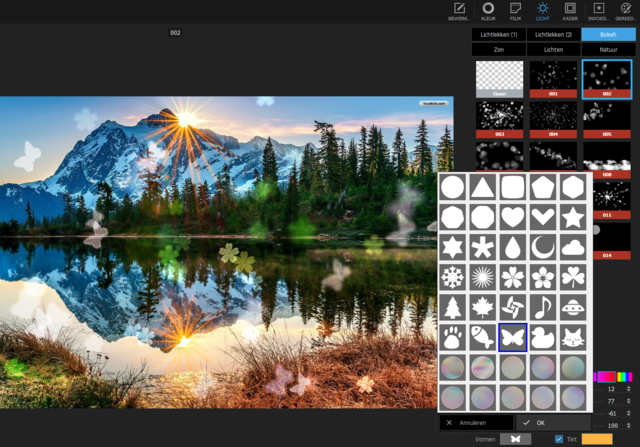
From bokeh to geometry
You can also provide your photos with all kinds of decorations and figures with PhotoScape X. As an example, we will first show you how to add bokeh. These are blurred particles in a photo, often in a certain shape. Then we will see how we get all kinds of geometric figures in a photo.
Let’s start with bokeh. To do this, press the button light and open the rubric Bokeh. At the very bottom you press the button To shape and select a suitable shape, after which you move the mouse over the sixteen available icons: the effect you will see in your photo. Select a suitable bokeh type and adjust both shades, and at the bottom Lightness, Bowls, Angle and Ratio as desired.
Over to the Insert button, at the very top right. Various geometric figures will now appear, such as an arrow and a line and furthermore a square (with or without rounded corners) and a circle (with or without filled). Depending on the chosen shape, more setting options are displayed. For example, if you choose an arrow, you can set type, thickness, opacity, shadow, angle and color. You can also determine the latter yourself with the help of a Color picker (pipette).
Text and titles
It can be nice to add a short text to a photo in your album every now and then. For that you open again Insert and choose you Text. The model text immediately appears in your photo and you can move, scale and rotate it as you wish.
From the right window you can define many other options, including the font, color and size, any background and shadow. You can distort your text just as well: place a check mark next to it Transformation, click on Transform and experiment to your heart’s content. By default you see here No , but in the drop-down menu you will find twenty possible text figures, such as Bow and Circle.
You can of course also place the text on top of another object, for example on a previously added rectangle. If the text behind that object disappears, select your text and click the button in the right window Forward. It should be clear: PhotoScape X just screams for your imagination. Have fun with it!
.