The upcoming HCC season theme is Shooting with your smartphone. We’re already kicking off with the possibilities of the built-in cameras of the iPhone.
Edited by Rob Coenraads
Chances are your compact camera is sitting idly in a drawer these days, if you still have one at all. Many people use their smartphone to take photos and videos. In the context of the upcoming HCC seasonal theme Photographing with your smartphone, you can read a number of options in this article and the articles that follow. We’ll start with Apple’s iPhone cameras. You can do more with this than you think.
 |
Camera app from iPhone
The Camera app of your iPhone and iPad makes a camera superfluous in many cases. It is a great advantage that you (almost) always have your smartphone with you, so that you can strike immediately at a photogenic moment. Moreover, the camera of the iPhone is no longer inferior to most compact cameras. You can take a photo by tapping the screen, but shaking hands can lead to blurry photos. It works much better to take pictures with the volume button on the side of the device.
Once you’ve taken a photo, you can edit it right away. This way, you can quickly straighten a crooked photo on your phone. When you’re done shooting, you can quickly take a look at the photos you’ve already taken from the app.
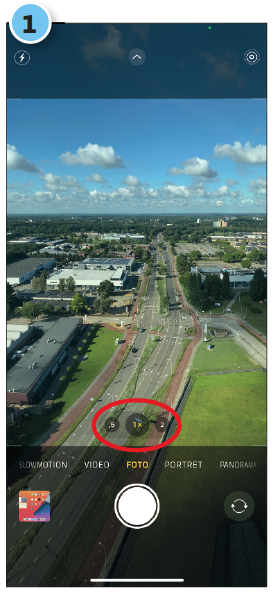
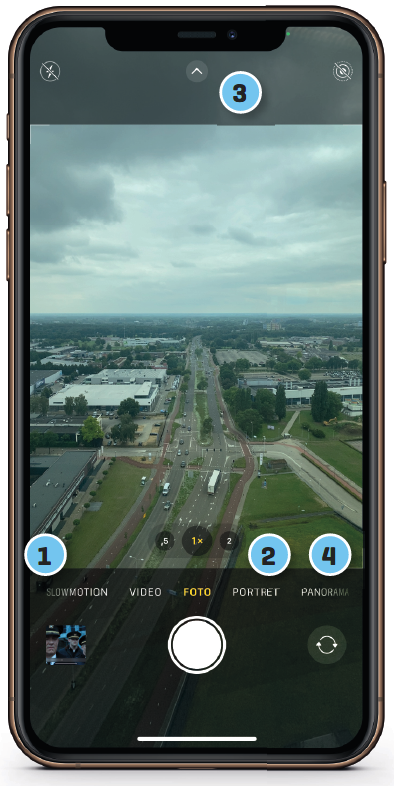
1 Zoom and shoot
The round button is the release button. You can zoom in and out by moving two fingers apart or together—”pinch,” as Apple so eloquently calls it.
RawFor avid photographers, there is also the option to save photos in RAW format. This allows you to extensively edit your photos afterwards. You make RAW available via Institutionsbelow Camera > File structures. Then use the menu from step 3 to enable it. Note: this only works with Pro models from the iPhone 12. With other models, you shoot in RAW via other apps, such as Halide. |
|
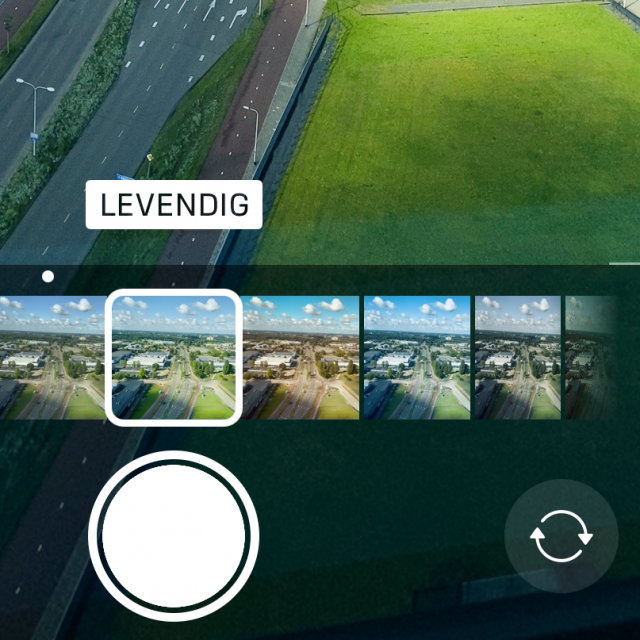
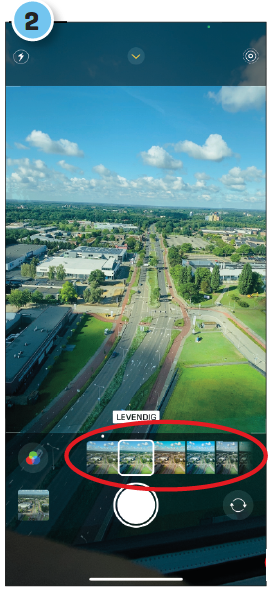
2 Effects Tap the arrow button to business
|
3 Button bar In the top left corner of the toolbar, you can |
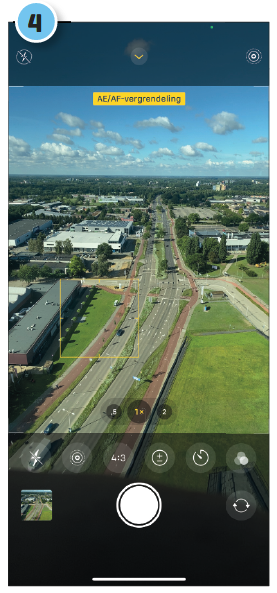 |
4 Focus Tap the part of the photo you want to focus on. Hold your finger on that part for a moment to lock the focus. For example, the iPhone does not automatically change the focus. |
||
|
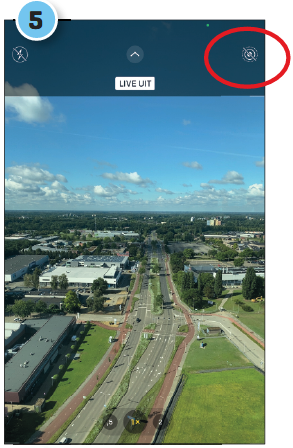
5 Live Photos By default, you create one Live Photo: basically a short movie about printing. Tap the button with the circles in the top right corner to turn it off. |
|
||
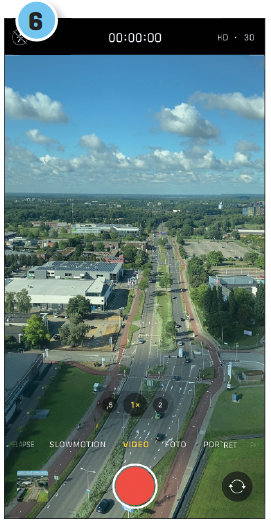 |
6 Photo Modes Swipe left or right anywhere on the screen to switch between camera modes: timelapse, slow motion, movie, video, photo, portrait or panorama.
|
More possibilities
In addition to normal photos, you can also take panoramic photos, portrait photos and time-lapse videos, for example.
|
1 Time Lapse A time lapse (or ‘lapse of time’) is a movie with lots of photos pasted together in rapid succession. This mode is often used to show a sunset, an opening flower or a busy street. Just search YouTube for ‘timelapse’ for inspiration. 2 Portrait The iPhone 7 Plus, iPhone 8 Plus, and all models since the iPhone X can take portrait photos. The background (and foreground on iPhone 13 and later) is blurred, the subject in front is sharp. That really pops! 3 Additional settings Tap the arrow at the top and you’ll pull up a bunch of extra settings that appear above the shutter button. Here you apply effects or choose a different aspect ratio. 4 Panorama The panorama function allows you to take photos of 270 degrees wide. So you can start with your left shoulder and capture your entire field of view up to and including your right shoulder in a photo with one movement. Vertical panoramas are also possible. Grid Do you want to take perfectly straight photos? Go into the app Institutions Unpleasant Camera and put the slider back Grid on green. |
|
Live textIf you point your camera at a text, it will be recognized. Yellow frames will appear around the text. Tap the notepad at the bottom right and you will be given the option to copy and paste the text. |