
Does Microsoft Excel look familiar to you, but have you hardly ever worked with it or have you never worked with it? We help you step by step to learn the basic functions to get started with this spreadsheet program.

Edited by Niels Brouwer
Excel is a spreadsheet program that is standard in all Microsoft Office packages, just like Word and Outlook. With Excel you can prepare overviews, keep track of data and make calculations and graphs. In this first part of this workshop you will read how to use Excel and learn the basics, such as the work ribbon and creating new workbooks. In part 2 in PC-Active 323 we really get to work with the program.
Excel is a spreadsheet program that is standard in all Microsoft Office packages, just like Word and Outlook. With Excel you can prepare overviews, keep track of data and make calculations and graphs. In this first part of this workshop you will read how to use Excel and learn the basics, such as the work ribbon and creating new workbooks. In part 2 in PC-Active 323 we really get to work with the program.
EXCELLENT 2019
There are different Excel versions, which in turn can be in different Microsoft Office versions. This workshop is written based on the possibilities and images of Excel 2019, which is part of Office 2019. If you have Microsoft 365, you may already have Excel 2021. This workshop can also be done well with Excel 2016, the novelties of We do not consider Excel 2019 and 2021 here. Something may have a different name, but it means the same thing.
DISCOVER EXCEL 2019
This workshop is intended for computer users who are new to Excel or who only know the basics. The article largely corresponds to the first chapter of the book Discover Excel 2019 by Wim de Groot (see box opposite). In this book of no less than 256 pages, you can read on the basis of countless detailed and surprising examples how you can get the most out of the program with little effort. You will also learn to work with data (enter text and numbers, create address lists, find data and sort or filter a list), explore and format the worksheet, calculate, count, create and print a chart. In short, a handy book to get to know Excel 2019 thoroughly and to expand your knowledge.
 |
| Figure 1 |
START WITH EXCEL
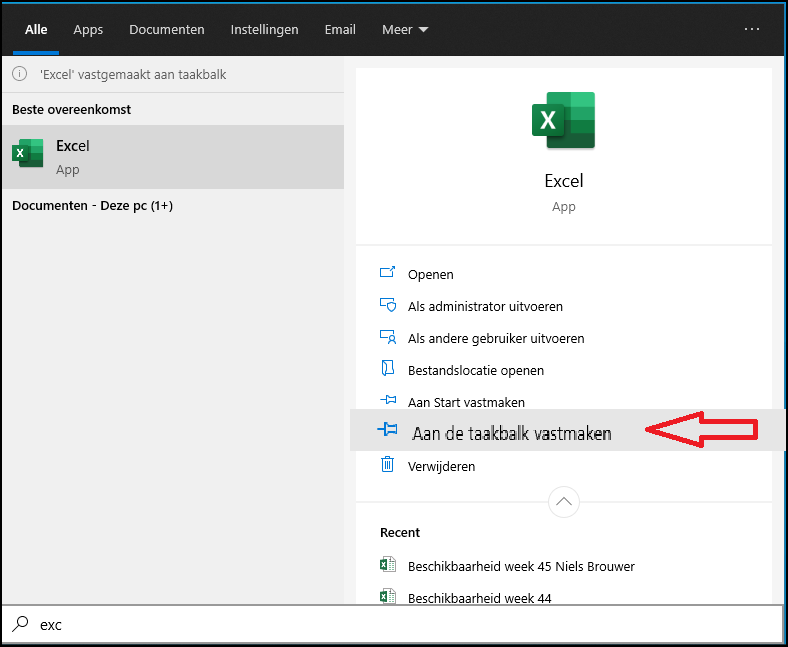
Start Excel by pressing the Windowsbutton at the bottom left of the screen or by clicking the Windowsbutton on your keyboard. In the search bar, type Excel and click on it. There is also a faster way the next time you use the program: click on the Windowsbutton and type in Excel. Right click on the program and select Pin to taskbar† See Figure 1.
 |
EMPTY WORKFOLDER
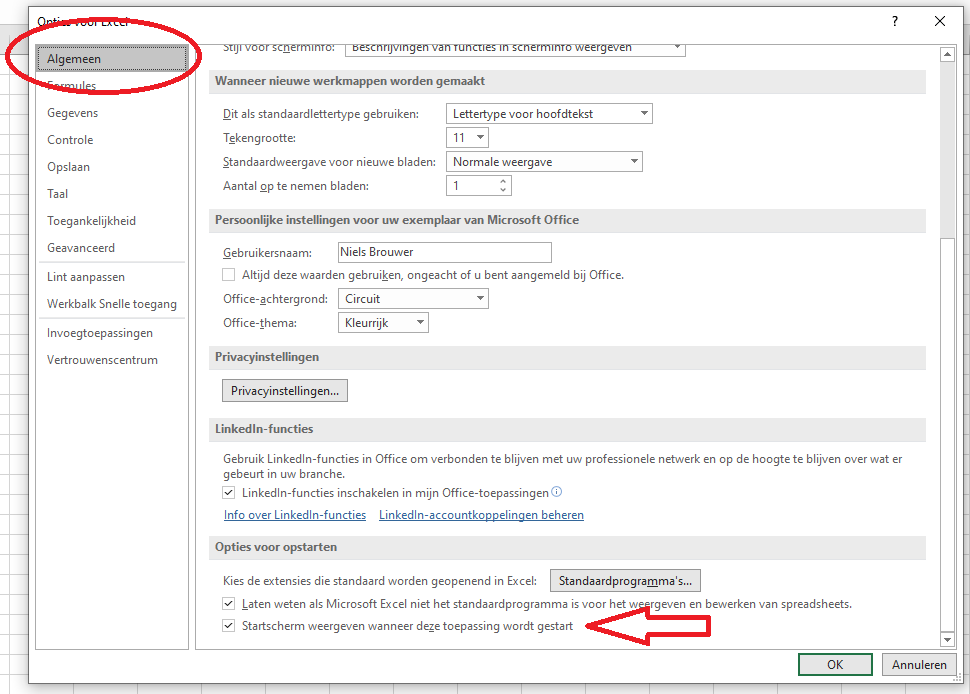
To start a new document, click Empty workbooksee image 2. This is already automatically selected when you open Excel. 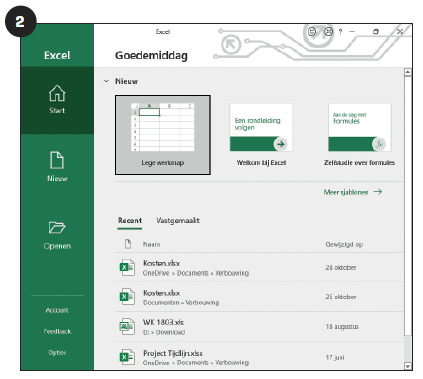 Every time you open the application, you will see this same home screen. If desired, you can adjust this so that when you open Excel you will immediately see a new empty workbook. Go to File, at the top left of the horizontal ribbon when you are in the workbook. You will then come to a window where you have a vertical menu on the left and your recent documents on the right. click on Options at the bottom left of the menu. Now the window opens Options for Excelsee figure 3. Make sure the menu option General is selected. Then scroll down and switch at Ostartup options the option Show home screen when this application is launched from. Of course you leave the option on if you want to keep this start screen when opening Excel.
NEW EMPTY WORKFOLDER
When you are in a workbook, you may like to open a new blank workbook. In that case, go to File top left of the ribbon. click on New and click on the home screen Empty workbook† Or use the key combination directly Ctrl+N† Such a workbook consists of a large table, the boxes are called cells. Cells below each other form a column, at the top the columns are marked with letters starting from A. A series of cells next to each other across the full width is called a row, which are marked on the left with numbers from 1. When you select a cell, the border is dark green. The column letter and the row number become gray and in the box above the letter A you see the so-called address of the current cell, for example E7. When you have a lot of information in the workbook and you want to go further to the right, you can move on the scroll bar at the bottom right of the bar or click on the arrow to the right (image 4). 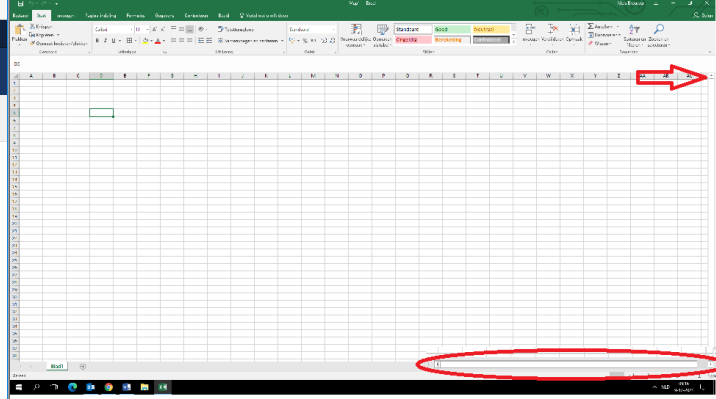
To move up or down in the workbook, click or slide the vertical scroll bar on the far right. If you don’t see a slider, you can set it manually. Go back to File top left and to Options. Click now Advanced and scroll down to Display options for this workbooksee figure 5. Check Show horizontal scroll bar and Show vertical scroll bar then click OK†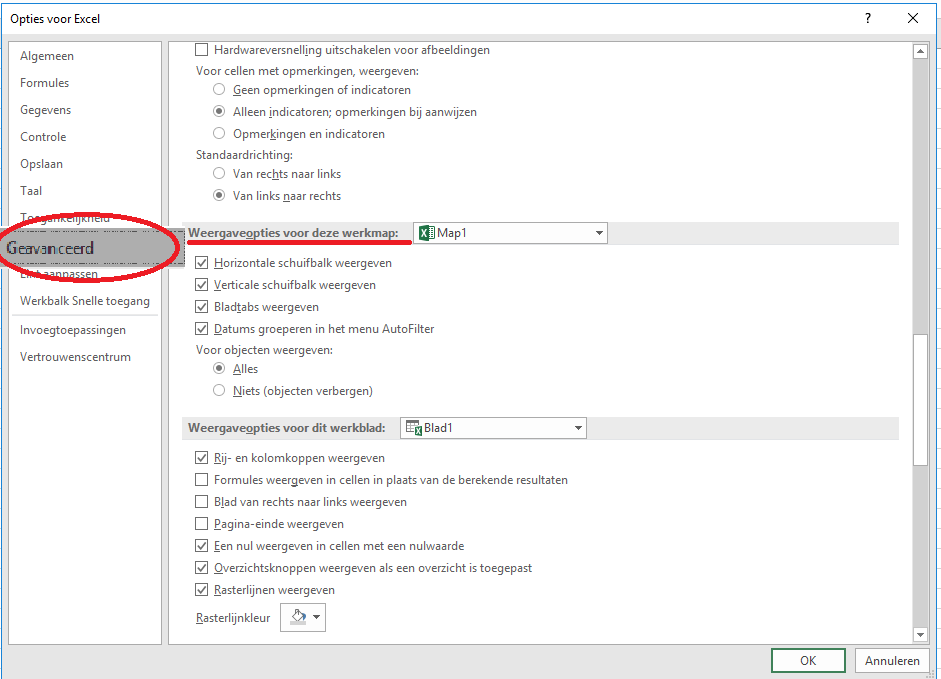 INTRODUCING THE RIBBON
At the very top center, above the ribbon, is the file name of your workbook. If you haven’t named the folder yet, it will say ‘Folder1 – Excel’. If you have multiple folders open, that number increases. Once you save the workbook (via File and Save or Ctrl+S), you will see your chosen file name here.
TABS
The ribbon contains nine tabs. When you click on one of those tabs, you’ll see all the options to get you started. When you hover your mouse over one of the buttons, more information will appear, see image 6. You can read here what these tabs mean and when you need them. 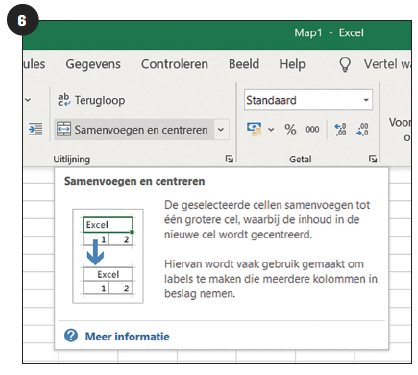 through the tab File takes you to the page with commands related to the file as a whole. This is also called the backstage-display. For example, when you click New, opens the home screen. Furthermore, here are the options To open to open a workbook, Print to print the file and Close to exit Excel.
Under the second tab Start you see the different options for formatting and editing the workbook.
In addition, you see the tab Insert† This button allows you to add images, symbols, special characters, charts, etc. to the workbook.
on the tab Draw you can highlight data in a workbook, among other things.
In addition, you see the tab Page layout for changing, among other things, the page settings. Think of the Windows preset Themes for the document, as well as page size, print titles, and print range.
In the tab Formulas you can create and calculate formulas for your file.
in the tab Facts you can filter and import data and convert text to columns, among other things. In the tab To check you will find the options to, for example, check spelling, add comments to the worksheet or to protect the document. You can also create queries here, in which you combine data from different sources.
in the tab Image set how you want to show or hide the workbook or screen components and whether you want to reduce or enlarge the image.
Finally there is the tabs Help or Tell what you want to do to look up information about Excel functions.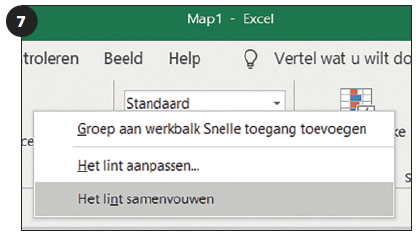 COLLAPSE RIBBON
If desired, you can also collapse the all-featured ribbon to enlarge the screen. Move your mouse to the ribbon and click on the right mouse button. Three options will appear (Figure 7). Choose Collapse the ribbon† You can also use the hotkey Ctrl + F1 impressions. To expand the ribbon again, click on the same shortcut or move the mouse to the ribbon again, right-click and select Collapse the ribbon to disable this option.
CHANGE TOP COLOR
Dark green is the default color for the top of the screen and tabs. Gray is the default color for the ribbon background, column letters, and row numbers. You can adjust these colors, go to File and click Account† As an option you can see here Office theme stand (Figure 8). By default this is set to Colorful† You can also choose Dark gray, so that the top of the screen, the column headings and row numbers become dark gray and the ribbon itself gray. Of Black all backgrounds turn black and when you White chooses, all backgrounds become white. Note that the setting of this Office theme affects all Office applications, including Word and PowerPoint. To exit this window again, click on the left arrow at the top Start† 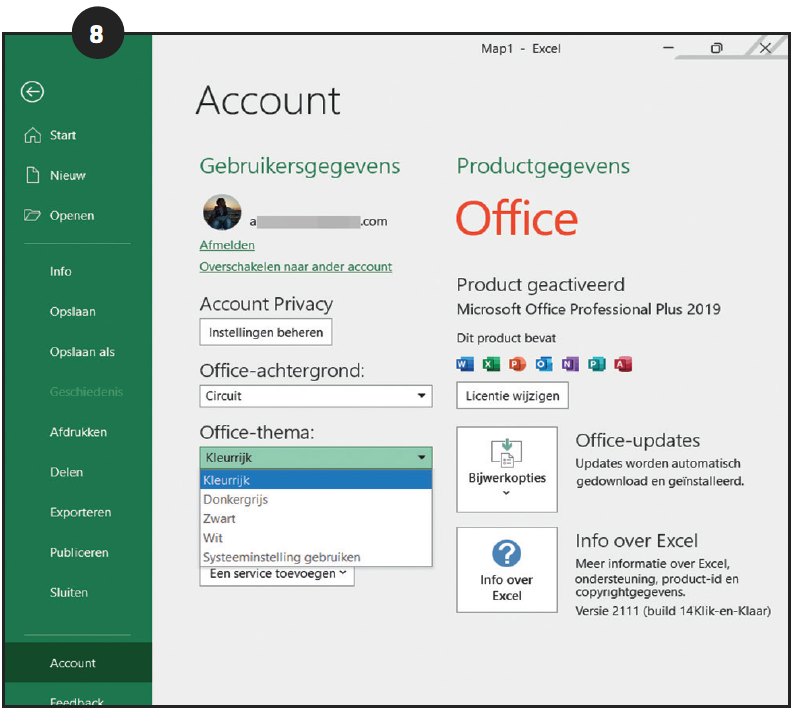 THE FORMULA BAR
You may have noticed that there is a white line below the ribbon. This is the formula bar, here you will find the contents of the cell you have selected. For example, if there is a formula in a cell, you will see it in the formula bar. You can also change the formulas in this formula bar. You can also adjust the height of the formula bar. For example, if the formula doesn’t fit on 1 line and you want to see it in its entirety, grab the bottom of the formula bar and drag it down or click the down arrow, which is located at the far right of the formula bar. 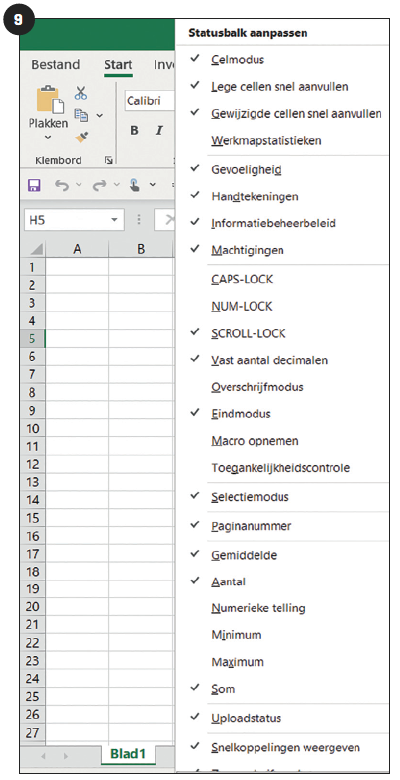
STATUS BAR
There is also the status bar, which is located at the very bottom of the workbook. Here a large number of settings can be adjusted, see image 9. Right click on the bar to bring up the context menu. At the bottom right of the status bar you will see a Zoom slider, which allows you to zoom in and out of your workbook. To the right next to it is the percentage of the enlargement or reduction. You will also see a number of interesting options here, such as Average† Number of† Numerical Count† Minimum† Maximum and Sum†
CALL FOR HELP
When you run into something, you can ask for help in Excel. For this you go to Help or Tell what you want to do, right in the ribbon. Type in your question or use keywords. We give two examples below.
Do you want to make a cell fat? Then click on the relevant cell. Then click on Tell what you want to do and in the search box type Bold. A menu will now appear with the option B fat† If you click on it, the contents of the mentioned cell will be made bold.
The second example is that you want to sort a series of numbers. Click on one of those numbers, go back to Tell what you want to do and type in: Sort. A menu with buttons will appear for various ways in which you can sort the cells. Do you choose Sort descendingthen the numbers are arranged from largest to smallest. Sort ascending List all numbers from smallest to largest. The useful thing about this help function is that it remembers recent searches or keywords. So if you want to make a cell bold again or sort a new row of numbers after a while, those choices will immediately come to the fore when you click Tell what you want to do clicks.