
A beautifully designed text or brochure invites you to read. In addition to layout, typography is also important and then we automatically end up with fonts. Read here how to install additional fonts and how to turn your own handwriting into a real computer font.
Toon van Daele
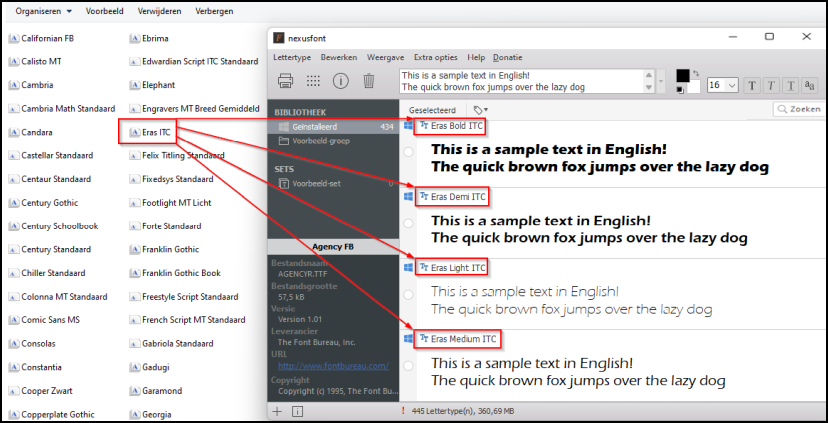 |
| A font (file) can contain multiple fonts. Here the font Eras ITC |
On a computer with a newly installed Windows 11 and Microsoft 365, we counted about 190 fonts. Or actually 440, since most fonts come in different font styles, such as bold and italic. Strictly speaking, a font in a specific font style and size is called a font or also typeface, but we don’t fall for that. 440 fonts and therefore plenty to choose from, but it still happens that we don’t quite find what we like. That is why we will first tell you where you can go for extra fonts and how to install them in Windows. To keep a good overview, we also propose an excellent management tool: Nexusfont. Finally, we’ll show you how to convert handwriting into an installable font.
 |
| With more than 60,000 fonts you will be sweet for a while |
ONLINE FONT COLLECTION
We assume you don’t want to spend money on a font. Fortunately, there are quite a few free fonts available. An impressive collection is that of dafont.com, with more than 60,000 fonts. Through Submit a font you can even upload your own fonts (see also the box ‘Creating fonts’).
You can search this collection not only alphabetically, but also thematically, with headings such as fancy† goth† Holiday, and so on. Click on a font to also see the individual characters and via preview and Submit display your own text in that font. Place a checkmark Show variants to see any variants. Most fonts are free for personal use. Once you have found a suitable font, click on the Download-knob. Right click on the downloaded zip file and choose Unpack everything and unpacking†
 |
| Google also offers hundreds of fonts, which you can also use for free – even commercially |
EVEN MORE FONTS
You can also find more than 60,000 fonts on 1001freefonts.com, which can also be searched alphabetically and thematically. A ‘smaller’ collection, but still about 17,000 fonts, can be found at 1001fonts.com. Click here on more to be able to select fonts from about fifty different categories.
Don’t let your font fun spoil it, but be aware that these are mostly fonts designed by non-professionals and can therefore contain imperfections. So don’t be tempted to install hundreds of fonts. You don’t use all of them anyway and Windows could choke on them.
Free, yet professional fonts can be found at Google, at fonts.google.com. There are only a handful Categoriesincluding serif and Sans Serif (i.e. serif and sans serif), but with more than 1300 font families you still have a nice offer. Choose a suitable font and click on + Select this style. Repeat this for other styles and fonts if necessary. When you’re done with this, press in the top right View your selected families and click Download all† Also extract this zip file.
Create FontsDownloading and installing existing fonts is one thing, downloading and installing your own existing fonts is one thing, designing your own font is another thing, of course. For simple pixel fonts, as you often encounter in old dos games, you can surf to pentacom.jp/pentacom/bintfontmaker2/gallery. Click on a nice font Copy&Edit, so that you end up in the online editor. Select a character on the right and add or remove pixels with the mouse. Repeat for all desired characters. At the end you choose build font and OK and download the resulting ttf file. Ttf stands for TrueType Font† The meaning of ttf (and otf: OpenType Font) goes too far for this article, see nl.wikipedia.org/wiki/TrueType for an explanation. |
|||
|
Start with a (copyright free) font, edit it yourself and download it as an otf file |
|||
INSTALLATION
You should now have one or more extracted font files, each with the file extension .ttf (TrueType Font) or .otf (Open-Type Font). If you have downloaded multiple fonts at the same time from Google Fonts, you will notice that each font ends up in a separate subfolder. The intention is of course to install the fonts in Windows. Fortunately, the installation is very simple. Navigate with the Explorer to such a file, right click on it and choose to install (for yourself) or Install for all users. When you then (re)start a word processor such as Wordpad, MS Word or another application, you will see the installed font in the familiar drop-down menu with fonts.
 |
| Installing a font is a matter of a few mouse clicks |
MANAGE: WINDOWS
It is of course a bit difficult to choose the most suitable font from such a small drop-down menu and also: how do you actually remove a redundant font? You can do this from the Windows Settings, where you first Personal settings and then Fonts opens. Here you see an alphabetical overview of the available fonts, including search bar, each time with a sentence in the relevant font.
When you select such a font, you will see the corresponding typefaces or fonts (such as Narrow† Italics and Fat) in an adjustable size and you can type in a text yourself that you want to see in that font. Bee Font file do you find the button remove, which removes the font from your system. Windows won’t let you just remove fonts it needs – an error message will pop up -, but for safety’s sake it’s a good idea to only remove fonts that you’ve installed yourself. At the top of the window Fonts there is also a box visible where you can drag font files. Fonts can also be installed in this way.
By the way, there is another way you can manage fonts in Windows. open you Explorer and type C:WindowsFonts in the address bar (or %systemroot%Fonts if the first folder doesn’t match). Here too you will see the font files in the corresponding font view. Once you select a font, options become available at the top such as Example and remove† Choose here Example and Printa handy sample text of that font will be printed in various sizes.
MANAGE: NEXUSFONT
Windows’ built-in font manager is great for those who only install an extra font every now and then. However, if you’ve fallen head over heels for typography, you’ll want to install a more powerful font manager, such as the free NexusFont (xiles.app). Click on the Downloadbutton and install the app with just a few clicks. As soon as you launch the app, it reads into the Windows Fonts folder and displays all installed fonts and images in the library Installed† At the top, you can customize the sample sentence, as well as the font color and size. You would do well to join Display the option Show file name to turn on. This way you can see which file corresponds to which font. Double click on a font to see it nicely in the Windows preview window (see ‘Management: Windows’).
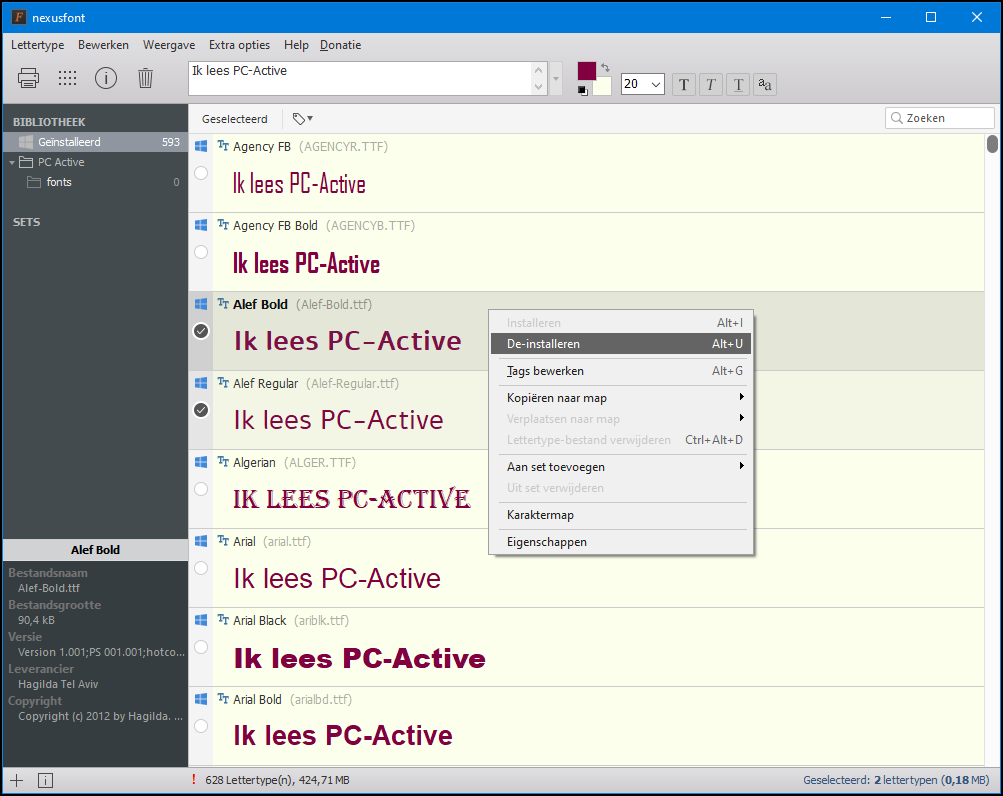 |
| NexusFont shows you all fonts and images and also lets you group them into separate groups |
You can select multiple fonts in Nexusfont, after which you see options appear with a right click as to install† Uninstall and character map† The latter shows you all the characters and symbols of that font. You can even copy these to the Windows clipboard, via Select and To copy†
ADDITIONAL MANAGEMENT
Unfortunately we don’t have the space to discuss all options of NexusFont, but we would like to show you how you can also view (yet) installed fonts, such as downloaded copies, with NexusFont in full regalia. You can then decide whether or not to install the fonts. We assume that you have already extracted those fonts and placed the corresponding files (.ttf and/or .otf) in a separate folder.
Right click in NexusFont on Library and choose Add group† Enter a name and confirm with OK† You will now find the new group in the window on the left. Right click on this and choose Add folder† Point to the (root) folder containing the extracted font files and confirm with OK† Open your group so you can have a thorough look at the fonts folder. If you don’t see any fonts, you may have placed the files in separate subfolders. To make it visible, open Display and select your Including subfolders†
Select the desired fonts, right click on your selection and choose to install† Preferably choose Copy files to the system fonts folder and press again to install† The fonts now also appear in the group Installed† If you prefer to lose such a font afterwards, you can just as easily use it again this way Uninstall†
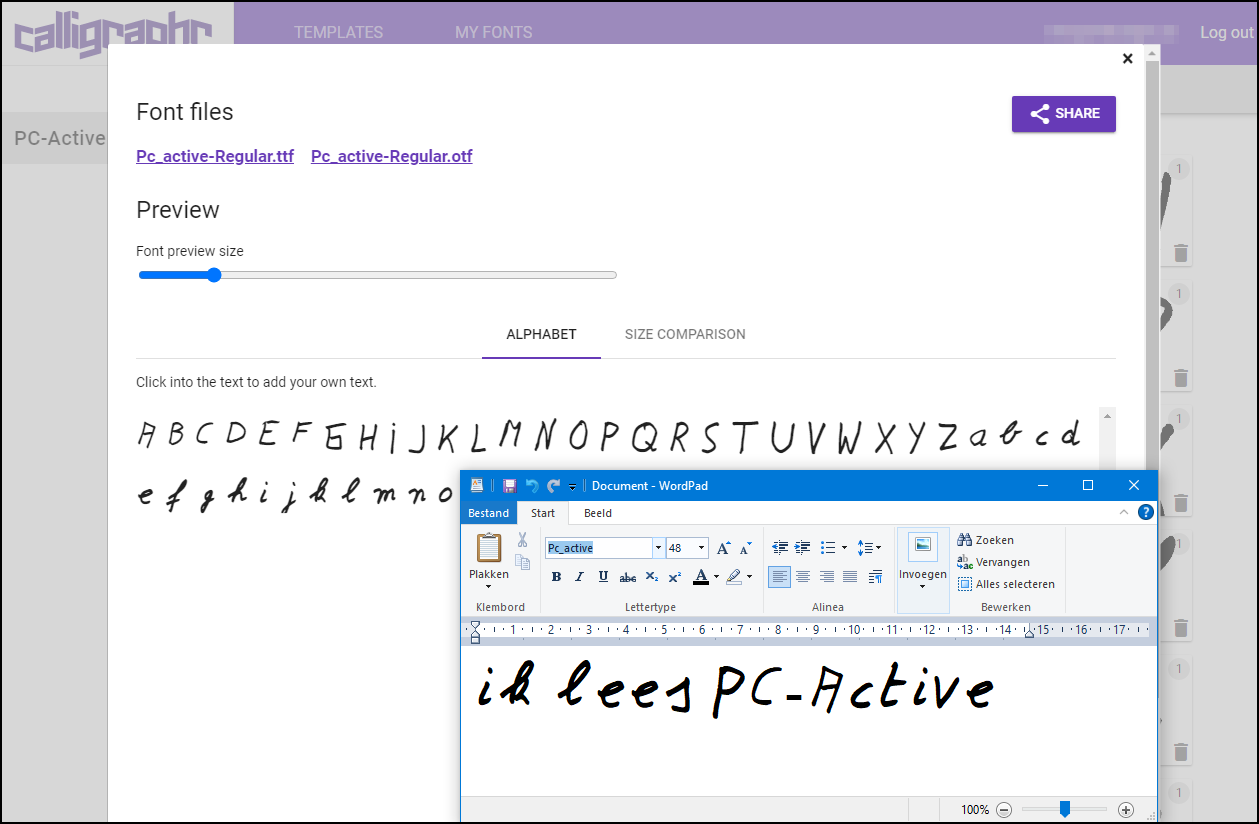
OWN HANDWRITING AS FONT
Would you like to convert your own handwriting into a real digital font? The Calligraphr web app (calligraphr.com) does this magic. The service is free if you are happy with a maximum of 75 font characters, but for ‘normal’ use that seems to be sufficient. click on Get started free and fill in the requested account information. Confirm with Submit† Click on the link in the confirmation email that you will receive a little later for your registration and then click on Start app, or first take a detour through the manual via go to tutorial†
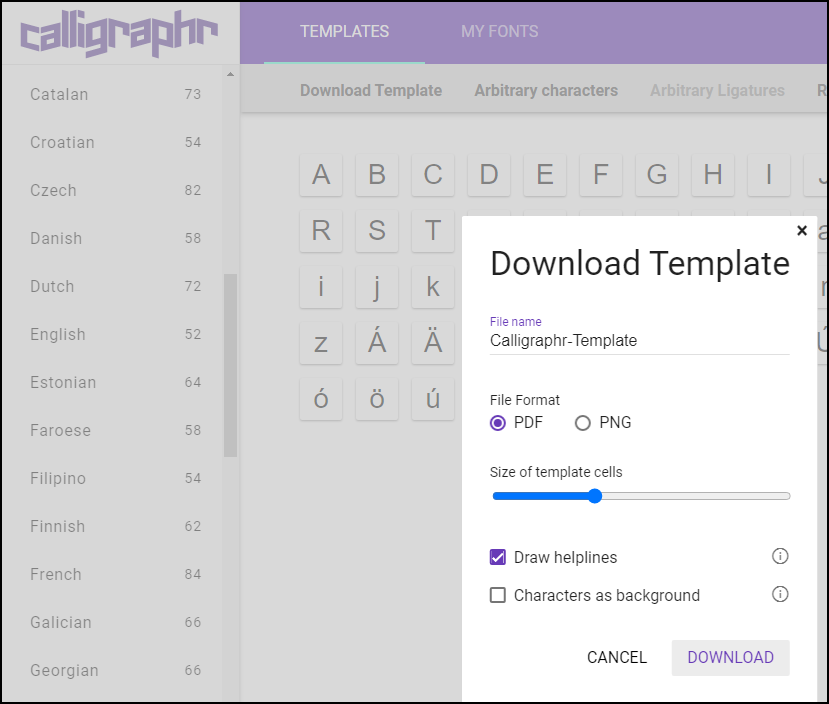 |
| Everything starts with downloading a template for your handwriting |
e select now first Create a template† In the window on the left, choose Common Scripts† Languages and English† Then click on the top Download Template† Preferably leave the default options as they are and confirm with Download and Calligraphr-Template.pdf† You have now downloaded a template for your own handwriting.
sFILL OUT TEMPLATE
Open the PDF document and print it. Preferably use a black ballpoint pen to neatly fill in the corresponding letter or symbol on both pages in each box. Take a sharp photo of both with your smartphone. Just make sure that the QR codes on the page corners are clearly visible.
Back in Calligraphr, select My fontsafter which you press 2x Upload Template click to upload both photos. You leave the check mark Automatically clean templates unless your handwriting contains fine details that you absolutely want to keep.
 |
| Fill in the template, upload it, click a few times and download it as an otf or ttf file |
Once the templates are uploaded with Upload templatechoose you Add characters to your font† Select a character to optionally optimize it with Edit character† Save the custom character with Save and close† click on Back to “MyFont” and on Edit Font Detailsthink of a suitable name for your font and confirm with Save† Then choose Build Font and build and click on the ttf or otf file to download it to your computer.
After installation you can immediately write the desired text in that font, er… type it