After 10 years, Microsoft has stopped supporting Windows 7. You can still continue to use Windows 7. One of the resources that you have at your disposal is virtualization. We explain here what the options are.
Once you have that new PC with Windows 10, that does not mean that you really want to say goodbye to the old Windows immediately. You can save some time by virtualizing Windows 7. You can then transfer things with a little more ease and look for alternatives to the things you had in Windows 7 but not in Windows 10. The virtualization that we use for this is host virtualization. Hereby you create a virtual machine on the new Windows10-PC containing your Windows 7 and all applications and if you want, even the corresponding data. You lose nothing and you are completely up-to-date again.
In addition, you can take additional measures with a virtual machine to secure that extra. There are several programs that can do this for you such as Oracle VirtualBOX and VMware Player and Workstation. The first two are free, the third is not but it clearly has the most options. We get started with Player but if you prefer to use one of the other two programs then the steps you have to go through are almost identical.
On the Windows 10 machine we get started with VMware Player. This is free to download but sometimes difficult to find. Go to the official site and choose Downloads / Free Product Downloads / Workstation Player / Try Workstation 15.5 Player for Windows. Because we are going to use VMware Player on Windows 10, the Windows version is the correct download. Save the file on the PC and then execute it. The installation is really only Next or OK clicks, the standard options are set correctly and the extra options are all disabled by default in the wizard and none of them are also required.
Virtual machine
There are now several options for the virtual machine with Windows 7. The first option is to create a whole new Windows 7 installation, directly as a virtual machine. For this you need a Windows 7 installation medium such as a Windows 7 DVD, an ISO file or a USB memory stick with the installation files on it. With each of these you can create a virtual machine in VMware Player and perform a clean installation of Windows 7.
The second option is to convert the existing real Windows 7 PC to a virtual machine. This is called a P2V, “physical to virtual”. This has the advantage that you really keep your current machine with all software and settings, but the disadvantage is that you also get the entire legacy of that installation. Consider remnants of software that you have removed, contamination in the Windows Registry, and so on.
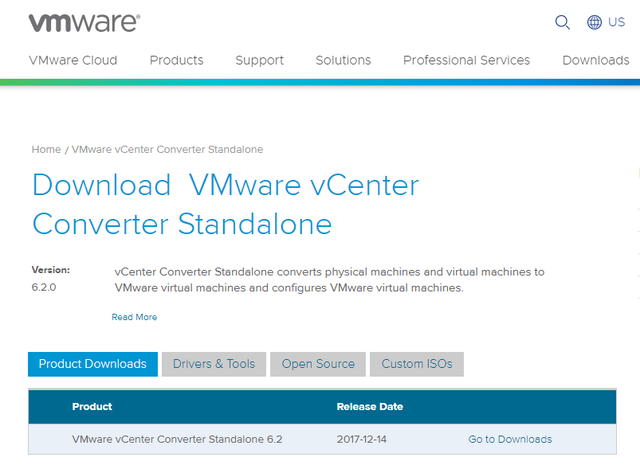
We first do a P2V and therefore convert our existing computer into a virtual machine. For this we use the vCenter Converter from VMware. Again free and quickly found via Google. And otherwise via www.vmware.com / Downloads / Free Product Downloads / vCenter Converter / Product Downloads / Go to Downloads / Download now. To use this, (free) registration with VMware is required, after which you can download the installation file, save it on the PC and then execute it. The current version is 6.2.0.1 and it is 172 MB in size. The installation is again straightforward, you just have to click OK and Next several times, accept the license agreement and choose a Local Installation to make.
After installation, the vCenter Converter did not always work flawlessly with us. First, a few start-up options were needed. Right click on the shortcut and choose Properties. Put on the tab Compatibility a check mark Run this program as an administrator. The software also complained that the necessary services had not been started and a check via Start / services.msc confirmed this. But manual starting didn’t work either. What did work was a small modification of the Windows Register. click on Start and type regedit. Press Enter.
Scroll to HKEY_LOCAL_MACHINE System CurrentControlSet Control and create a new one DWORD32 with the name ServicesPipeTimeout with a decimal value of 300000 (5 minutes). Finally, an adjustment of the service authorizations. Open Start / services.msc and scroll to the VMware vCenter Converter Standalone Server. Right click on it and choose Properties / Login and put a check mark Service can be performed interactively with desktop. Confirm with OK.
Conversion
Start the Vmware vCenter Converter Standalone after installation. It is not a quick start, it takes some patience, especially on an older Windows7 machine. Then choose Convert machine and select This local machine. click on View source details to view information about your own Windows 7 machine, such as the Converter has collected and seen. click on Next and select VMware Workstation or other VMware virtual machine as the destination type. Select as level for the virtual machine at Select VMware Product, the highest version, VMware Workstation 11.x / 12.x.
Give the virtual machine a name and click Browse to select the place where you want to save the virtual machine. That can often not be the same computer, you need an external drive or a network share to save the virtual machine. This must also be a considerable amount of storage, since the entire computer is copied into it. Once the location has been chosen, click Next. You now see a comprehensive summary of the actions that the converter will perform and what it does with disks, network cards and so on.
It is best to check these settings and certainly those with a yellow or red exclamation mark. Furthermore, it is recommended to switch off the network cards to prevent problems when starting up as a virtual machine. Click at Networks on Edit and check the check mark on all network cards Connect at power on from. When everything is ready, click Next to start the conversion.
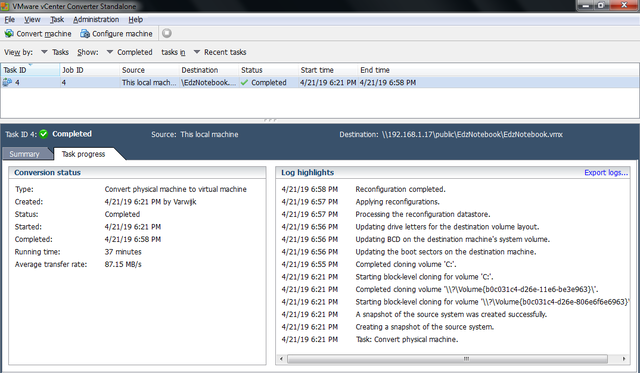
The conversion consists of two files, a .vmx and a .vmdk. The first is the virtual machine, the second the copy of the hard drive. The .vmx file is only a text file of a few kilobytes with configuration data, the .vmdk can be many GBs. Copy the files to the Windows10 machine on which the VMware Workstation Player software was previously installed.
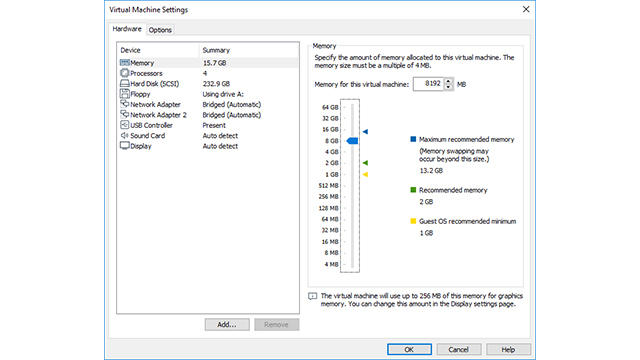
If the copy stroke is complete, start the Player and choose Open a Virtual Machine. Browse to the folder with the copied files and select the .vmx file. Then click To open and the Windows7 machine is added to the Player. The name of the machine appears on the left in the margin. Click now Edit virtual machine settings and check how they relate to the hardware of the new Windows10 PC on which the virtual machine will be used.
Also look specifically at the amount of ram. This is still equal to the total memory of the old PC. Is there sufficient memory available for that? Otherwise, screw it back to 4 or 8 GB of ram. Confirm the changes with OK and then click Play virtual machine to actually start it up. If it is a 32-bit version of Windows 7, then the 4GB ram is the maximum useful memory for the virtual machine. More, a 32-bit operating system cannot address, even as a virtual machine.
Log in with the username and password of the old Windows 7 PC and, if necessary, further adjust the configuration such as that of the network. Probably one or two reboots will be needed to keep the machine comfortable in its own skin.
It is also recommended the VMware Tools for Windows Vista and later to install. These ensure better interaction between the virtual and the real machine. Player already offers a pop-up to download and install it, installation in the virtual machine will be done later Player / Manage / Install VMware Tools. A restart is also required after this.
Windows 7 clean install
If the old Windows 7 installation is too dirty or contains all sorts of software that you no longer need, a fresh installation may be a better choice than a P2V. Another valid reason is the switch from 32 bit to 64 bit. If it concerns a 32-bit Windows 7, it can address a maximum of 4 GB of ram, which always imposes limitations on usage. If you install the 64-bit version of Windows 7 in the virtual machine, then that limitation is not there.
Whatever the reason, a clean installation requires that the Windows 7 installation disc is available or another source such as the installation files in an ISO file or as an installation disc on a USB stick. The license key is also required, because a virtual machine requires a valid license as opposed to a real Windows installation.
To create the clean Windows7 virtual machine, start the VMware Player first. Then click Create a New Virtual Machine. Now choose where the required installation files can be found. If you use the installation DVD, the Installer disc is the right choice, select it in the drop-down menu. If you use an iso file, choose Installer disc image file and click Browse. Then browse to the location where the iso file can be found and select it.
Because Player recognizes the installation files as Windows, it can install them almost automatically. That’s called Easy Install and means that only a few questions need to be answered in advance, after which Player performs the entire further installation of the operating system including configuration of the virtual machine in one go. Therefore enter the license code in the next window, select the version to be installed, enter a user name and password twice and put a check in the box Log on automatically.
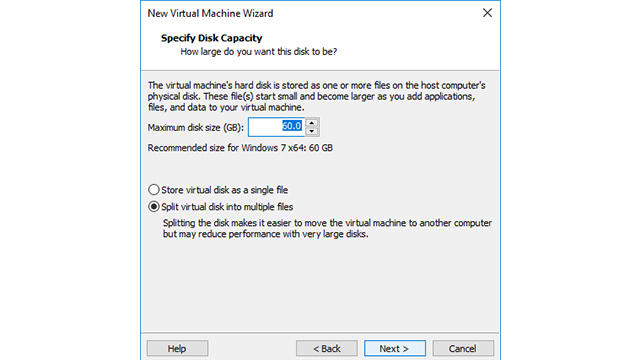
Click in all subsequent windows Next unless you want to change an option somewhere like the machine name or the location for the virtual machine. The amount of ram for the virtual machine is also a point of attention. VMware is conservative in this, it can quickly be useful when the new Windows10 PC has enough memory (at least 12 GB), to give 2 GB to the virtual machine instead of 2 GB. You can do that via Customize hardware / Memory. After that everything is ready to make the new virtual machine, click on Finish one last time and wait until the installation is complete.
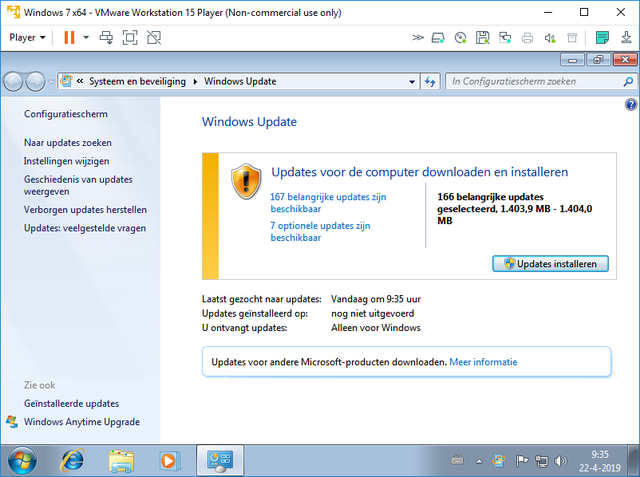
For every Windows 7 installation applies, install all updates while it is still possible. This applies to the machine that was made and transferred via P2V and also to the whole new Windows7 machine. Certainly the latter will be behind a very large number of updates. The first thing to do after the virtual machine is started is via Start / Windows Update perform in the virtual machine and download and install all updates.
Reduce safety risks
Virtualization is not a method to secure a system. However, you can take small measures such as switching off the network cards of the virtual machine and only activate them temporarily when it is really needed. For the other time you have full access to the old Windows7 PC with all your own applications, you can still add it in the new installation, but without the threat of a new infection from the internet. In addition, take all other security measures also in the virtual machine. So install a good antivirus that also really supports Windows 7, including AVG, Avast and Norton Security.
As mentioned, migrating Windows 7 to a virtual machine is not a security measure. It only makes it possible to use the operating system and its applications for some time. Even as a virtual machine, it is a greater than average risk after January 14, 2020. A very important measure to take is therefore making backups. This is possible for the entire virtual machine, but as we have seen, a virtual hard disk is very large, it may be more appropriate to back up the standard user folders with all your own files, just like on a normal Windows machine.
Because backup in Windows 7 is not exactly implemented properly, it is necessary to use a separate backup solution for this in the virtual machine. There are countless of them, both commercial and free. Because backups should also have been made for the access to the virtual machine, it is most obvious to continue to use the previously used backup solution now and to shorten the intervals between different backups and make them longer to preserve.
Because the risk of the virtual machine with Windows 7 is higher after the support has been stopped and there are no more security updates for the operating system, the virtual machine should be used less and less. A good way to achieve this is to remove those applications for which alternatives have been found in Windows 10 from the virtual machine. That happens in the virtual machine no different than just in Windows via Programs in the Control Panel, and then the option Delete a program.
.