Integrated since Windows 7, Microsoft Defender is a basic antivirus software available free of charge, allowing you to protect your computer against viruses and various online threats. Whether it’s setting it up, enabling it, or disabling it, it can be helpful to know how to use Windows Defender.
If you want to configure Microsoft Defender, this guide is for you. Its purpose is to review the ways to access the different components of the software under Windows 10, Windows 7 and Windows 8.
What is Microsoft Defender?
Microsoft Defender, also known as Microsoft Defender Antivirus, is the default built-in antivirus in Microsoft Windows 7, 8, 8.1, 10, and 11. Originally a spyware-fighting tool, Defender evolved into an antivirus offering both real-time and cloud-based protection to guard against numerous online threats. Note here that the Microsoft Defender under Windows 7 is a simple anti-spyware, a third-party antivirus is recommended.
Available for free with Windows 10 and 11 and directly integrated, Windows antivirus shows strong results in protection against threats but presents mixed results in the field of false positives and especially the impact on system performance. Windows 10 wanted to simplify its protection tools and distinguishes three tools called “Defender”:
- Microsoft Defender Antivirus that provides effective protection against the latest online threats with protection data available in the cloud.
- The Microsoft Defender Security Center groups together Defender Antivirus under the name “Virus and threat protection”, the firewall of the same name and “Smartscreen” browser protection against malicious websites and downloads. It also offers parental control tools, Microsoft account data as well as computer health reports.
- The Microsoft Defender firewall that protects the system by monitoring incoming and outgoing connections on public and private networks. This tool allows you to block or allow applications to connect online.
Access Defender in Windows 10 and 11
This tutorial was performed on Windows 10 and 11
Open Microsoft Defender Antivirus
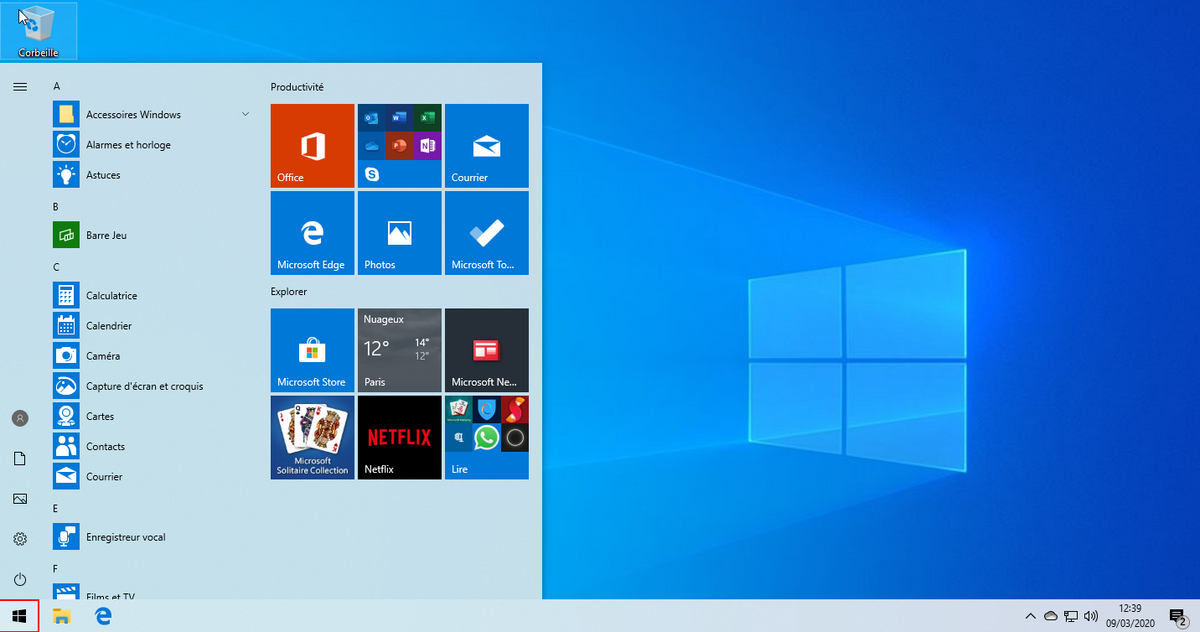
1. Click on the “Start” icon located at the bottom left of the desktop to open the menu.
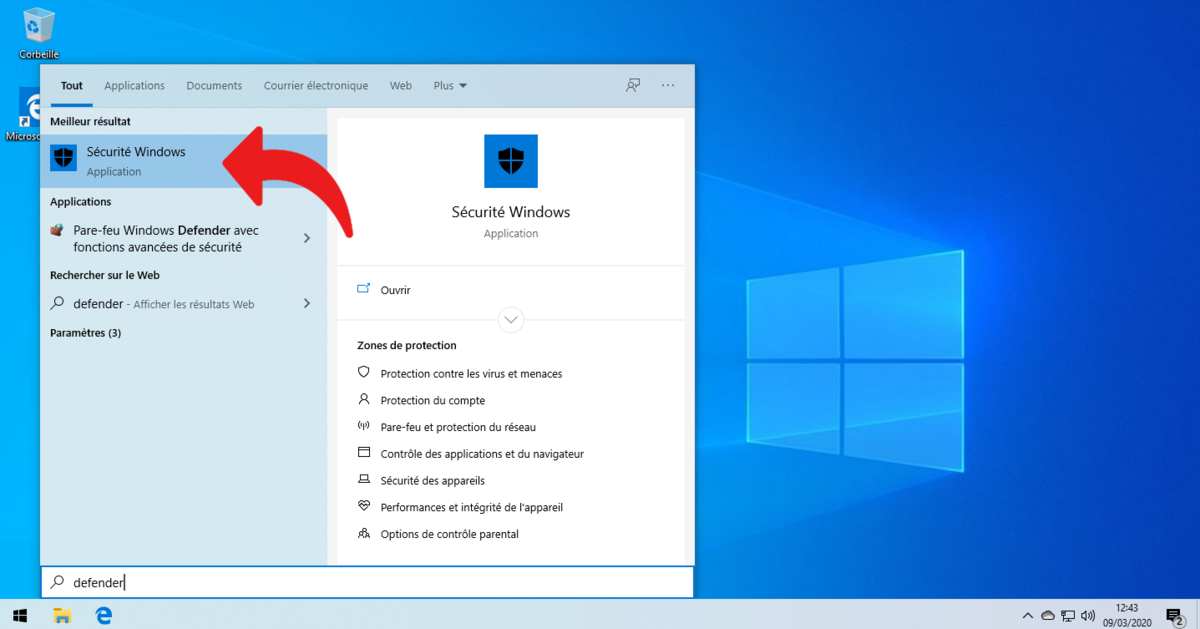
2. Start typing “Defender” and click on “Windows Security”.
3. Microsoft Defender is not shown explicitly in Windows Security Center. You will need to click on “Virus & Threat Protection” to open options for Defender Antivirus.
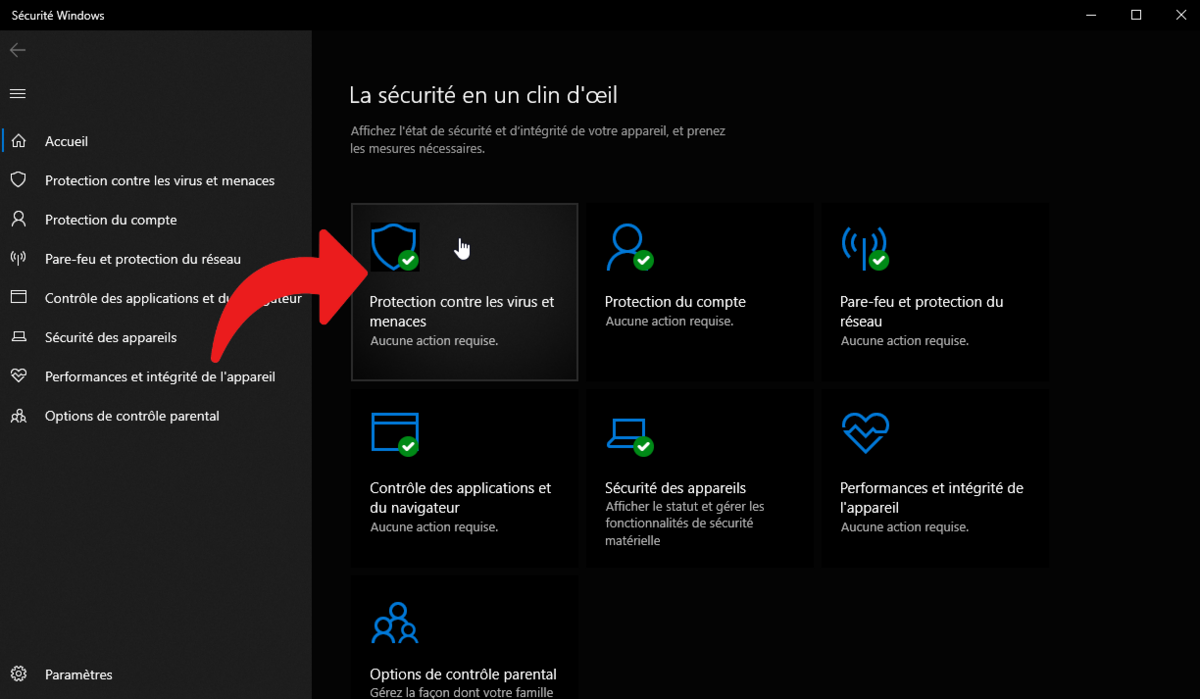
This menu provides full access to the antivirus options, namely quick scan of the system and its options, event history and authorized threats. It is also possible to configure the protection in real time and in the cloud, to update the signature database and to manage the protection against ransomware via a device to control access to specific folders.
Open Microsoft Defender Security Center
The Microsoft Defender Security Center brings together all the security components integrated into the operating system, including the antivirus and the firewall, also called Defender. To access the Security Center, the easiest method is to repeat steps one and two from the previous tutorial (above). It is also possible to access it via the settings:
1. Open the “Start” menu via the icon located in the lower left corner of the desktop by default.

2. Click the cog icon to open Windows Settings.
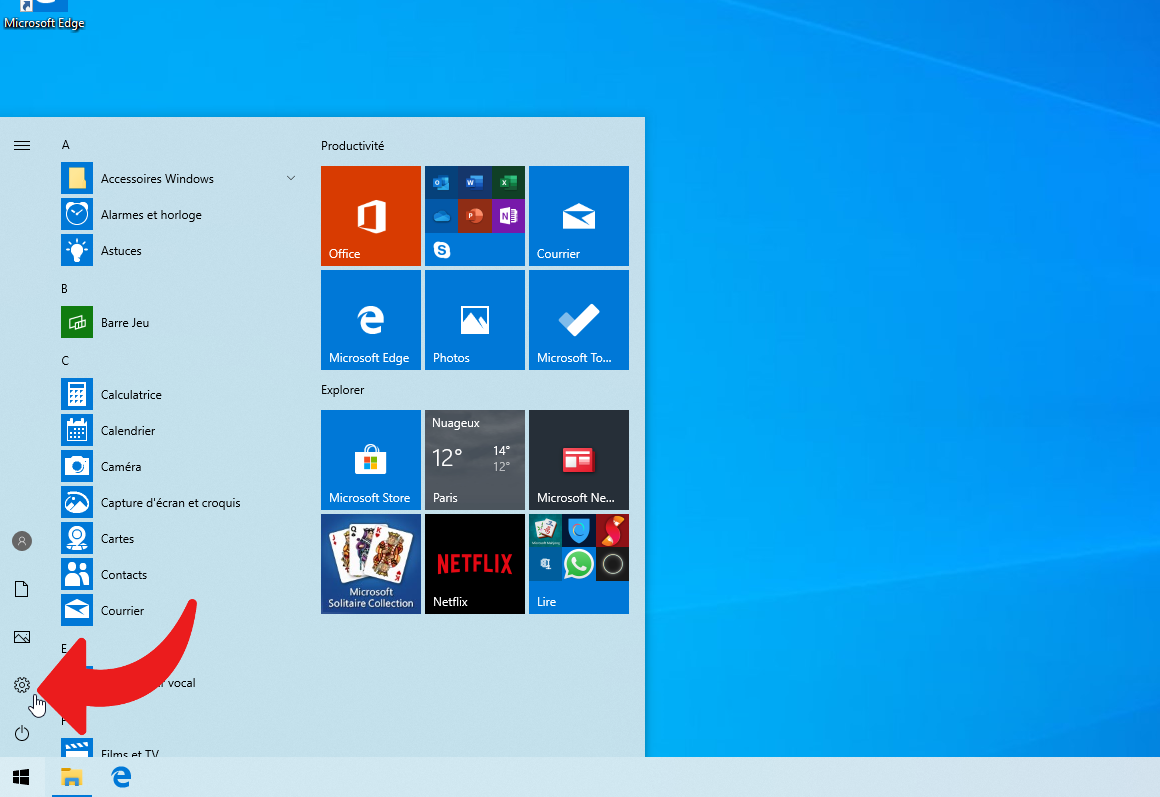
3. In the settings menu, select the “Update and Security” option.
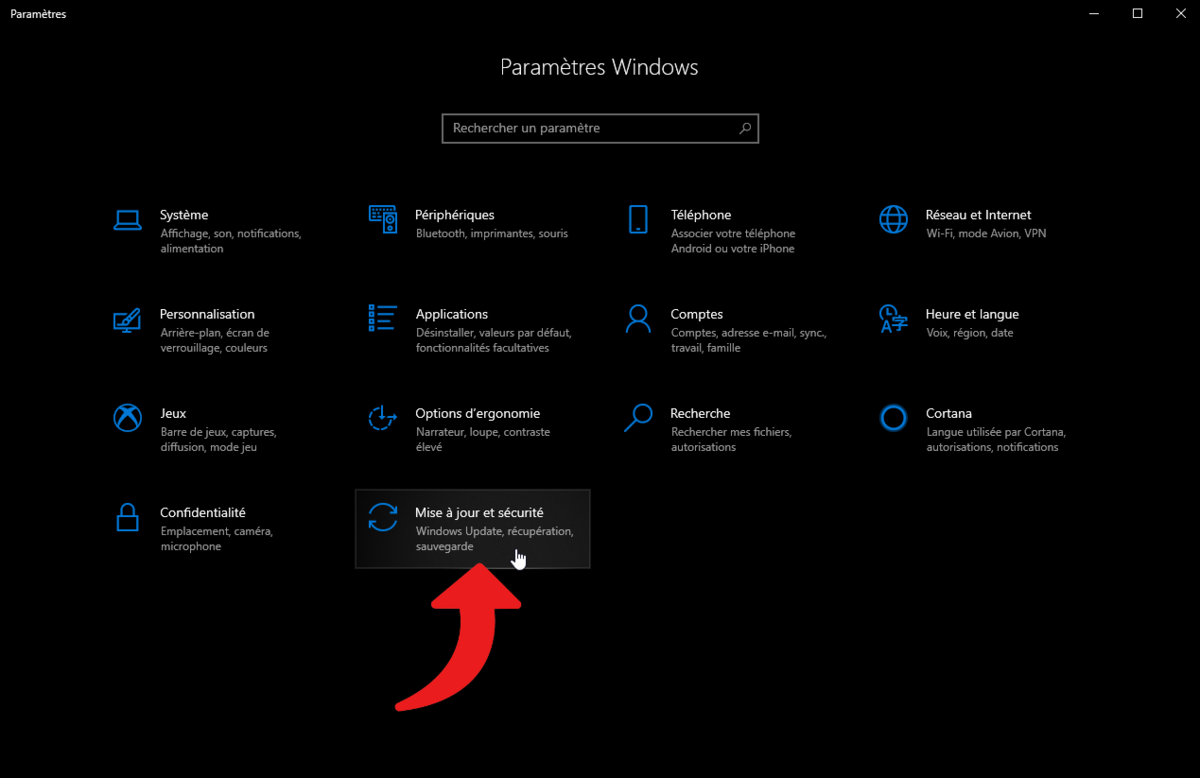
4. Once in this new menu, click on “Windows Security” in the left column.
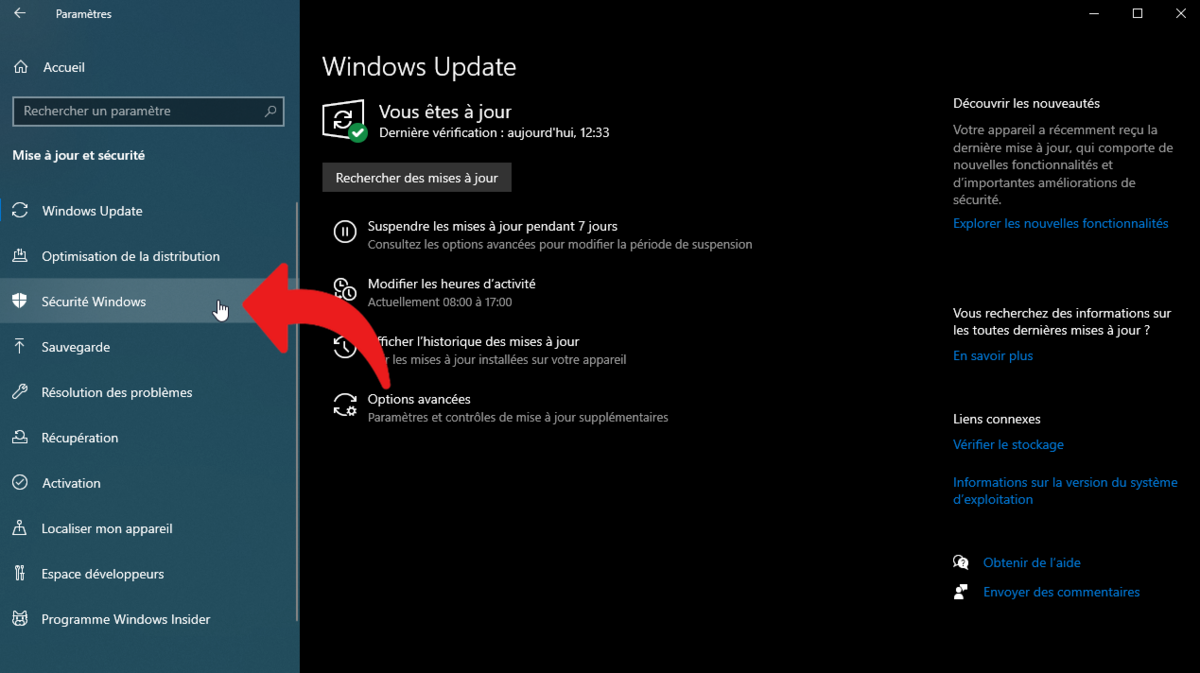
5. In order to access the Microsoft Defender Security Center, then click on “Open Windows Security”.
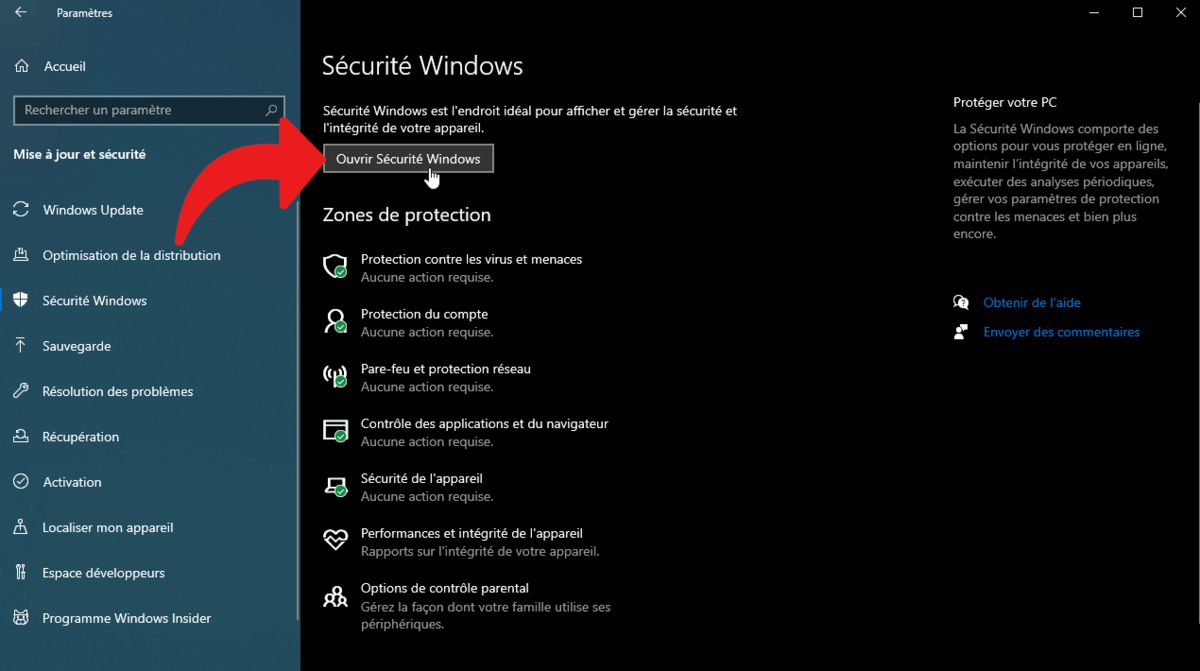
This menu allows you to view and configure Defender Firewall, Defender Antivirus, Microsoft Account Protection, Parental Controls, Browser and SmartScreen Controls, and Device Health Reports. .
Access Microsoft Defender Firewall
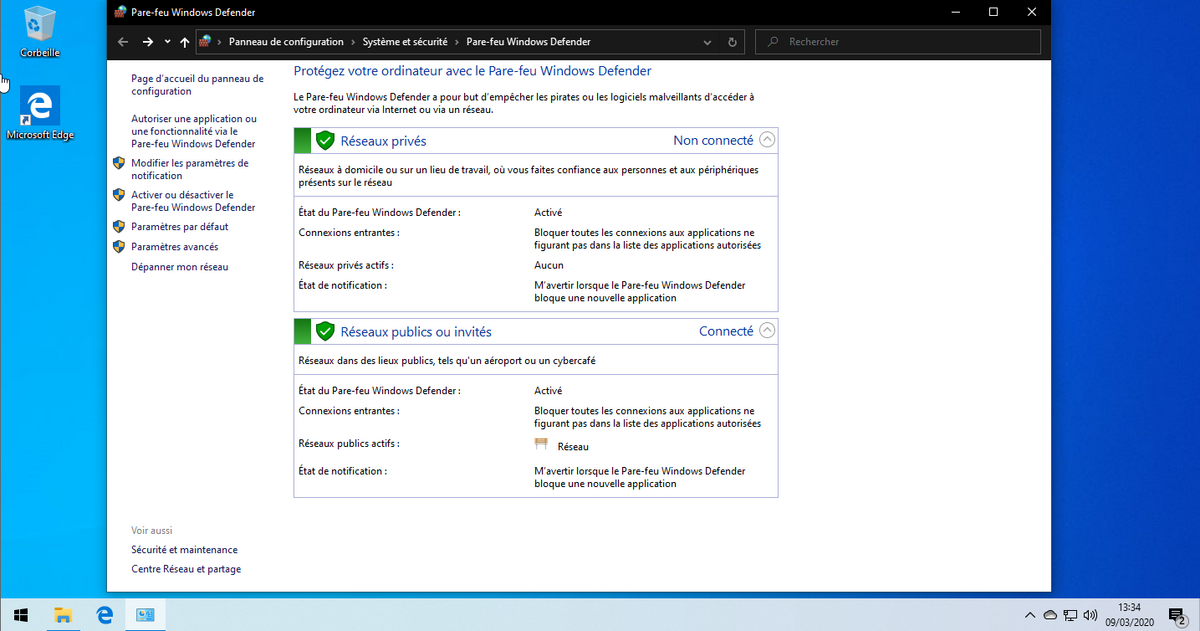
Windows 10 is equipped with a Microsoft Defender firewall activated by default and which makes it possible to secure incoming and outgoing connections in order to guard against malicious applications. The firewall is accessible through the control panel or through this method:
1. Open the “Start” menu via the icon located in the lower left corner of the desktop by default.

2. Start typing “firewall” and then click on “Microsoft Defender Firewall”
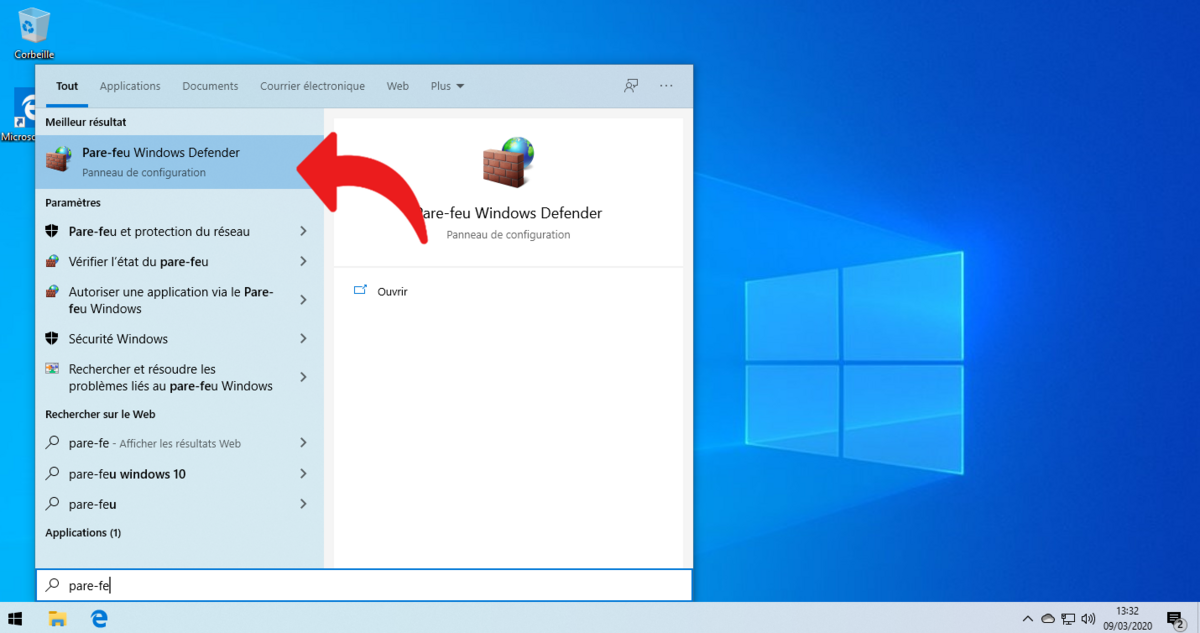
3. The window that opens allows you to observe whether the Microsoft Defender firewall is activated or not, to access the advanced settings and to allow an application or a feature through the firewall.
Access Microsoft Defender in Windows 8.1
If Microsoft Defender is accessible through the Control Panel, unlike Windows 10, users can access it more easily:
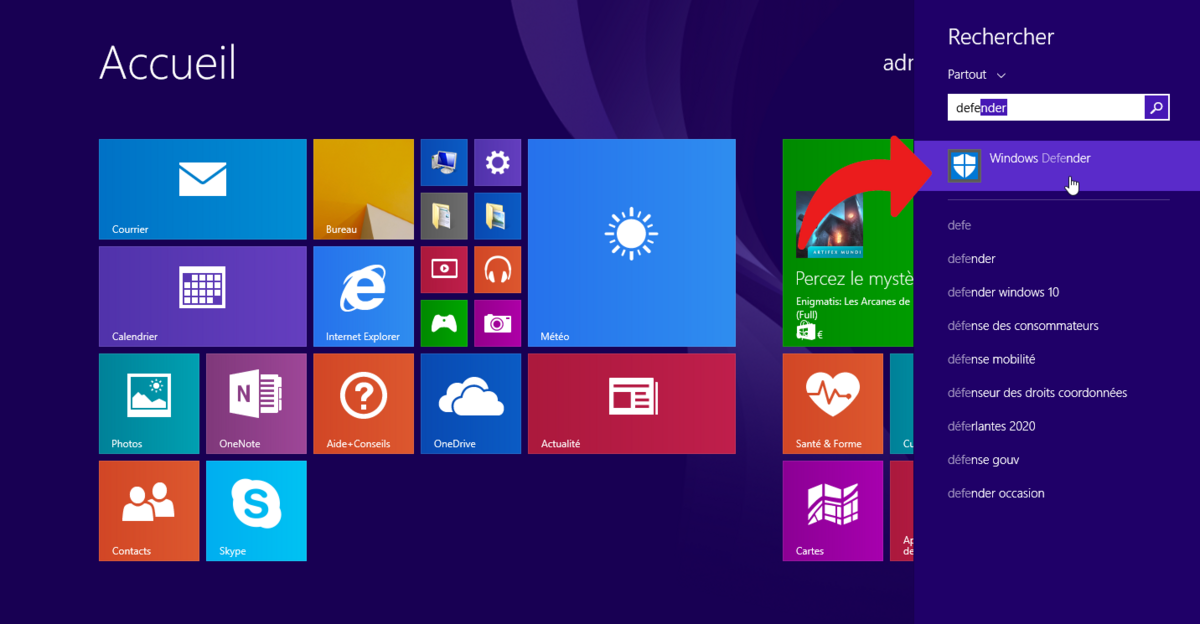
1. Open the Windows 8 Start menu by clicking on the “Start” button located at the bottom left of the window.

2. In this menu, start typing “Defender” to open search and click on “Microsoft Defender” option to open Microsoft antivirus.
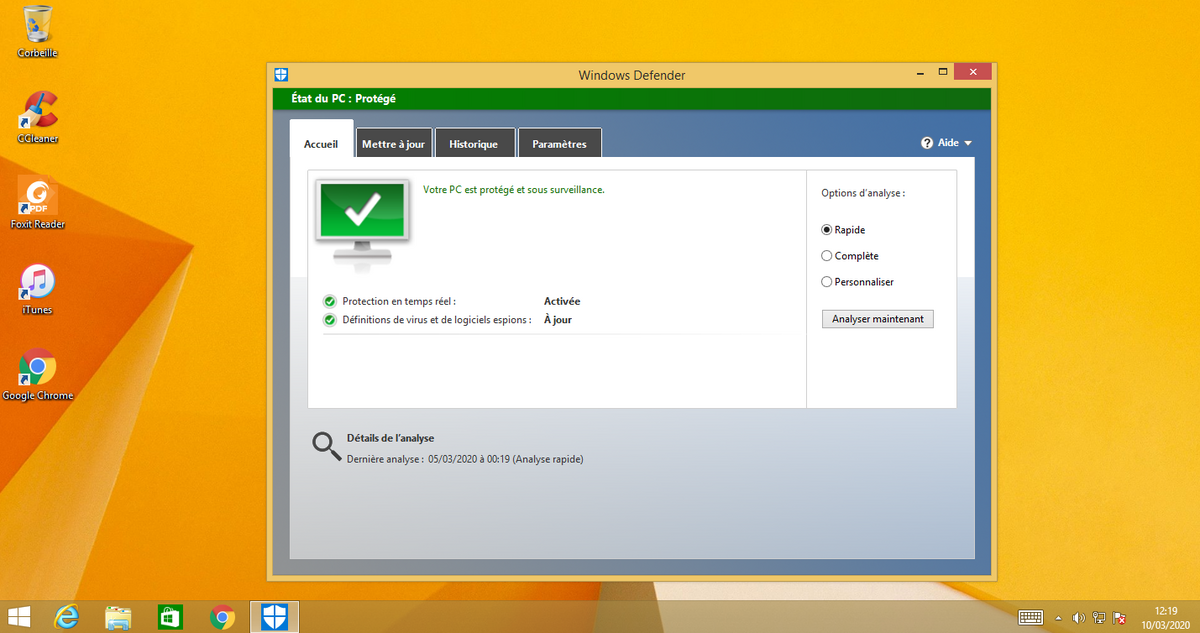
3. The window that opens allows you to launch a quick, full or personalized scan, update the signature database, view the history of quarantined items and configure the settings.
Access Microsoft Defender in Windows 7
If Windows 7 is no longer maintained or updated since January 2020, the Microsoft Defender signature bases will be regularly updated until 2023. It is however an anti-spyware, so it is all even advised to install a third-party antivirus. If the function is available in the control panel, here is how to access Defender in Windows 7 more simply:
1. Click on the “Start” icon located in the lower left corner to access the menu.

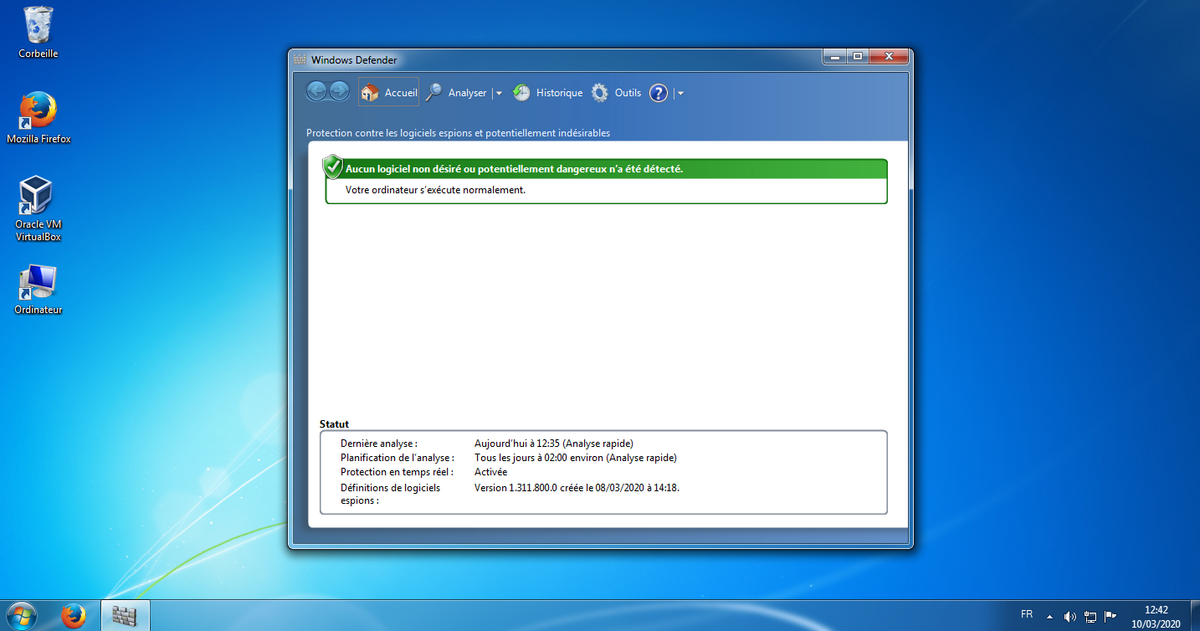
2. In the search field, start typing “Defender” to display and open the Microsoft Defender feature

3. The window that opens will allow you to know if the protection is activated or not, to launch a scan (quick, complete or personalized), to consult the history and the quarantine as well as the parameters of Microsoft Defender.
Also read:
- Is Microsoft Defender enough to protect my PC?
- How to activate Microsoft Defender on your computer?
- How to properly configure Microsoft Defender?
- How do I temporarily or permanently stop Microsoft Defender?
.