In everyday use, Microsoft Defender proves to be effective in protecting its browsing against online threats. However, it happens that Defender is deactivated after a manipulation or following the installation of another antivirus. Here’s how to enable or re-enable Microsoft Defender in Windows 7, Windows 8.1, Windows 10 and 11.
What is Microsoft Defender for?
Integrated and activated by default in Windows 7, 8, 10, 11 Microsoft Defender is a free antivirus that helps protect against viruses and online threats. Originally a tool to fight against spyware, Defender has evolved into an effective protection tool, thanks to a real-time protection module and a database of signatures in the cloud.
While its reliability has grown over the course of updates, Defender antivirus protection shows good performance in terms of protection against threats, especially against free antiviruses. However, the detection of false positives and especially the impact on system performance indicate that efforts are still needed to be a solution preferred by the general public.
If Windows 10 wanted to simplify its range of protection, Defender presents several tools called “Defender”:
- Microsoft Defender Antivirus that protects the system against the latest online threats through real-time and cloud-based protection.
- The Microsoft Defender Security Center which brings together
the Defender antivirus, the eponymous firewall as well as several modules of
SmartScreen-like protection for online browsing,
parental controls and Microsoft account data. - Microsoft Defender Firewall to protect the system through
increased monitoring of incoming and outgoing connections on the
public and private networks. It allows to authorize healthy applications
and block the most unwanted ones.
In the tutorials below, we will refer to Windows Defender as the antivirus built into Windows 7, 8 and 10-11.
Why enable or re-enable Defender?
Since Windows Defender is at least as efficient as many free antiviruses, it can be interesting to use it on a daily basis. Although it is activated by default during a new installation, there are many situations in which it is necessary to activate or reactivate Windows Defender.
When installing another third-party antivirus, Microsoft Defender automatically disables itself so as not to interfere with the operation of the new antivirus. If the subscription is terminated or if this new antivirus is not suitable, it is possible to uninstall it and it may happen that Defender does not reactivate automatically. Following a previous manipulation, it is possible that Defender is present to run a program or a feature or to do tests. Some computers used offline may also have Defender protection disabled to save system resources.
Activate Microsoft Defender
These tutorials explain how to enable or re-enable Microsoft Defender Antivirus protection on different versions of Windows with the latest updates installed. Depending on the version, a system message or notification informs that Microsoft Defender is inactive and requires activation.
Under Windows 10
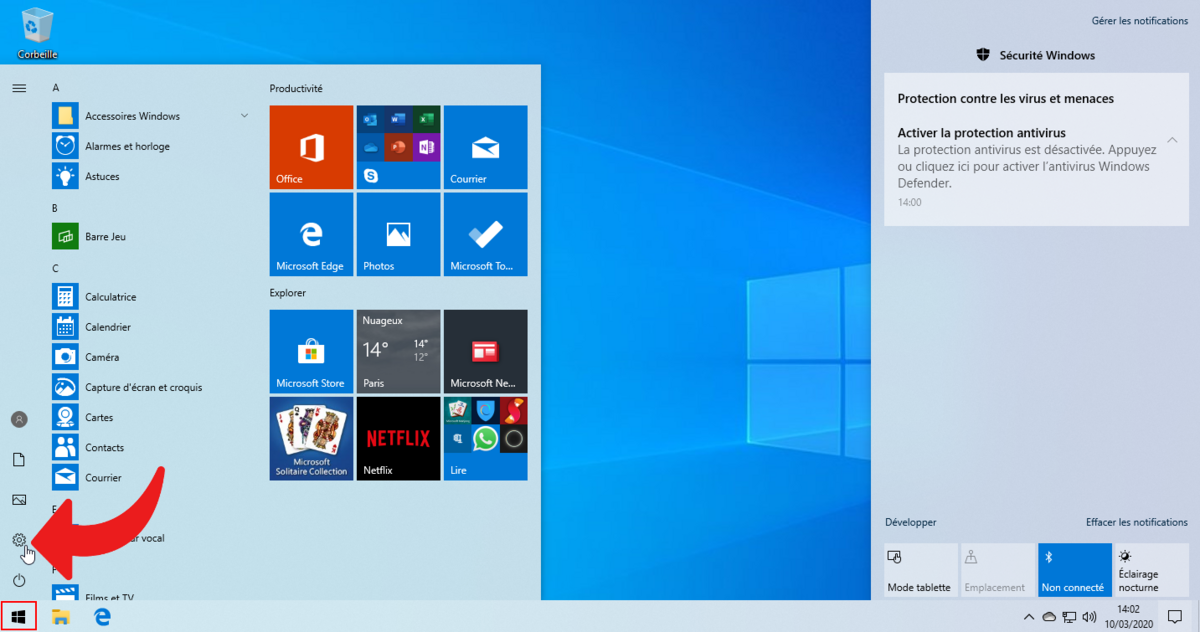
1. Click on the “Start” button located in the lower left corner of the desktop and select the “Settings” icon (shaped like a cog).
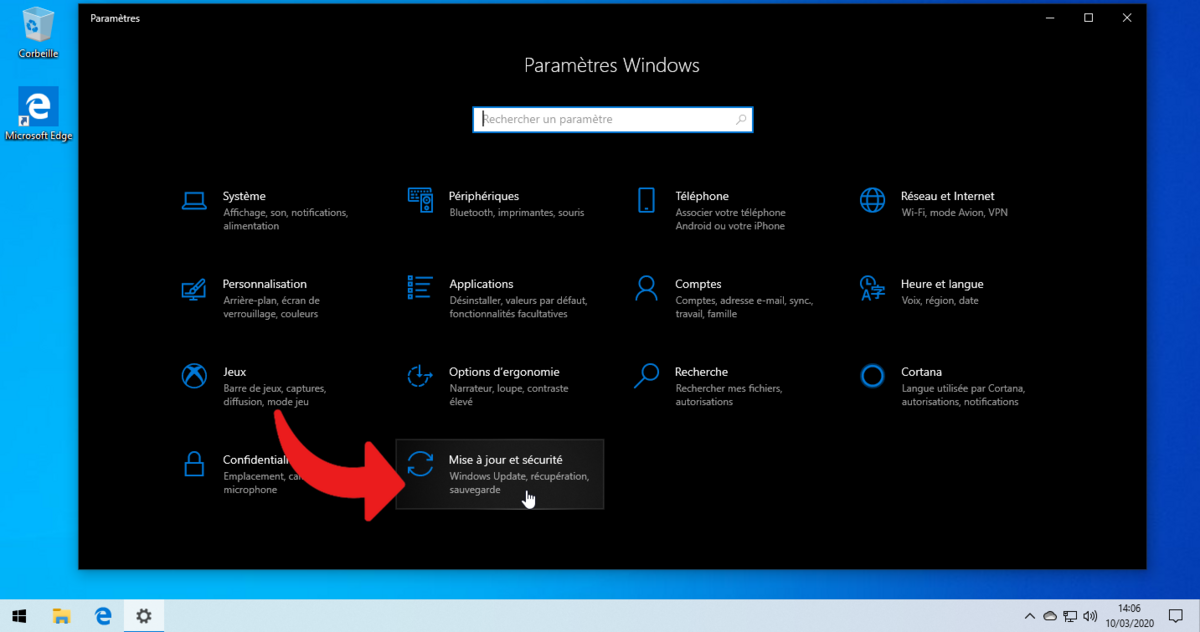
2. Once in the Windows settings window, select “Update and security”.
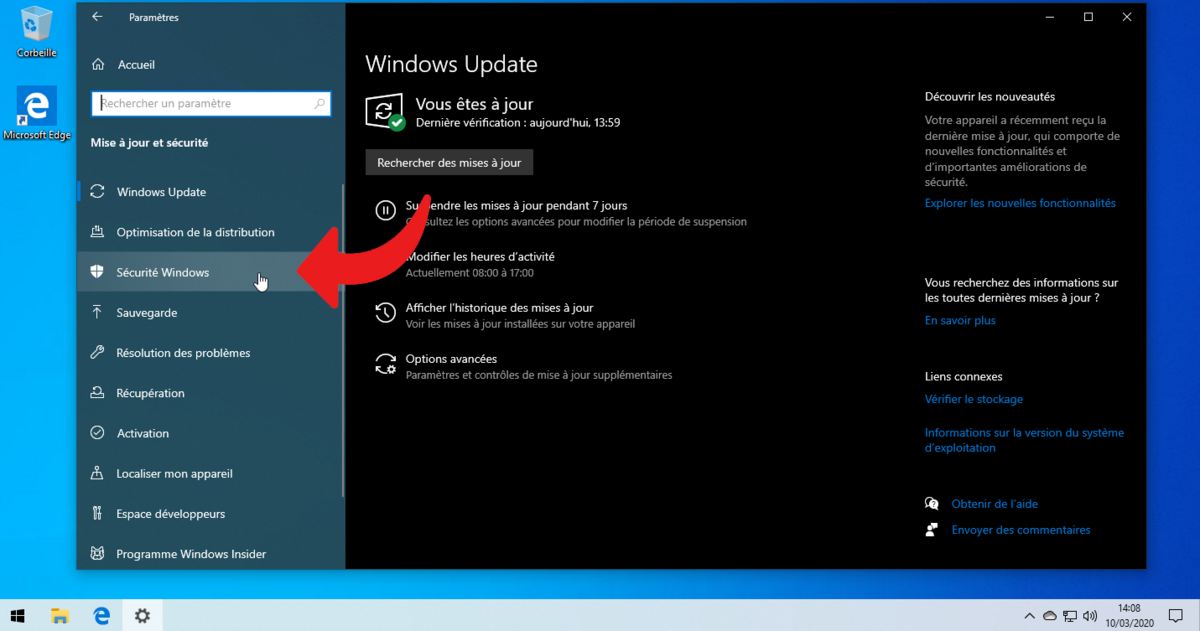
3. Then click on “Windows Security”.
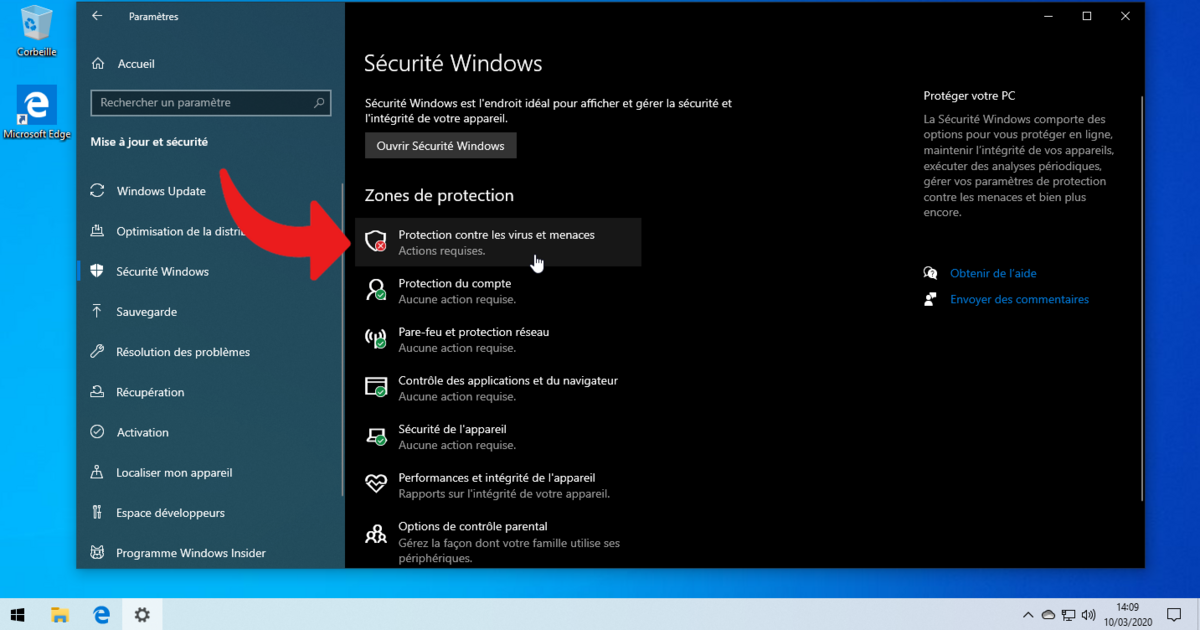
4. Once in the Windows Security window, select “Virus & threat protection”.
5. Then go down to the “Virus and threat protection settings” section and click on “Enable” to restart real-time protection.
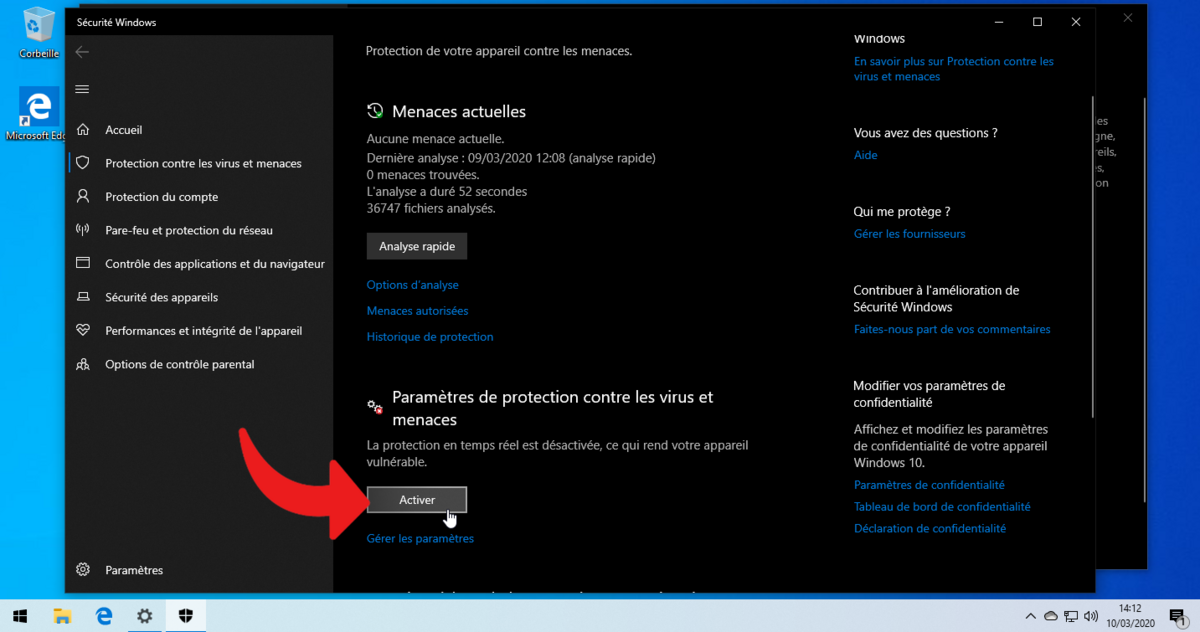
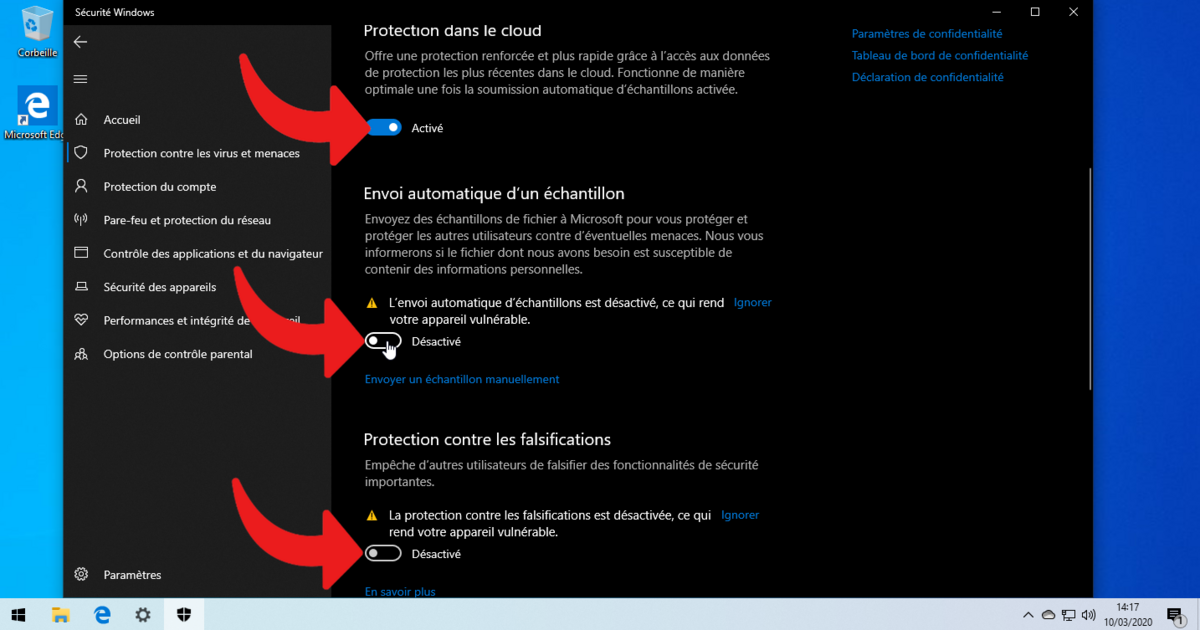
In the previous window, it is also possible to click on “Manage settings” to access the advanced options of Microsoft Defender and reactivate, as desired, protection in the cloud, the automatic sending of a sample to Microsoft as well as the Tamper protection that prevents malicious apps or users from tampering with Windows security features.
Under Windows 8.1
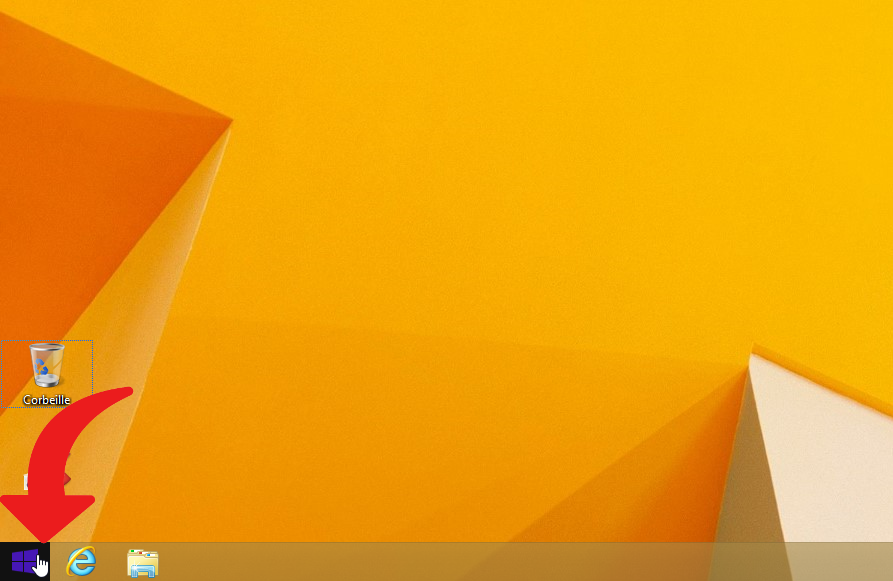
1. Click the “Start” button located at the bottom left of the desktop to open the Windows 8.1 Start screen.
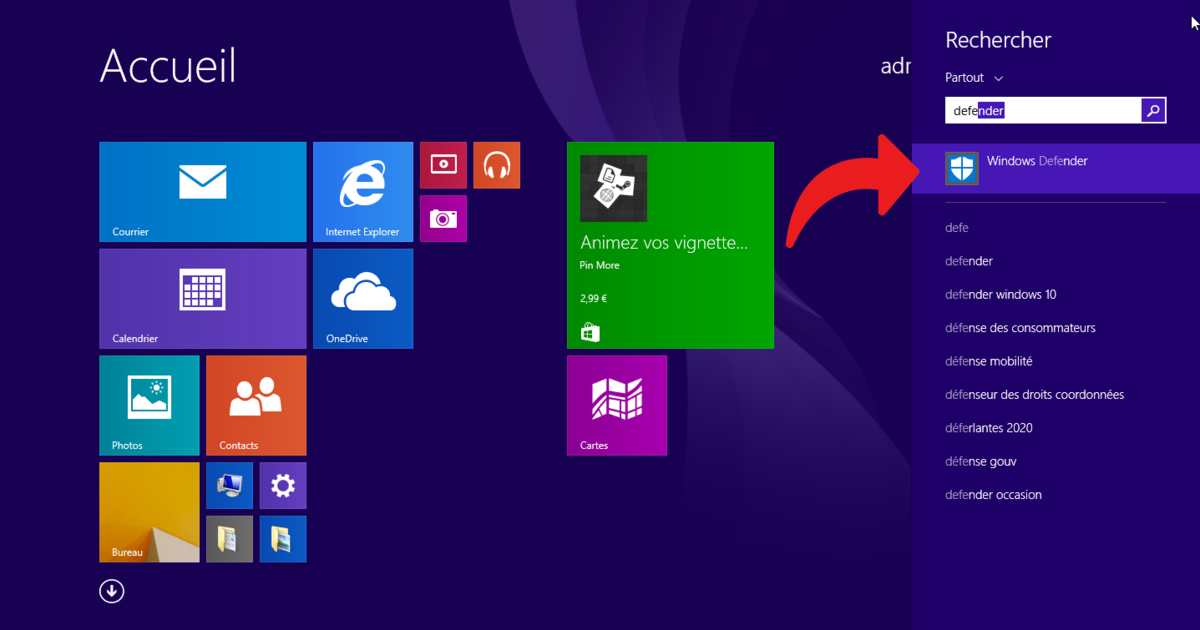
2. Start typing “Defender” to start a search and then select “Microsoft Defender”
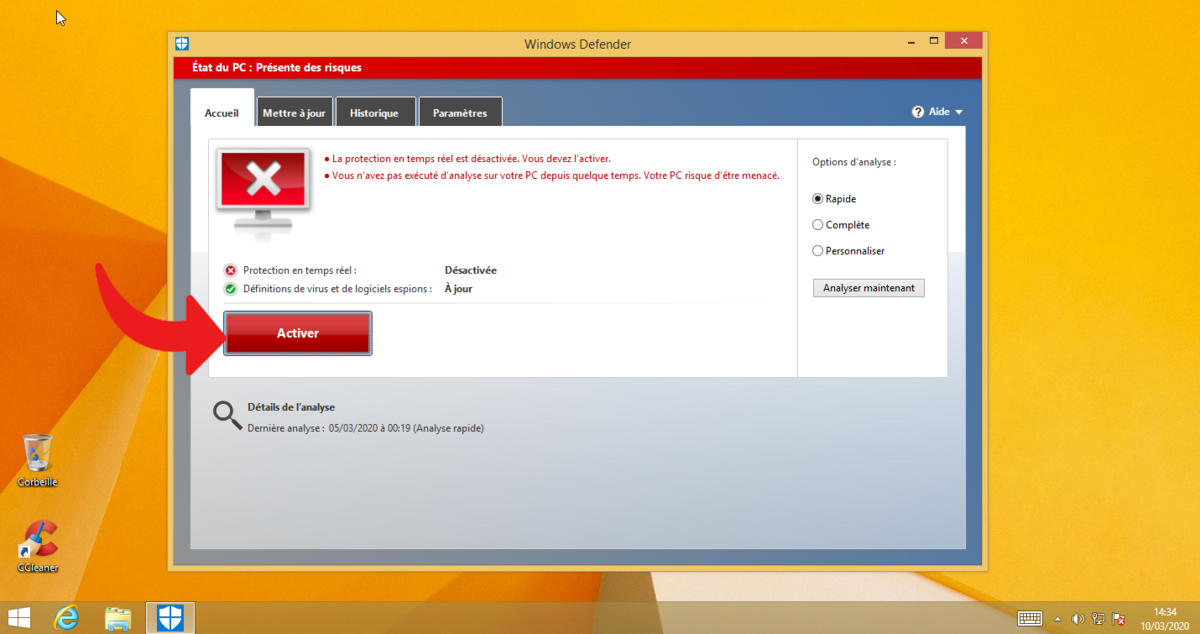
3. Once on the Microsoft Defender page, simply click on “Enable” to restart real-time antivirus protection.
Under Windows 7
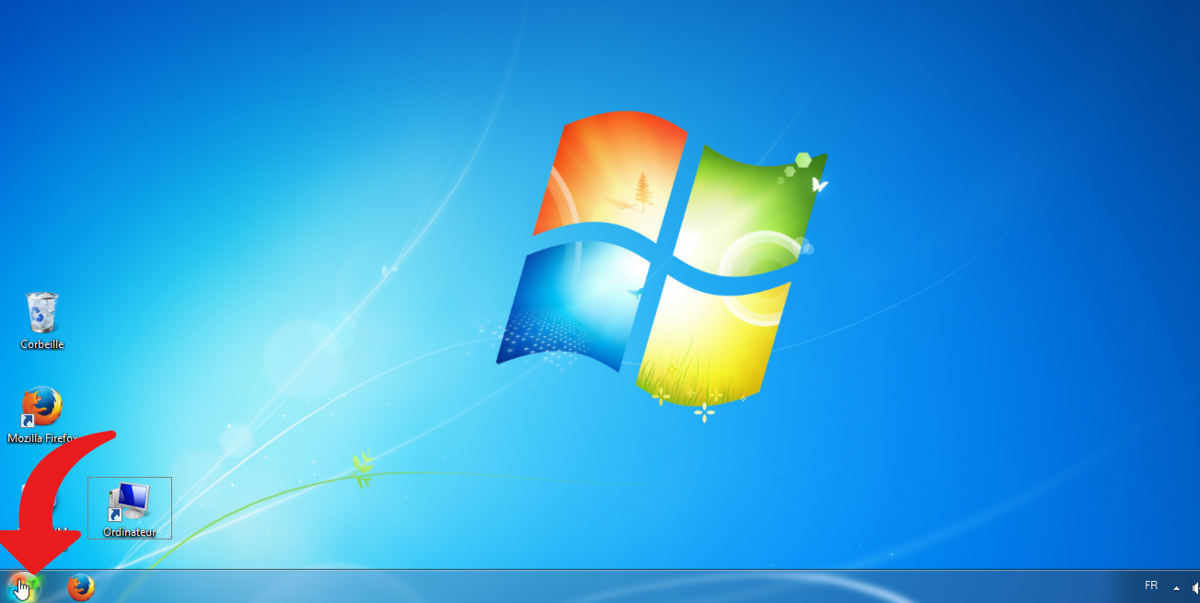
1. On the desktop, click the “Start button” located in the lower left corner.
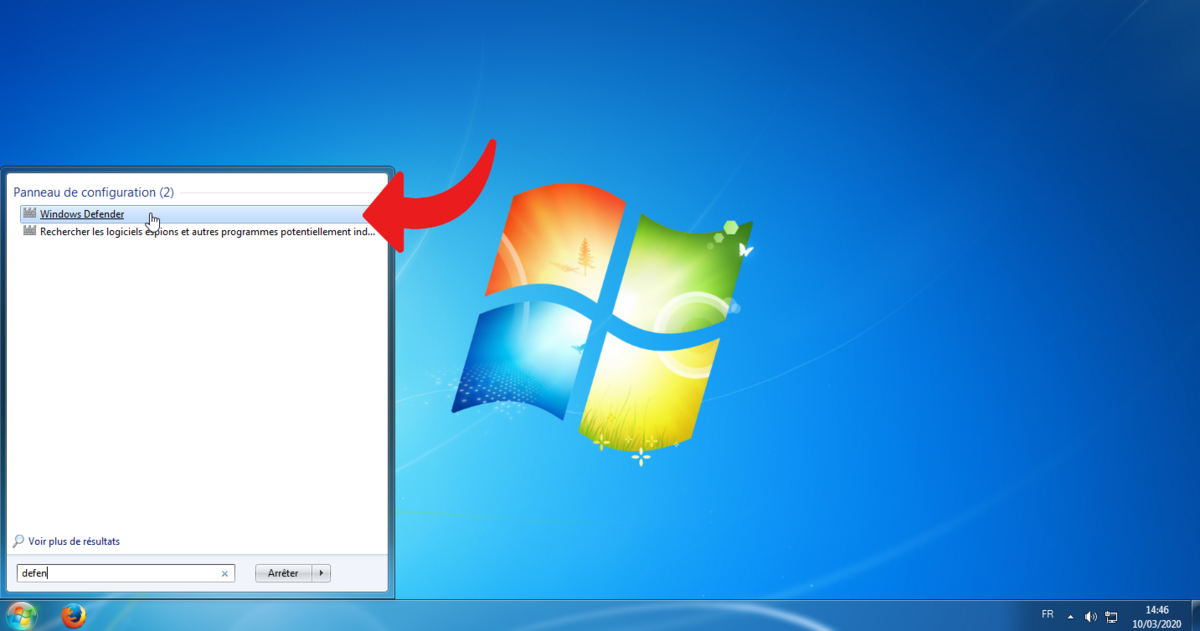
2. Start typing “Defender” in the search engine and then click on “Microsoft Defender”.
3. In the Microsoft Defender window, a message informs you that the service has stopped, just click on “Start now” to reactivate Microsoft Defender.

4. To ensure that the real-time protection is launched, go to the “Tools” tab, still in the same window.

5. Then select “Options” from the settings menu.

6. Check that the “Automatically scan my computer” option is checked in the “Automatic scan” tab and that the “Use real-time protection” option is also checked in the “Real-time protection” tab.


Also read:
.