Black and white images should be expressive and rich in contrast. In this tutorial for Photoshop, we show you how to create an effective black and white photo in just a few clicks with two methods:
1- With the options of the Image tab
2- With Black/White adjustment layer
How to switch your photo to black and white in Photoshop with the Image tab?
1. Open the document you want to switch to Black and White
File > Open
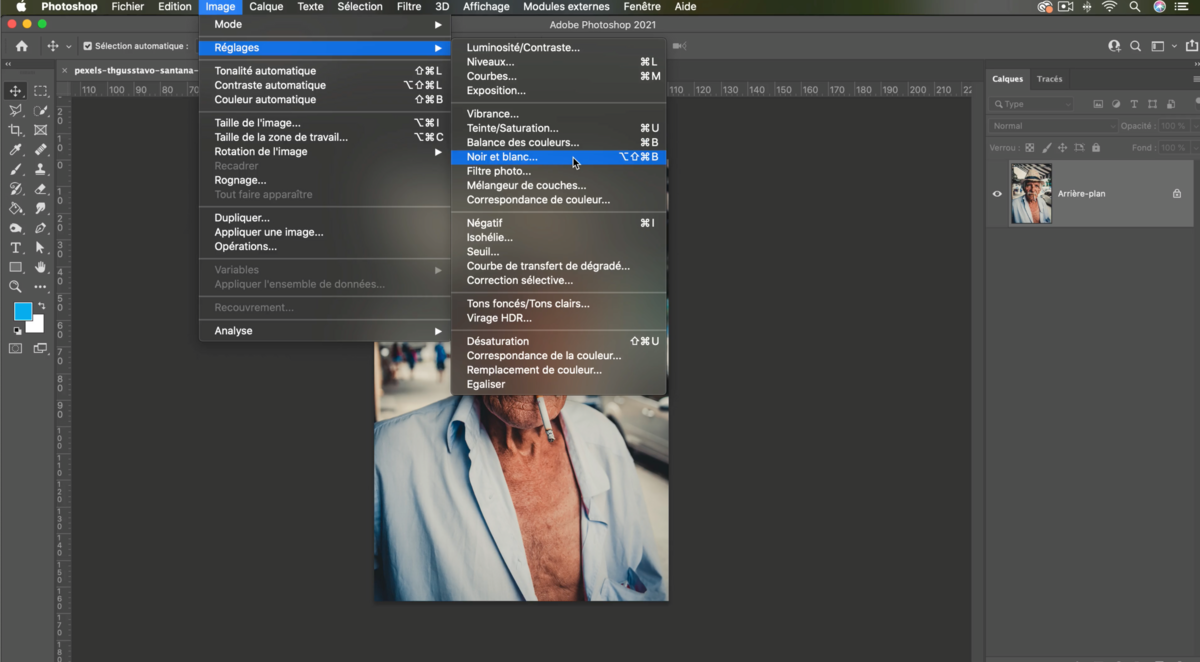
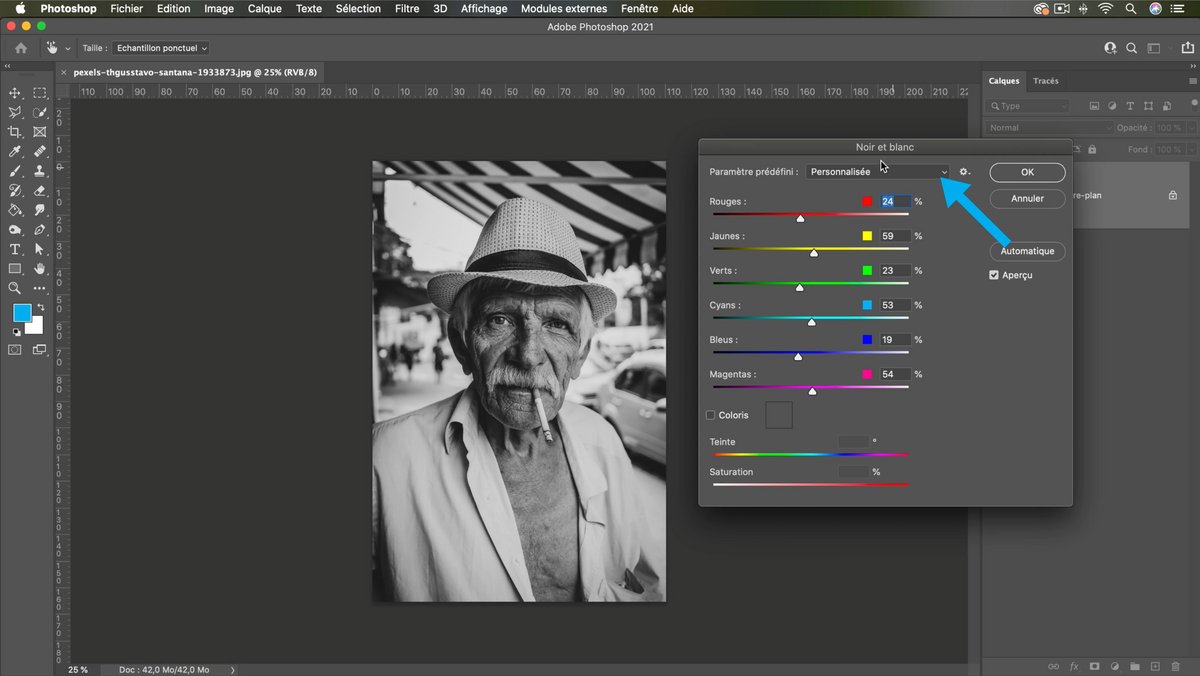
2. Click on the tab:
Image > Adjustments > Black and White
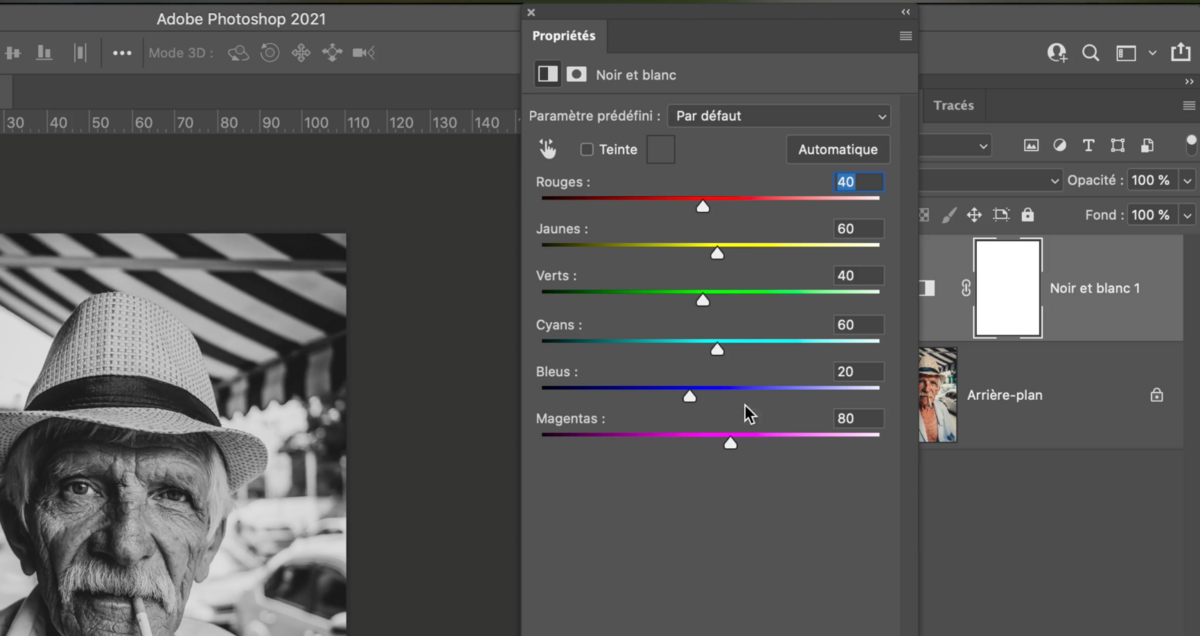
3. Once validated, a new window will open with different parameters available.
You will be able to vary the intensity of each color in your Black and White by moving the sliders from right to left.
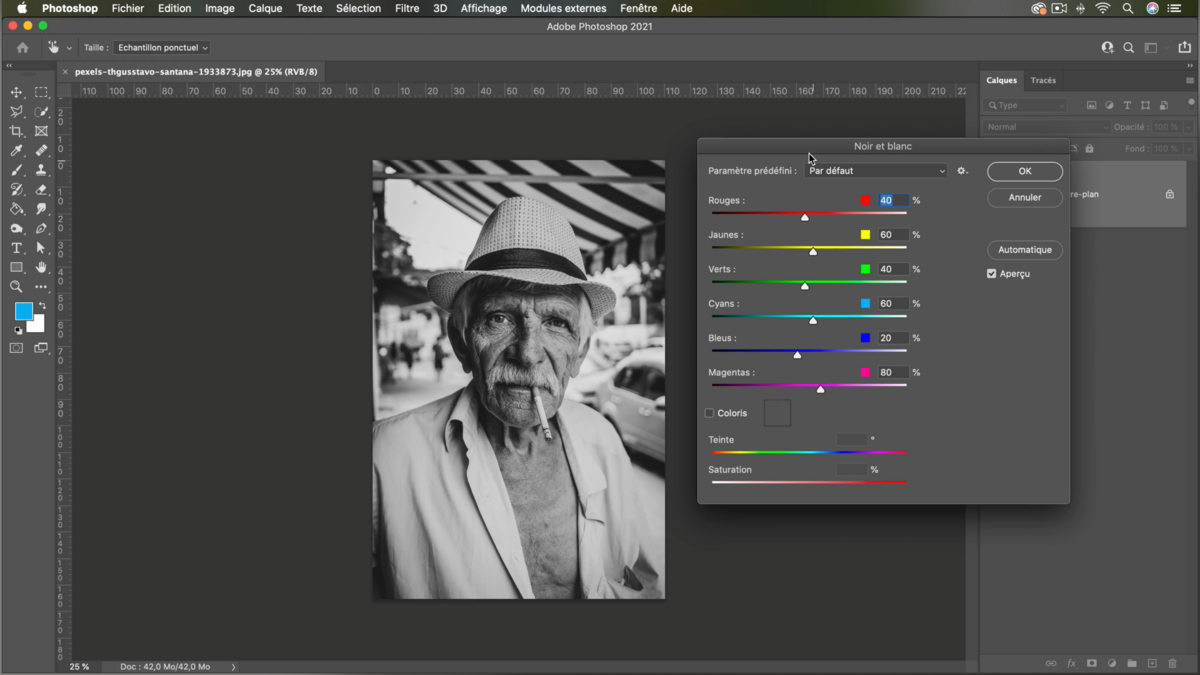
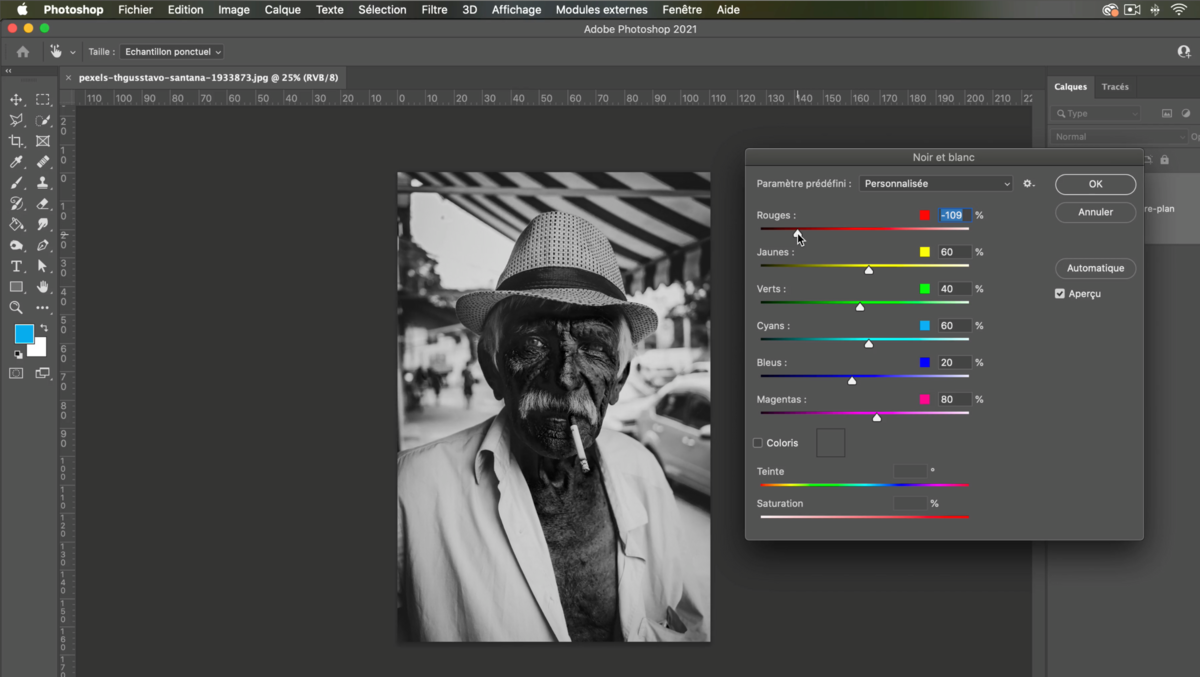
4. Adjust the percentage of colors to achieve the desired result.
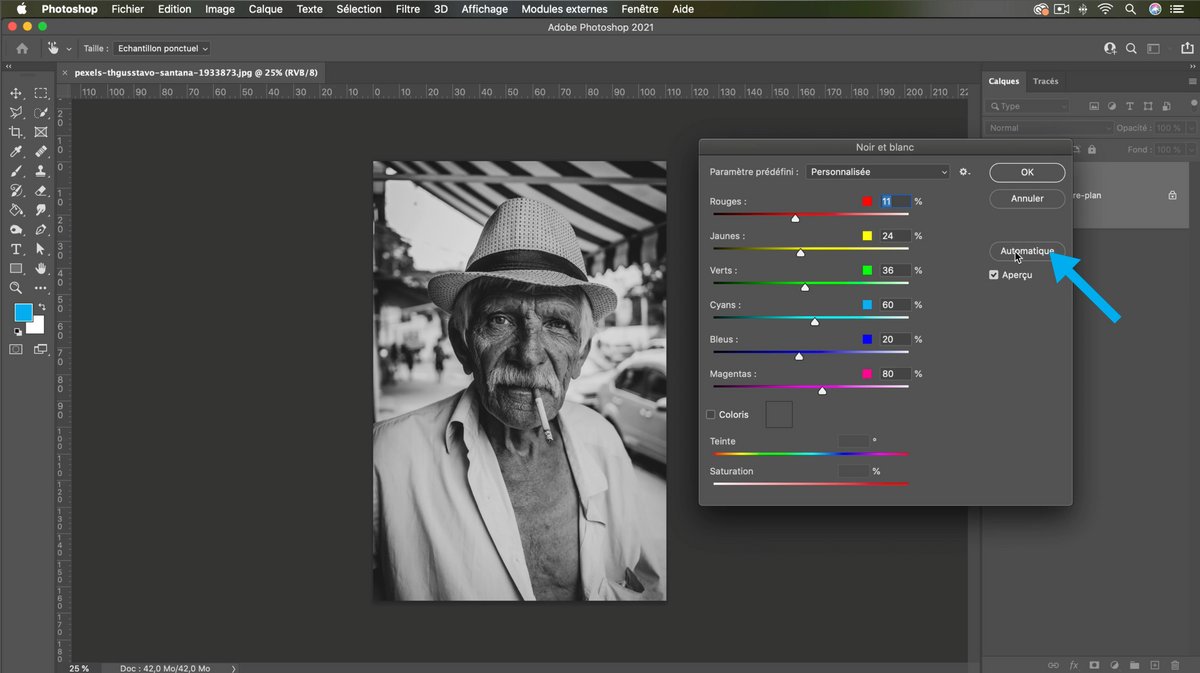
5. If you have trouble finding the right settings press [Automatique] and the software takes care of finding the most accurate setting.
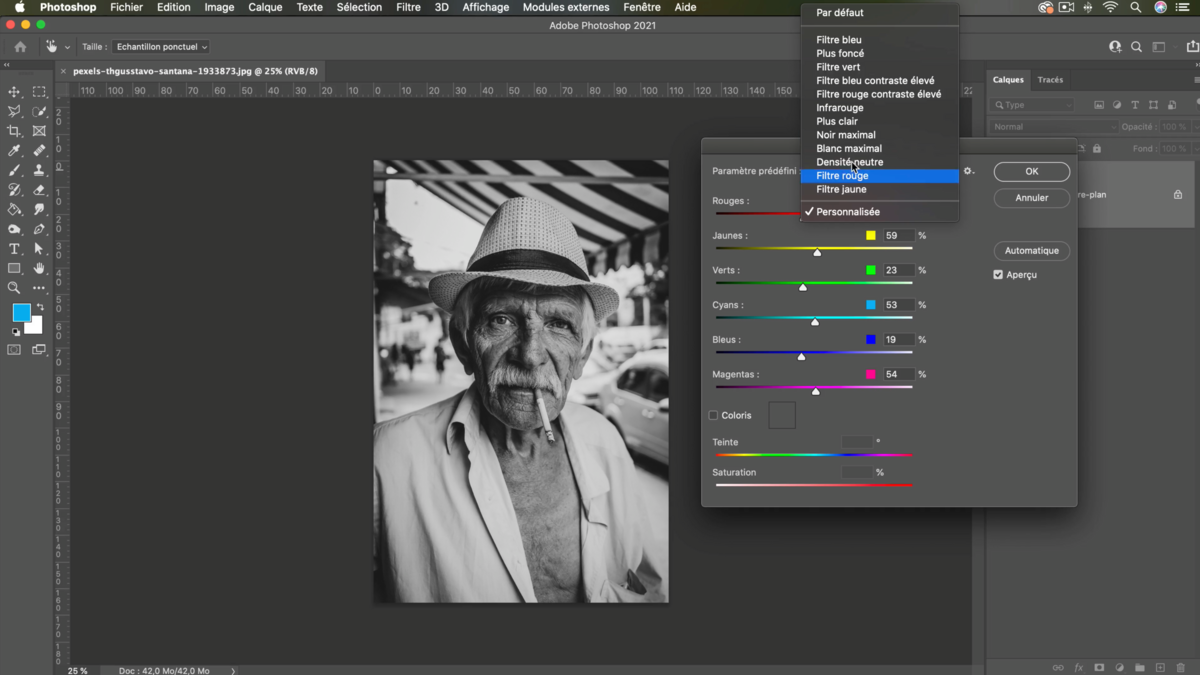
6. It is possible to customize the effect with preset filters.
Click on [Personnalisé]
A drop-down menu will appear with the different effects.
Click on [OK] to confirm your settings.
How to switch your photo to black and white in Photoshop with an adjustment layer?
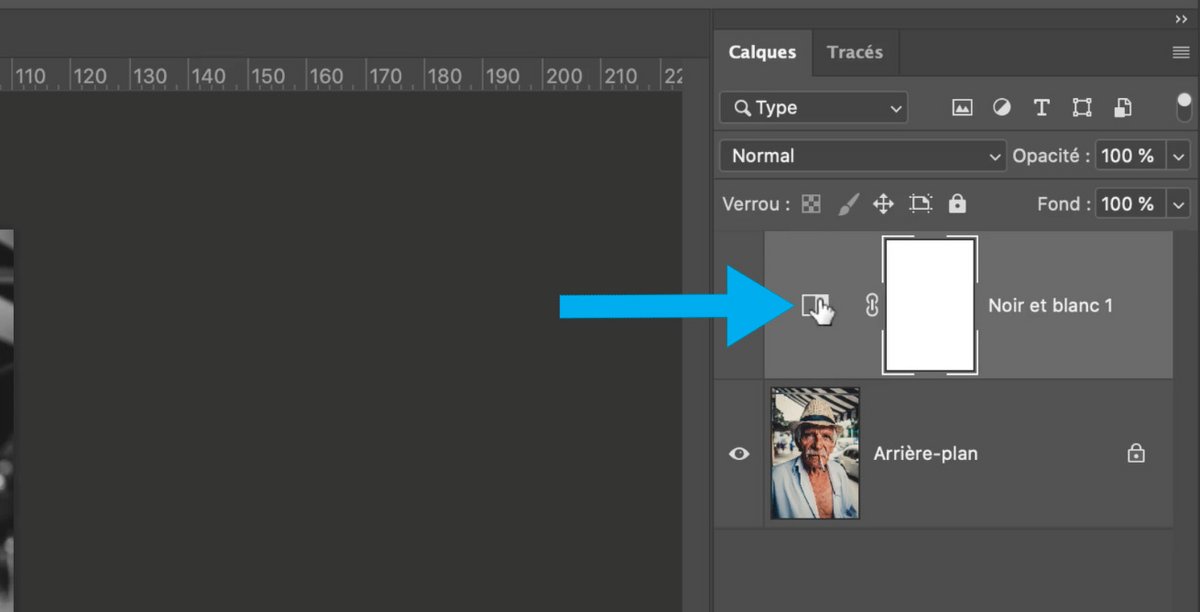
1. In the layers palette, click on the adjustment layers symbol and select “Black and White”
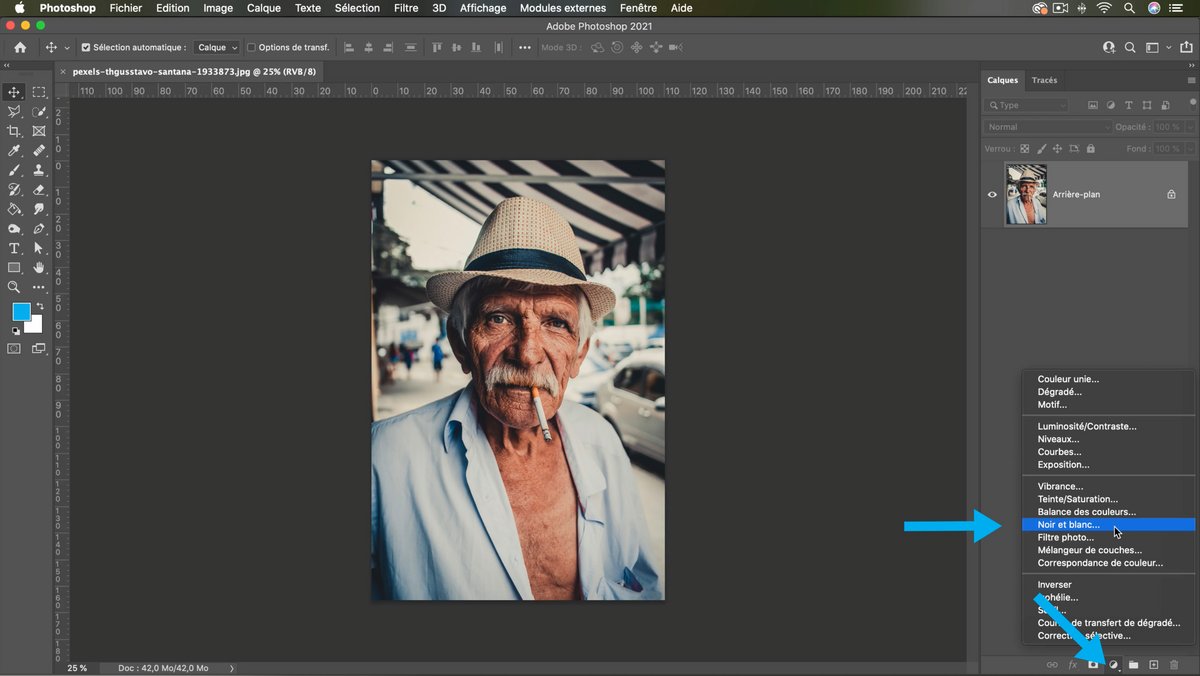
2. A layer will be created above this one named “background”
The settings from it will be assigned to the bottom layer.
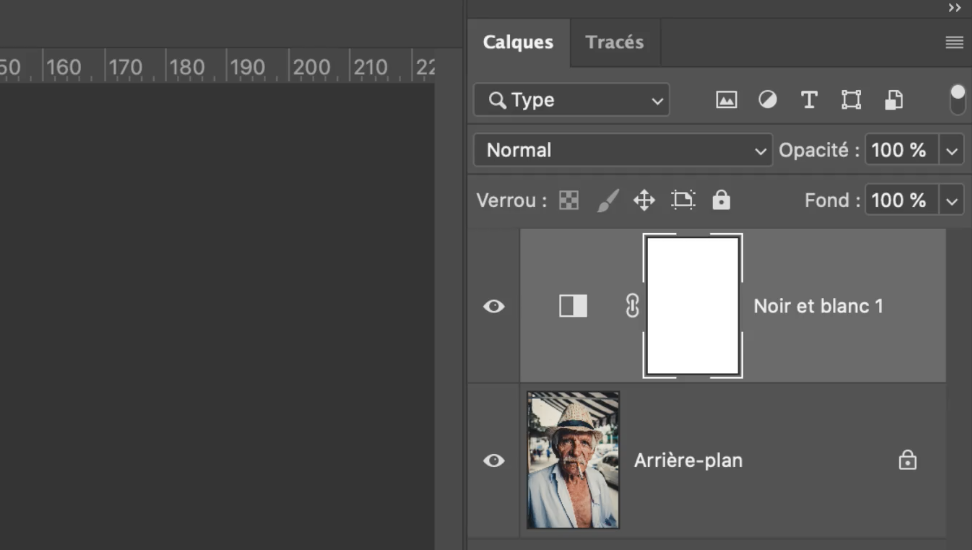
3. A new settings window opens where you can change the color settings.
Click on [ OK ] to validate your effect.
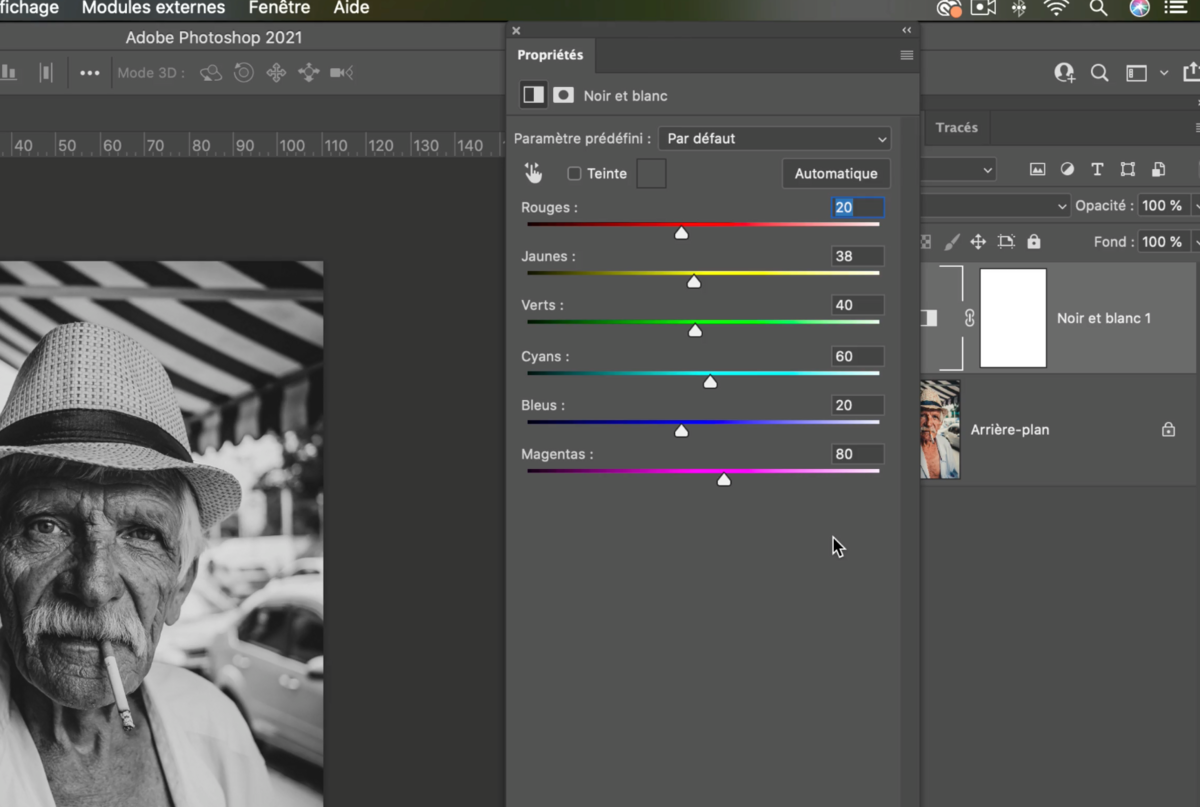
4. With this method you can change the assigned parameters easily.
Double click on the adjustment layer icon and the properties window will open to change the settings you want to adjust.
Two methods are possible for the same result, but the 2nd is much more suitable because you can go back to your settings whenever you want.
.