
© Apple
Strengthen your knowledge and mastery of macOS by adopting these tips and unveiling its many hidden functions.
Using macOS daily for several years does not mean that you have mastered it perfectly. Apple developers working on macOS have, over the years, tweaked the OS enough so that the functions it embeds natively are sufficient to satisfy the most basic tasks.
The OS indeed contains a large number of small features, sometimes surprising and often unknown, which, when mastered, can save you precious time in carrying out the most basic tasks.
Because in addition to the traditional keyboard shortcuts essential to know to work effectively on your Mac, the operating system itself, as well as certain native applications, embed hidden functions which could change your life. Here are a few.
1. Quickly hide an open app
If you happen to need to quickly hide the active window visible on the screen when someone approaches you, there is no need to click the button to minimize the window.
You can instead use the keyboard shortcut command + H (H for Hide) to make the active window disappear.
2. Quickly convert your images
You don’t need to download any third-party app to convert images on macOS. Best of all, you also don’t have to open your images one by one in Preview to export them to another format.
To quickly convert an image on your Mac, right-click on it in the Finder, then from the Quick Actions menu, select Convert Image.
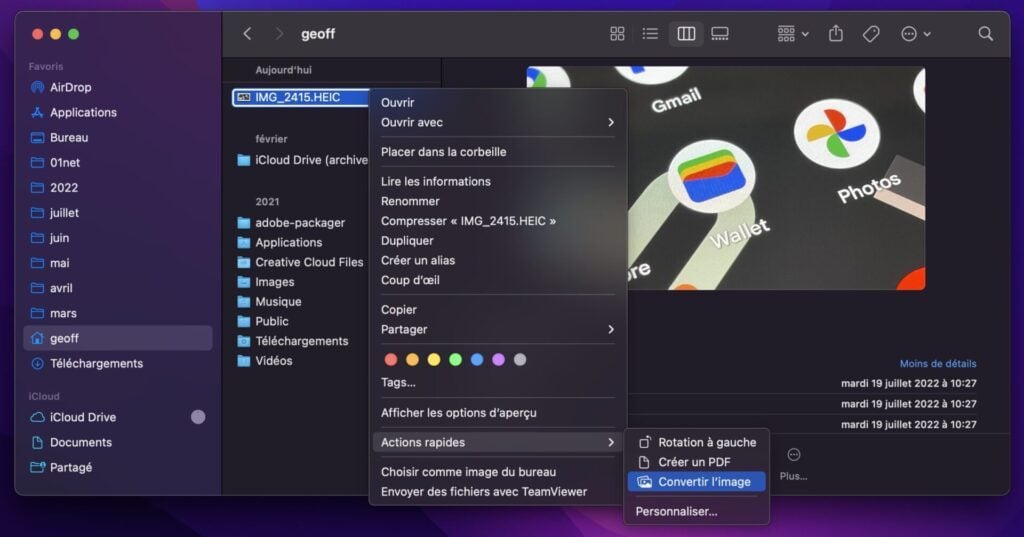
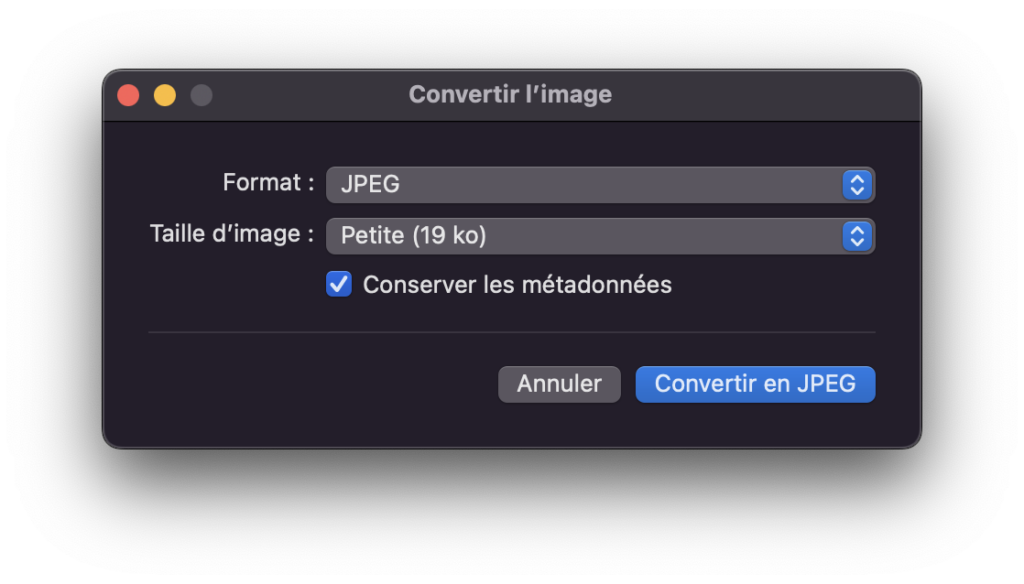
Then select the image format you want to get as well as its size, then click the Convert button.
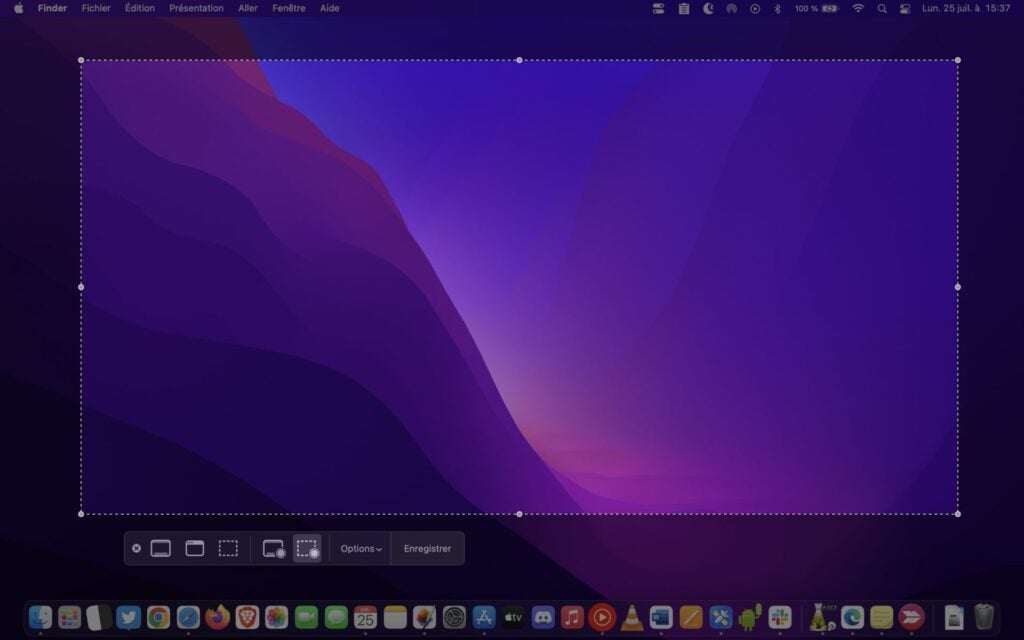
3. Master screenshots
Taking screenshots on macOS is as easy as one, or rather, three keyboard shortcuts. To capture your entire screen, use the shortcut Command + Shift + 3. To select an area to capture, use Command + Shift + 4. Then pressing the spacebar will allow you to capture an entire window.
Finally, to display the snipping tool and all of its options, use the keyboard shortcut Command + Shift + 5.
4. Pin Your Work Folders in Finder
You might not know this, but you can pin your regular working directories to Finder Favorites for quicker access. To do this, simply drag and drop your directory into the Favorites area of the Finder.
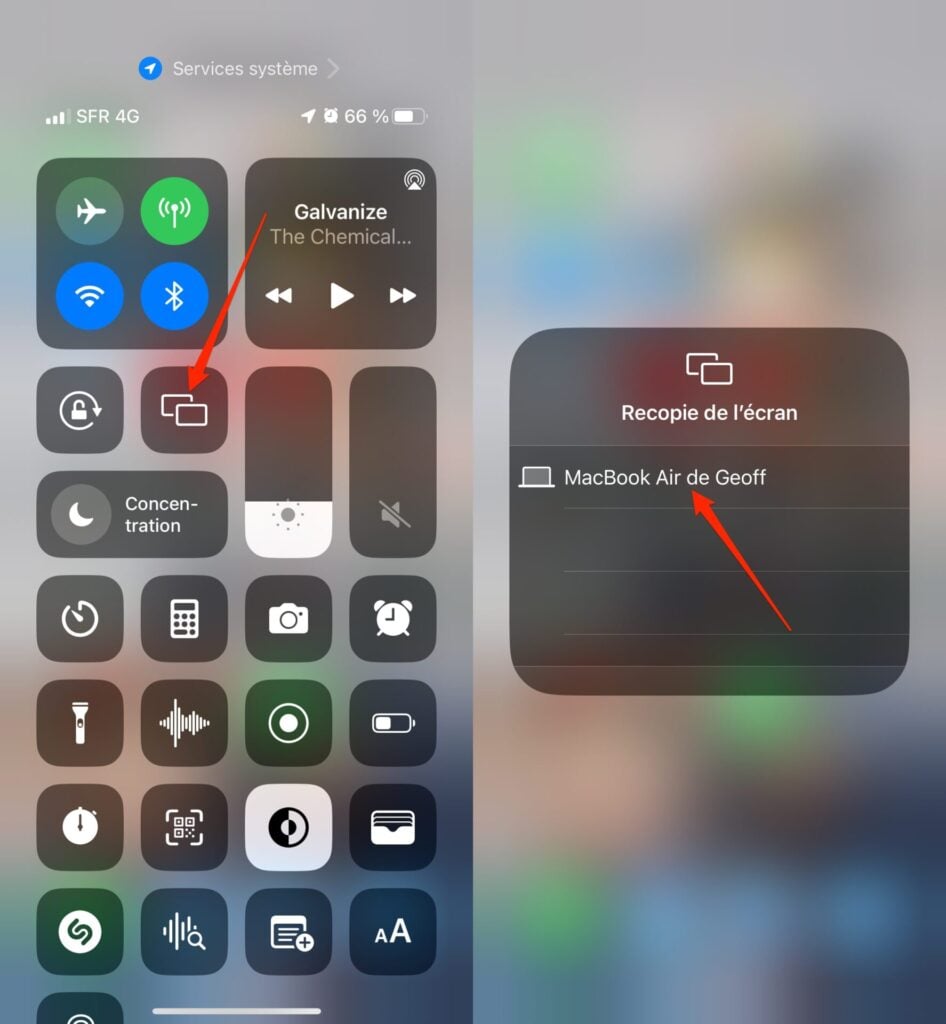
5. Mirror your iPhone screen to your Mac
While it’s possible to use AirPlay to stream content stored on your iPhone to a Mac, you can also hijack the feature to directly display your iPhone’s screen on your Mac.
To do this, on your iPhone, deploy the Control Center, and simply press the mirroring icon represented by two overlapping rectangles. In the Screen Mirroring screen that appears, select your Mac. Your iPhone screen should then automatically appear on your machine.
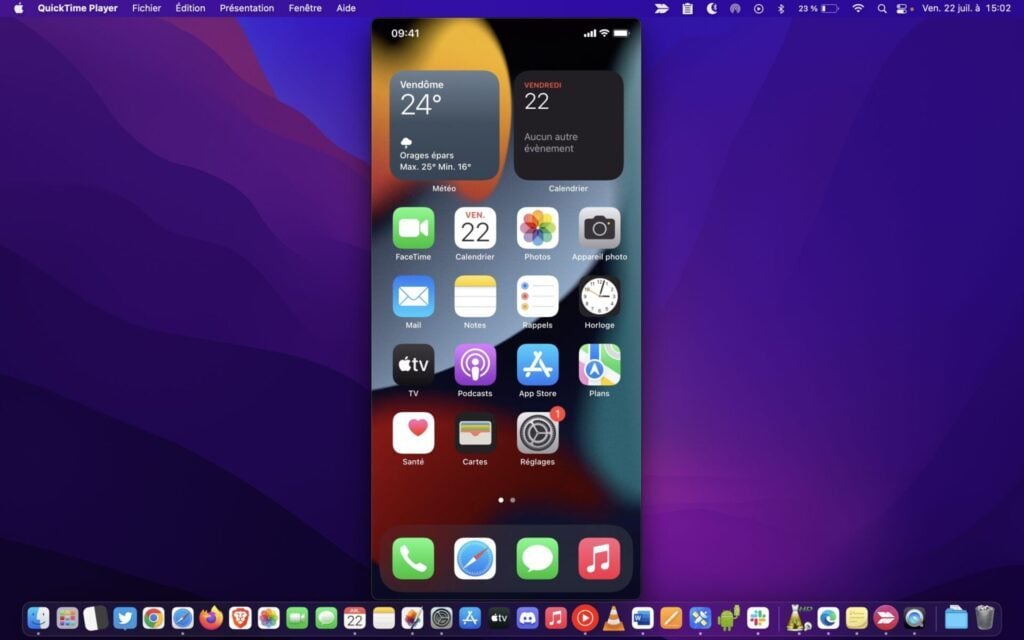
macOS also supports this feature in QuickTime. To do this, you will only need a Lightning cable to connect your iPhone to your Mac, and follow these instructions.
6. Do a quick video edit
To continue with QuickTime, a video player full of surprises, you can use it to quickly edit your videos. If you’re looking to join multiple videos together and trim them, you won’t need to open iMovie, Final Cut, or Adobe Premiere. QuickTime will do just fine.
You can already start by trimming each of your videos directly from the Finder. To do this, select a video and press the Spacebar to preview it. Then click on the edit icon at the top right of the window.
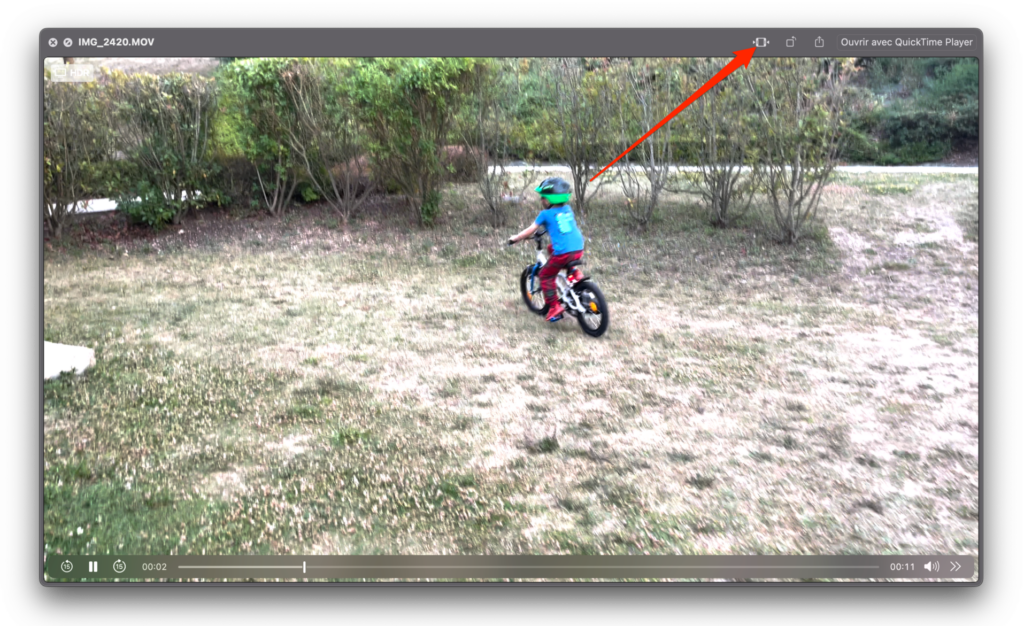
You can then shorten the video to select only the passage that interests you, then save it by clicking on Finish.

To paste your clips one after the other, open a first video in QuickTime. Then drag and drop the videos into the window of the first video played in QuickTime so that it is added directly after the first.
Then click OK, then from the File menu, choose Export As and select the export quality to save the generated video.
7. Sign your documents with Preview
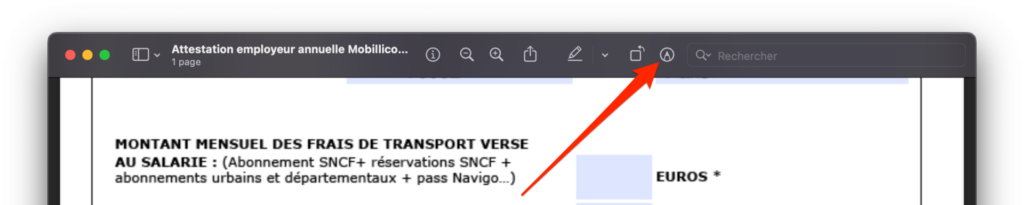
If you happen to need to put a handwritten signature on documents before resending them by e-mail, it is entirely possible to do so from your Mac. To do this, open the document to be signed in Preview. Then click on the icon showing a pencil in a circle, at the top right of the window, to display the annotation tools.
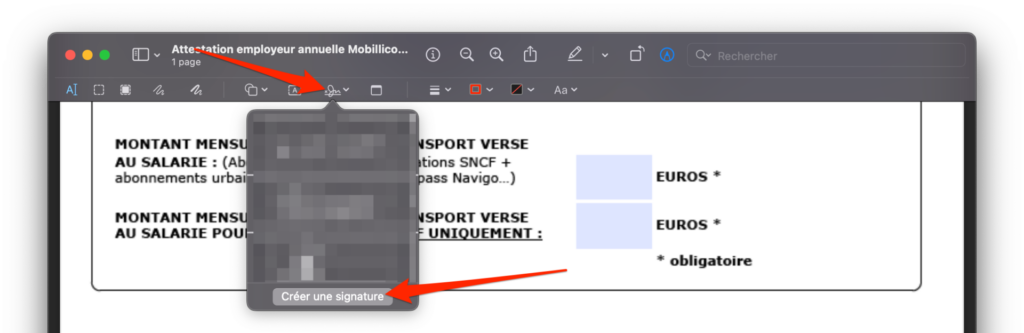
Select the signature tool, represented by a handwritten signature and click on Create signature.
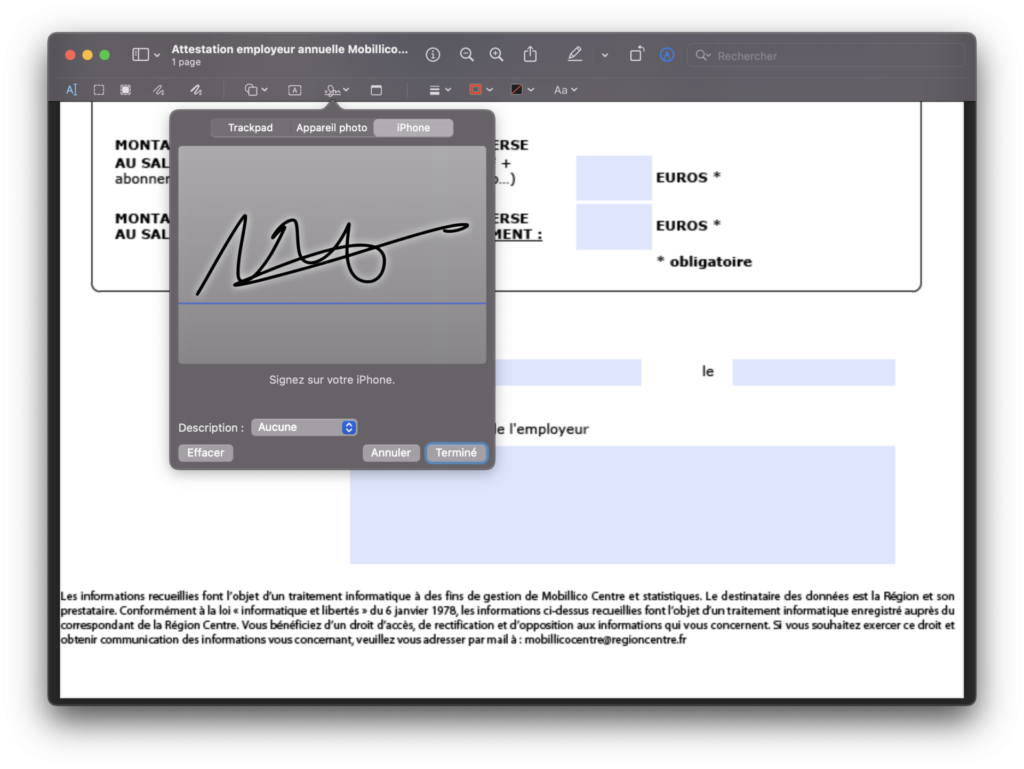
Then choose the medium you want to use to create a digital version of your handwritten signature. You can do this by using your Mac’s trackpad, by taking a photo of your handwritten signature on a piece of white paper using the FaceTime camera, or even better, by using your iPhone’s touchscreen.
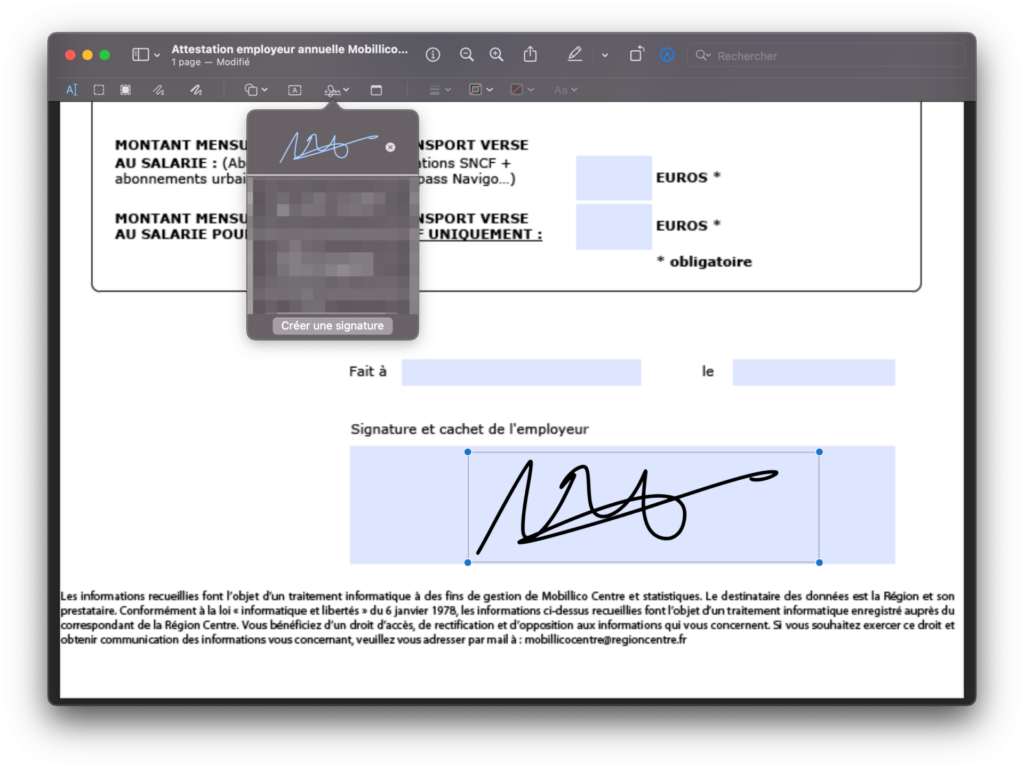
You then just have to select your signature from this menu to make it appear on your document. You can obviously move it around and change its size so that it is perfectly readable.
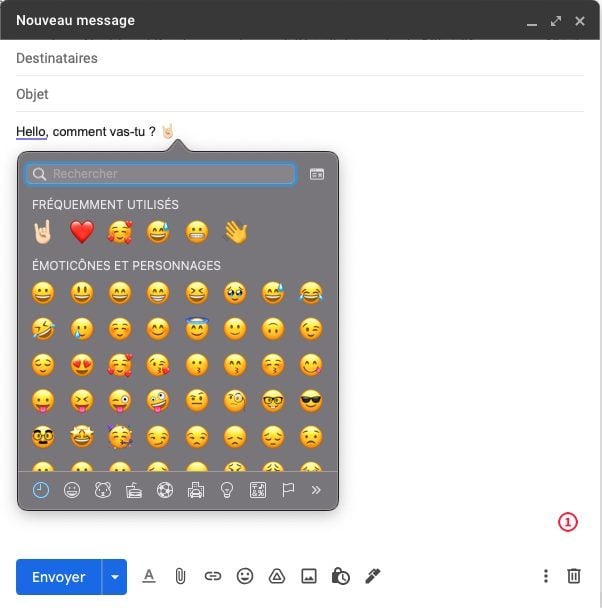
8. Access emojis
Would you like to punctuate a conversation using emojis? You can make them appear in a dedicated window at any time using the keyboard shortcut Control + Command + Space.
9. Control sound and brightness with precision
Using the media control keys to manage the sound volume of your Mac is convenient, but still less precise than using the slider present in the control center.
However, you can divide the sound adjustment steps to increase or decrease the volume with more precision.
All you have to do is hold down the Shift + Option keys, then adjust the volume using the dedicated keys on the keyboard. The icing on the cake, it also works with the keys to adjust the brightness of the screen.

10. Hide desktop icons
Organizing documents and files on a computer requires a certain rigor. If you’re the type to leave documents lying around that you download or save on the macOS desktop, it can very quickly turn into an unreadable battlefield.
In order for the macOS desktop to be constantly clean, it is possible to hide the icons displayed on it. Desktop items, invisible on the macOS home screen, will remain accessible from the Finder, in the dedicated Desktop directory.
The official method for hiding desktop icons is perfectly reversible, but requires going through the Terminal. To do this, open the Terminal, paste the command defaults write com.apple.finder CreateDesktop false and validate by pressing the Enter key on the keyboard.
You must then restart the Finder for the changes to take effect. Then type killall Finder in the Terminal and press Enter to validate. All Finder windows should then relaunch and your desktop should be free of any icons.
To go back and make the desktop icons appear again, type the command defaults write com.apple.finder CreateDesktop true and press Enter, then type killall Finder to restart the Finder.
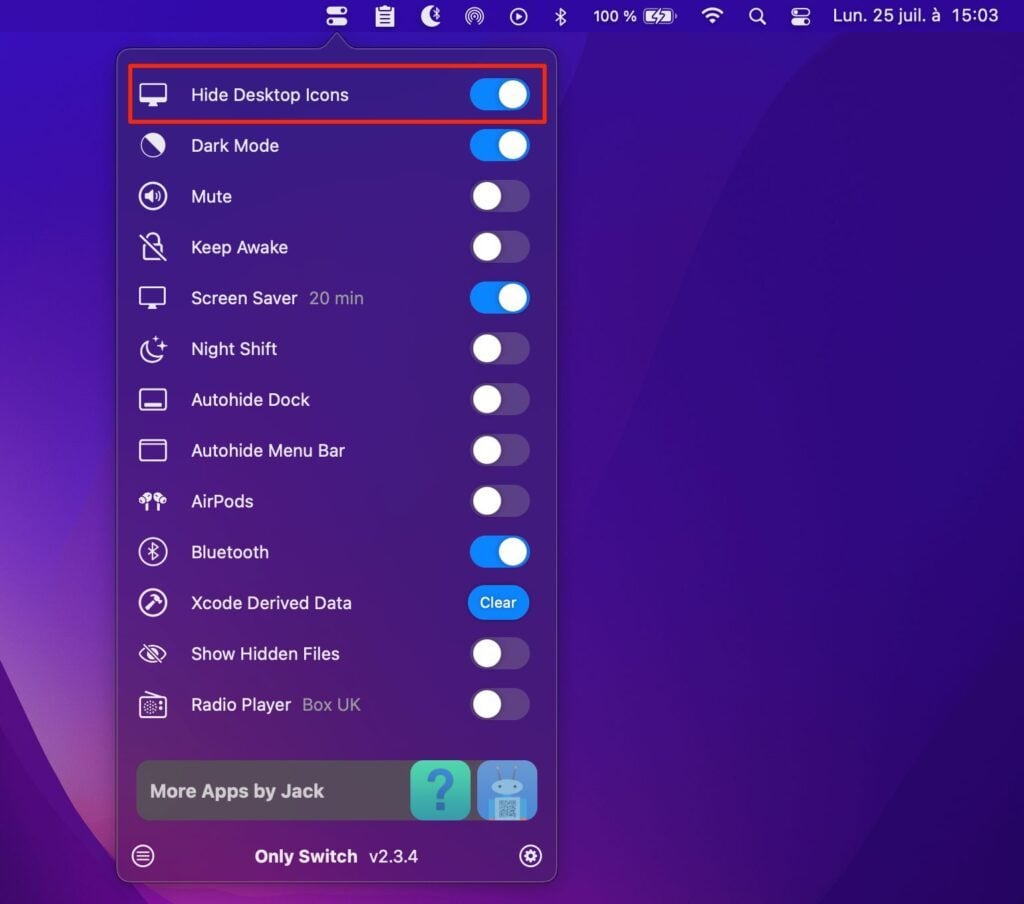
Although quite simple, this manipulation can quickly become restrictive if you have to perform it frequently, in particular to temporarily hide the elements of your office before making a presentation in front of an audience.
You can then call OnlySwitch, a free and open source third-party application that allows the operation to be carried out by activating a simple button. The program, once installed, is housed directly in the status bar of macOS and will also allow you to activate or deactivate dark mode on the fly.