You have photos that you want to retouch, you want to smooth the skin, give a more “magazine” look to your portraits but you don’t know all the manipulations to achieve this?
Let’s see how to achieve a near-pro result with Photoshop’s Neural Filters in just a few clicks.
How to smooth skin in 1 click with Photoshop?
1. Open your image
File > Open
2. Go to the Filter tab and search for Neural Filters.
Click on it, a dialog window will open.
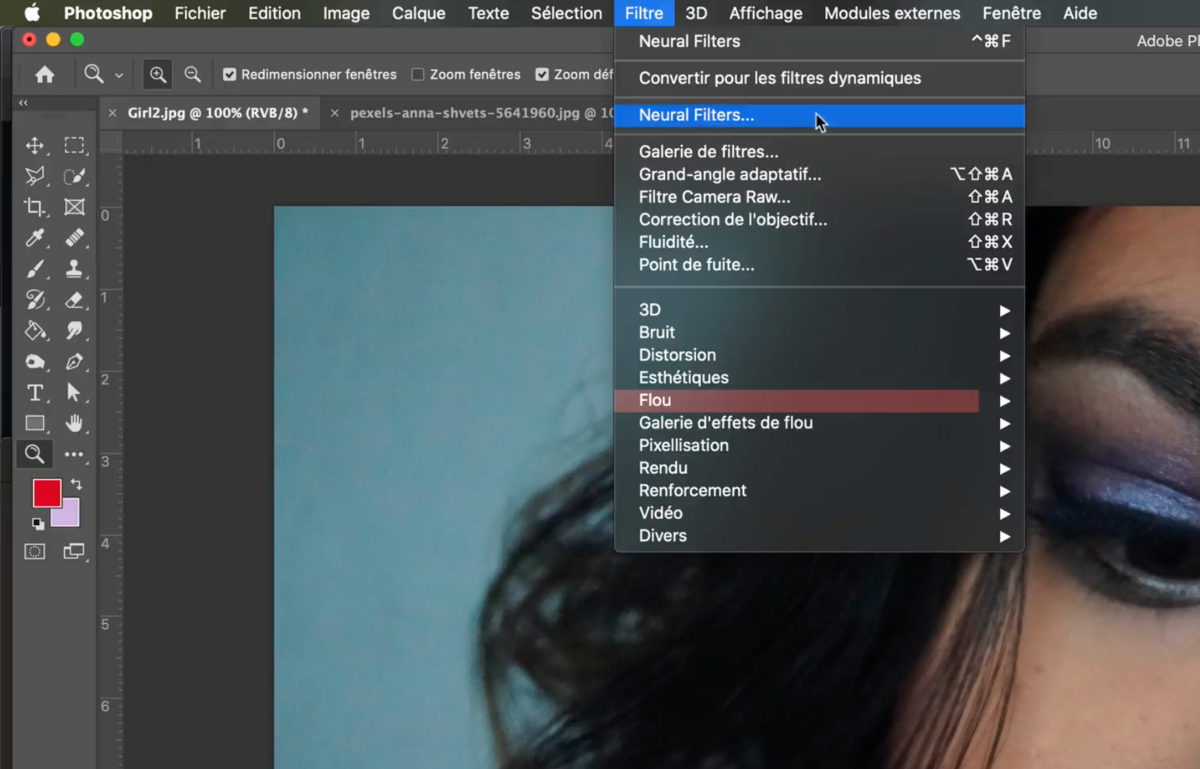
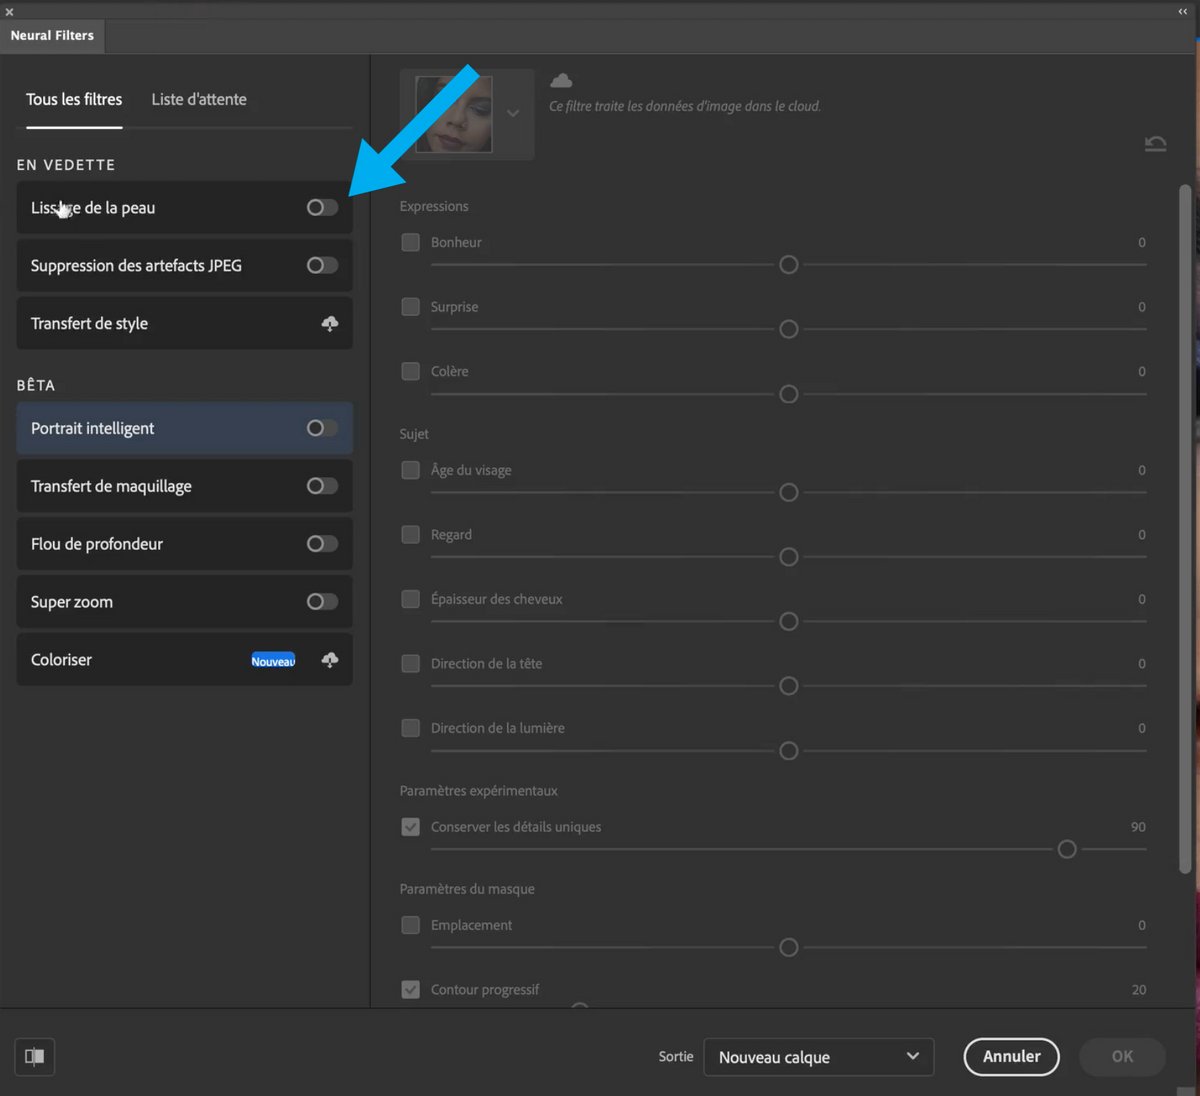
3. In the Neural Filters window click on Skin Smoothing
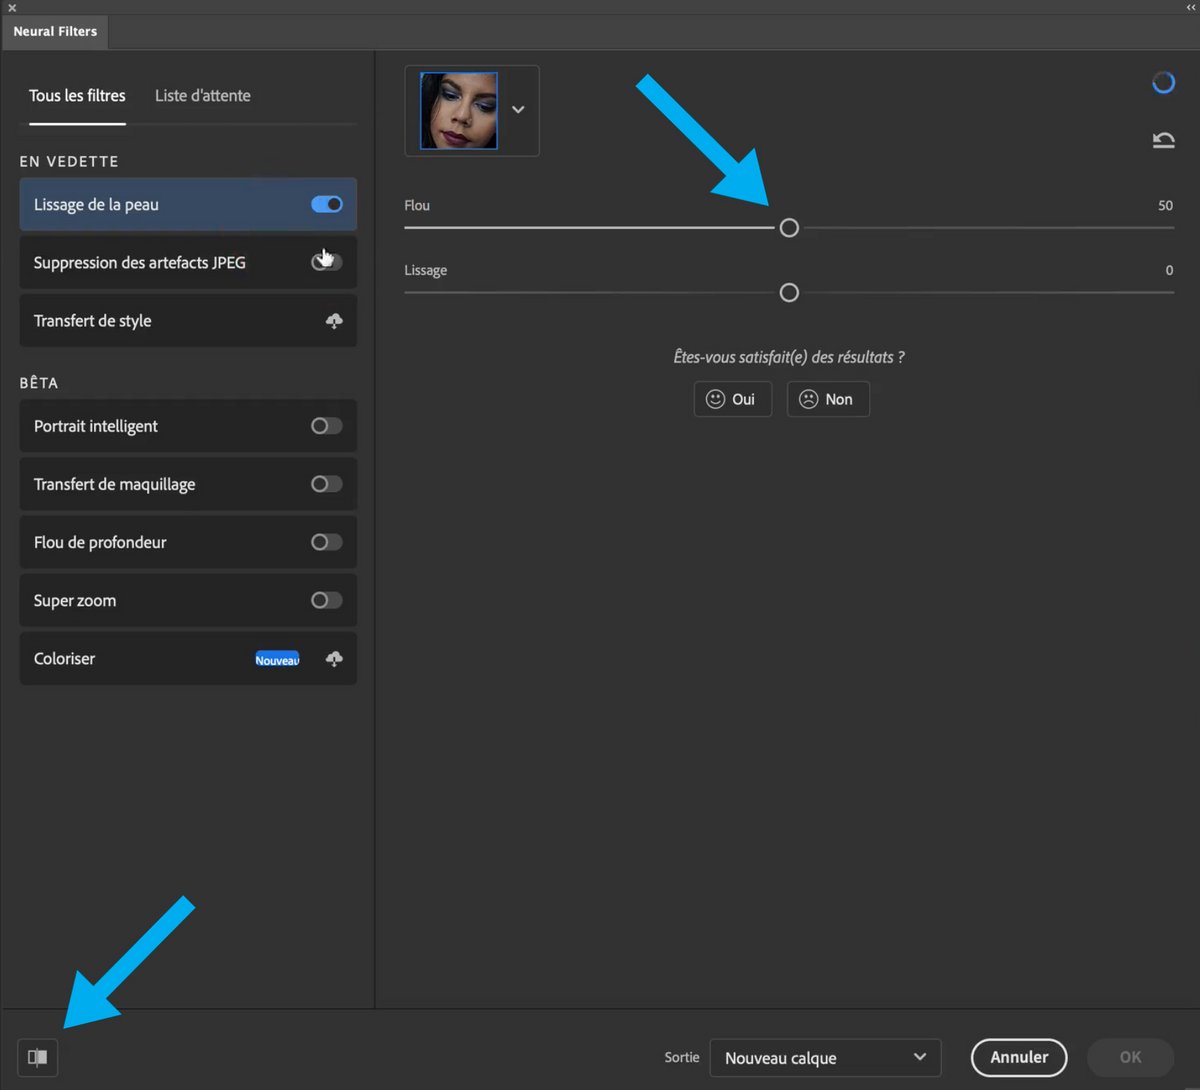
4. Vary the settings to adjust the rendering of your portrait.
Drag the sliders from right to left to increase or decrease Blur and Smoothing.
Tip: At the bottom of this window you can see the Before/After result by clicking on the symbol.
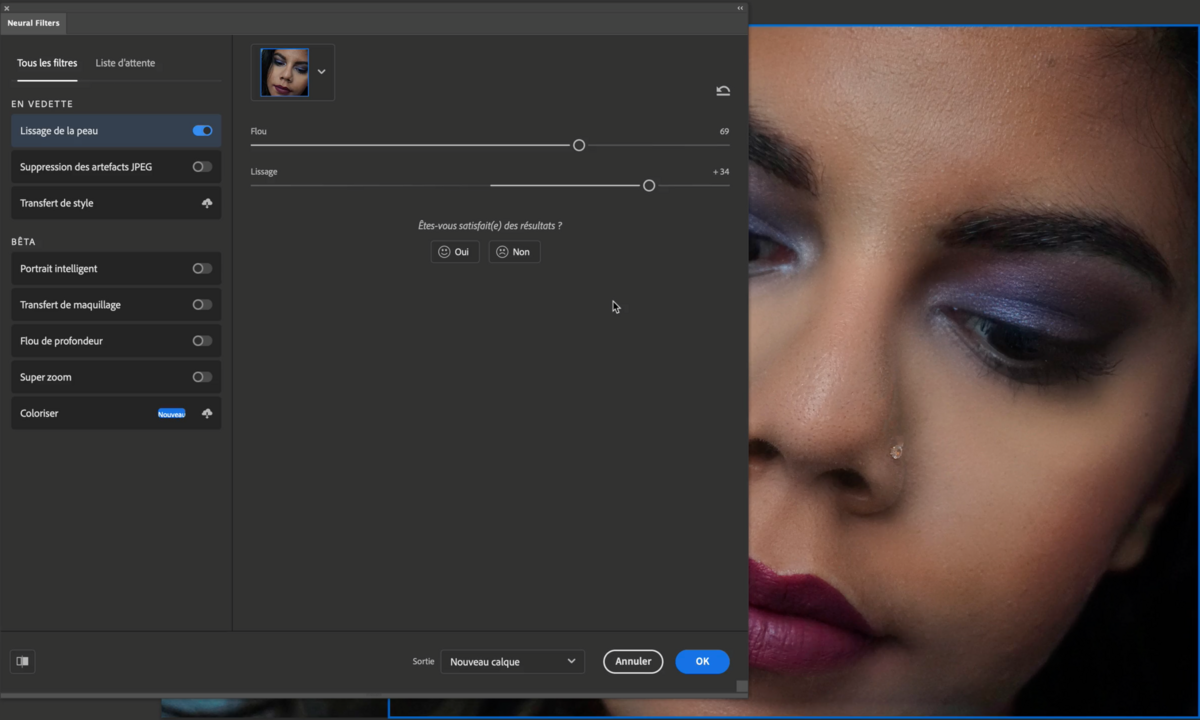
5. Choose output mode.
At the bottom of the window you will have to choose the output mode according to your needs.
For the example we will choose “New Layer”
Click on [ ok ] to validate your effect.

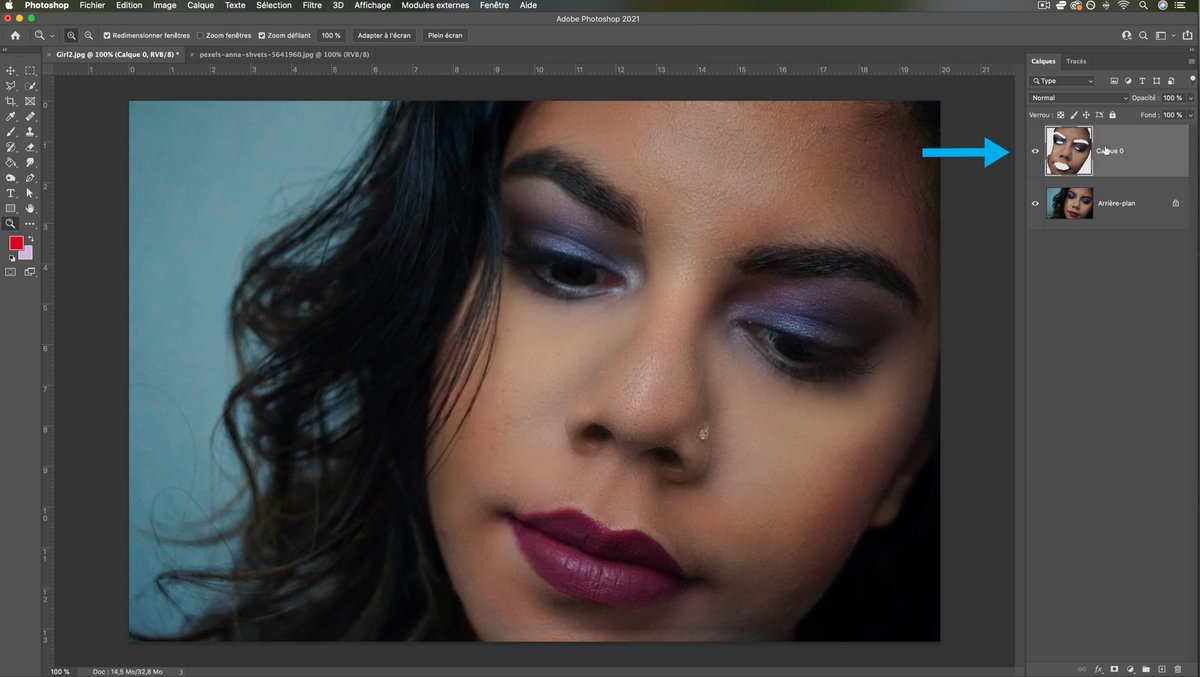
6. Now in the layers window (on the right) a new layer with the effect has been created.
Tip: click on the eye to make this layer disappear or appear to see before/after)
With this technique you will be able to very easily correct the small imperfections on the portraits.
You can repeat these same manipulations on other photos.
.