
© Glen carrie – unsplash
Configure the privacy settings of your Facebook profile to avoid showing private information that you no longer remember sharing.
You don’t use Facebook now the way you used it ten years ago. And chances are that when the social network notifies you of a memory from the past, you may roll your eyes at certain memories that you are not very proud of today.
Facebook is a real gold mine to allow your new friends, your colleagues, or your managers to better identify you and understand a little better who they are dealing with. To avoid posts from the past that no longer reflect the person you are today, it’s best to clean up your posts from time to time. For this, Facebook already offers a tool to simplify the deletion of your old publications.
If to avoid problems, some adopt the radical solution of permanently deleting their Facebook account, it is quite possible to modify certain privacy settings of your profile to lock it. Be careful though, Facebook’s privacy settings are a real gas factory. Here’s everything you need to know to shield your profile against potential stalkers.
1. Edit your publicly available personal profile info
In order not to leave your personal information open to all winds, the first step to take is to clean up the information in your biography that is accessible to the public.
To do this, go to your profile, then in the Intro box, click on Edit info.
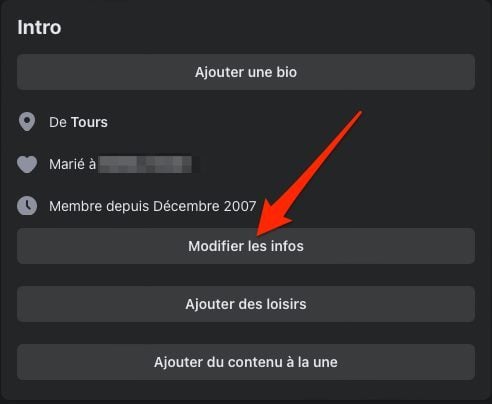
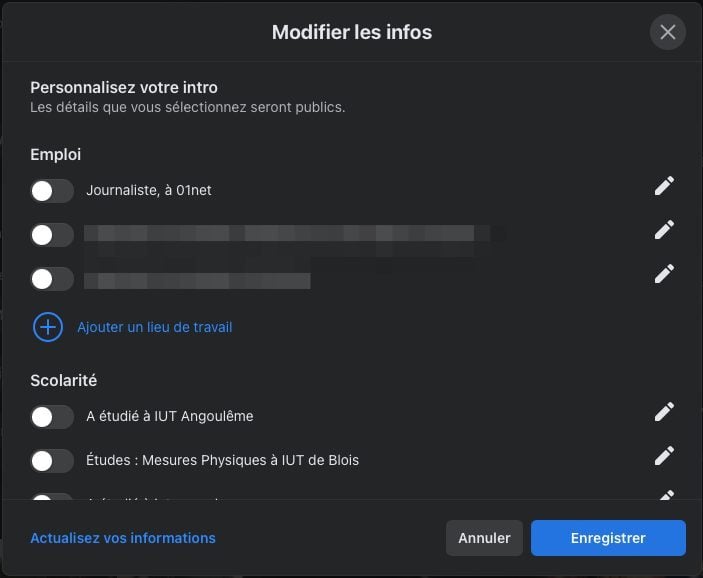
Job, education, hometown, current city, relationship status, uncheck any information you don’t want displayed on your public profile. Remember to click Save to save your changes.
2. Enter Privacy Settings
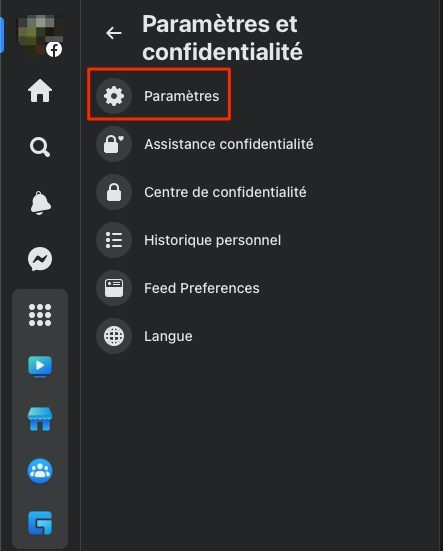
On the Facebook main page, in the sidebar, click your avatar to expand the main menu, and then enter the Privacy Settings.
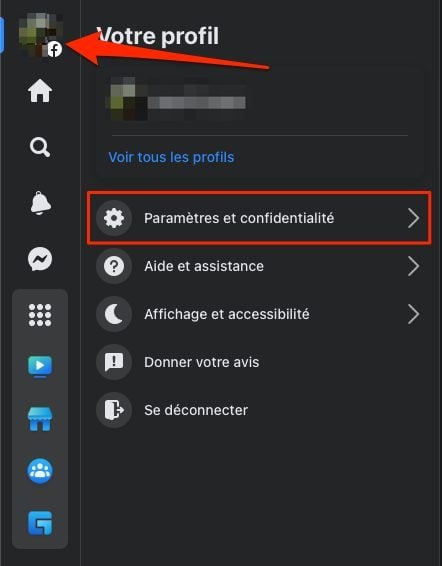
Then click on Settings to access the global settings panel for your account.
3. Limit the audience of your future publications
If you’ve never poked around in Facebook’s privacy settings and have been using the platform for over a decade, chances are your posts are public. You can check this very easily by looking at the small logo displayed next to the publication date of your posts: a world map means that your post is publicly visible, while the icon with two silhouettes indicates that the post’s audience is limited. to your friends only.
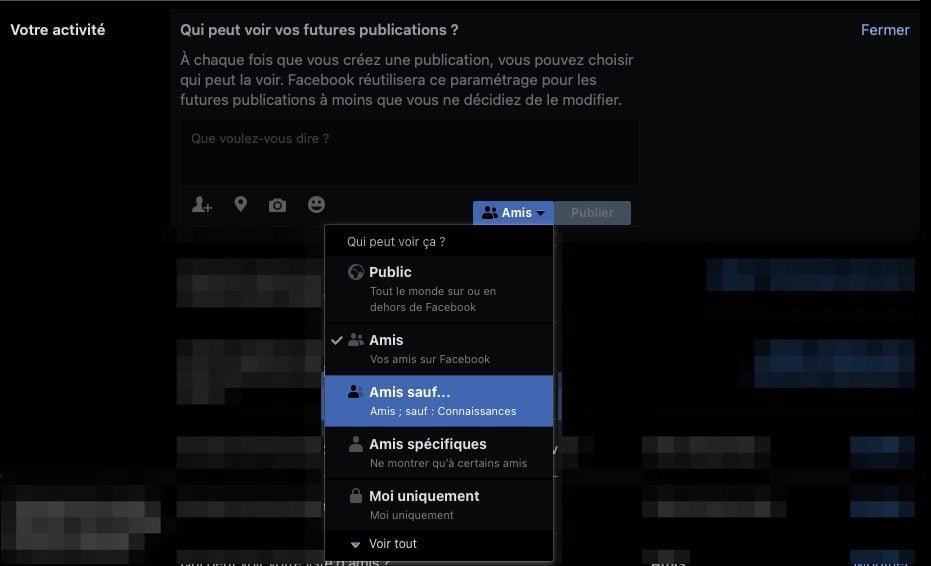
To limit the audience for your posts, in the Your activity section, in the Who can see your future posts row, click Edit.

Then click the drop-down menu next to the Post button and select the group of people you want to allow to see your posts.
4. Change the audience of your old posts
Similarly, all your old posts have a defined audience. It is likely that some of your posts will be visible to everyone, or even to friends of your friends.
To change this, on the line “Limit the audience of posts you have opened to friends of your friends or to the public“, click on Limit the audience of old posts.
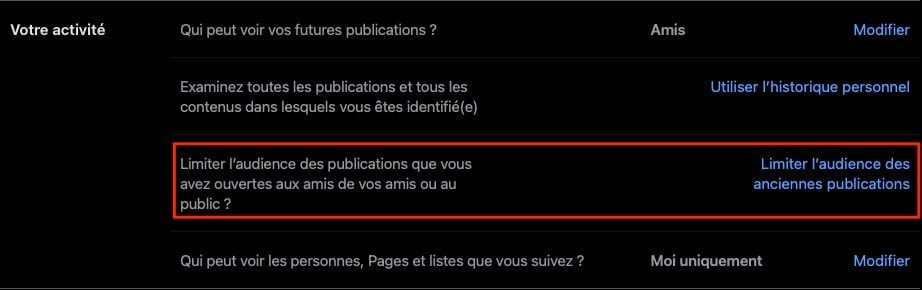
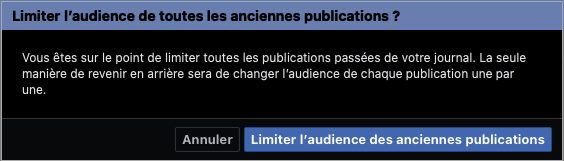
Then click the Limit audience for old posts button again.
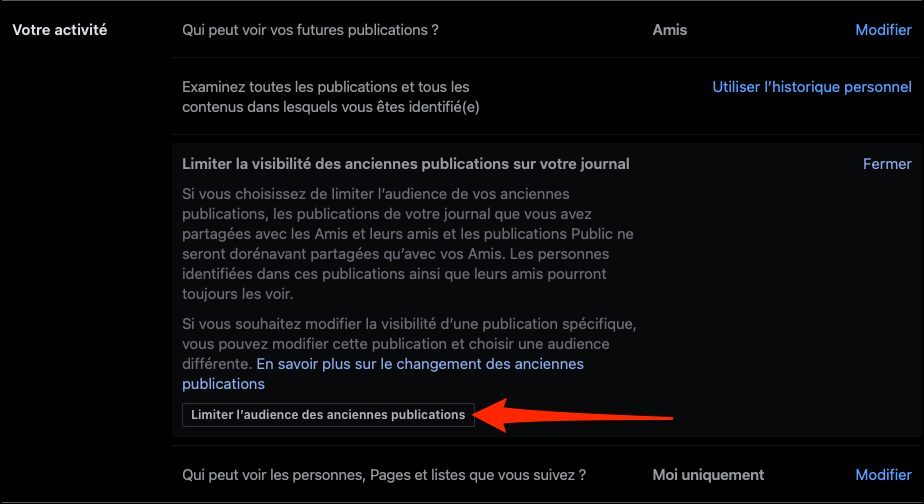
Finally, validate your choice to Limit the audience of old publications by clicking on the appropriate button in the window that appears as a pop-up. Finally press Close to save your preferences.
5. Keep the pages and people you follow private
Facebook is the ideal tool to find out about your areas of interest. To prevent everyone from knowing about your hobbies, it’s probably safest to block your contacts from seeing the people, pages, and lists you follow.
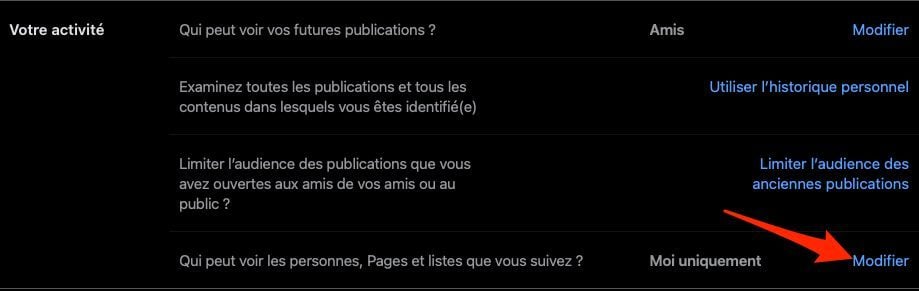
Locate the Who can see the people, Pages, and lists you follow row and click Edit.
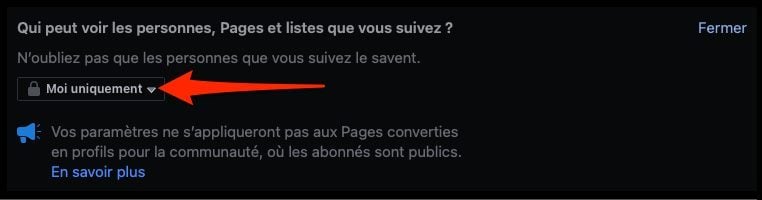
From the drop-down menu, then select Me only.
6. Hide your friends list
Hiding your friends list from your friends, as well as from all Facebook users, can save you a lot of trouble. By preventing your contacts from browsing the list of your friends, you can, for example, prevent them from knowing that you had a party with such and such a person.
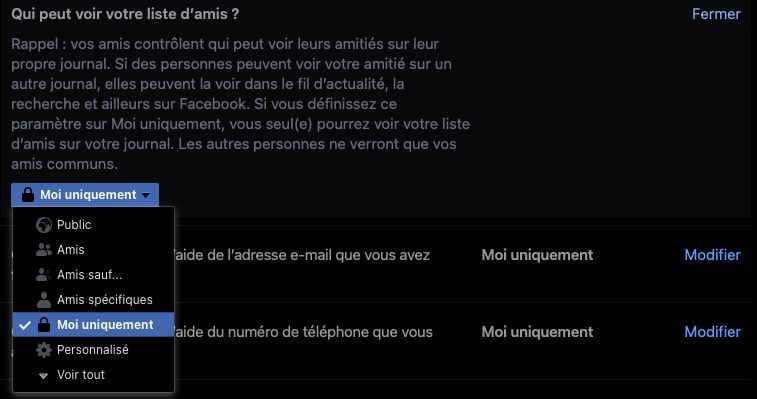
To hide your friends list, in the How others can find and contact you section, locate the line Who can see your friends list.
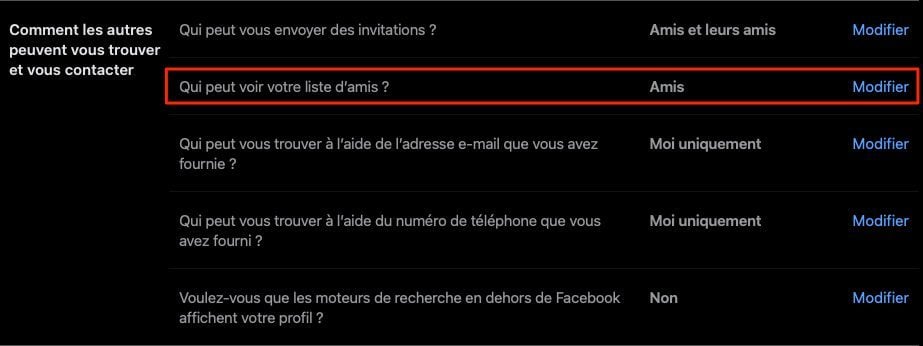
Click Edit and change the audience to Me only.
7. Prevent people from finding you with your phone number or email
Let’s be clear, there is bound to be someone in your immediate or distant entourage that you absolutely want to dodge on Facebook.
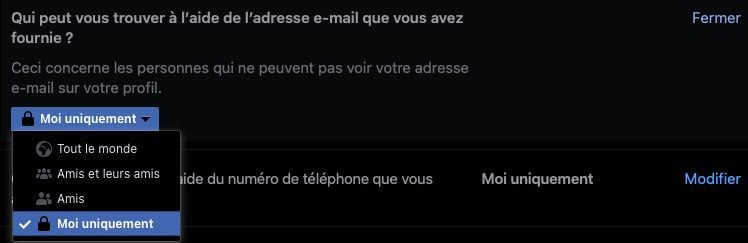
To prevent anyone with knowledge of your email address or phone number from finding you on Facebook, locate the Who can find you using the email address you provided? option, and click click Edit to choose Me Only.
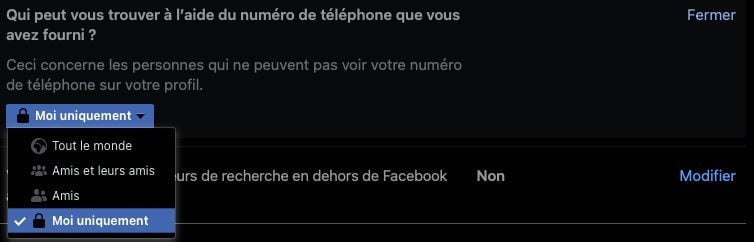
Do the same with the Who can find you using the number you provided? option.
8. Remove your profile from Google results
If you’ve never changed your privacy settings on Facebook, your profile may appear in search engine results.
A potential recruiter, who would type your first and last name into Google, could easily access your Facebook profile. It could be like a gold digger having found a vein. It’s probably safer for a recruiter to stumble upon your LinkedIn profile than your photos from student nights in which you likely appear tipsy and perhaps even partially naked.
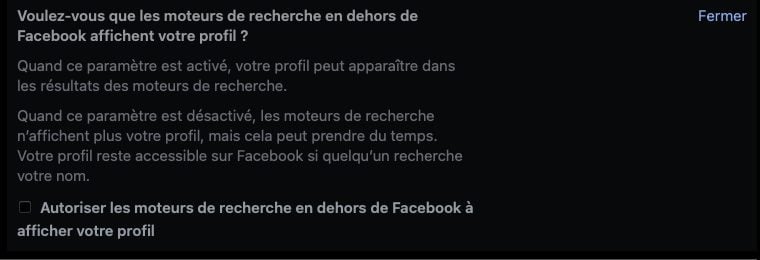
To remove your Facebook profile from search engine results, in the line “Do you want search engines outside of Facebook to display your profile?”, click Edit.
Then uncheck the box
.
9. Prevent your friends from seeing what others have posted on your wall
Do you also have this schoolboy friend who doesn’t hesitate to post borderline jokes on your wall? To avoid creating discomfort, it is probably more prudent to prevent your contacts from being able to consult what others publish on your wall.
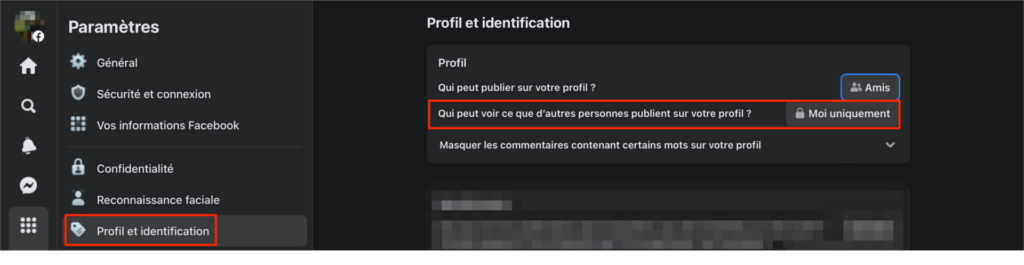
To do this, in the Settings column, select Profile and identification. In the Who can see what other people are posting to your profile row, click the default audience and choose Me only. Posts sent by your friends on your profile will now only be visible to you.
10. Block others from seeing posts you’ve been tagged in
You may not be immune to this clumsy friend who finds it funny to bring up old files about you by publishing, for example, a compromising photo of you and identifying yourself. If this is the case and you do not have control over the content in which you are identified, all your friends will potentially have access to it when you would probably like to forget it.
To avoid this kind of mishap, it is preferable, again, to lock the identification options. To do this, in the Profile and Identification section of your Account Settings, locate the box devoted to Identification. Feel free to change the audience from Who can see posts you’re tagged in on your profile to Me only. Do the same with the next option.
Finally, if you’ve decided that your friends can still see posts you’re tagged in, turn on both Review options.
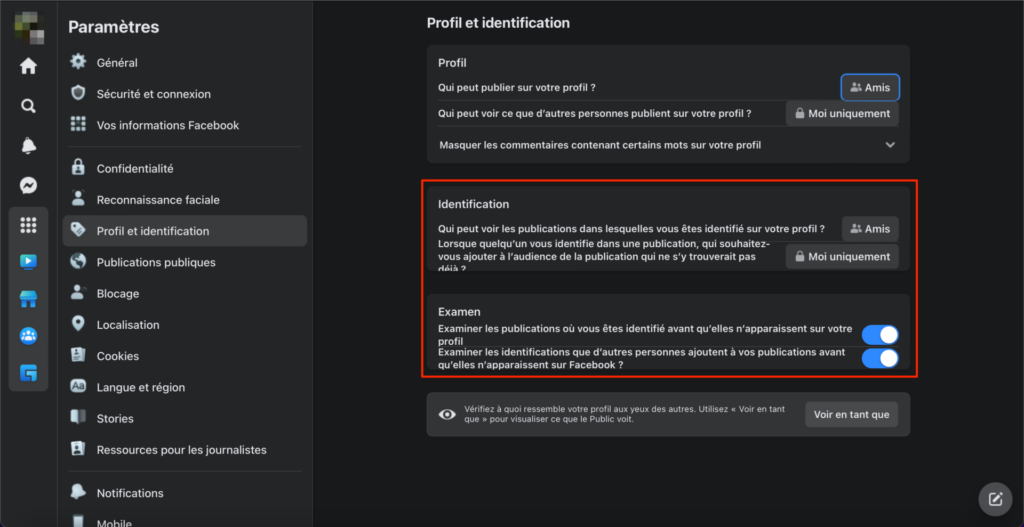
This will allow you to Review posts where you are tagged before they appear on your profile, as well as Review tags that other people add to your posts before they appear on Facebook. You may thus allow some of your friends to find themselves displayed when they have not asked for anything.
11. View your profile based on audience
Wondering what your public Facebook profile looks like? At the very bottom of Profile and identification settings, click the View as button.
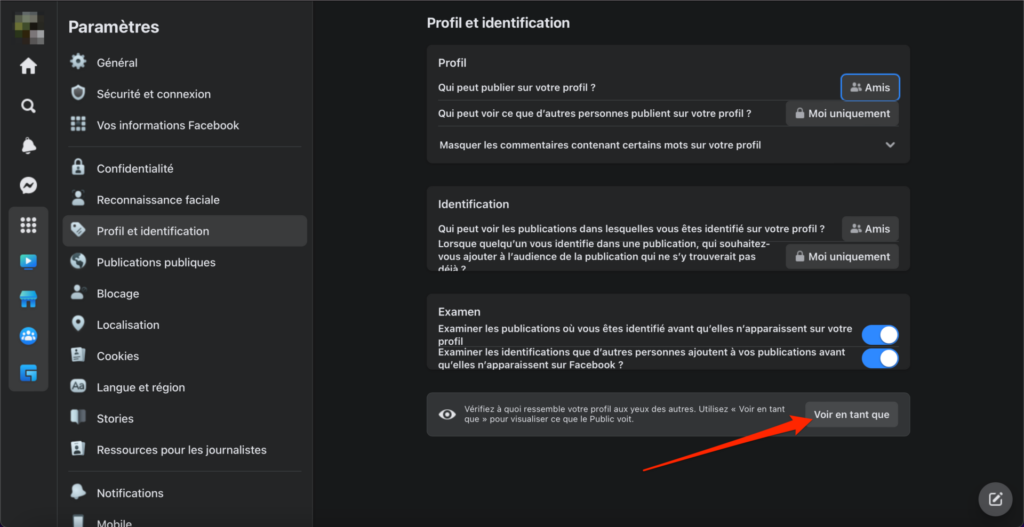
Your Facebook profile should open in a new tab displaying all of your public information. This will allow you to review publicly available information and take steps to conceal it if you are not satisfied.