
© Pixabay – Kito32
Give your heavy images a slimming cure to share them more easily online. One by one, or in batches.
Embarking on online administrative procedures is rarely easy. The process may be dematerialized, but it is not necessarily simpler than with paper documents.
In the all-digital era, companies offering to carry out procedures online impose certain constraints that may prove more difficult than expected to resolve. This is the case, for example, when it is requested to send documents online.
Whether sending documents by e-mail or via an online service, the documents sent should generally not exceed a certain weight. It is therefore essential, even in an emergency, to have a quick and easy solution available to reduce the size of your files. In the case of documents, there are many solutions to reduce the size of your PDF files. And even if some online services offer to do this for you, it is generally recommended to favor tools operating locally on your computer, for obvious reasons of confidentiality.
But in the case of images and photos in JPEG or PNG format, the tools can be more or less complex with sometimes random results. To understand why, it is necessary to look at all the technical intricacies related to images. There are indeed several possibilities to reduce the size of an image: reduce its definition or reduce its resolution.
By reducing its definition, you reduce the dimensions of your image, expressed in number of pixels in length and width. Your final image will then have reduced dimensions and will be smaller when displayed on the screen. By zooming in to view the image larger, the quality may be reduced.
By lowering the resolution, you reduce the pixel density in the image. In other words, you lower the sharpness of the image. The latter, expressed in pixels per inch (ppp) or dpi (dot per inch), is considered to be of sufficient quality when it reaches at least 100 to 150 dpi. If your images are only intended to be displayed on a screen, this resolution is in principle largely sufficient. However, if your images need to be printed, a higher resolution may be required.
Be that as it may, in the case of online procedures, the documents requested are generally destined to be stored in the Cloud. You can therefore easily reduce their resolution to reduce the size of the files you have to send. And, as in the case of documents in PDF format, there are a thousand and one ways to reduce the size of an image on Windows.
With the native Photos app
You don’t need to upload your images to an online service to reduce their weight. Photos, the native Windows 11 image viewer, includes everything needed to perform the operation.
1. Open your image
First start by opening your image with Photos. In principle, the Windows image viewer is selected by default in the OS to open all your images. If not, right-click on your image, select Open With, and choose the Photos app.
2. Resize the image
Once the image is open in Photos, click on the options button represented by three small points, then choose Resize.
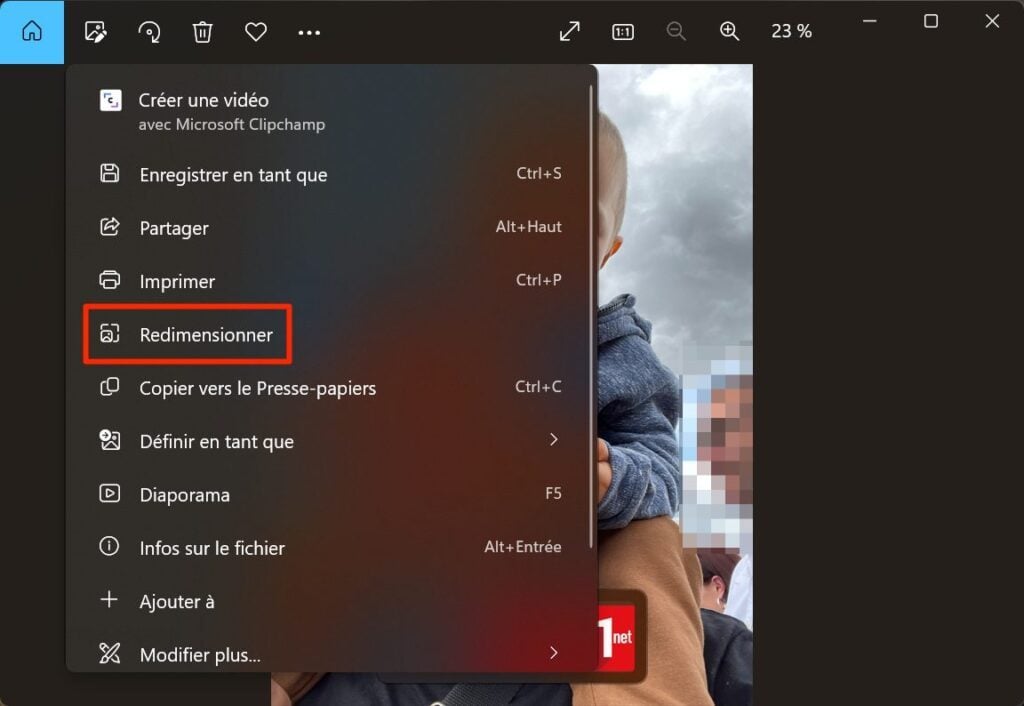
Three predefined options are offered with an estimate of the final weight obtained after resizing. Select the one that suits you, then save the image under a new name to keep the original file.
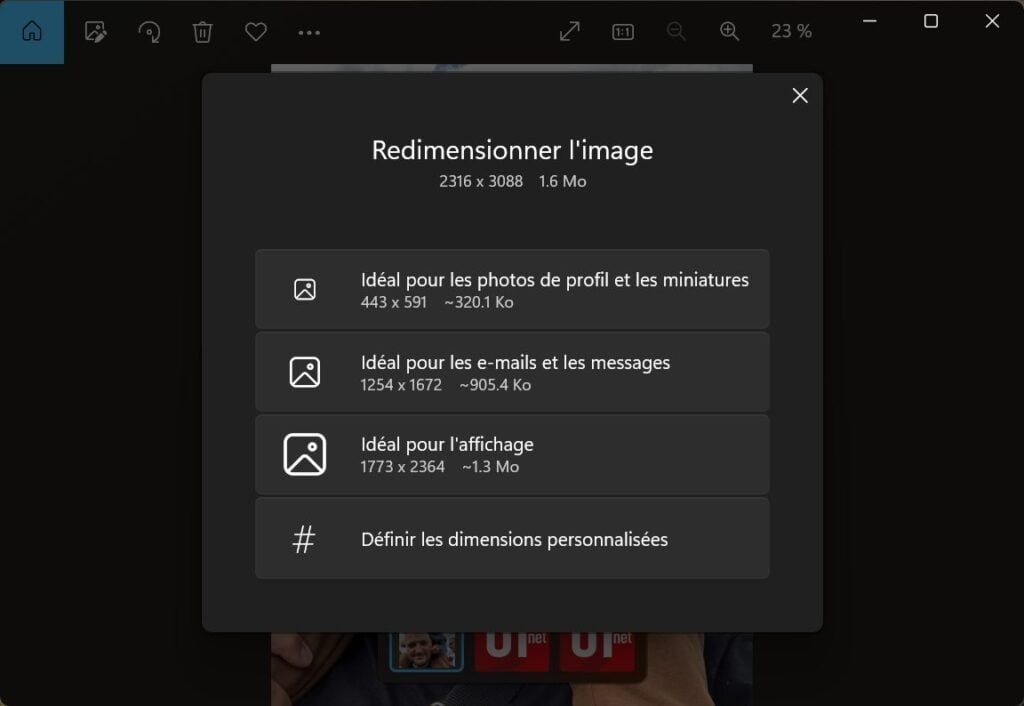
Note that if none of the predefined settings suit you, you can absolutely click on Set custom dimensions to choose the dimensions of your choice. However, you will not have a preview of the final weight before saving the file.
With Microsoft PowerToys
If resizing a single image with Photos is possible from time to time, performing the operation for several images can quickly become time-consuming. To go faster, you can use the Resize images module, integrated in Microsoft PowerToys.
1. Download the PowerToys
If you haven’t already, start by downloading and installing the PowerToys. This free utility, developed by Microsoft, offers a toolkit, which integrates perfectly into Windows. Among the functions offered, you will find one to resize images from the right-click context menu.
Download Microsoft PowerToys for Windows (Free)
2. Resize one or more images
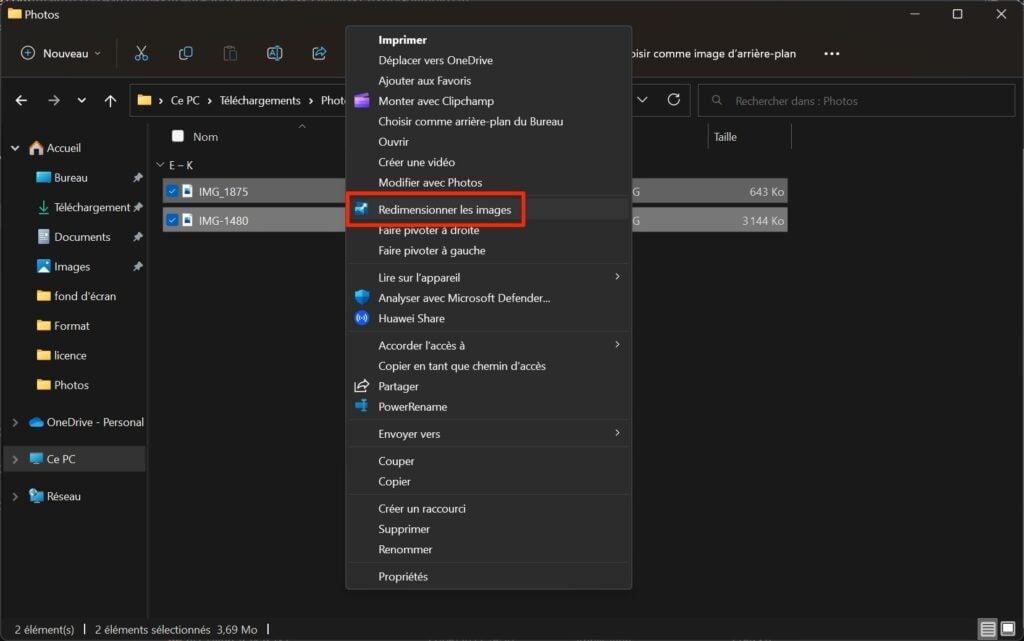
Once the application is installed on your machine, go to the directory containing your images. Then select one or more images (while holding down the Ctrl key on the keyboard), right-click on your selection, and click on Show more options.
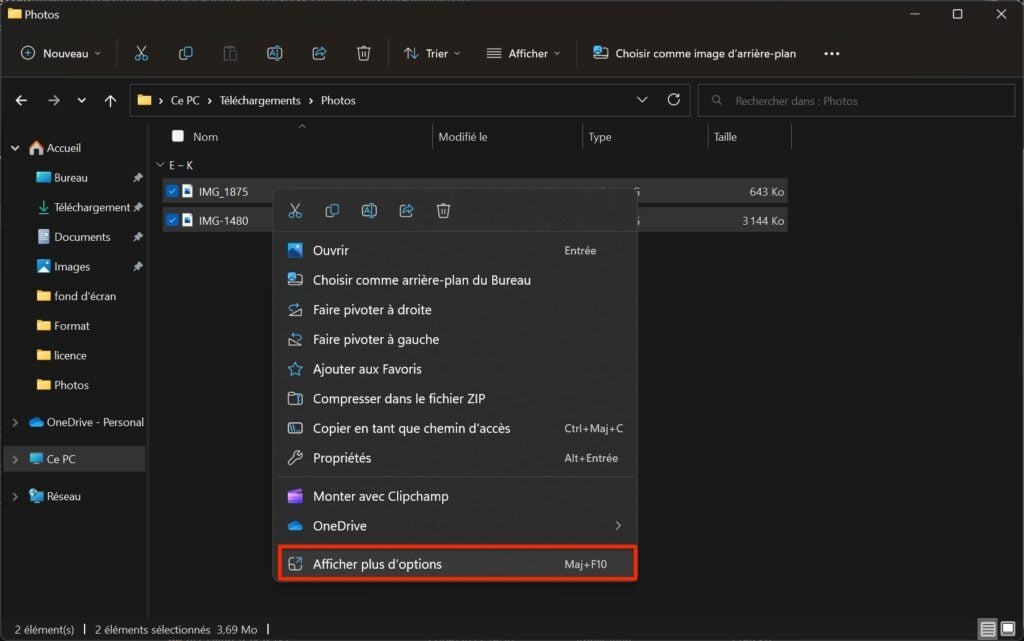
In the new context menu that appears, choose the Resize images option.
Then click the Select a size drop-down menu, choose the image size you want for your final images, and click Resize.
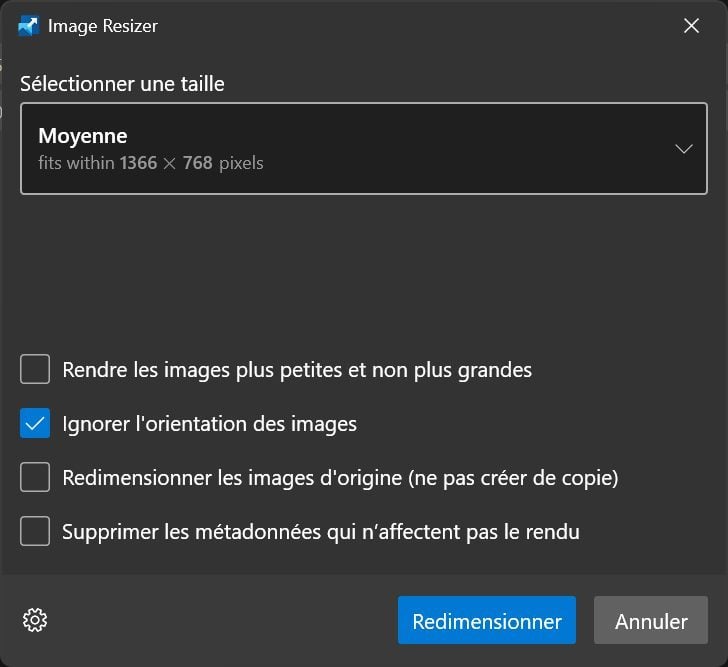
Your resized images will be automatically saved in the source directory and will be renamed with the chosen resizing.