
© 01net.com
Digitize your documents very easily using the native scanning module embedded in iOS and Android.
Are you still one of the people who download third-party apps to scan documents with their smartphone? It’s time to change your old habits to adopt new ones.
Android and iOS natively embed everything you need to scan documents with your smartphone’s camera. The method, as simple as it is practical, has a major advantage: it automatically synchronizes the files obtained on your cloud storage space.
So you don’t even have to manually transfer scanned documents to your computer or email them to yourself. On Android, the scanning module is directly integrated into the Google Drive application. It is also on the storage space of the Google service that the PDF files obtained are automatically saved. On iOS, on the other hand, you have to go to the Files application, which is none other than the OS file manager, to access the scanner function. The documents can then be exported locally on your iPhone, or better, saved in a directory synchronized with your iCloud account.
Scan a document on Android
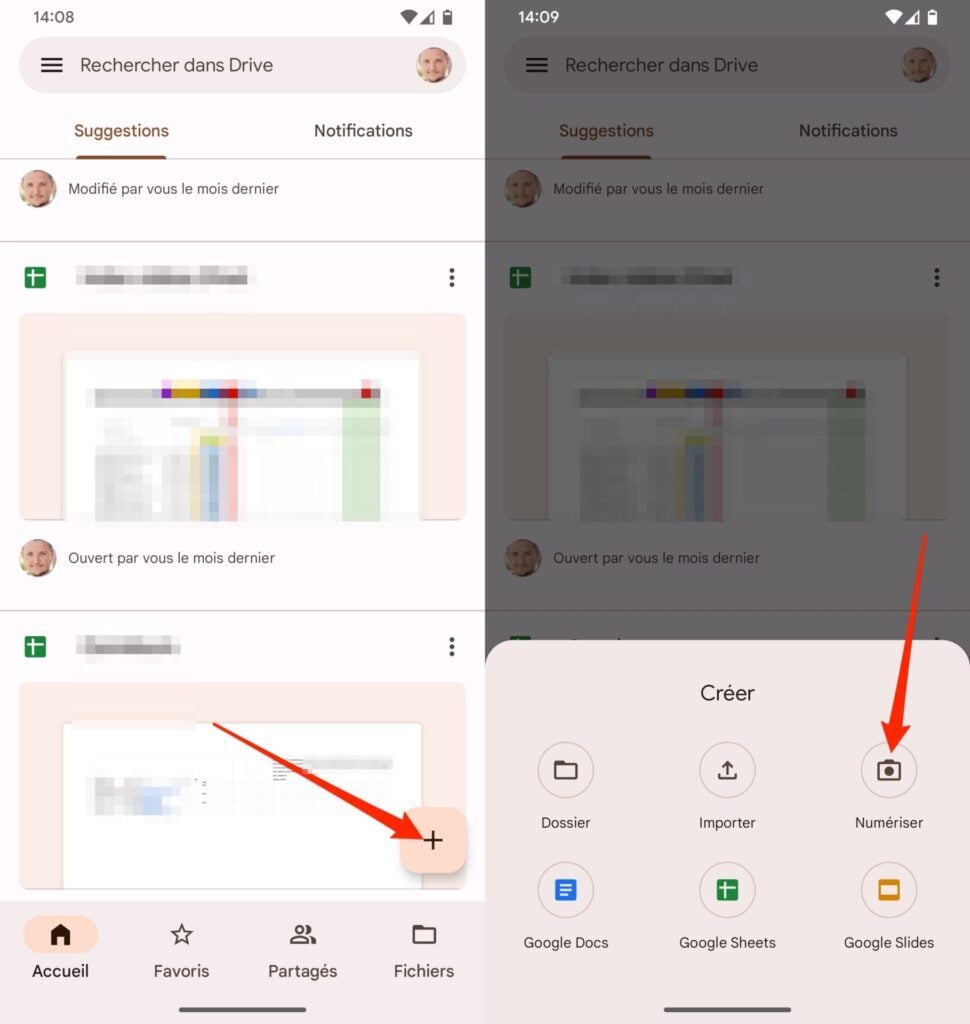
1. Open Google Drive
Google Drive is normally installed on the majority of Android smartphones. If not, download and install Google Drive on your device, open the app and connect your Google account to it. Once on the main Google Drive page, tap the + button in the bottom right to create a new document, and in the Create pane that appears, tap Scan.
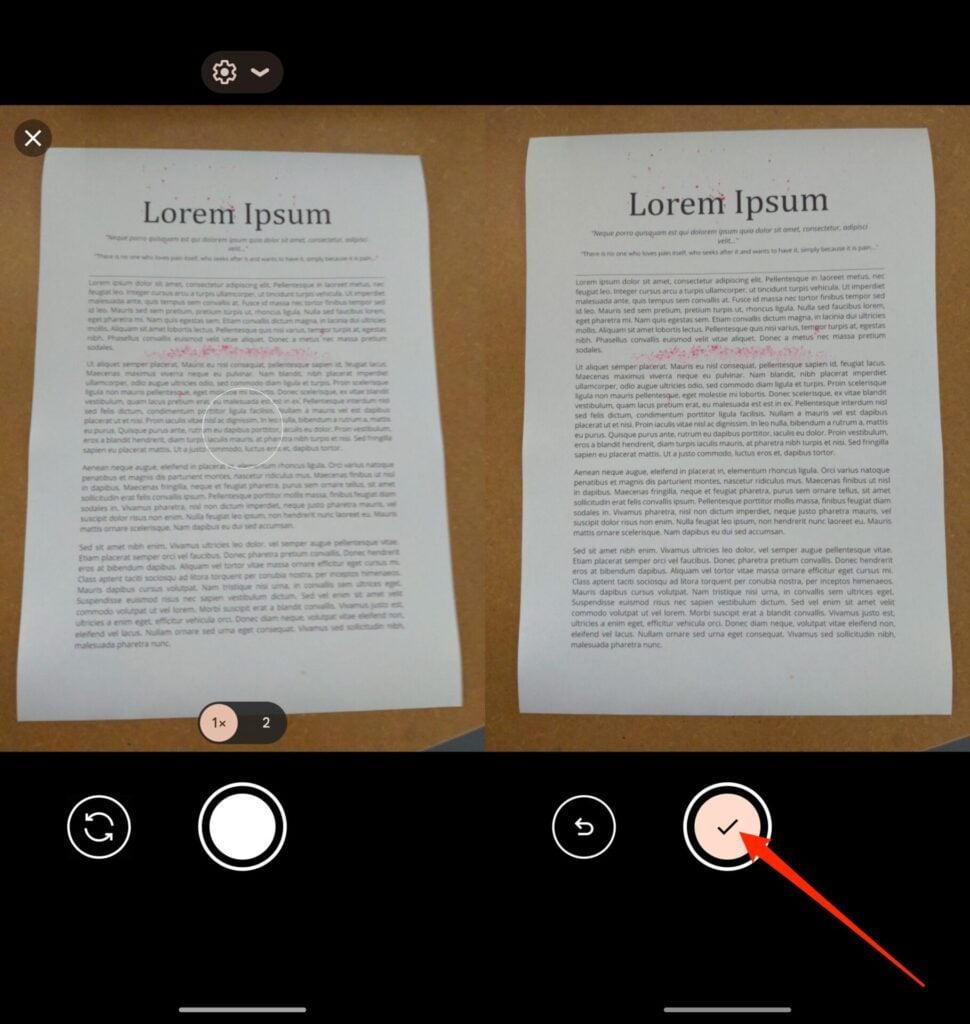
2. Scan your document
Your smartphone’s camera should then open. Stand high above your document, frame it, and press the camera shutter to capture the image. If the shot seems suitable, validate it by pressing the button with a checkmark.
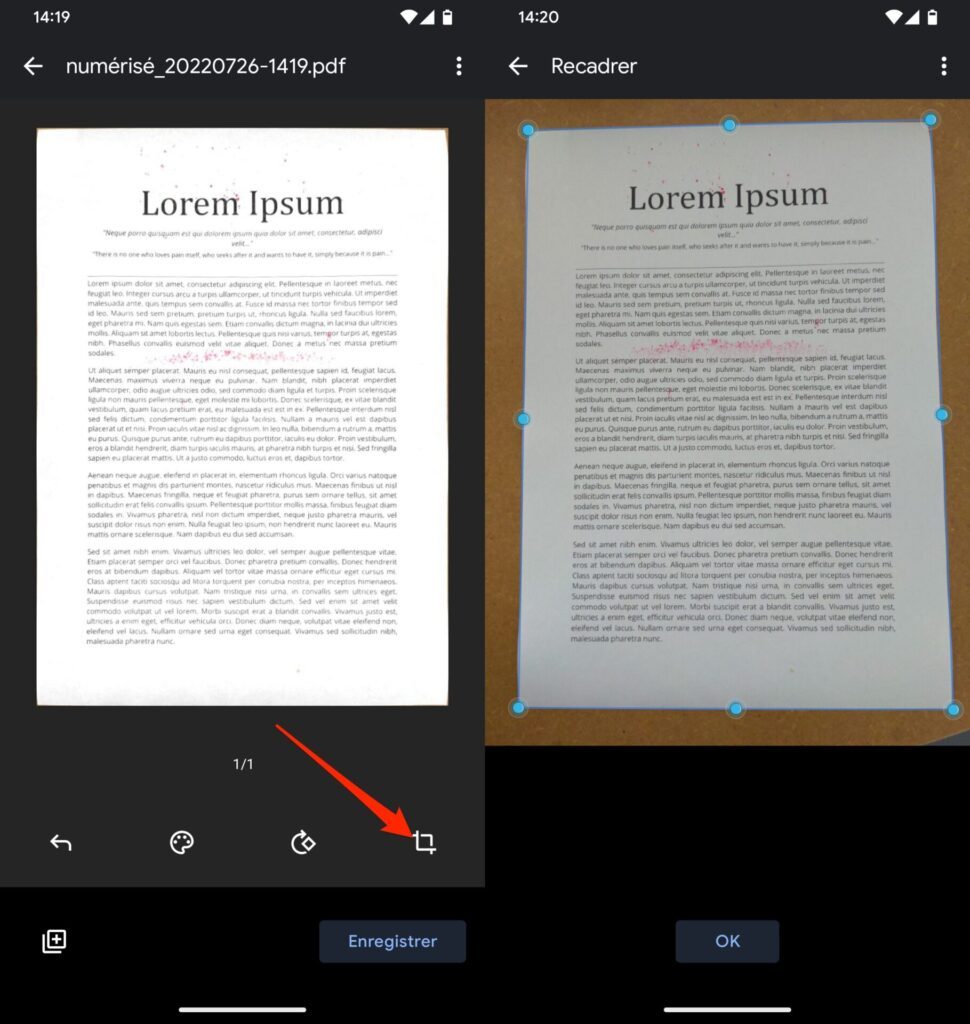
3. Crop the document
If you’ve just scanned an A4-size document and it’s perfectly readable, Google Drive should automatically detect the edges and crop the document perfectly.
If not, tap the crop button, at the bottom right of the screen, then adjust the position of the blue dots to match them perfectly with the outline of your document. When the scanned document is in the frame, press OK.
4. Rename and save your document
This step is not essential, but may be necessary if you want to keep your Drive files in order and find your documents easily. To rename your file, press the name generated by default (in scanned_date_time format), then in the pop-up that appears enter the name of the document and press OK.
Then press the Save button to save your file in PDF format. Customize the file name if you haven’t done so already, select the Google Drive account and the backup directory where you want to save your file and press Save to validate.
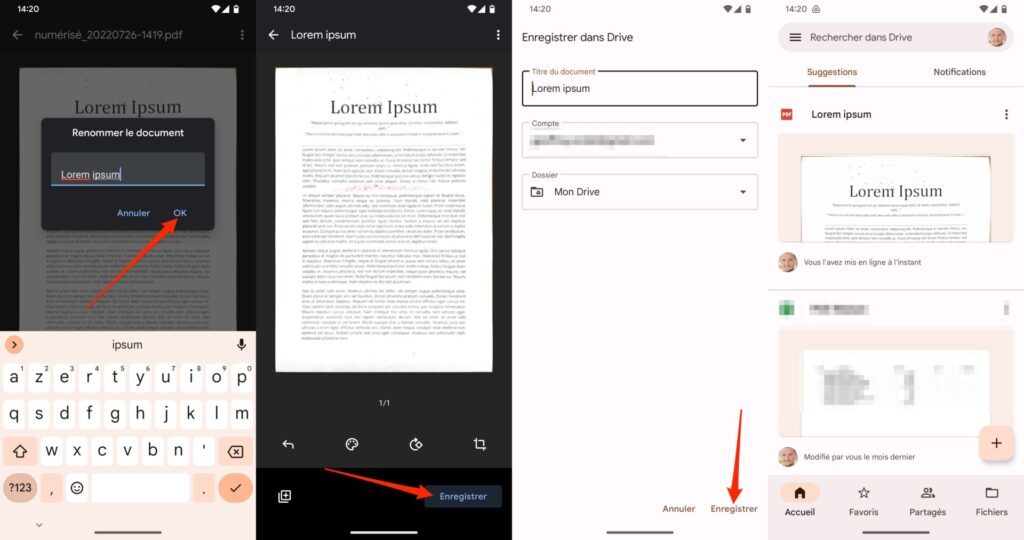
Your document, in PDF format, should then be immediately visible (and accessible) at the top of the Suggestions list where the last documents you have opened are grouped.
Scan a document on iOS
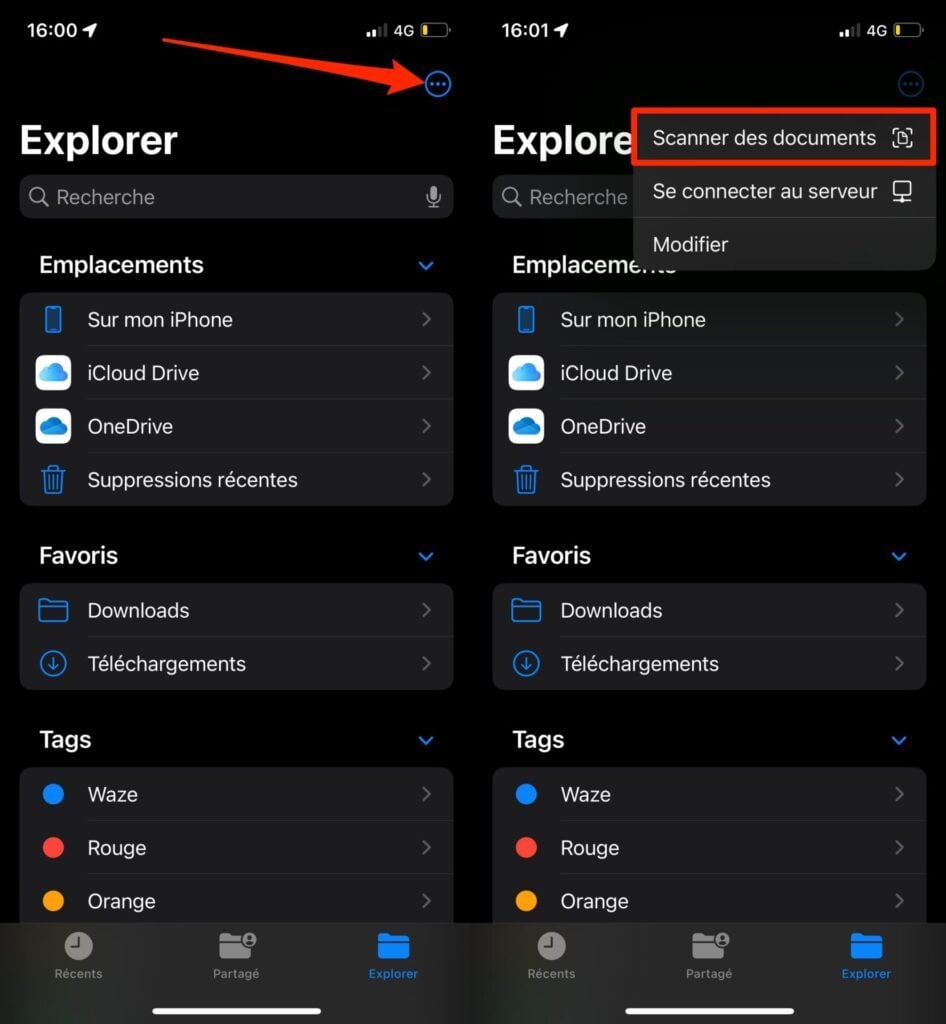
1. Open Files
Open the Files app on your iPhone, tap the button with three little dots on the top right of the screen and choose the Scan Documents option.
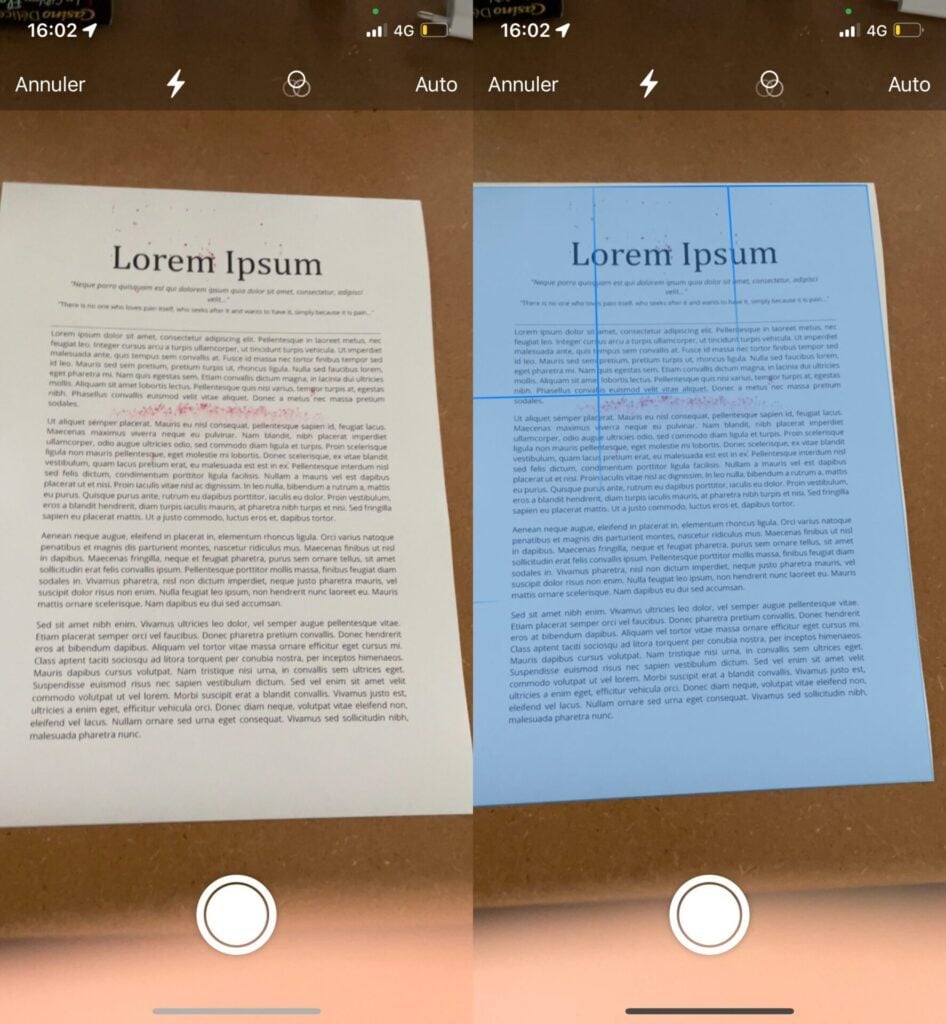
2. Scan your document
The iPhone’s camera should then open. Position it above your document and frame it. In principle, iOS automatically detects the outlines of your document which it displays in blue highlighting. If the detection is precise enough, iOS automatically triggers the shooting of your document. If not, press the shutter button. If your document has multiple pages, continue shooting.
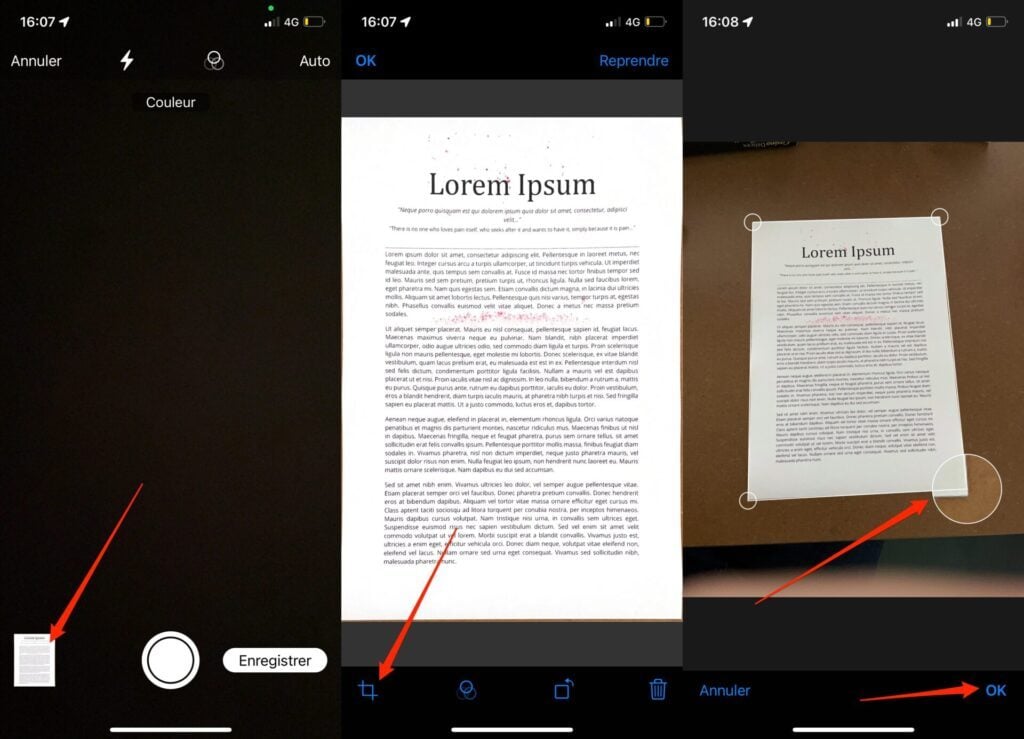
3. Crop the document
Now tap the thumbnail of the scanned file, displayed at the bottom left of the screen, to view its preview. If the document is not cropped correctly, press the crop button at the bottom left, and adjust the position of the four circles to match the four corners of your document. Press OK when you are satisfied with the frame, then press OK again to validate.
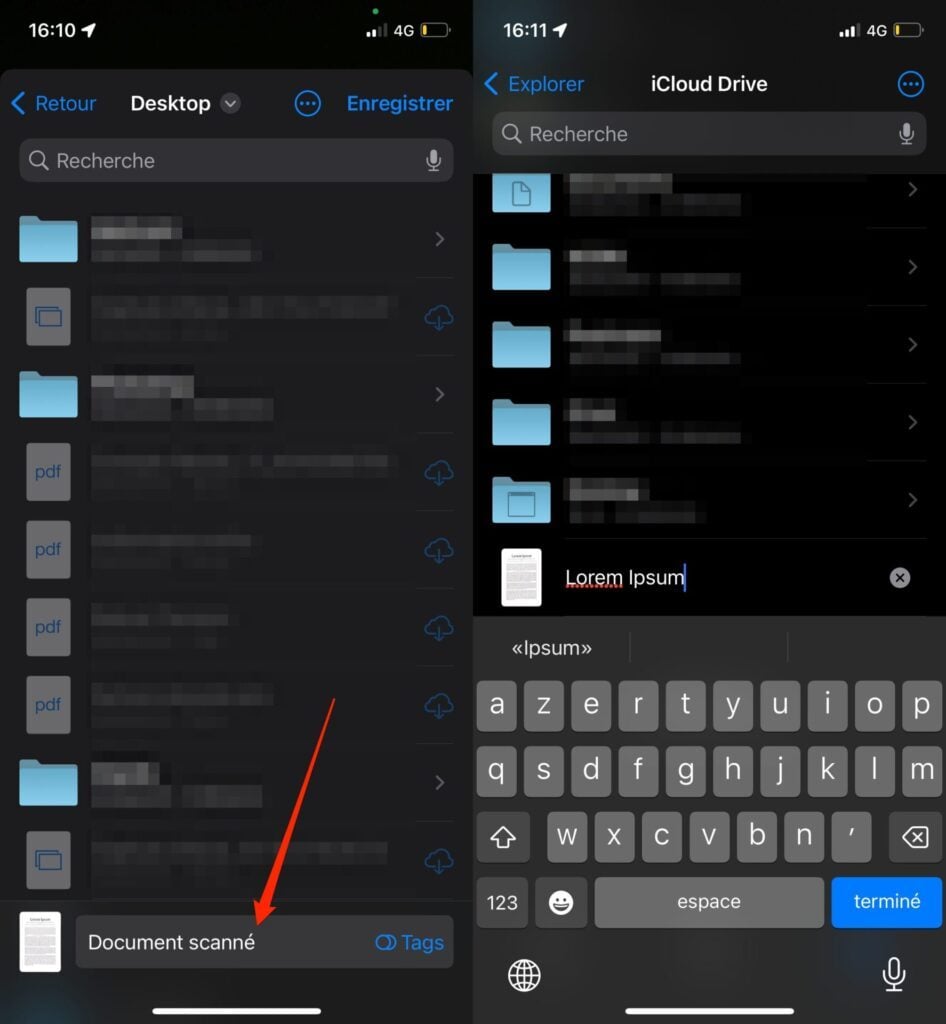
4. Save the document
If you don’t have another page to scan to include in your document, press Save. Now choose a backup directory for your file (if possible on iCloud to easily find your document on your computer). Then tap on the name given by default to your document (Scanned document) at the bottom of the screen and customize the name of the file. Then press the Finish button to save the file.
Your document, in PDF format, is now saved and accessible on your iPhone, but also on your computer if you have opted for a backup if iCloud.