
©Google
Google’s online word processor has nothing to envy to Office. Very complete, it includes everything you need to create your documents. Here’s everything you need to know to master it at your fingertips.
No, it’s not just Microsoft Office in life. If you are looking for free word processing software, free solutions exist online. For example, you can choose to turn to Office Online for free access to a simplified version of Word and other tools from Microsoft’s office suite.
However, if you are a loyal user of Google tools, it is probably better for you to use the office tools integrated into the Google Workspace suite. For word processing, Google Docs will do the trick as a Word replacement. You can also use Google Sheets or Google Slide, two credible alternatives to Excel and PowerPoint.
In addition, adopting Google’s office tools will allow you to constantly keep an up-to-date copy of your documents. They are, in fact, automatically saved on Google Drive. You can therefore access it from any computer, but also from your smartphone. Note, however, that it is advisable to use Google Chrome, the home web browser, to be sure to take advantage of all the features offered by Google Docs.
Either way, don’t be fooled by the apparent simplicity of Google Docs. Google’s word processor is full of resources and includes a number of largely underestimated features. You will discover in the following lines a dozen tips that will allow you to master Google Docs like a pro.
1. Enable offline use
You may not know it, but Google Docs includes an Offline mode. Google indeed offers an option which, when activated, allows you to use its tools without an Internet connection. Documents created or edited offline are saved locally on your machine and are automatically synchronized whenever a web connection is available.
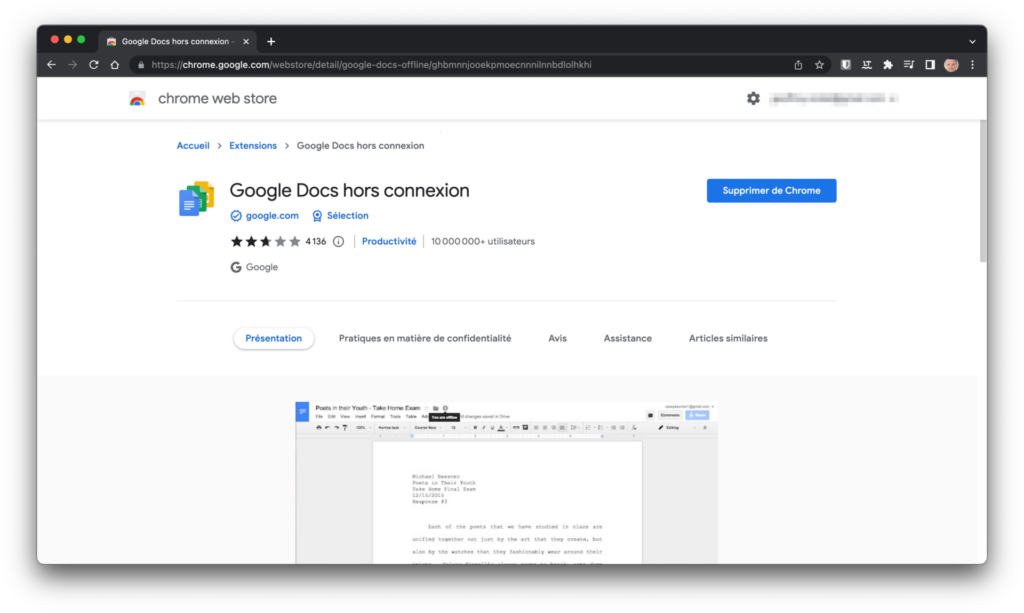
First start by downloading and installing the extension Offline Google Drive for Google Chrome.
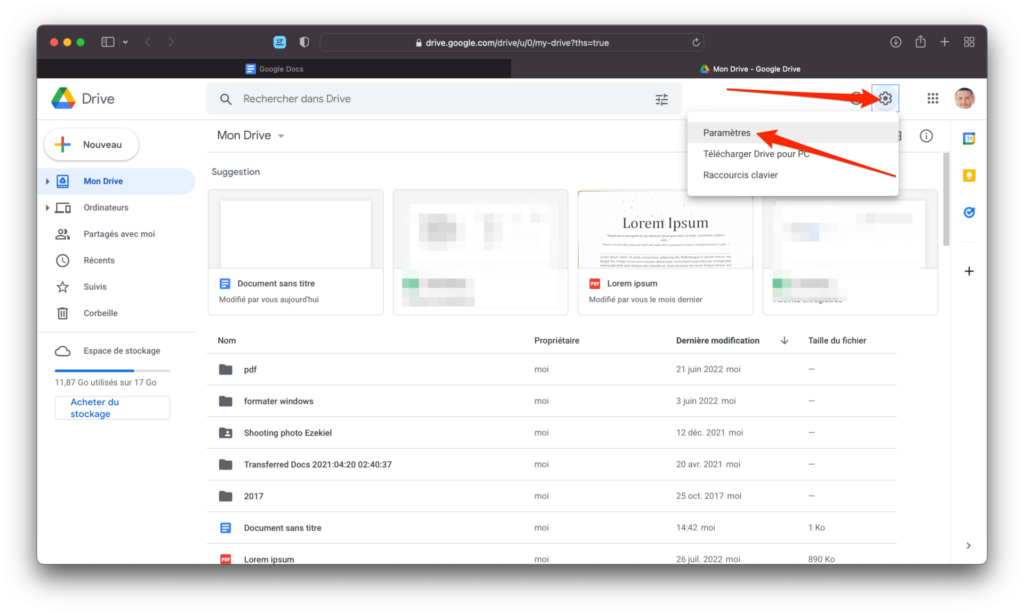
Then go to Google Drivethen click the gear icon in the top right, and go to Settings.
In the General tab, locate the Offline mode section, and check the associated box. This will allow you to Create, open, and edit your recent Google Docs, Sheets, and Slides files on this device, while offline.
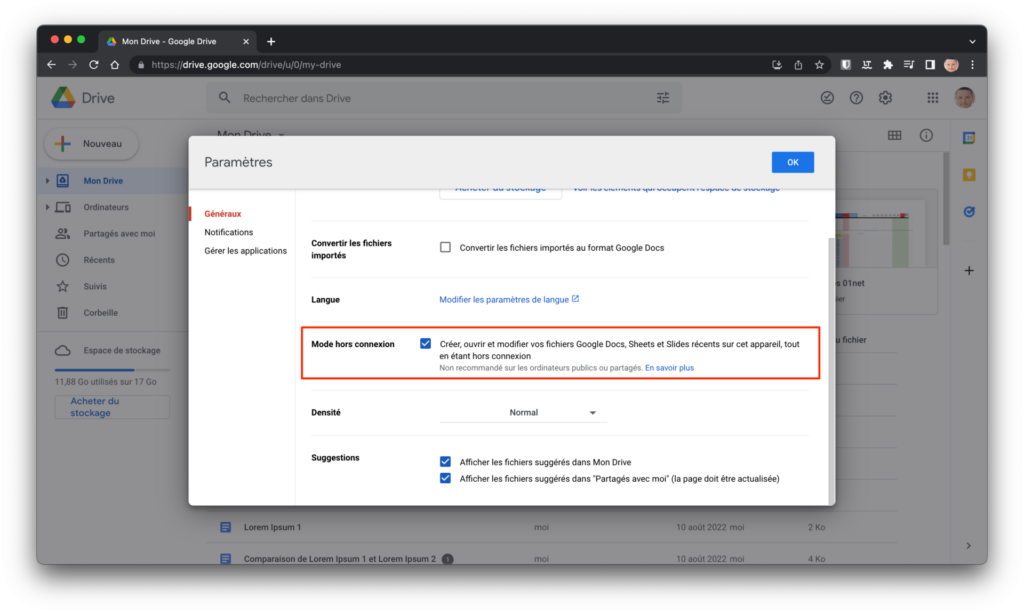
Finally, click OK to save your changes.
2. Dictate your text
If you’re more of a rush type and feel comfortable enough, you can dictate your text directly rather than trudging on the keyboard.
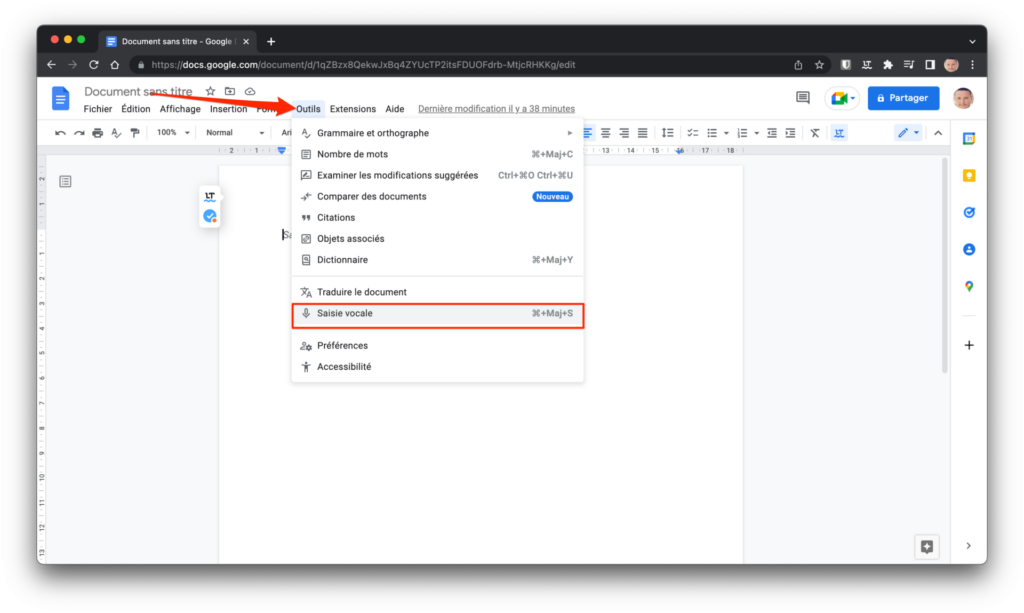
To do this, in Google Docs, click on the Tools menu, then choose Voice input.
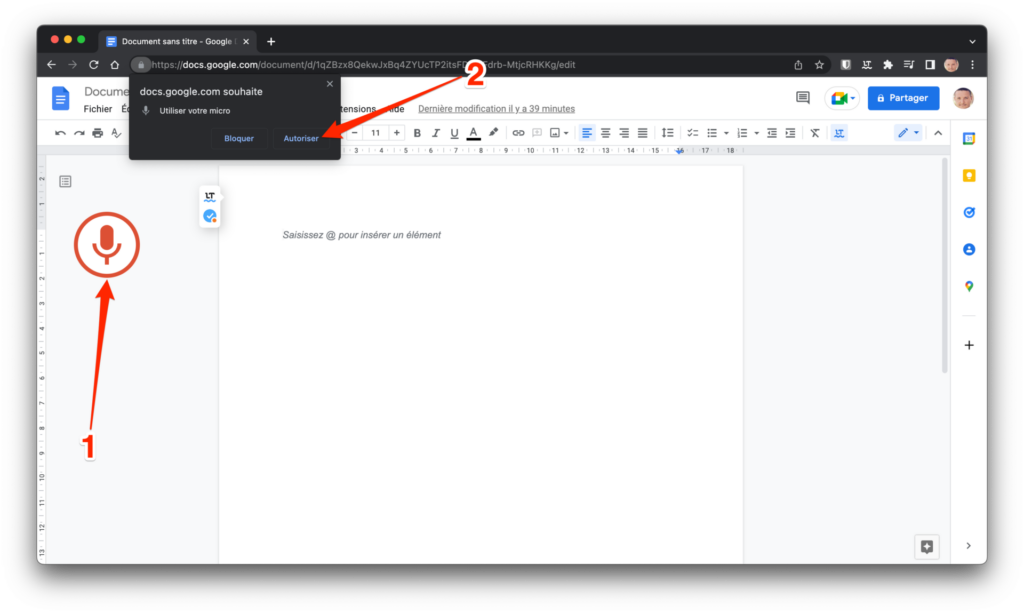
A new button featuring a microphone should then appear to the left of your document. Click on the microphone and start dictating your text. Click it again to stop dictating. On first use, you may have to Authorize Google Docs to Use your microphone by clicking on the appropriate button.
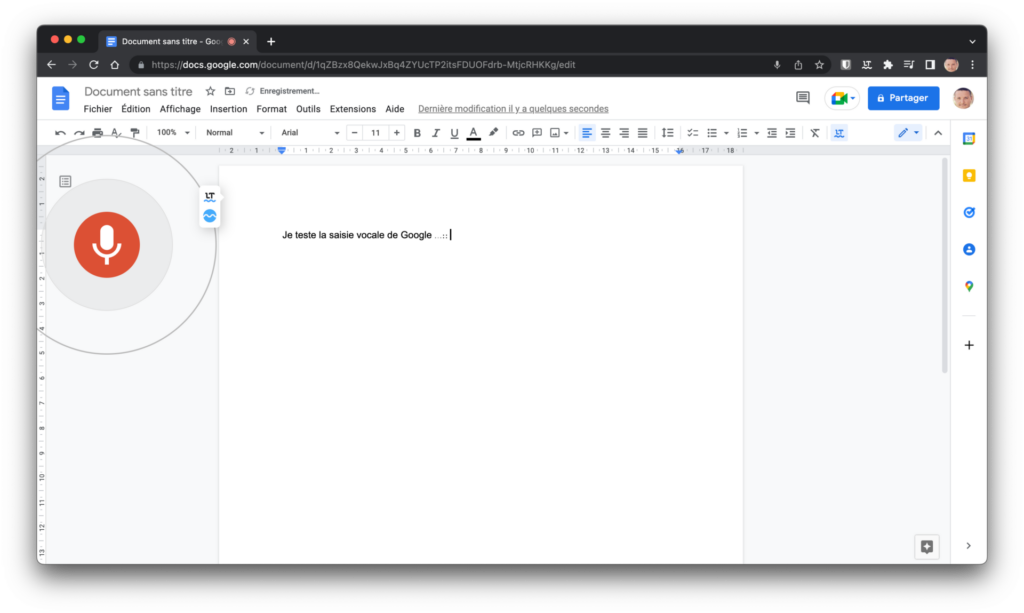
You can add punctuation directly to your text by saying “comma”, “period”, or “on the line”. Google Docs will automatically understand these commands and run immediately.
3. Insert images from the web
With Google Docs, you no longer need to save your images locally and then insert them into your documents. It is indeed possible to search for an image online directly from the document being edited.
To do this, click on the Insert menu, then in Image, choose Search the web.
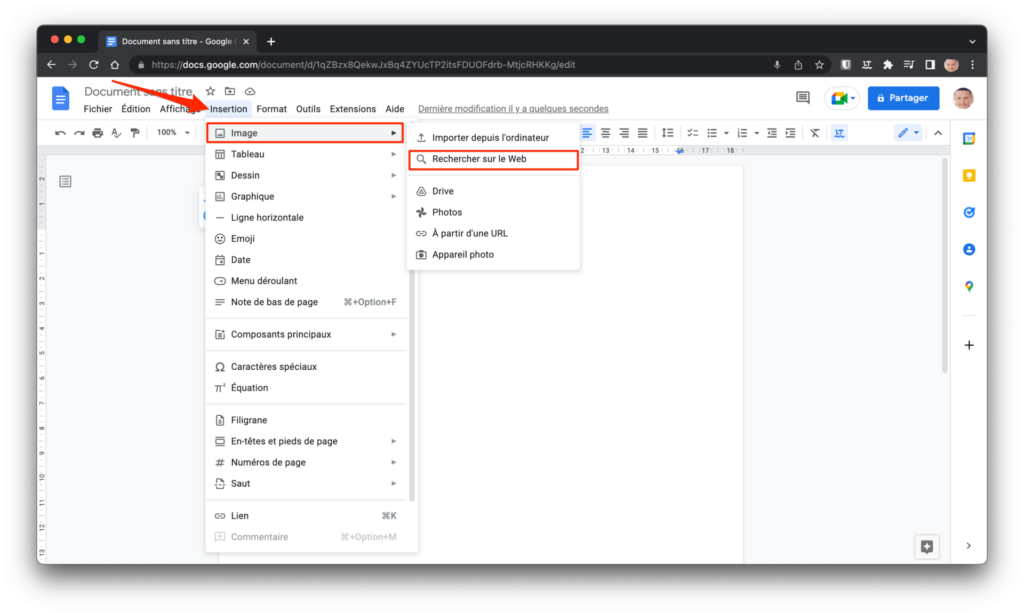
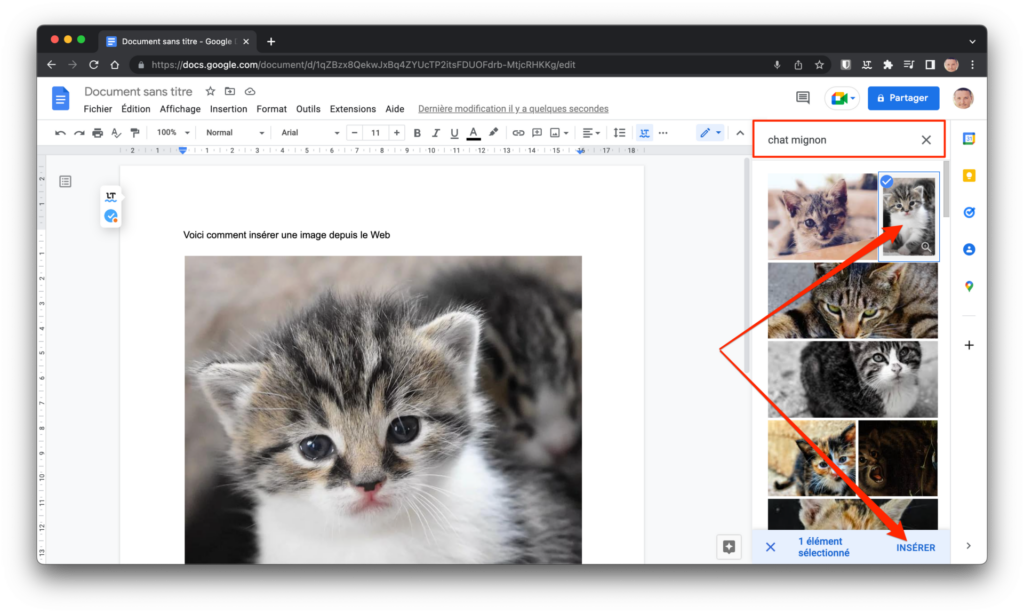
A Google Images pane should then open to the right of the document. Simply enter your keywords in the search field, select the image of your choice and click the insert button.
4. Add a watermark to your documents
Are you about to distribute a long document written by you? To avoid having your work stolen, you can mark all the pages of your document by inserting a watermark. Also called Watermark in English, it is a text or an image appearing in transparency in the background of your pages.
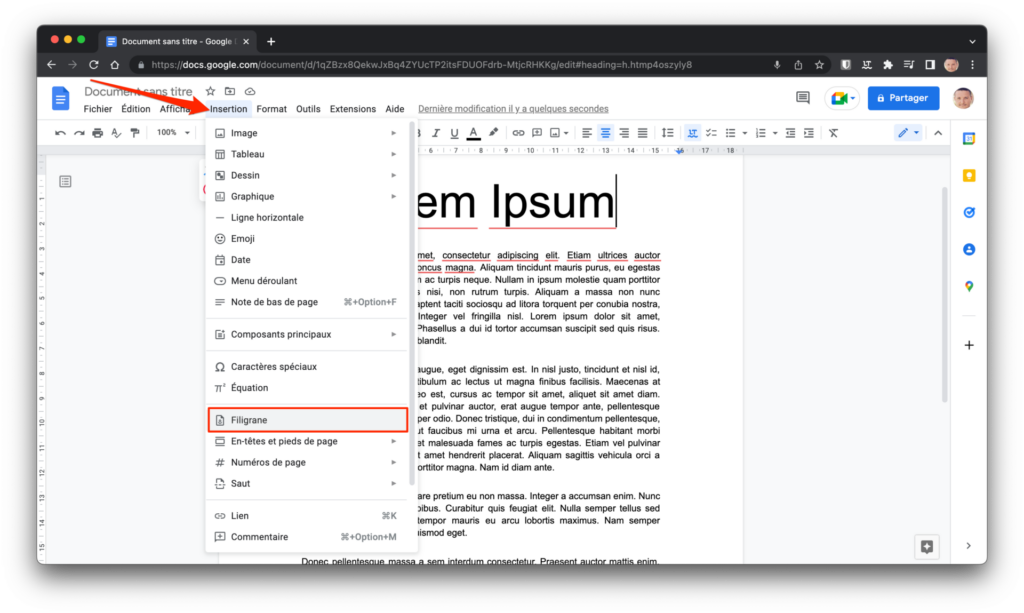
To insert a watermark into your Google Docs document, click on the Insert menu and then choose the Watermark option.
In the Watermark pane that opens on the right of the screen, choose between Image or Text, and insert the content you want to appear in the background of your document.
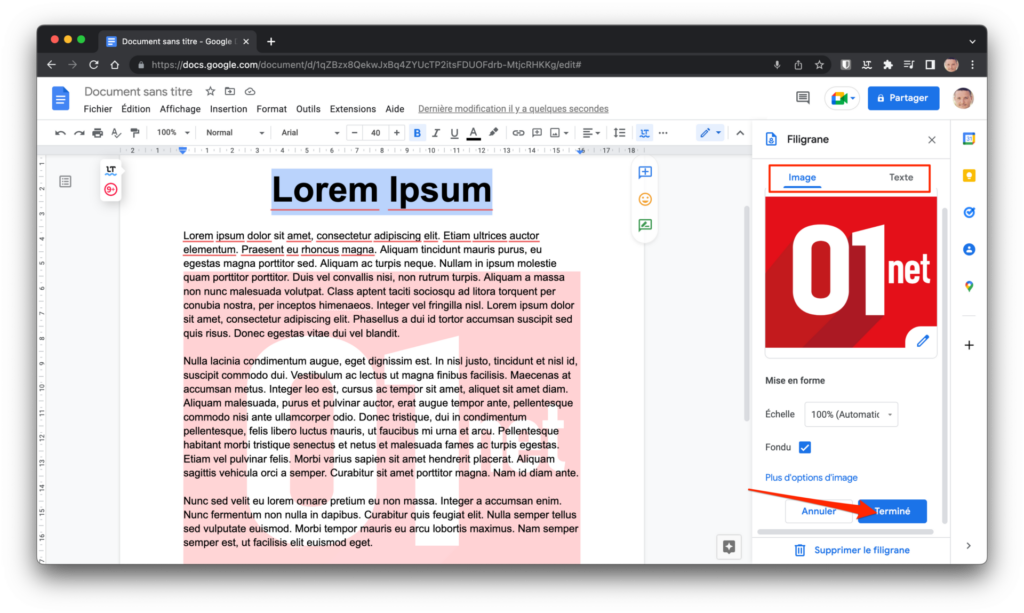
Then click Finish to validate your changes.
5. Embed a document on the canvas
If you happen to publish articles on the web, know that it is quite possible to integrate a Google Docs document into your publications. By doing so, people viewing its content won’t need to navigate directly to the document in Google Docs.
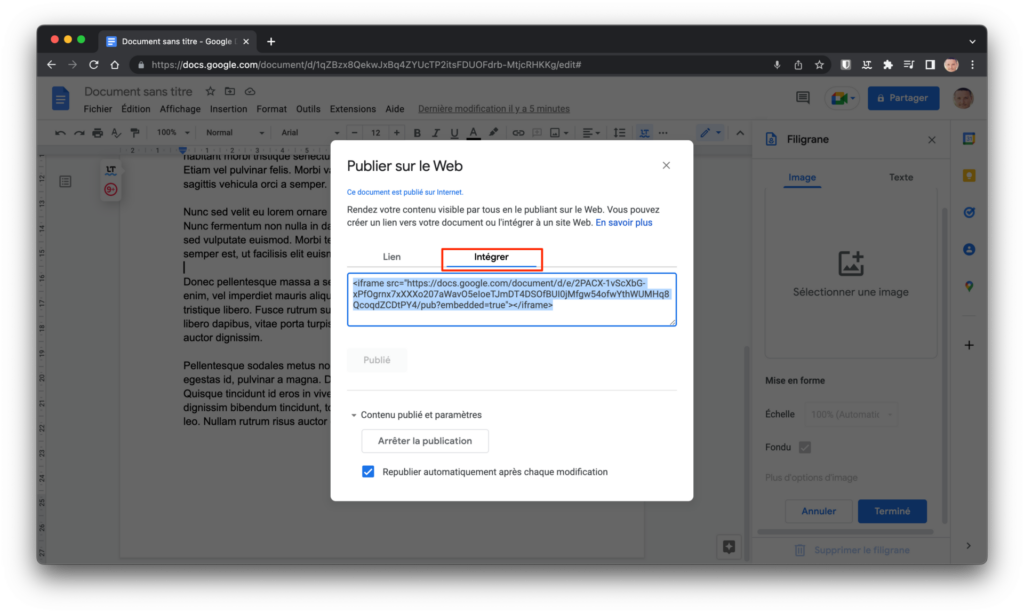
To get the embed code, click the File menu, then under Share, select Publish to Web.
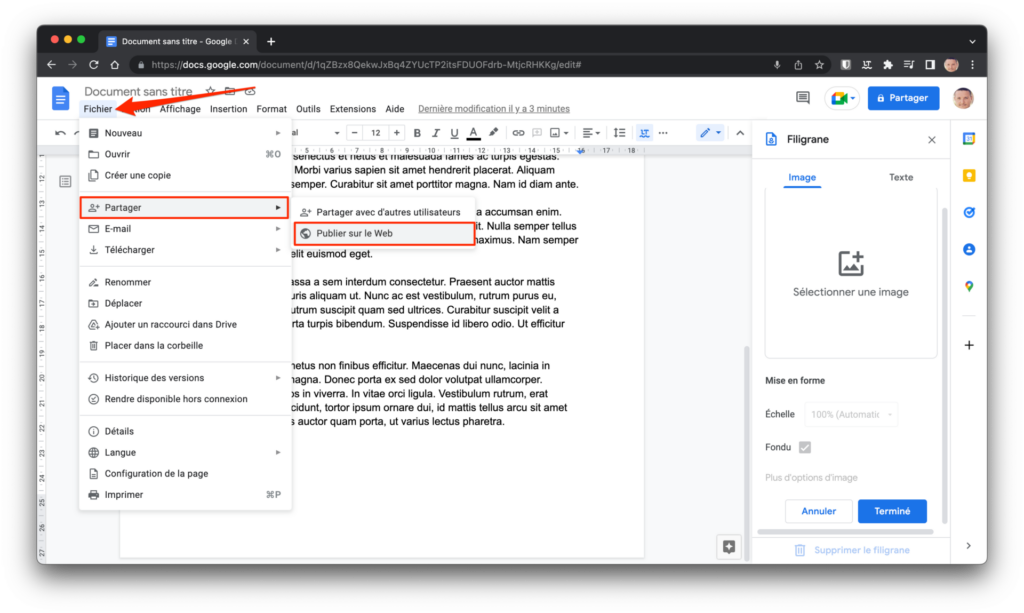
Then go to the Embed tab and click Publish. You will then obtain the integration code for your document that you will only have to insert into your online publishing tool.
6. Install extensions
One of the great advantages of Google Docs is that it is possible to improve it by installing extensions, like on Chrome. To do this, click on the Extensions menu, then from the Add-ons menu, select Download Add-ons.
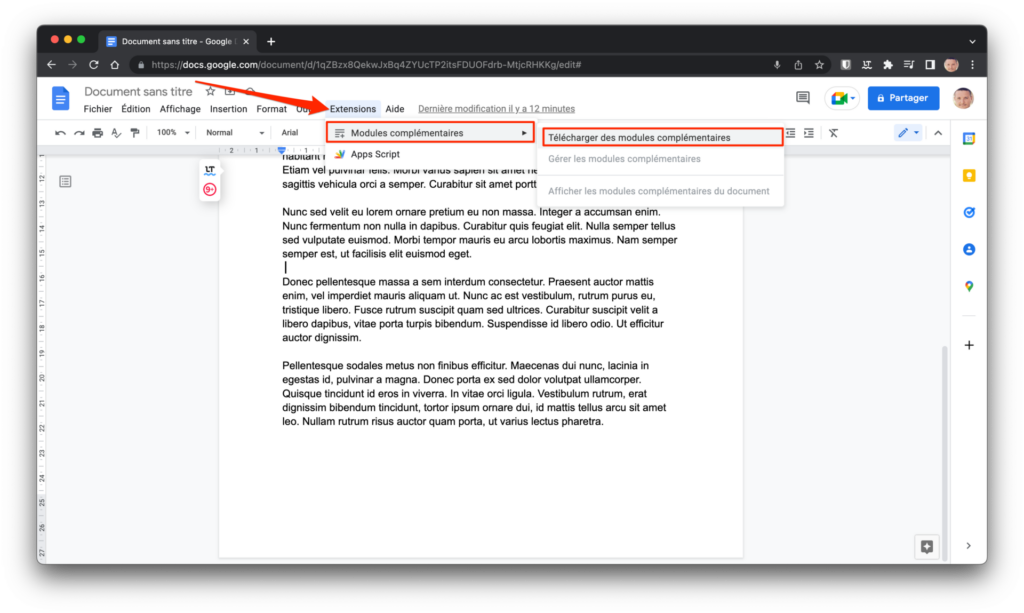
You should then arrive on the Google Workspace Marketplace, the extension store dedicated to Google Docs. After searching and choosing an extension, click the Install button to add it to Google Docs.
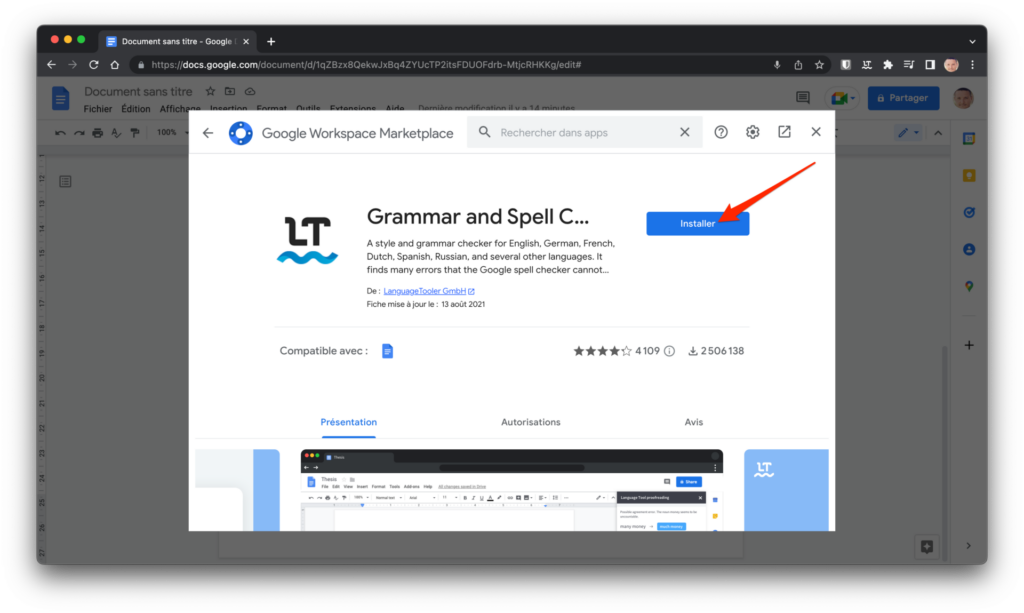
A good way, for example, to complement the native spell checker of Google Docs with the excellent LanguageTool spelling and grammar checker.
7. Download a local copy of your documents
The documents you create on Google Docs aren’t just meant to be stored on Google Drive. As with any other office suite, you can save a local copy of your documents in various formats.
To download a local copy of the document being edited, click on the File menu, then in Download, select the file format in which you want to obtain a copy of your document.
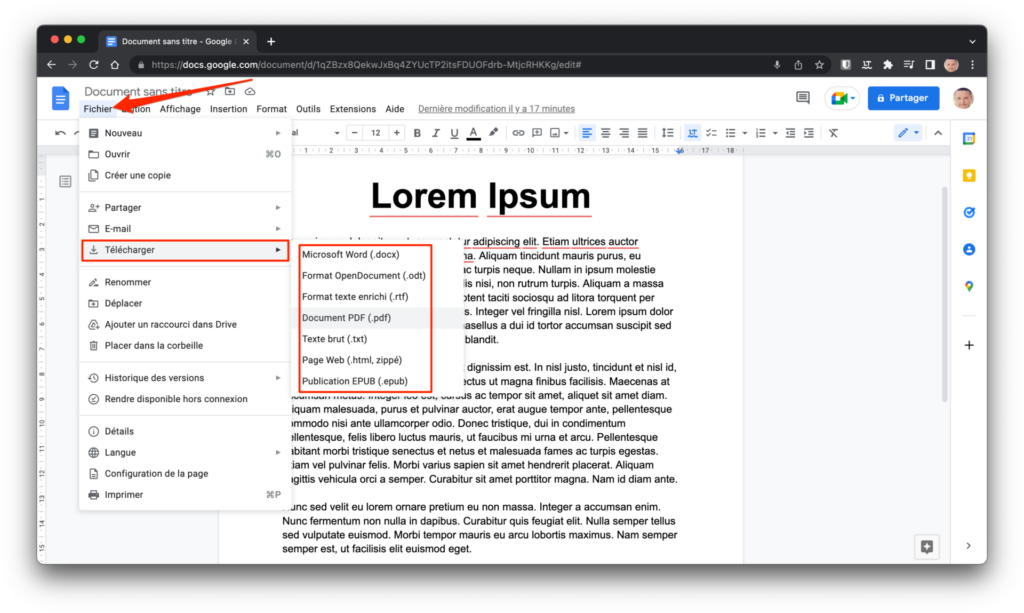
You can thus very easily generate the document you have just created in a file in .doc format (compatible with Office), or in PDF format, which is practical if you have to send it to a third party.
8. Compare two documents
Have you just created two fairly similar documents and you can’t find the differences? Do not panic, Google Docs includes a dedicated tool for this.
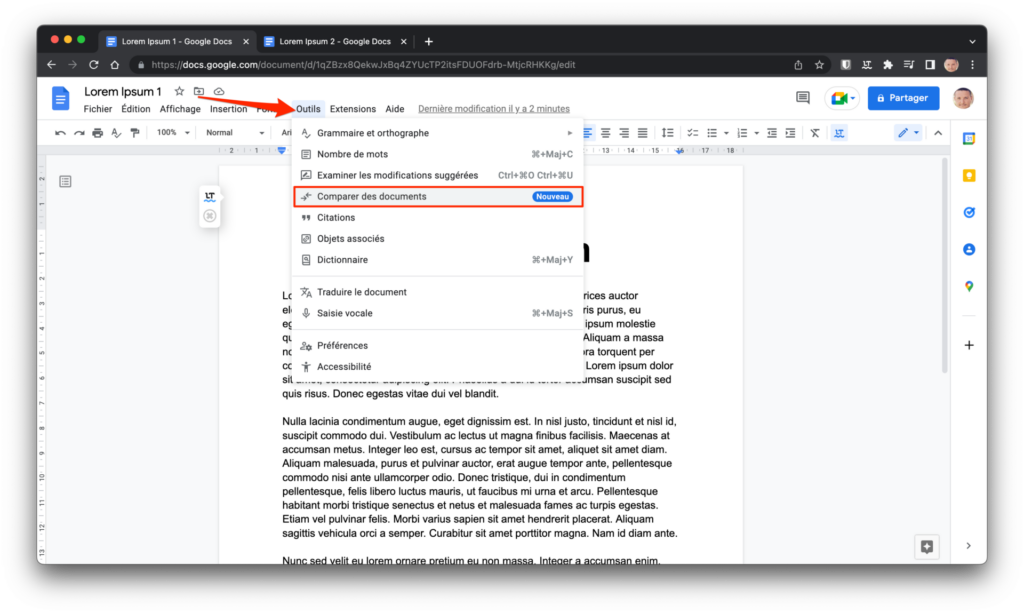
From one of the documents to compare, click on the Tools menu then choose Compare documents.
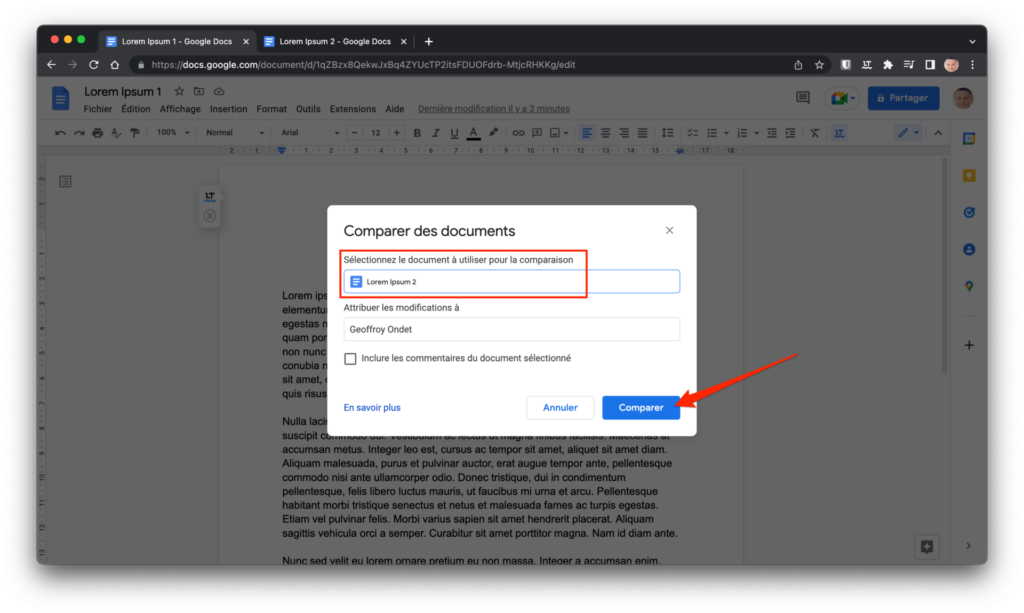
In the pop-up that appears, click in the Select the document to use for comparison field and choose the document to compare with the document being edited. Then click the Compare button.
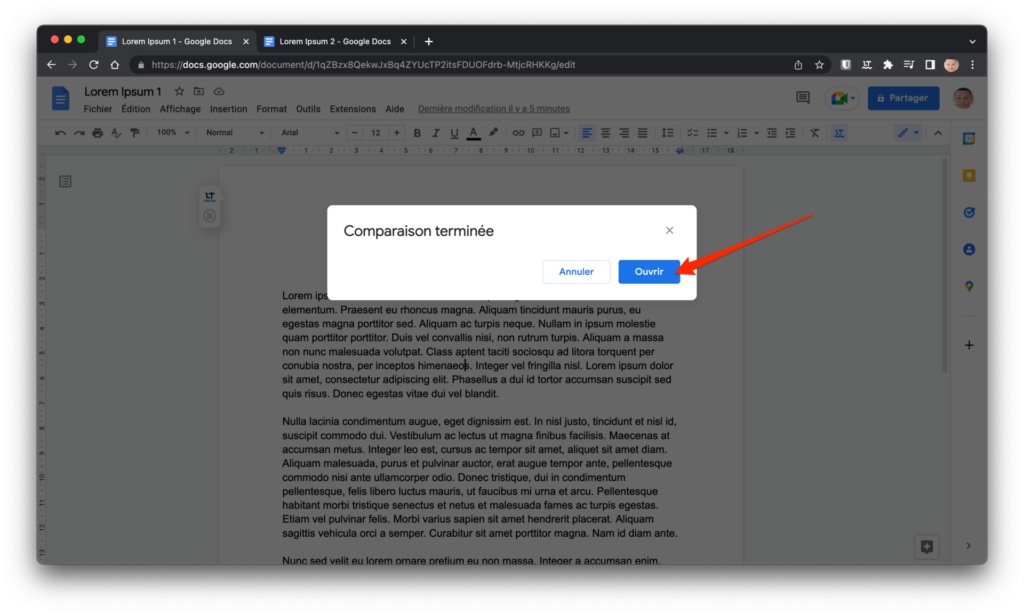
Once Google Docs has done its job, a Comparison Completed pop-up should open. Click on the Open button to view the differences that have been identified.
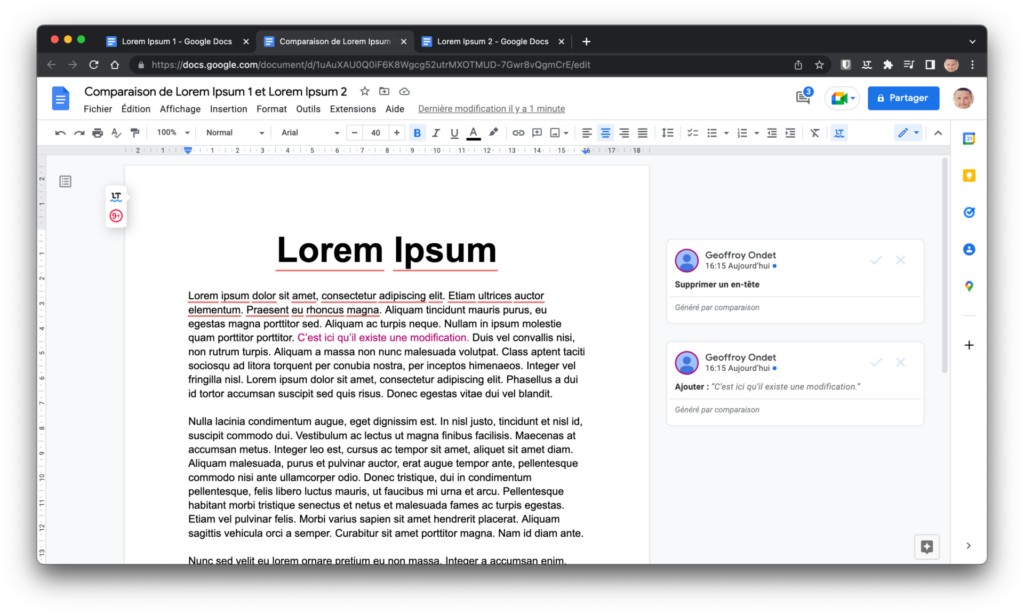
The comparison page between the two documents is displayed. All elements different from the initial document are displayed in color. In addition, boxes displayed on the right of the screen indicate all the modifications that have been found.
9. Configure auto-replace options
Do you need to use certain special characters frequently? Rather than having to constantly search for them in the Insert > Special Characters menu, you can create replacement shortcuts to type them more easily. First start by copying the special character you want to be able to type easily to the clipboard.
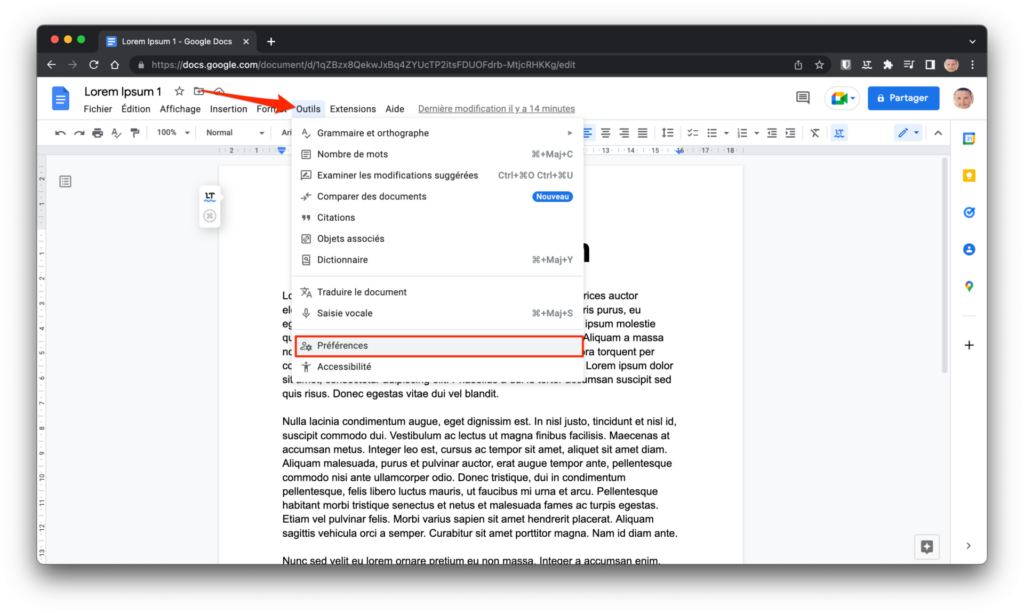
Then click on the Tools menu and go to Preferences.
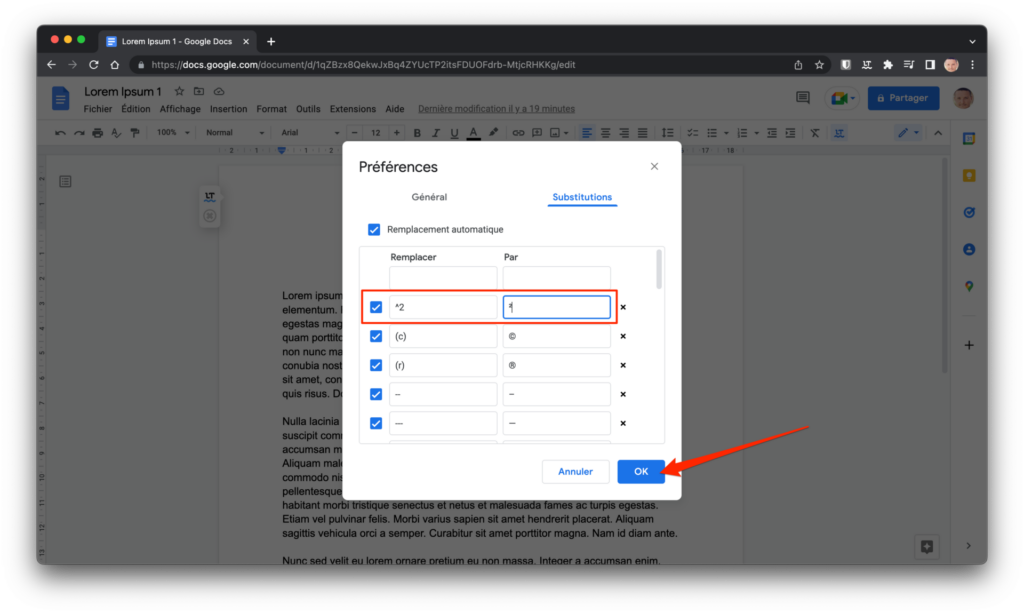
In the window that appears, select the Substitutions tab. All you have to do is fill in the shortcut to use in the Replace field, then paste the sign that should replace it in the With field. In our case, we want Google Docs to automatically show the exponent 2 when we type ^2 on the keyboard.
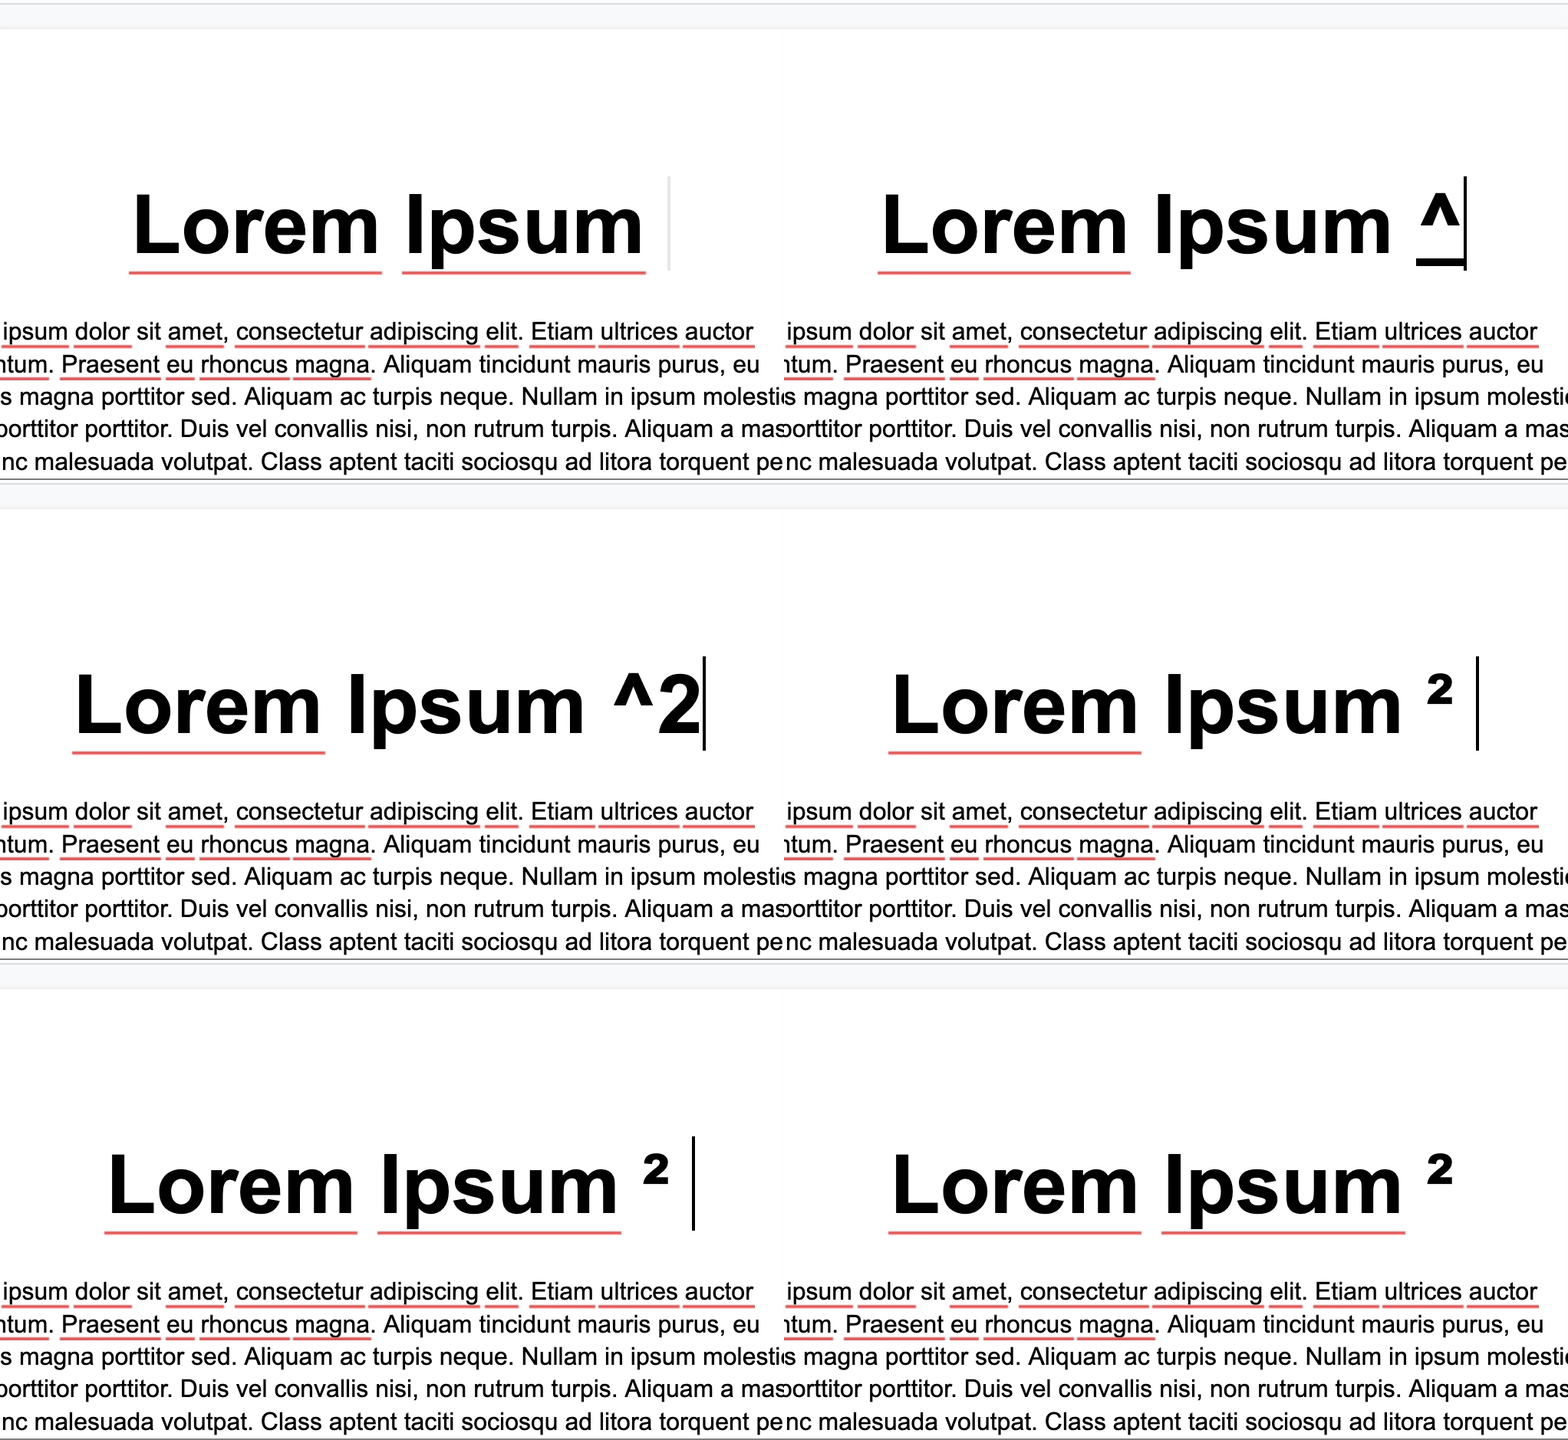
Now, each time you enter the configured shortcut, Google Docs will automatically replace it with the text you gave it.
10. Master the keyboard shortcuts
You will not escape keyboard shortcuts. Like any good self-respecting tool, Google Docs supports a lot of keyboard shortcuts. Google has published the very long list on its support pages for Windows, macOS and ChromeOS.
If it seems difficult to remember them all, sort through the shortcuts that seem most useful for your daily tasks and write them down somewhere to help you remember them. Regardless of the tool used, a good knowledge of the supported keyboard shortcuts is essential. By learning them, you will work much faster, reduce repetitive tasks and save valuable time.