
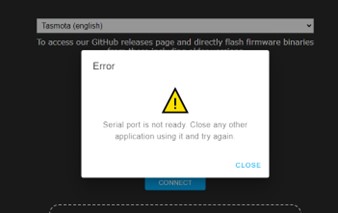
In PC-Active 335 and also at HCC meetings there was attention for the workshop ‘Building sensors’. TinyTronics now supplies an ESP model (ESP-12F) that is not available via the Tasmota Web installer-page, as described in PC-Active 335. Even if you had installed all drivers, you still get the message that something is wrong with the computer’s serial port. Fortunately, there is a good solution to this problem.
It’s still fun to put things together yourself, install the software and then get it working. Many have completed the workshop ‘Building sensors; which was given at various HCC locations and was also included in PC-Active 335 and 336. As an HCC member you could also receive a significant discount on all kinds of hardware that you needed for the workshop and which you could order from TinyTronics. TinyTronics currently supplies an ESP model (ESP-12F) that is not available via the Tasmota Web installer-page can be programmed, as described in PC-Active 335. Even if you installed all the drivers, you still get the message that something is wrong with the computer’s serial port.
(text continues below image)
We have received several questions about this and have also encountered it ourselves during the workshops. Fortunately, there is a good solution to this problem. The problem can be solved on a Window computer by using Tasmotizer. Type this link https://github.com/tasmota/tasmotizer/releases/tag/v.1.2 into a web browser or scan the QR code:

On the GitHub page for Tasmotizer 1.2 you will find 4 download links. The top one is the one you need to have (tasmotizer-1.2.exe):

After downloading the file (file) are most likely in your download folder.
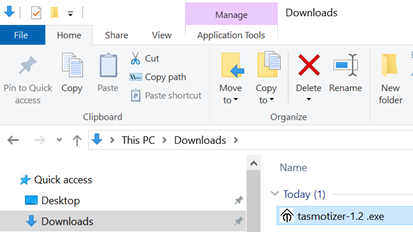
So go there and double click on that file to start. You will get the following screen:
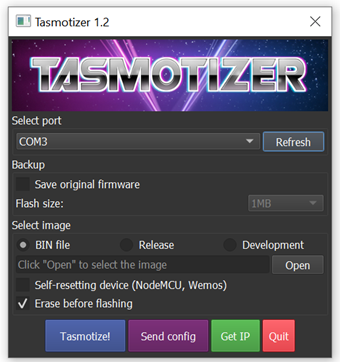
Select the correct COM port below Select port:
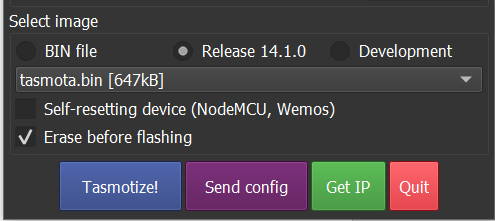
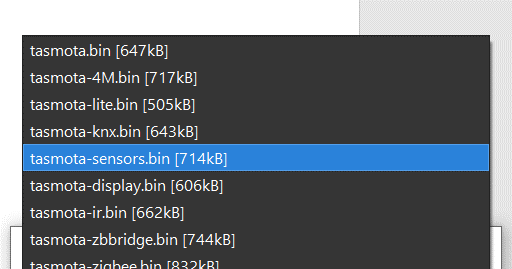
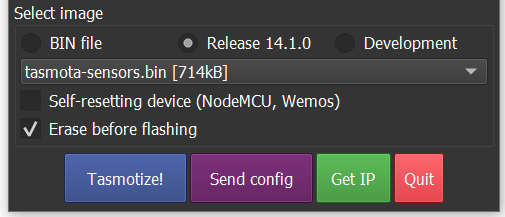
Then you choose at Select image in the lower part for Release. In the bar that now becomes active under this button, select tasmota-sensors.bin
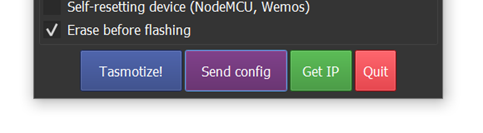
If you have everything set up correctly, it will look like below. Now click on the blue Tasmotize!-button.
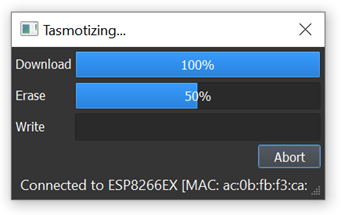
First, the requested version of Tasmota will be downloaded for you (first bar); the ESP is then cleaned (second bar):
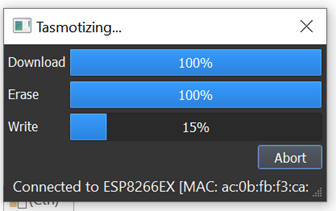
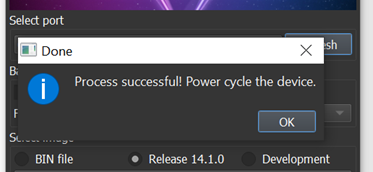
Then Tasmota starts writing to the ESP (third bar):
When the writing is done, you can click on the OK– button click:
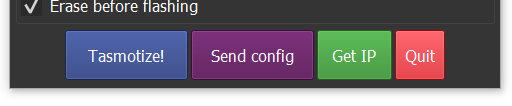
In most cases you can just leave the power on and press the button directly Send Config click:
In the menu that now appears, first check the WiFi section. Then enter the name of your own WiFi network and enter it below password from your network. Then click Save. Tasmotizer now sends this data to the ESP. You can click away the screen that tells you this.

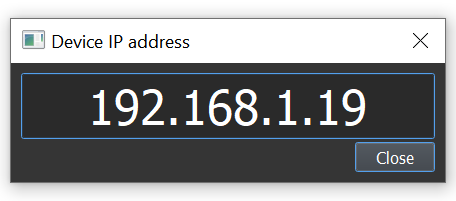
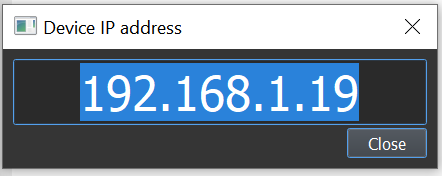
Wait about 20-30 seconds before clicking the green button to see what the ESP’s Wi-Fi address is.
If everything went well, you will see a screen with the IP address of your device. So you will most likely see a different address than in the accompanying picture. (If you see 0.0.0.0, you were a little too fast. If the message XXXX remains, you probably made a mistake when typing the WiFi network name and password. Check that again and pay attention to upper and lower case letters) .
Highlight the numbers with the mouse and the key combination Control and c you can copy the address. Or simply type it into a web browser.
And use Control and V to paste into a web browser:

After this, the Tasmota page will become visible and you can pick up the thread of the story again in the PC-Active Edition 335 (APRIL/MAY 2024). Good luck and have fun