A CD with only data
To learn how to create a CD or DVD with data (photos, documents, etc.), see the Burn CD or DVD in Windows article. You can also burn music files as described there. But you cannot play those CDs in the ‘normal’ CD player of your music system. You can if you make a music CD. We describe how this is done in this article.
CD or DVD burner?
To check whether you have a burner on your computer:
- click on Start > Computer. If you are using Windows 10, open the Explorer with the shortcut Windows+E and click in the left menu on Computer or This PC.
- The Explorer opens. Look under ‘Devices with removable storage media’ (7) or ‘Devices and drives’ (10). There you will see if you have a CD/DVD (RW) drive.
It doesn’t matter if you have a CD or DVD burner. Both can burn music CDs.
Windows 7 or 10: Windows Media Player 12
The most recent version of Windows Media Player for Windows 7 and 10 users is number 12. Media Player 12 is included by default in the following editions of Windows 7: Starter, Home Premium, Professional, Ultimate, and Enterprise. If the Media Player cannot be found on your Windows 7 system, you will find it in the following place: Media Feature Pack (this set includes the Media Player).
Before you start
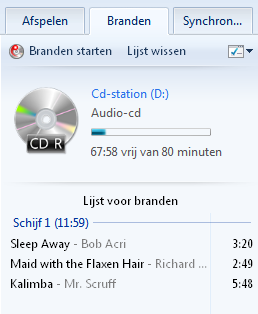
First of all, put a blank writable CD in the burner tray. Although it is not necessary to put a blank CD in the burner before you start, it is useful. Windows Media Player reads how many minutes fit on the blank CD, and then displays this. As a result, you never select too much music. Every time you add a track, you will see at the top right of the program (next to the picture of the CD) how many minutes are left of the total playing time. If you are using Windows 7, first click on Burn an audio CD.
Please note: you will not receive a warning if you select more music than will fit on one CD. Windows Media Player puts that music on a second disc. If you only want to burn one CD, pay attention when you see ‘Disk 2’ appear on the right. This is the sign that you have selected music for more than one CD. Delete one or more numbers.
Burn a CD with Media Player 12 (Windows 7 and 10)
- Start Windows Media Player in Windows 7 via Start > All Programs > Windows Media Player. In Windows 10, click Start > Windows Media Player.
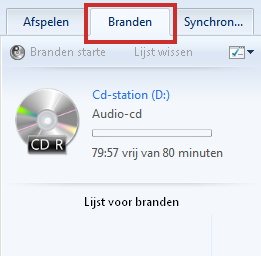
- Press the button To burn.

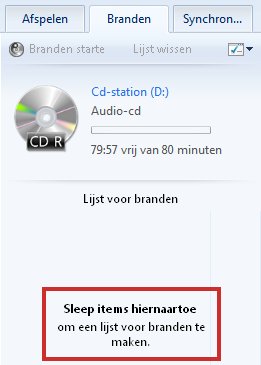
- Now drag the songs you want on your music CD to the box that says, “Drag items here.”

You can do this by selecting the songs and holding down the mouse button and dragging the songs to them. Or, if that’s easier for you, you can right-click on a song and choose Add to > Burn List. - The number will then appear on the right of the list. In this way you can create a collection that you want to burn to CD.

- You can also remove songs from the list on the right. Select the number and press the Delete key. Or right click on the song and select Delete from list.
When you are completely done with the compilation of your CD, click on the button on the right Start burning. The rest is done automatically: all tracks are checked and the volume is adjusted if necessary. You can see the progress of the burn process itself at the bottom right of the burn window. Depending on the number of tracks, it may take a while for your CD to be ready. When the CD is ready, the CD player will eject it. You can then play it!