
Despite strong resistance from apps such as Prezi and LibreOffice Impress, PowerPoint from Microsoft remains the most popular presentation program for the time being. If you already have experience with PowerPoint, here you will find eleven tips with which you can make your presentations even more beautiful, more fun or more efficient.
Toon van Daele
We assume PowerPoint for Microsoft 365 (version 2108, you can read your own version via File and Account), but many tips can also be used in other PowerPoint versions. The first part of our tips mainly focuses on inserting media files, creatively editing images, and special animation effects. Later on, we will discuss some techniques to add something extra to existing objects and to handle your presentation more efficiently.
 |
|
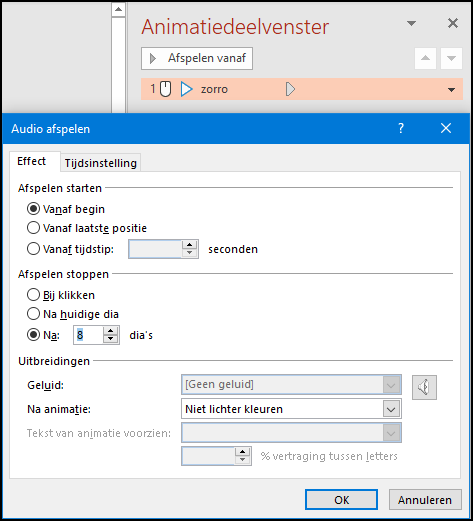
| You tell PowerPoint after how many slides the background music can stop |
1. BACKGROUND MUSIC
How do you ensure that background music starts on a certain slide and stops automatically on another slide? get via Insert the audio file on the slide where the music should start. Click on the speaker icon of this audio file and open Play in the ribbon. In the section Audio options imagine Get started in on Automatically† Place a checkmark Play during slides and possibly also at Repeat until movie or sound is stopped† Go to Animations and click in the section Advanced animation on the panel Animation† Select Play in the section Animations and then right click on your audio file in the panel, where you Effect options chooses. On the tab Effect enter a number Stop playing After [x] slides. Confirm with OK†
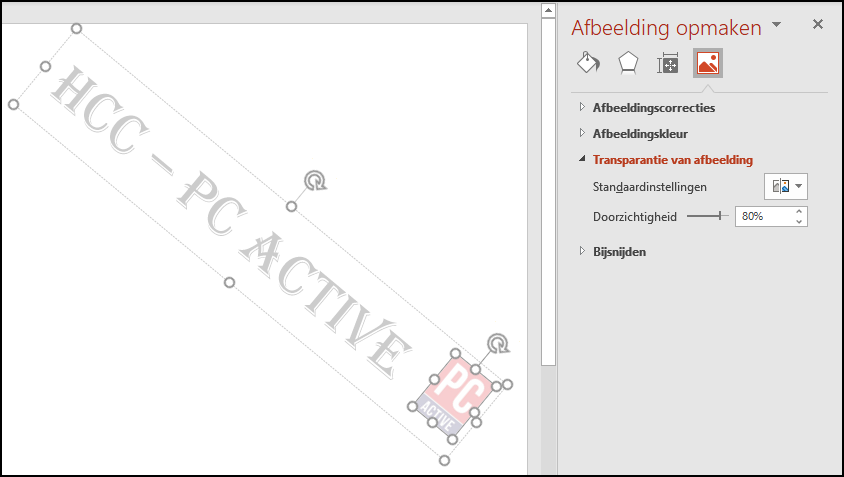 |
| It is best to make a watermark quite transparent |
2. WATERMARK
You are making a presentation for your company or association and you want a watermark on every slide. This works easiest with a slide master. Open Image and select slideshow in the section Model Views† Click on the top slide in the left panel. Then open Insert and choose at Text the option text box† Draw a text box and enter your text with an appropriate font, size and color. Also add with Pictures Add a logo and position your text box and logo close to each other. Select both objects, right click on your selection and choose group Bee group† Position the combined object You tell PowerPoint after how many slides the background music can stop. It is best to make a watermark quite transparent on your slide. Select the text in your text box, right click on your selection and choose Formatting text effects† Select text padding in the right panel and set the desired Transparency in (e.g. 85%). Then select the logo and choose in the right panel Image and Image transparency, where you set the same transparency. Finally you open again Image and choose you this time Normal Bee Presenter views†
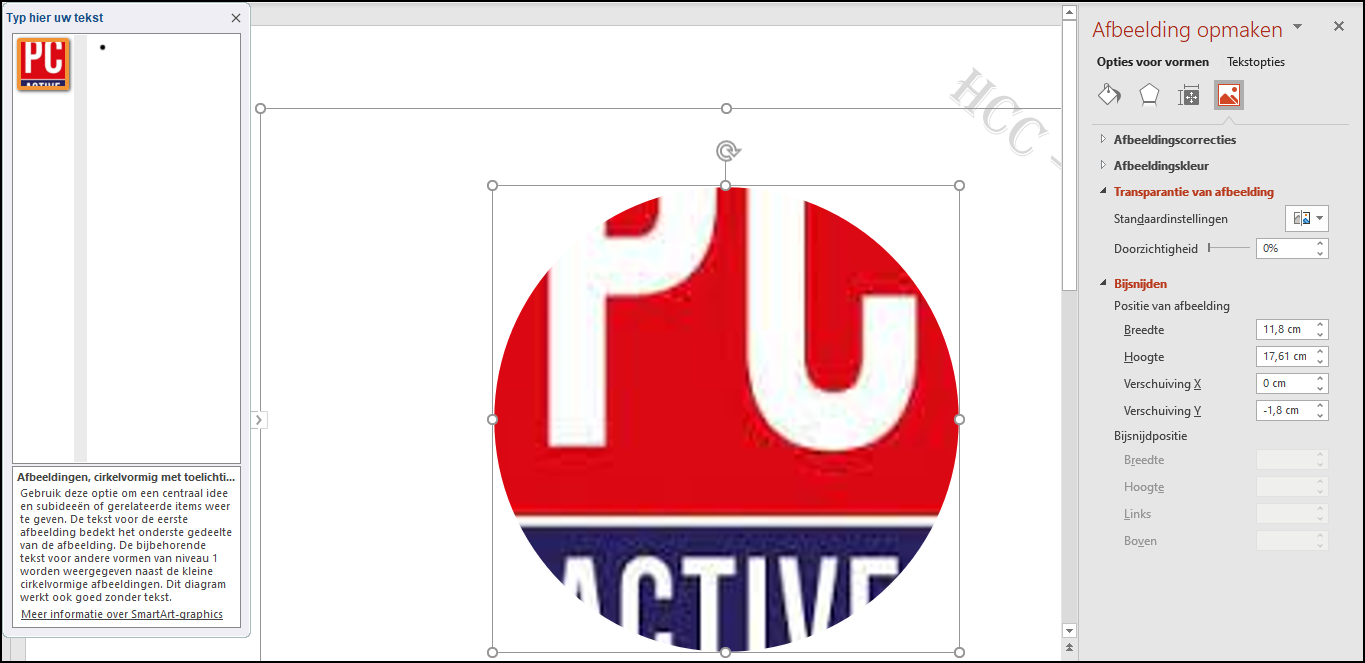 |
| You pour your photo into a (round) fit using SmartArt |
3. ROUND PHOTO
You want to get an image in a nice circular shape, like a profile picture. Open for this Insert and click SmartArt in the part Illustrations† In the dialog open the section Image and select the second image (with four circles). In your slide, click on the arrow button to the left of this image and tap in this panel on the various boxes with Text, each time clicking on the backspacebutton until only one large circle remains. Click on the icon in this circle and add your image. Right click on the image and choose Format Shape† In the right panel you then open Image and can you join crop position the picture optimally within the circular shape.
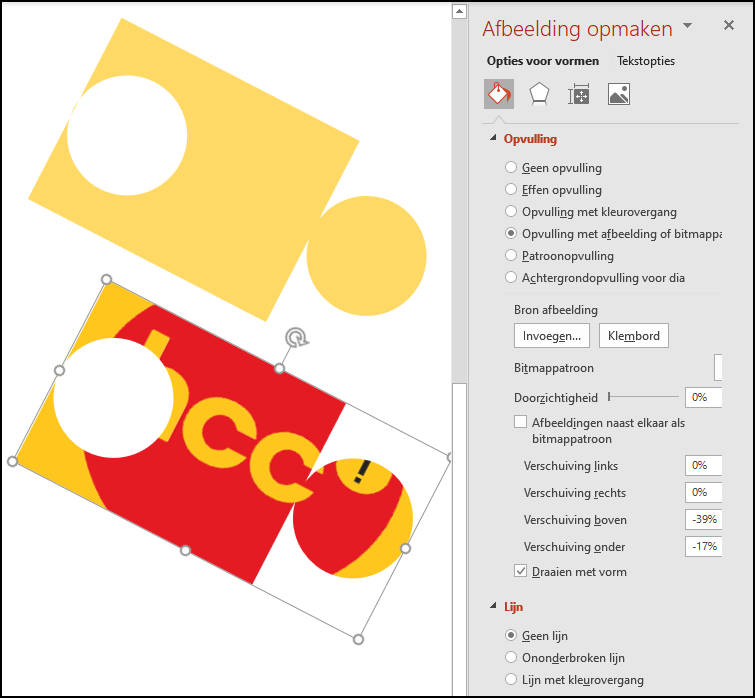 |
| Make your own puzzle piece with your own image |
4. PUZZLE PIECES
With some effort you can also turn a picture into a puzzle piece. add via To add and Forms both a colored rectangle and a circle shape. Make the latter about half the height of the rectangle. Right click on each of the two objects, select Format Shape and choose at Line the option no line† Move the circle to just over a rectangle edge. Copy and paste the circle shape with Ctrl + C and Ctrl + V and move the duplicate to the opposite inside of your rectangle. Select both this duplicate and your rectangle, go to Form division and choose at the part Insert shapes the option Merge shapes and To combine† Now select the three objects and choose this time Merge shapes and unite† Right click on your puzzle piece and choose Format Shape† In the panel Format Shape you choose at I example Image fill or bitmap pattern and refer you via Insert to your picture.
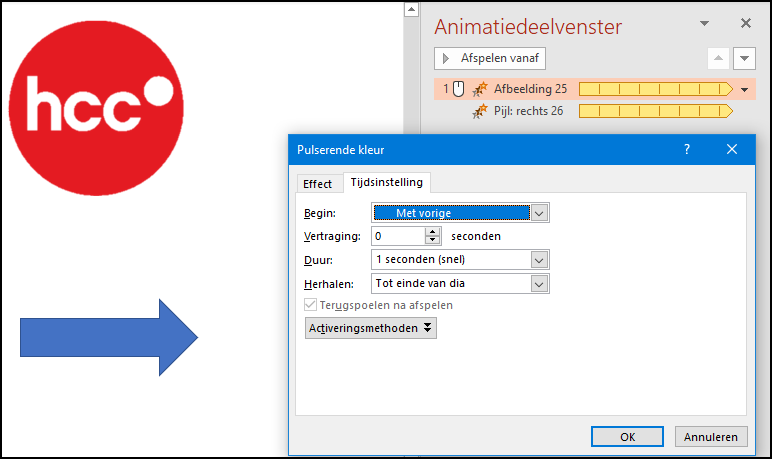 |
| With a pulsating color you give all the attention to that one object |
5. EYE-CATCHER
To put an object in the spotlight a little more, you can make it pulse. Select the object and open Animations† Press the arrow button, select at Emphasis the option Pulsating color and adjust Effect options a suitable color. Then click on Animation panel where you right click on the object animation and Time Settings chooses. Get started can you set to with previous† Duration for example at 1 second (fast) and To repeat on Until end of slide† Confirm with OK† Please note that objects you have inserted via Insert and Forms, will change color. With your own images, this only happens in places that are transparent. You can also adjust these from within PowerPoint itself. Select your image, open Image formatclick on Remove background and indicate the parts that you (just not) want to make transparent.
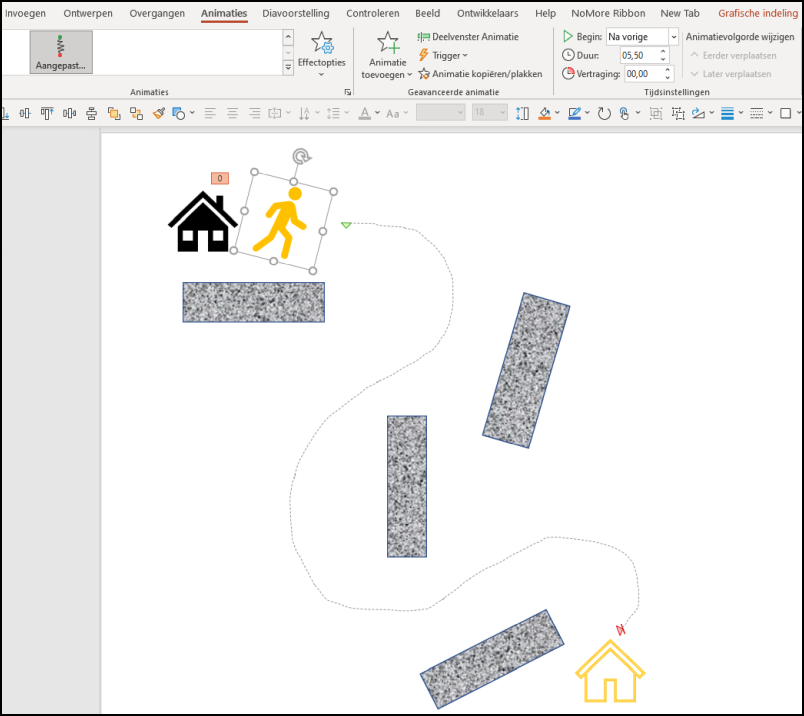 |
| Map out the route along which an object moves Have an animation run once your video has reached a certain point |
6. ANIMATION PATHS
You’ve probably already worked with a simple animation in PowerPoint, where you made an object move in a straight line from point A to B. But you can also draw the animation path along which that object should move. Select the object, go to the tab Animations and click Add animation in the part Advanced animation† Scroll to Animation paths and choose Amended, after which you use the mouse pointer to draw the path along which the object should move. Double click on the end of this path. Get started† Duration and Delay simply adjust in the ribbon to the item Time Settings†
 |
| Run an animation once your video reaches a certain point |
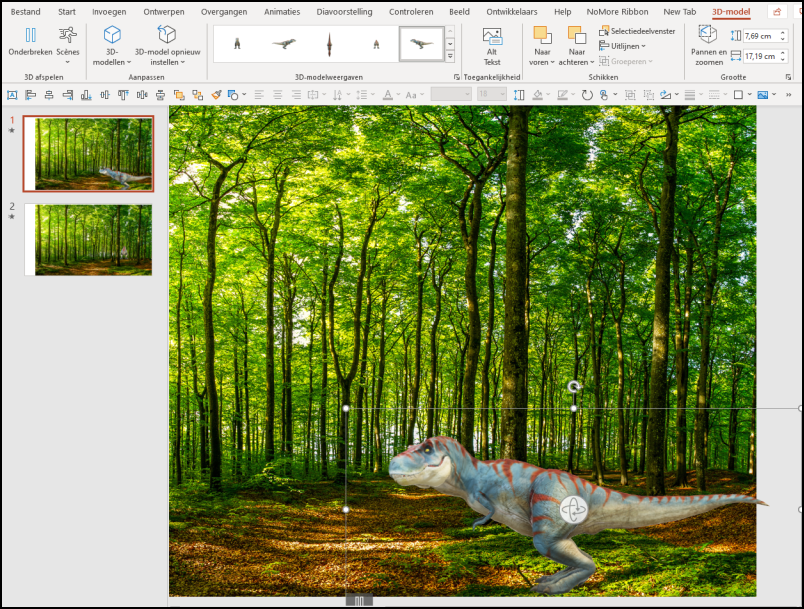
7. 3D ANIMATION
As a gimmick, it can be fun to include a 3D animation in your presentation. Go to Insert and choose 3D models at the part Illustrations† Choose Stock 3D Models to choose from an online catalog. You can search here both thematically and via keywords (for example swimming shark† An icon with a walking man indicates that the 3d image already has its own animations. You will find it in the tab 3D modelBee scenes in the section 3D Playback† Also try the following: duplicate the slide on which you placed the 3d model. Open the second slide, choose on the tab 3D model another 3d model view and move and scale the model as you like. Now open the tab transitions and choose Morphing at the part Transition to this slide† Bee Time Settings also adjust the duration.
 |
| Run an animation once your video reaches a certain point |
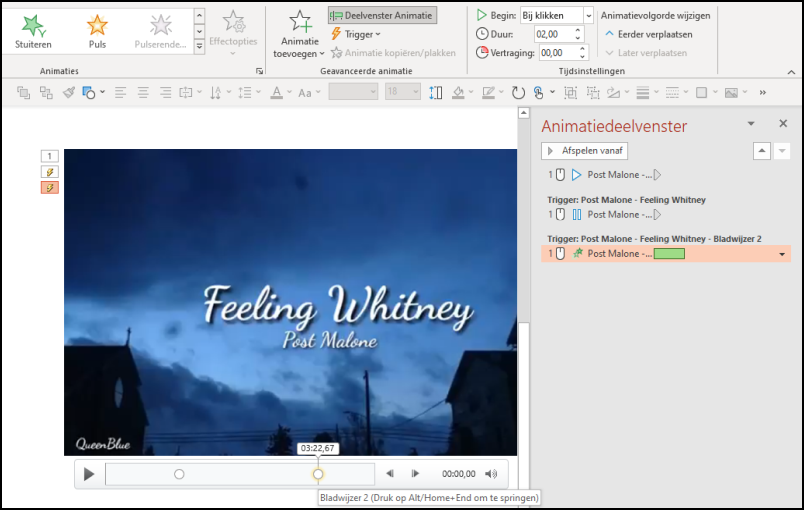
8. VIDEO BOOKMARK
Adding a video to your presentation only takes a few mouse clicks. If it is a somewhat longer video, it can be useful to add bookmarks to quickly navigate to a certain point or to link an animation to it. Go to the video moment where you want to add such a bookmark. Make sure your video is selected, go to Play and click add bookmark at the part bookmarks† A dot will now appear in the progress bar of your video. You can now add other bookmarks.
Such a bookmark can also be used as trigger for an animation. Select the video, go to Animations and choose Add animation† Select an appropriate animation and press the button triggerjust next to Add animation† Here you choose By bookmark and point you to the correct bookmark.
 |
|
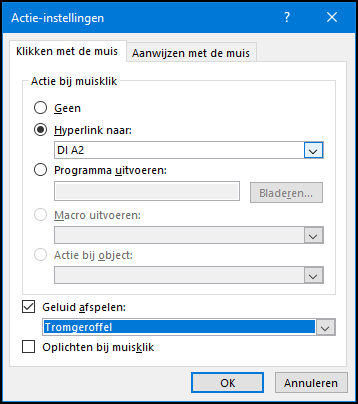
| Make PowerPoint perform an action as soon as you click or point to an object |
9. ACTION
In PowerPoint you can easily link a hyperlink or an action to a piece of text or another object, such as an image or button. Bee Insert and Forms you will even find a special section for this: Action Buttons†
Select the text or object, go to Insert and choose Links† To link to an external web page, then click Clutch and select in the dialog box Existing file or web pageafter which you join Address enter the URL. You can also here Place in this document and then point to the desired slide in your presentation.
You get a little more options via Links and Action, where you decide via tabs whether that action should be performed when you point to the object or when you click on it. You can also add hyperlinks along this way, but also have a sound play or light up the object, for example.
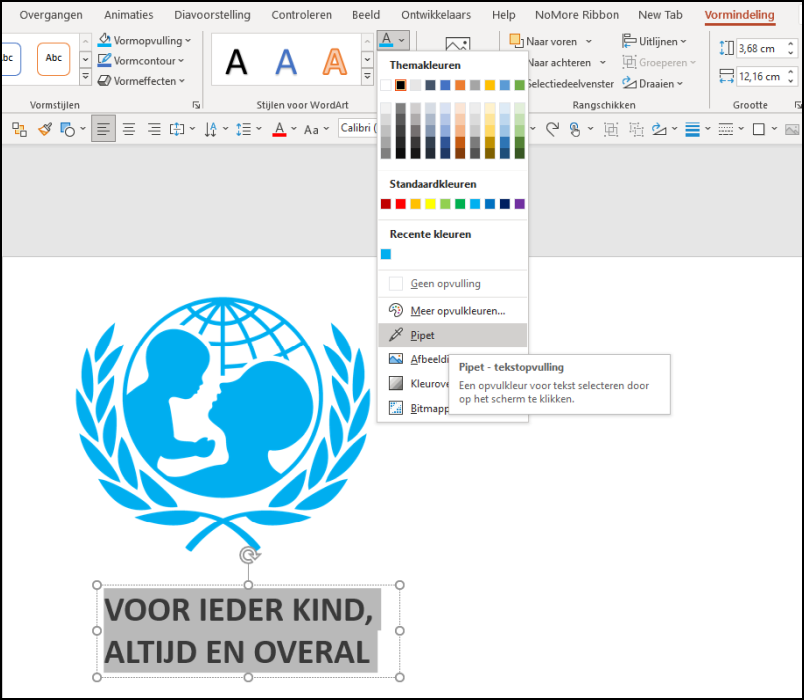 |
| With the eyedropper you specify the exact color you want Design your own document theme that fits nicely with your corporate identity |
10. COLOR PIPETTE
You have inserted an image into a slide and you would have liked to see the corresponding title or description in the same color as a main color of the image. Then select the text, open the tab Form division and click the arrow next to the icon text padding in the section Styles for WordArt† Select Pipette and click with the custom mouse cursor on the desired color. You can also do the ‘reverse’ and change the color of a shape or text frame to match the text color. Open for this Form division and choose Shape Fill and Pipette in the section Shape Styles†
11. DOCUMENT THEME
You prefer to design a presentation for a company or association in a consistent house style. You can create a document theme for this, which you can also apply to other presentations and documents. To do this, start an empty presentation, go to To design and click on the arrow button at the bottom right Variants† In the drop-down menu, select Colors† Adjust colors (through More colors you can also enter your own color codes). Think of a name for your theme color and confirm with Save† Also select the desired fonts via Fonts† Customize fonts and do the same to background styles and Format background†
To put these parts into one theme, go to To design and press the arrow button at the bottom right of the item Themes† Choose below Save current theme and save the generated .thmx file in the default location. You can also copy this file to another computer, in the same subfolder.
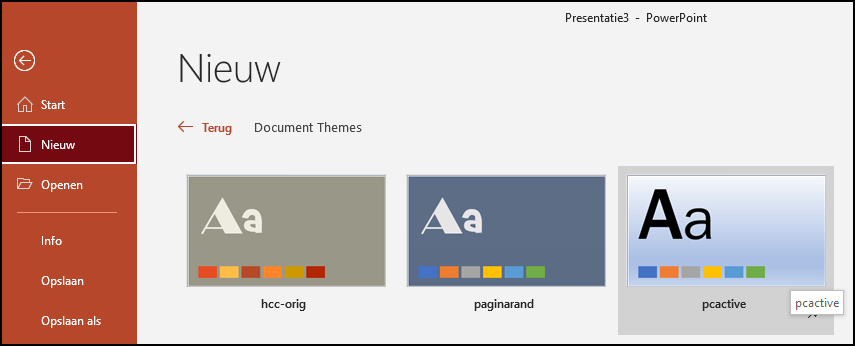 |
| Design your own document theme that fits nicely with your corporate identity |
To reuse this theme, open File† New and click just below the title New on Amended and Document themes† Now all you have to do is select your theme. You can also find this theme in other Office applications, such as Word (via To design† Themes†