While generative AI is appearing almost everywhere, Copilot appears to be the most practical solution imagined by Microsoft for Windows 11 users. But the service is not accessible directly from PCs unpacked a few months ago, even a few years. It will therefore be necessary to carry out a little manual work in order to force the installation of Copilot, but also to implement a keyboard shortcut allowing simple access to it. So this is the main objective of this tutorial.
What is Copilot and why do you want to use it?
Since all operating systems seem to no longer be able to do without generative AI, it was only a matter of time before Windows benefited from its own solution of the kind, which takes the form of Copilot. A name suited to the purpose of the service, since it is a personalized and context-aware AI assistant. Basically, it’s a sort of ultra-boosted version of Cortana, to put it bluntly.
To be a little more concrete, Copilot can both access the internet in real time and check the information given when the user asks it a question (a real advantage over ChatGPT at the moment). It is also possible to provide it with a URL address and ask it to summarize the page, for example. Another new feature brought by Copilot, which should please quite a few users: it is possible to choose the response style used by the AI. So, if you find the AI’s speaking a little too formal, you can ask it to respond in a more creative tone. If you find that Copilot lacks precision in its responses, you can also ask it to make an effort in this regard.
The problem is that for the moment, European users are deprived of the functionality, since Microsoft has not yet had the necessary rights to integrate it into Windows in Europe. Fortunately, it is possible to bypass these restrictions by doing a little manual work, and thus install it on any PC with Windows 11, whether you are in Europe or not.
How to install Copilot on Windows 11?
To force the installation and then be able to use Copilot on Windows 11, simply follow these steps:
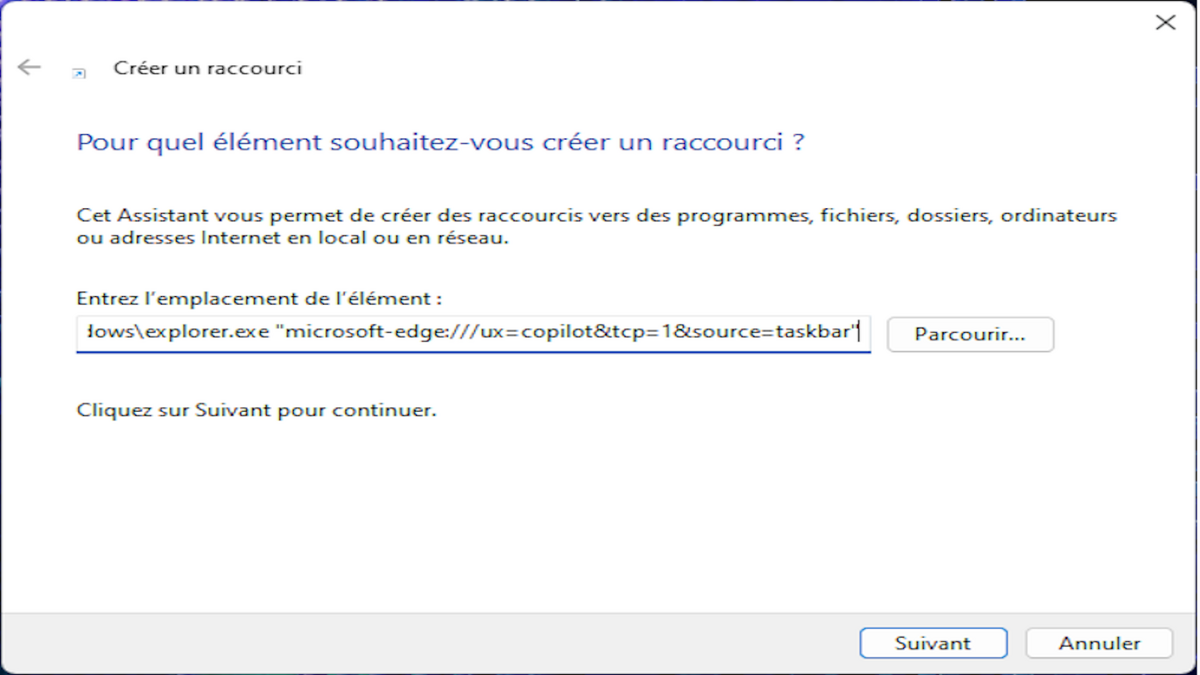
First, start by creating a shortcut for Copilot to launch it on your PC. To do this, right-click in an empty space on your desktop, then navigate to “New” then “Shortcut”.
Next, go to the “Enter item location” box, and copy-paste the command:
C:\Windows\explorer.exe "microsoft-edge:///ux=copilot&tcp=1&source=taskbar"
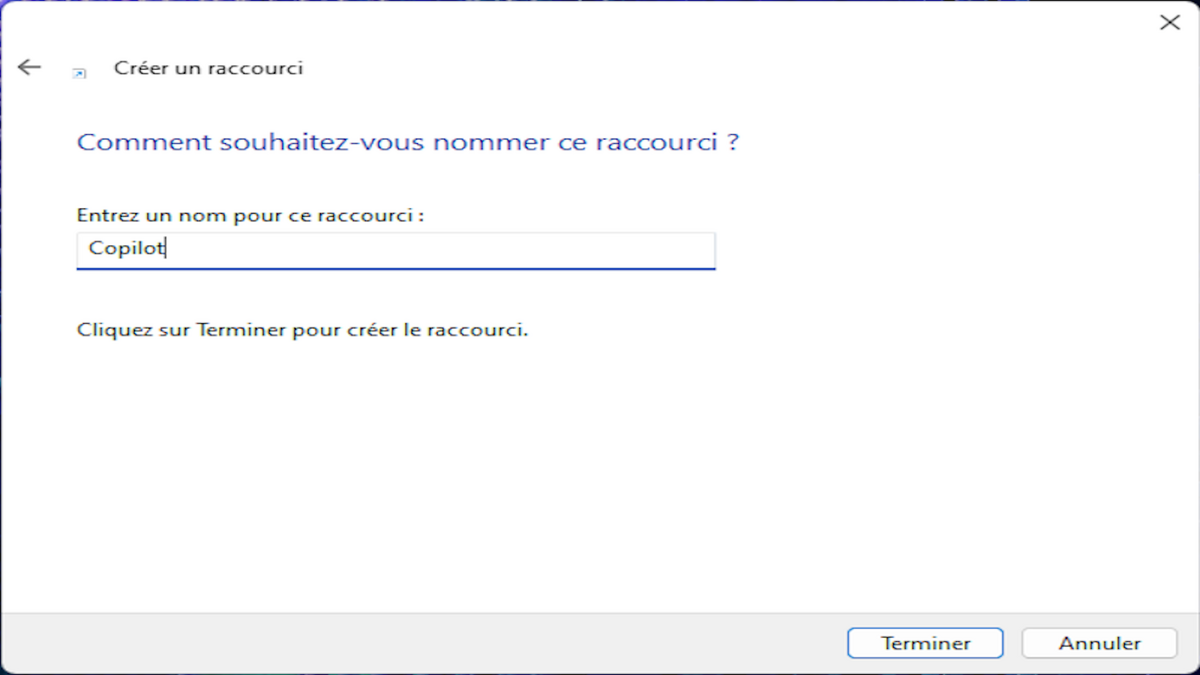
Then give it a name: it can, for example, be “Copilot.exe” or just “Copilot”. This command will have the main effect of opening Copilot in Microsoft Edge.
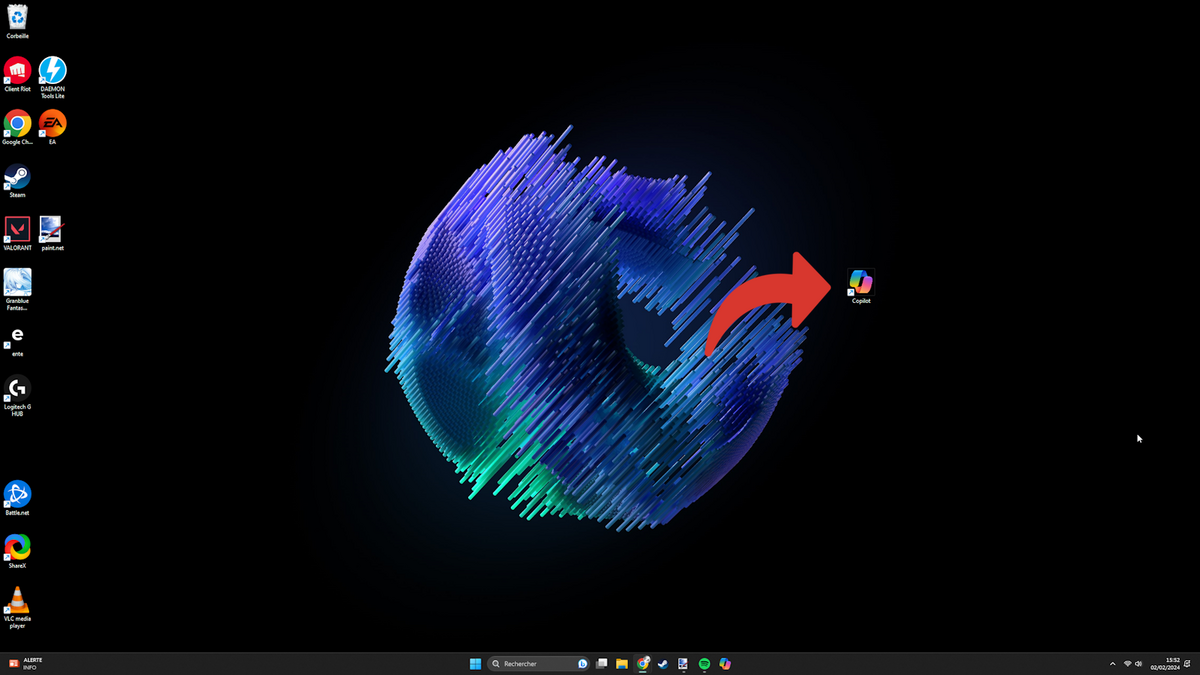
Then click “Finish” and you should see the new shortcut appear on your desktop.
Now let’s see how to change the icon of the now created shortcut. First of all, you will have to find this icon. You will need to choose an icon corresponding to Copilot on the web, but it is important to note that it must necessarily be in “ico” format. For example, you can type “copilot filetype:ico” to quickly obtain a suitable image.
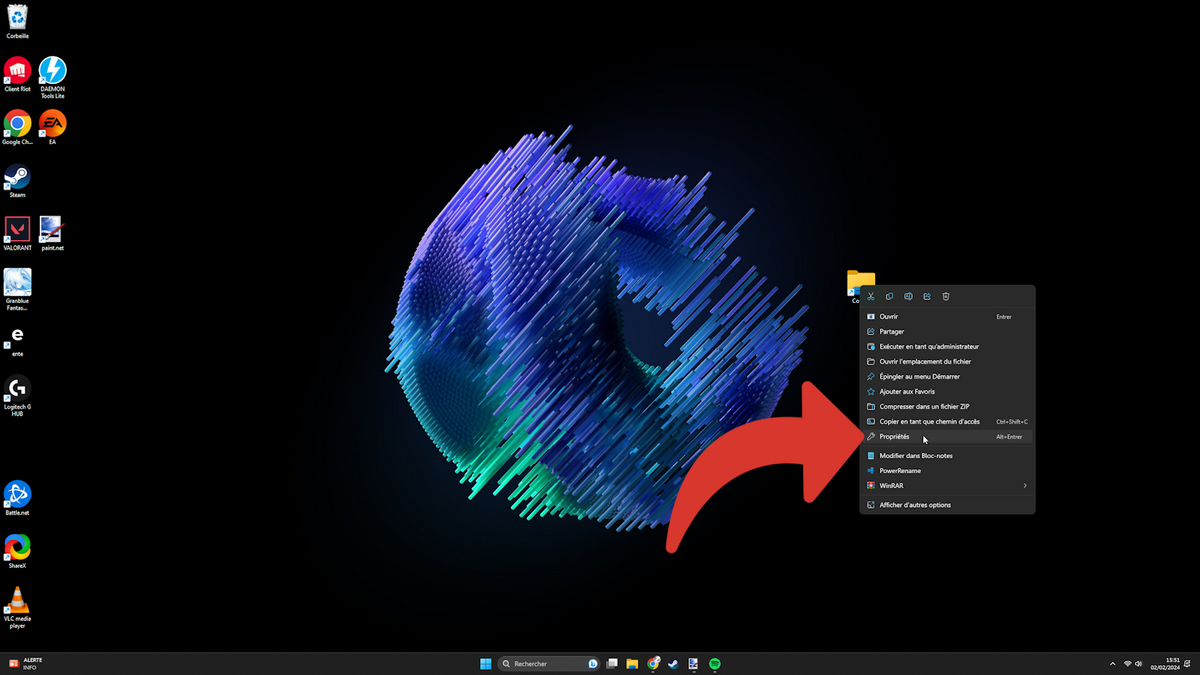
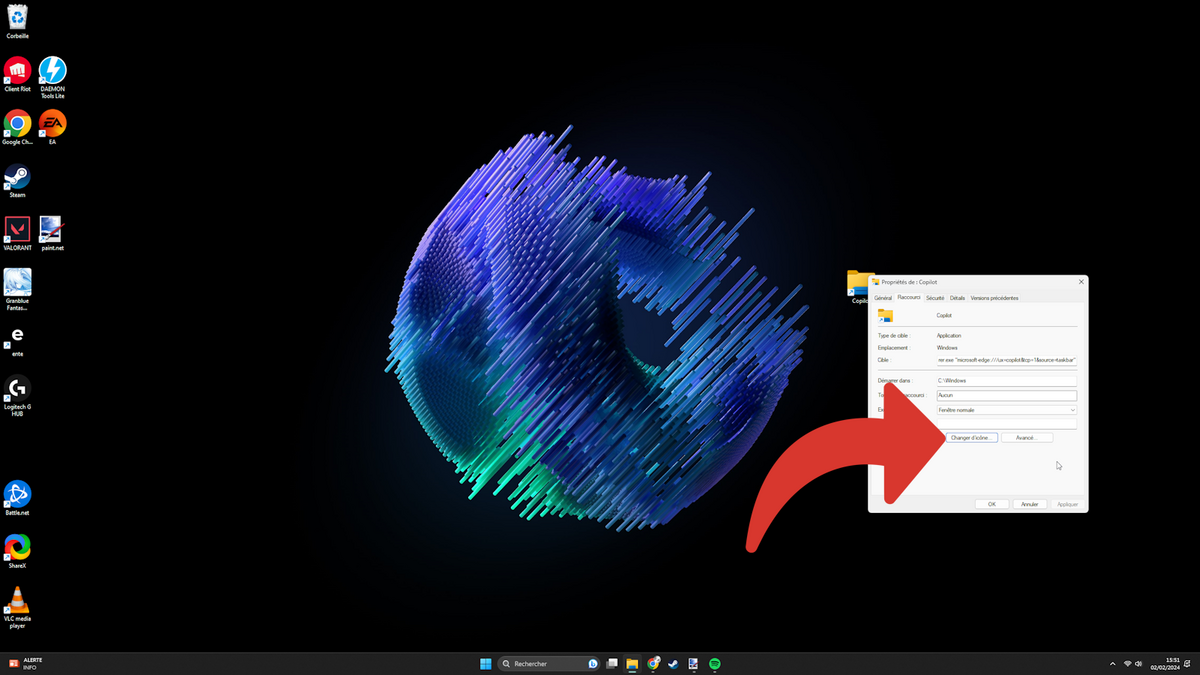
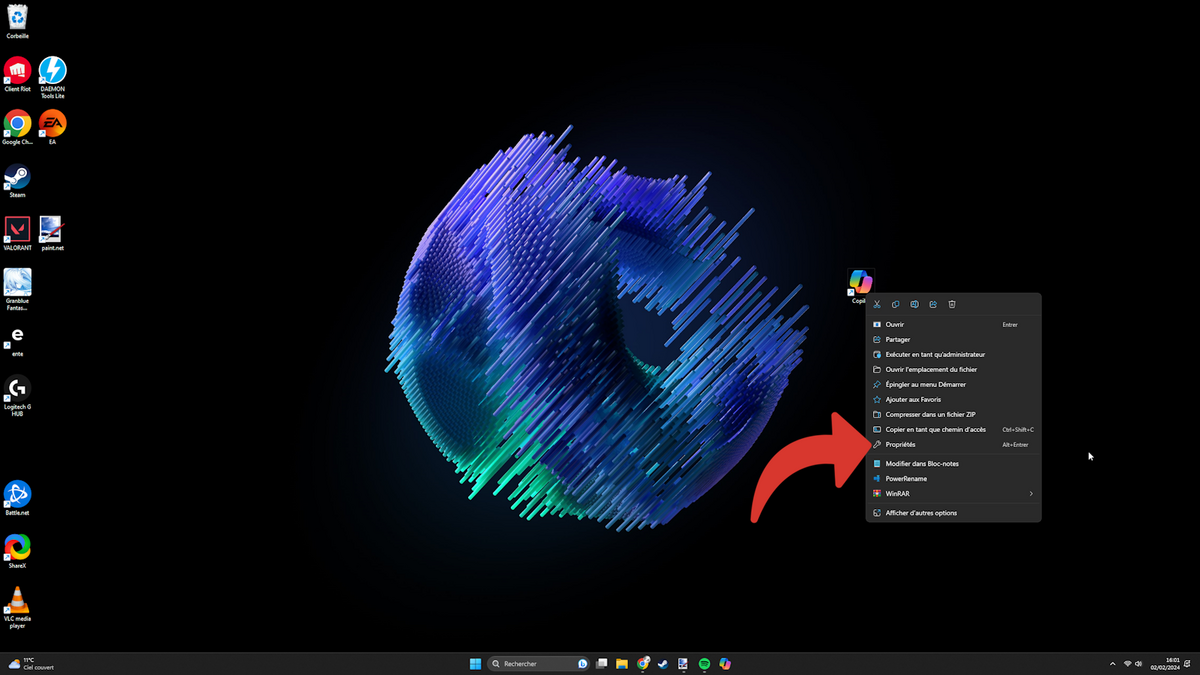
Next, right-click the new shortcut and select “Properties”. Then go to the “Shortcut” tab, then click on the “Change Icon” button.
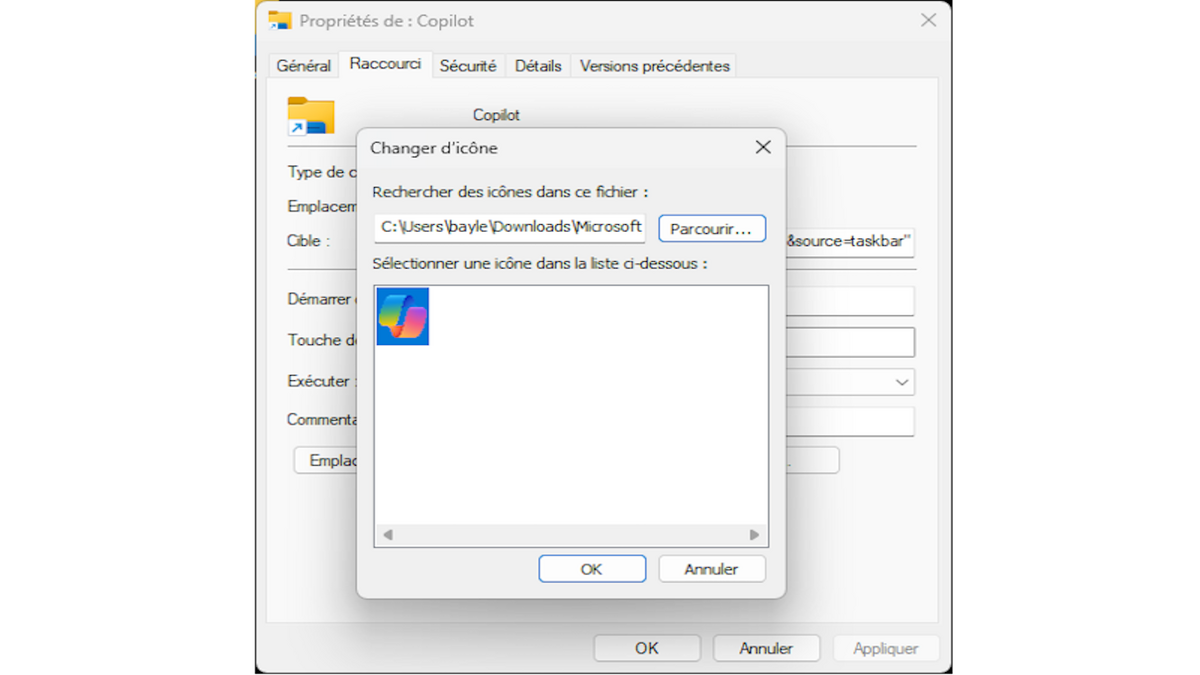
Select the icon file you just downloaded, then click “Open.” Then click “Ok” twice in a row and your icon should be in place.
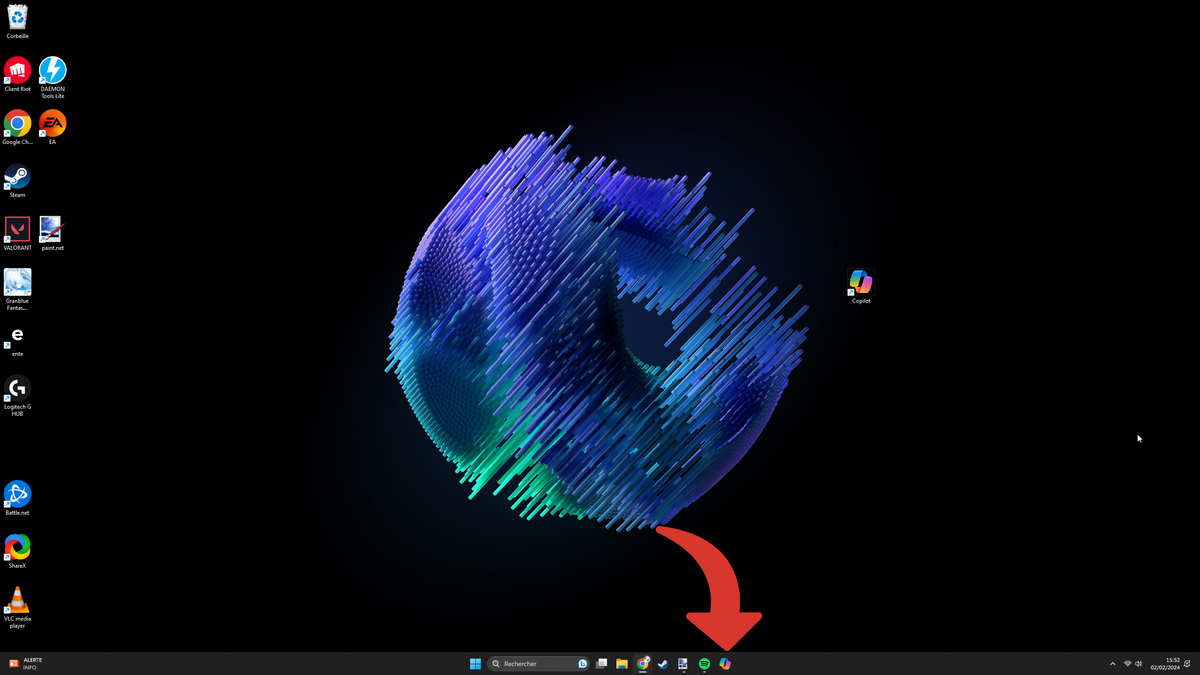
If you do not want to have to close your windows to access the desktop and thus click on the shortcut, you can insert it in the taskbar, with a very simple method: left-click and hold on the Copilot shortcut that you just created, then drag it to the taskbar at the bottom of your screen. You will be able to access Copilot from any location on your PC, even if many windows are open.
How to create a keyboard shortcut for Copilot on your PC without having to buy a new one?
The keyboard of Windows-affiliated laptops has not really benefited from any changes for several years, until Microsoft decided to introduce its Copilot tool with great fanfare, indicating that all Windows laptops released in 2024 will benefit from a special button dedicated to launching the assistant. The problem is that not all older PCs will be entitled to such a mechanism. The good news is that it is possible to create your own keyboard shortcut, as long as a little manual manipulation is not disqualifying for you.
1. How to assign a keyboard shortcut using a key combination for Copilot?
It is possible to make the use of Copilot more accessible by assigning a keyboard shortcut of several keys to the shortcut you have just created.
To do this, start by right-clicking on the shortcut in question, then select “Properties”.
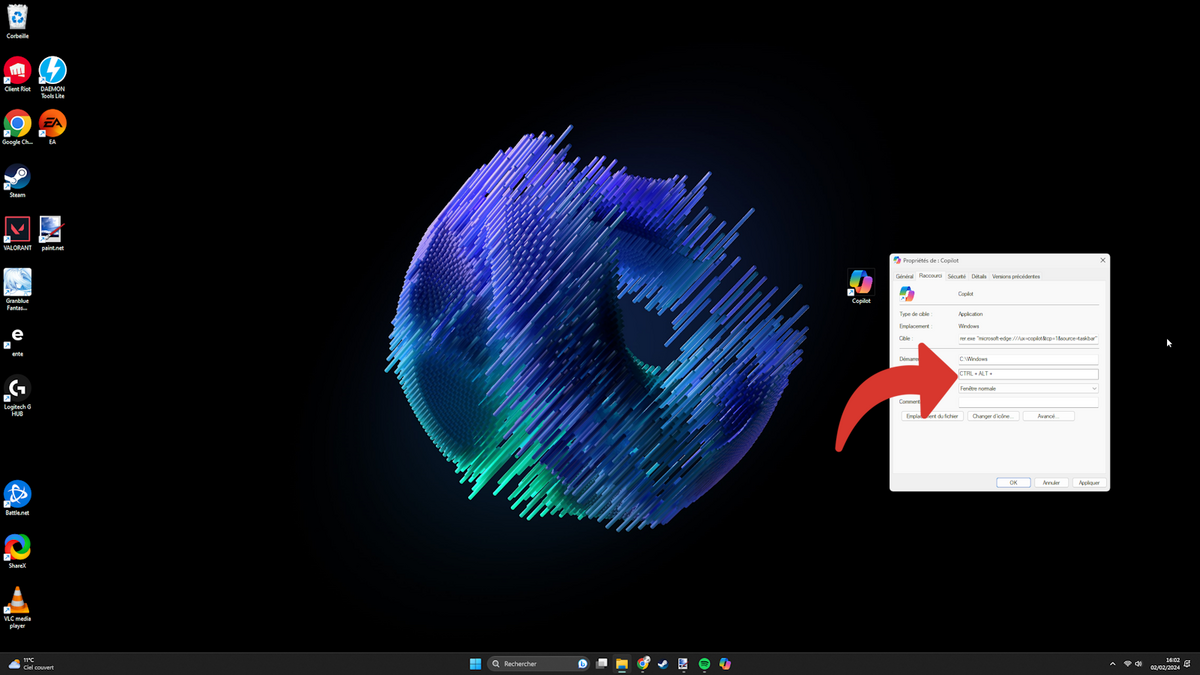
Next, go to the “Shortcut” tab and then “Shortcut key”.
Now press the key combination you want to adopt to launch Copilot via your keyboard. For example, it could be CTRL + SHIFT + C (like Copilot). Then click “OK” and enjoy your shortcut.
2. How to put Copilot as a keyboard shortcut using PowerToys?
PowerToys is a tool developed by Microsoft whose aim is to allow the most experienced users to get the most out of their computer. With this tool, it is possible to remap your keyboard in order to allow an unnecessary key on your keyboard to become the key dedicated to launching Copilot, for example.
To use PowerToys, you can install it on your PC using the Microsoft Store. Once installed, launch the software, then click “Open Settings” on the welcome screen.
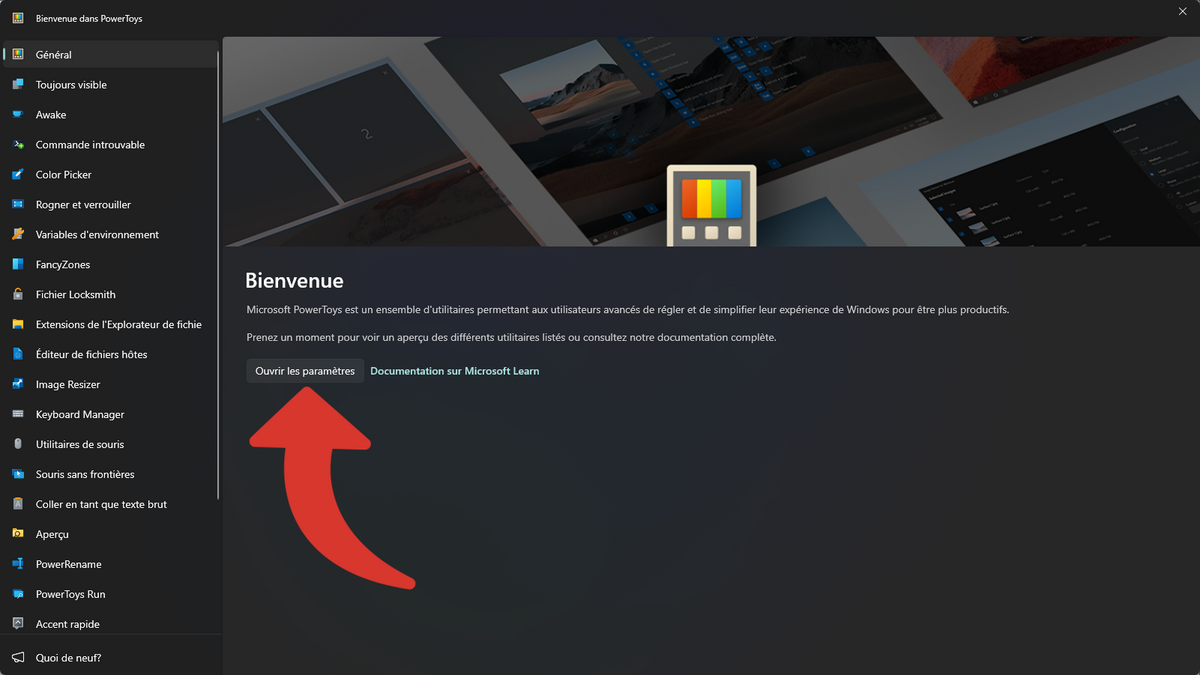
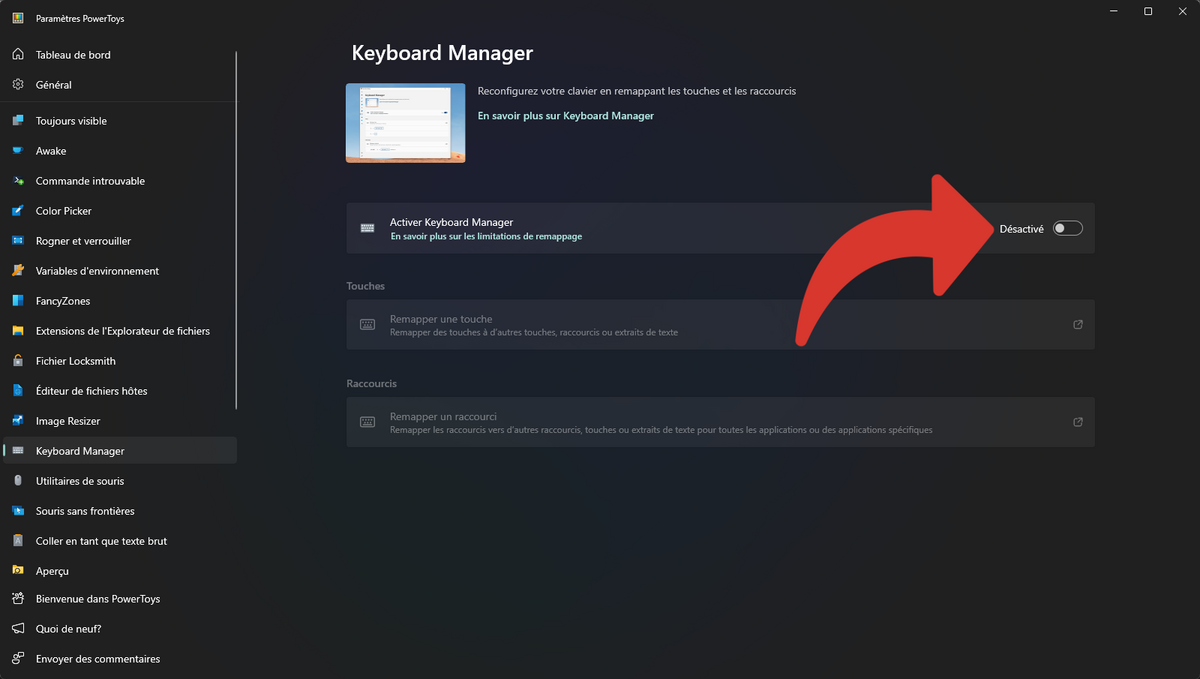
Then click on the “Keyboard Manager” option on the left panel. Then select “Enable Keyboard Manager”, which should give you access to the “Remap a key” option.

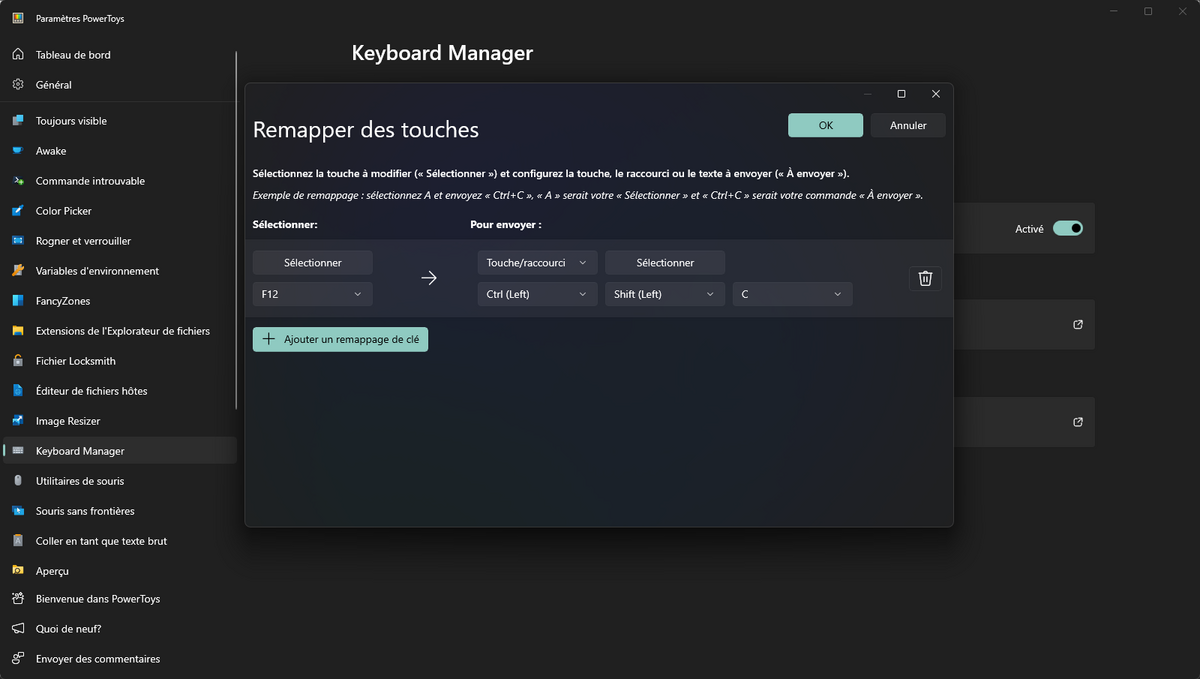
A new window will then appear with the option “Add a key remap”. Click on it. Here, you can see on the left which button to assign the shortcut to, then on the right the shortcut in question (CTRL + SHIFT + C to use the example given in step 1). You can therefore decide to remap the famous shortcut to a single button that seems unnecessary to you, such as “Scroll Lock” or an F1, F2, F3 key, etc. Now, when you press the newly chosen button, your system will automatically launch the longer shortcut chosen earlier.
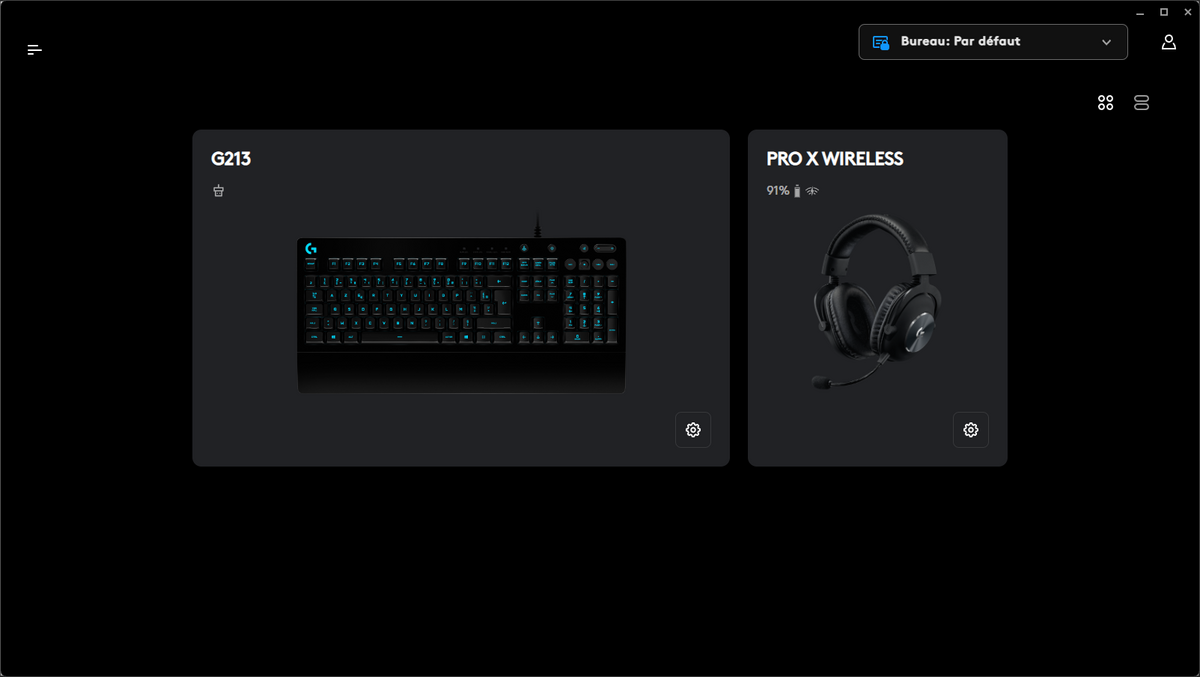
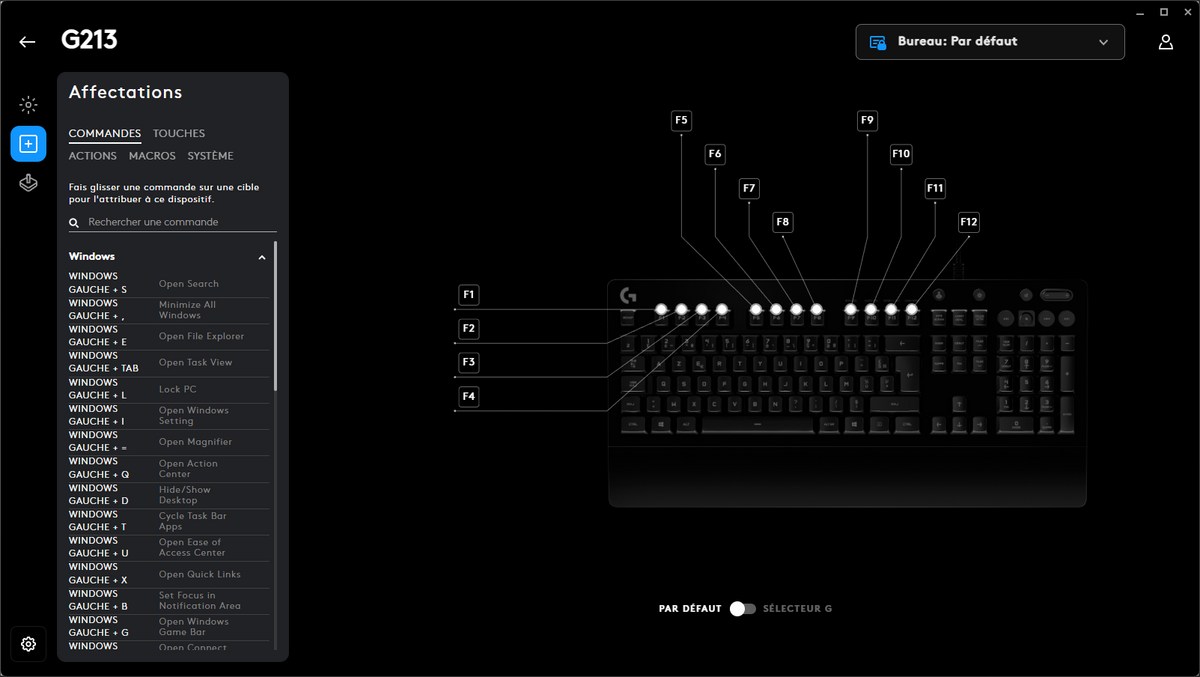
3. How to set Copilot as a shortcut using your keyboard software?
Various software offered by your keyboard manufacturer, such as GHub for Logitech or Synapse for Razer, allows you to perform key remapping. This is an alternative to PowerToys, since their effect is essentially the same. For this tutorial, we used the GHub software. Access the option allowing you to change the purpose of your keys to define new macros or actions, then remap your shortcut determined earlier (CTRL + SHIFT + C in this case) to a single key. When you press this key, Copilot will launch automatically.