Among the manipulations within Adobe Photoshop CC it is important to know the basics and in particular the rectangular selection.
Let yourself be guided in your first steps and find this tutorial in the video below.
During your creations you need to select parts of a photo or an image and move them
How to make a rectangular selection in photoshop and move it around?
1. Once your document is open (jpeg or psd) you will be able to move part of this image.
To select it, there are several possibilities, but we will see how to do it with the rectangular selection tool.
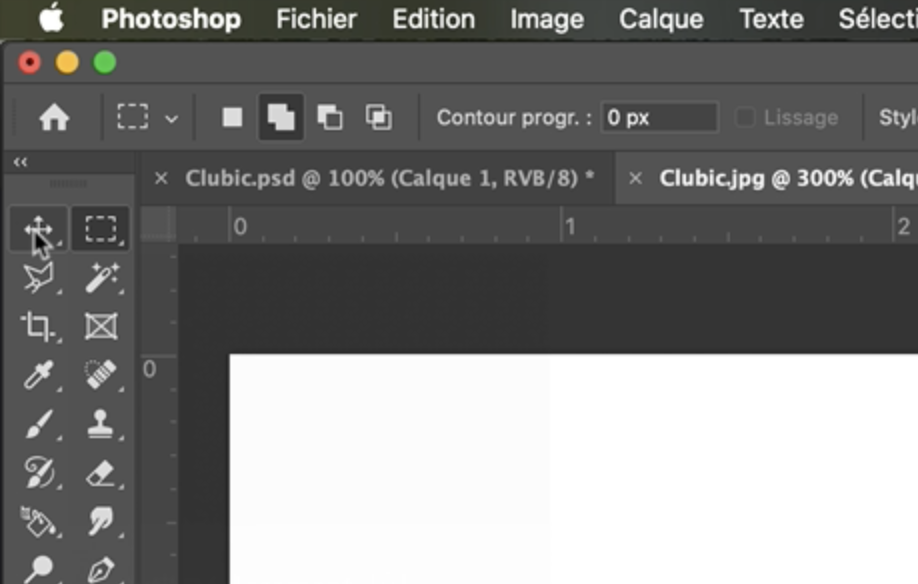
Go to the toolbar and click on the “dotted rectangle” icon
Ps: This feature shares its place with the Ellipse selection tool
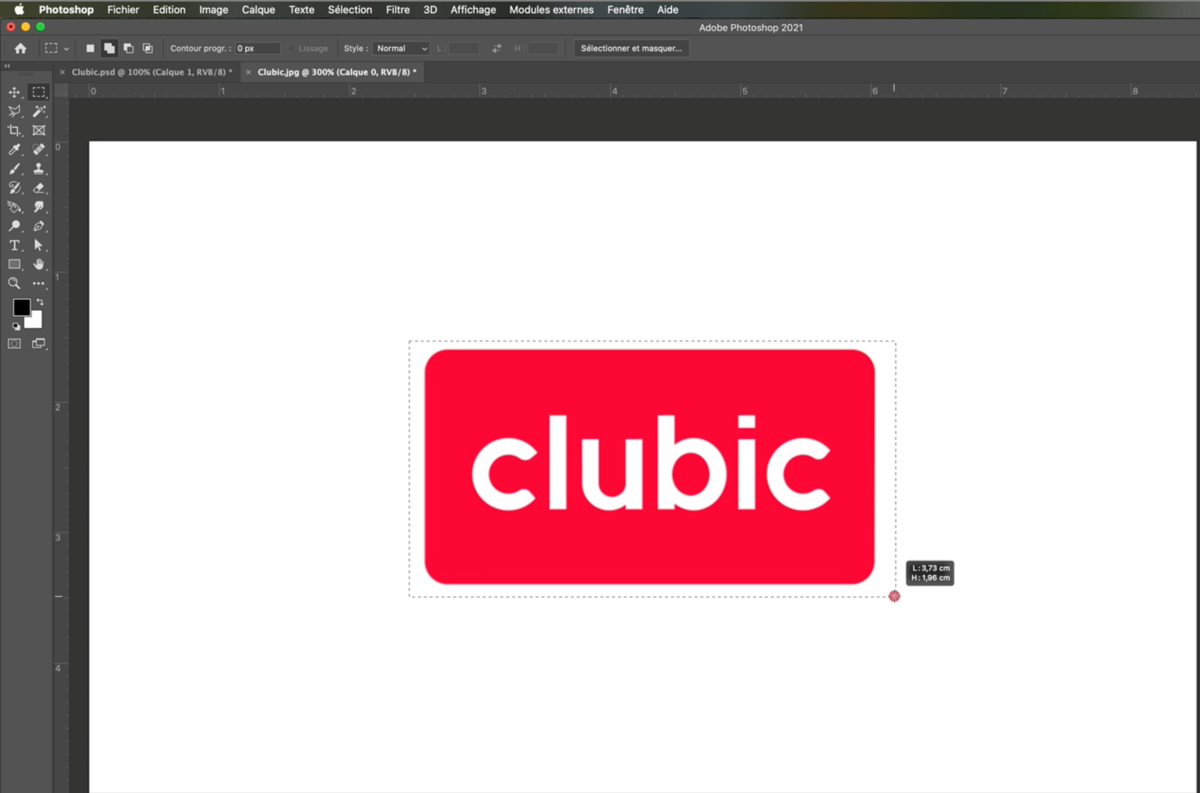
2. Once the tool has been chosen, you can now select the area you want in order to move it later or copy/paste it to another layer.
Go to the desired area, click and hold the mouse finger.
Move the cursor and the tool will create a dotted rectangular area which will then be the area of your selection.

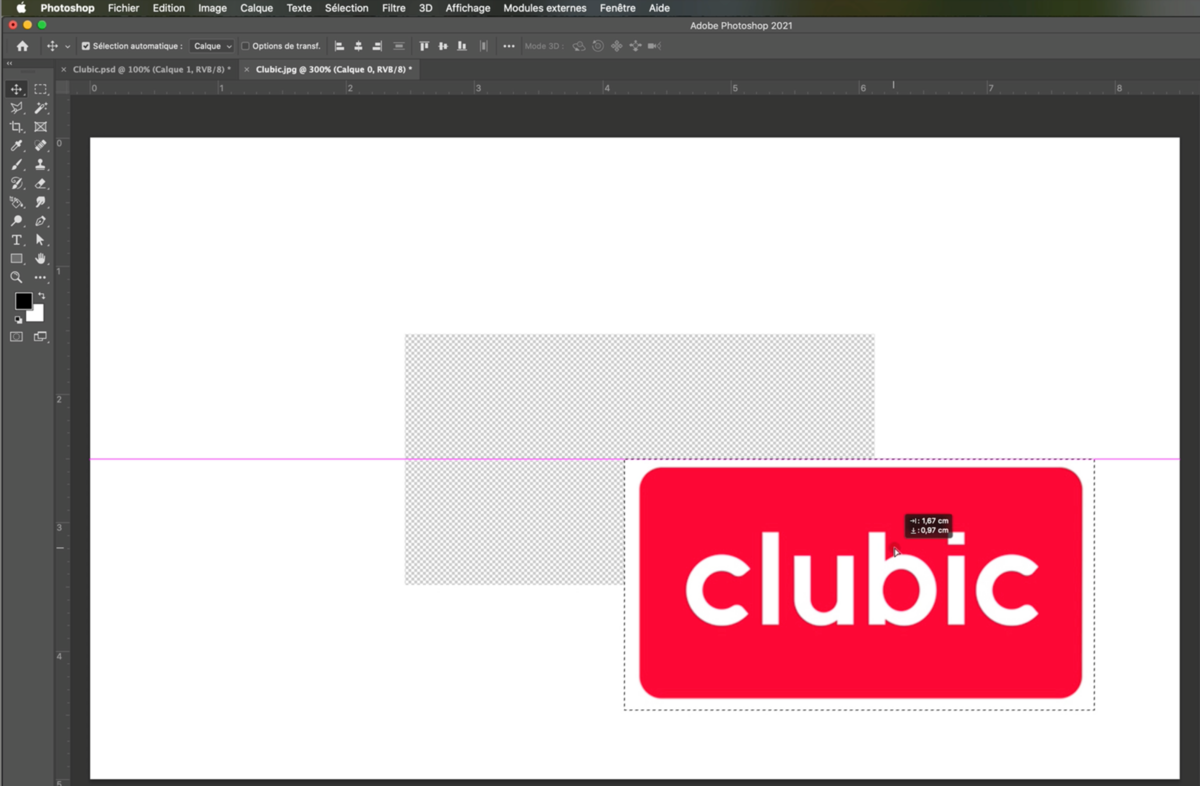
3. Once the zone has been selected, you will be able to move it using the move tool. (cross with arrows | 1st tool in toolbar)
Select the move tool and go to the dotted area.

4. Click and hold your finger. Now you can move this area wherever you want.
You can also copy it and add it to a new layer.
Copy then paste (a new layer will be created and you can also move this new element).

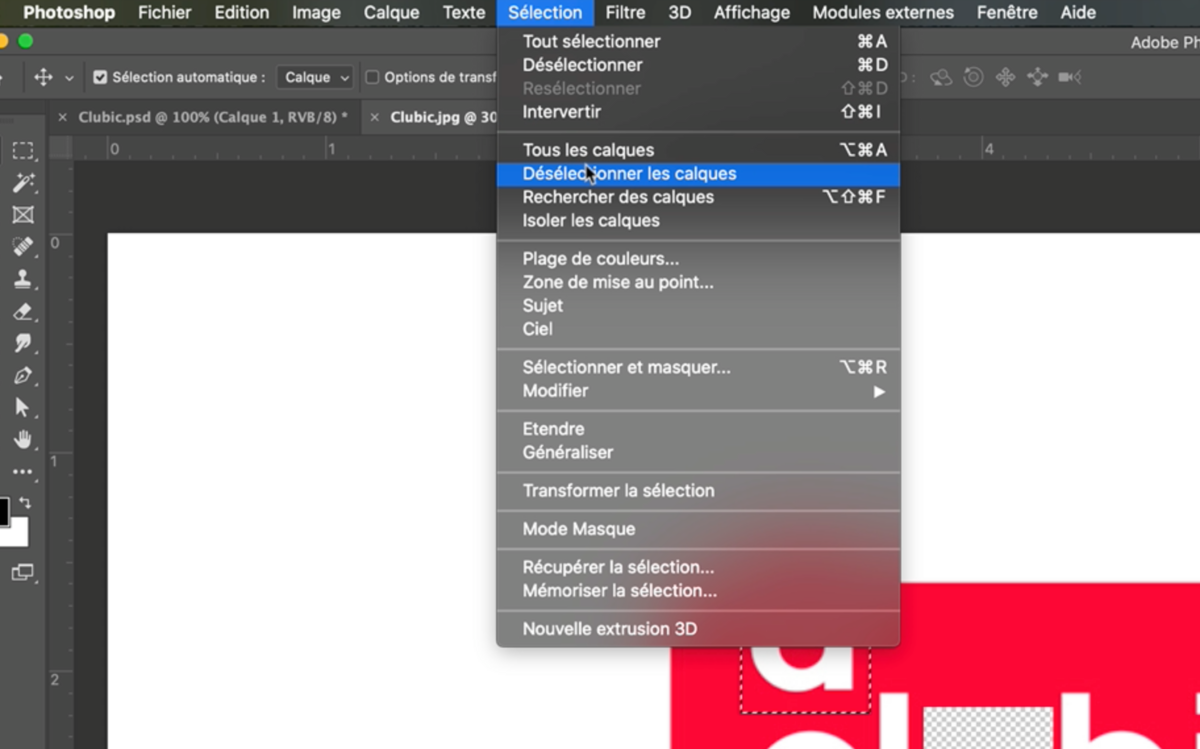
5. You moved your element and you want the selection dots to disappear?
Go to the Selection tab and choose Deselect Layers.
The dotted lines will disappear and your area will no longer be selected.
