In order to obtain precise GPS guidance in Google Maps, especially for journeys on foot, correctly calibrating the application is of crucial importance.
The famous Google Maps GPS guidance application is one of the most used to date. To obtain very precise geolocation and therefore avoid getting lost when traveling in an urbanized area, it is more than recommended to carry out the calibration proposed by the application. The handling is similar on iOS as on Android. For this tutorial, we are using an Android smartphone.
How to calibrate Google Maps?
How to check current location accuracy in Google Maps?
1. Access calibration settings
We start by opening the Google Maps application. Once the map is displayed, we locate the blue dot which indicates our current position. We click on this point.
2. Check Location Accuracy
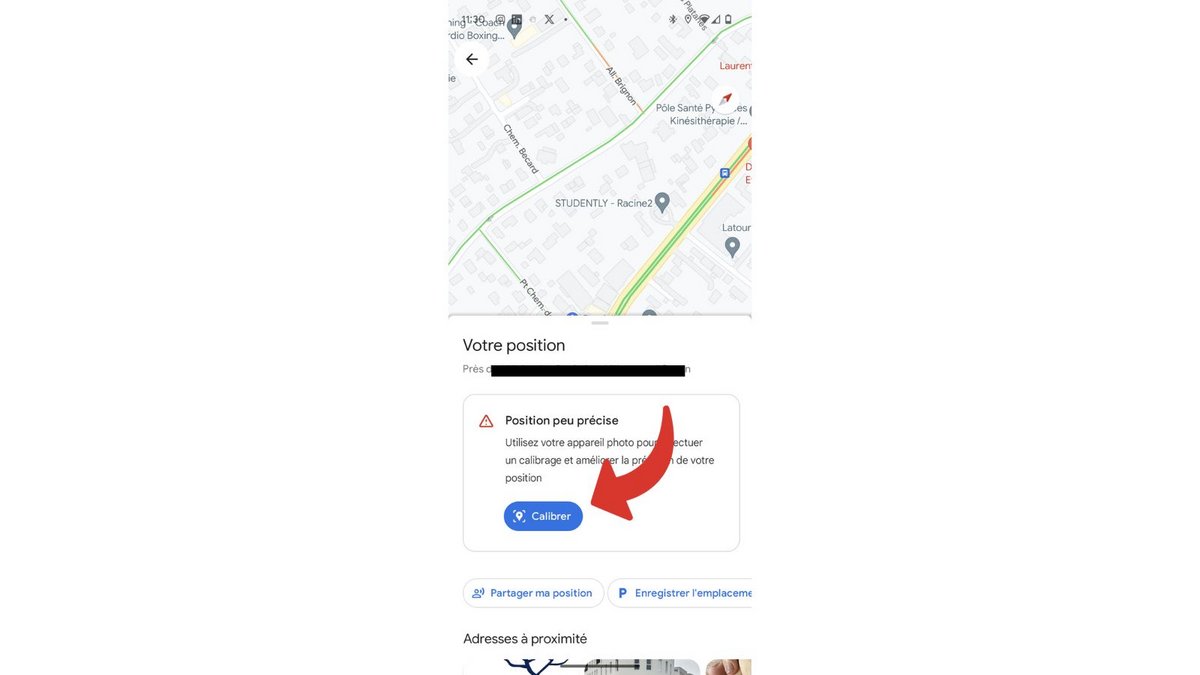
In the pane that opens, if the application indicates “poor position”, we invite you to read the rest of this tutorial to remedy this problem. Otherwise, your smartphone is already calibrated correctly with Google Maps.
Adjust geolocation accuracy in Google Maps
1. Access the calibration settings
As for checking this parameter, we open the Google Maps application, we locate the blue dot which indicates the current position and we click on it. A shutter opens. We click on the “Calibrate” button.
2. Approve camera access
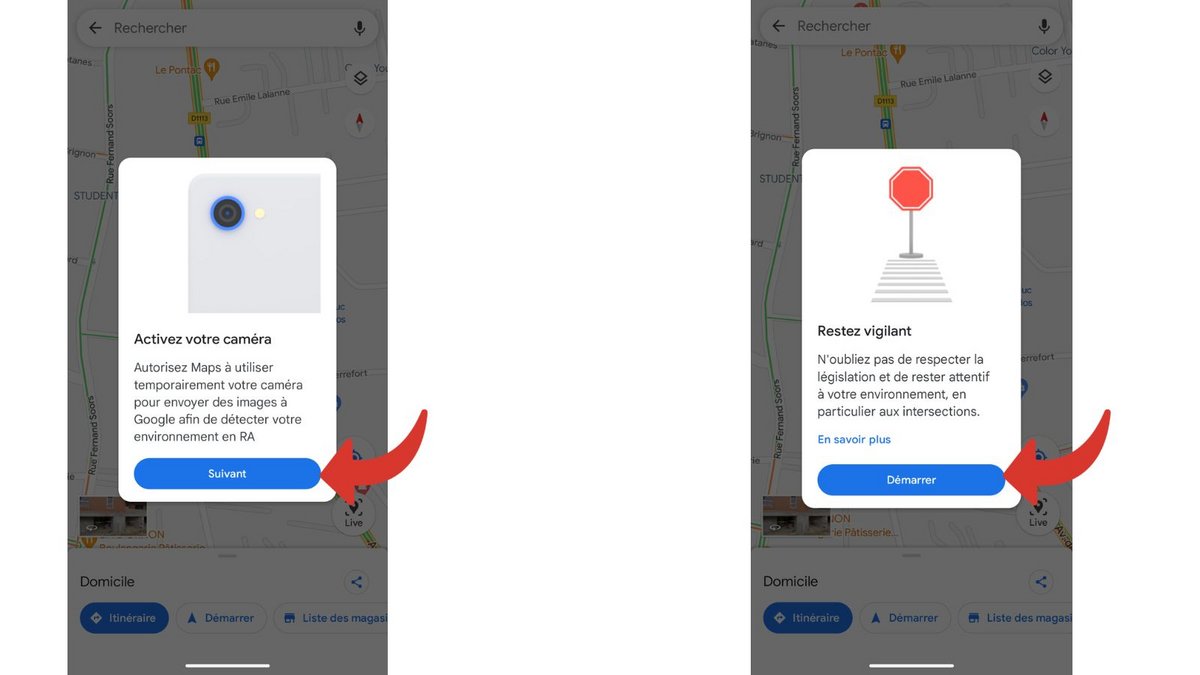
If a window authorizing access to the device’s camera opens, validate this request by clicking on “Next”. The next window indicates to pay attention to the surroundings during calibration. We press “Start”.
3. Orient the smartphone for calibration
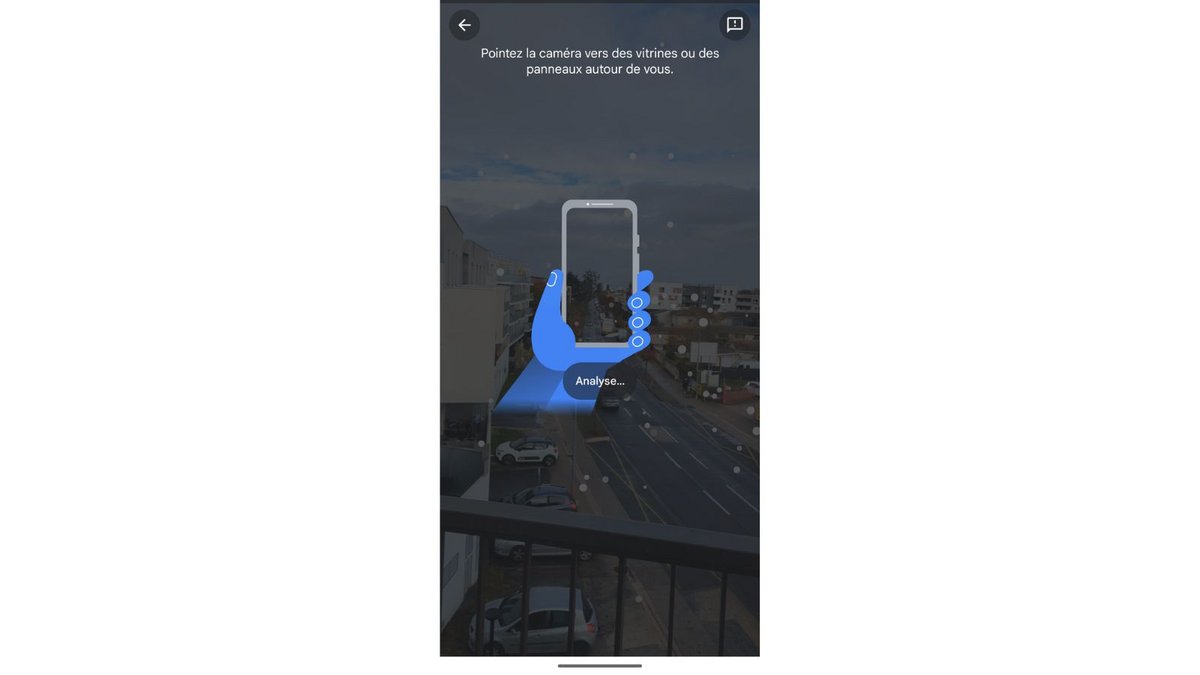
When the screen displays what the smartphone is filming, we orient the latter so as to bring into the visual field any shops and possible signs in the immediate vicinity. This action has the effect of allowing Google Maps to determine the user’s precise location. This window closes automatically once the application has determined the location. This process should only take 3-4 seconds.
Conclusion
If you followed the steps in this tutorial, your smartphone should now be calibrated for the Google Maps application. Your position is now more precise, making it easier to find streets in an urban journey from the screen of your smartphone.