Photoshop offers the possibility of creating many effects. We are going to discover together the Gaussian Blur which is widely used both to create a depth of field and to blur parts of your composition.
Definition: Gaussian blur is part of the attenuation filters. In Photoshop, the latter makes it possible to standardize the parts of an image by blurring them and therefore by harmonizing the details of it.
How to Create a Gaussian Blur in Photoshop?
1. Open the image on which you want to assign this effect.
File > Open
Look for your image in your computer
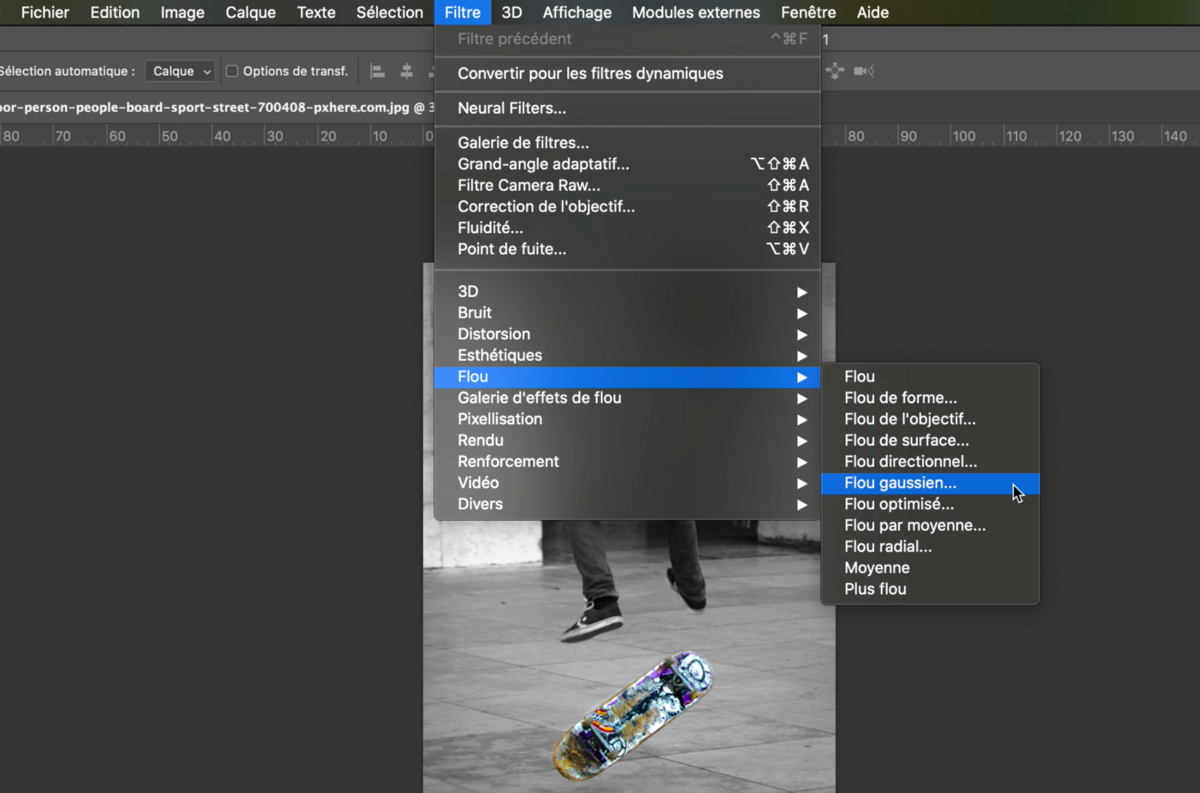
2. Go to Filter > Blur > Gaussian Blur
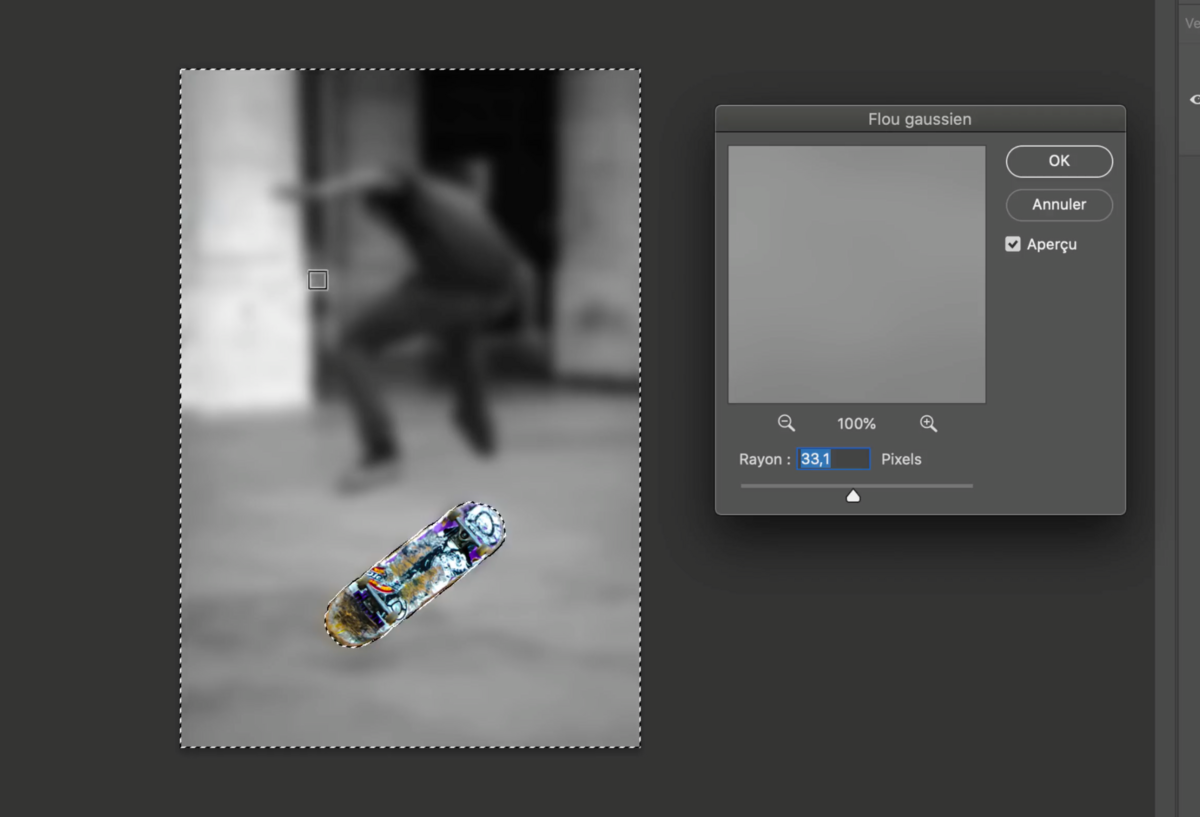
3. After validating this effect the Gaussian Blur window will open with different parameters available.
The (4) and (5) allows us to vary the intensity of the effect.
Simply enter a numerical value (4) or vary the cursor from right to left (5)
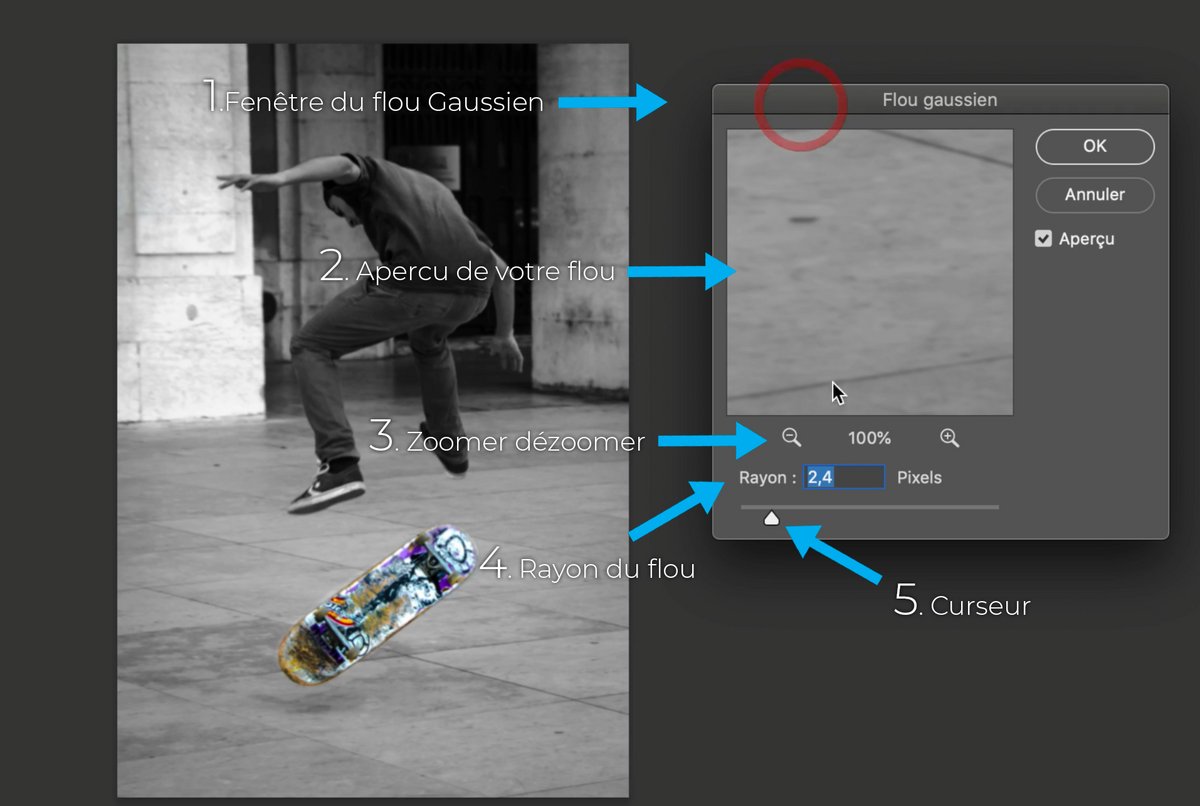
4. The larger this value, the more pronounced the blur.
Once the correct value click on OK to validate the effect.
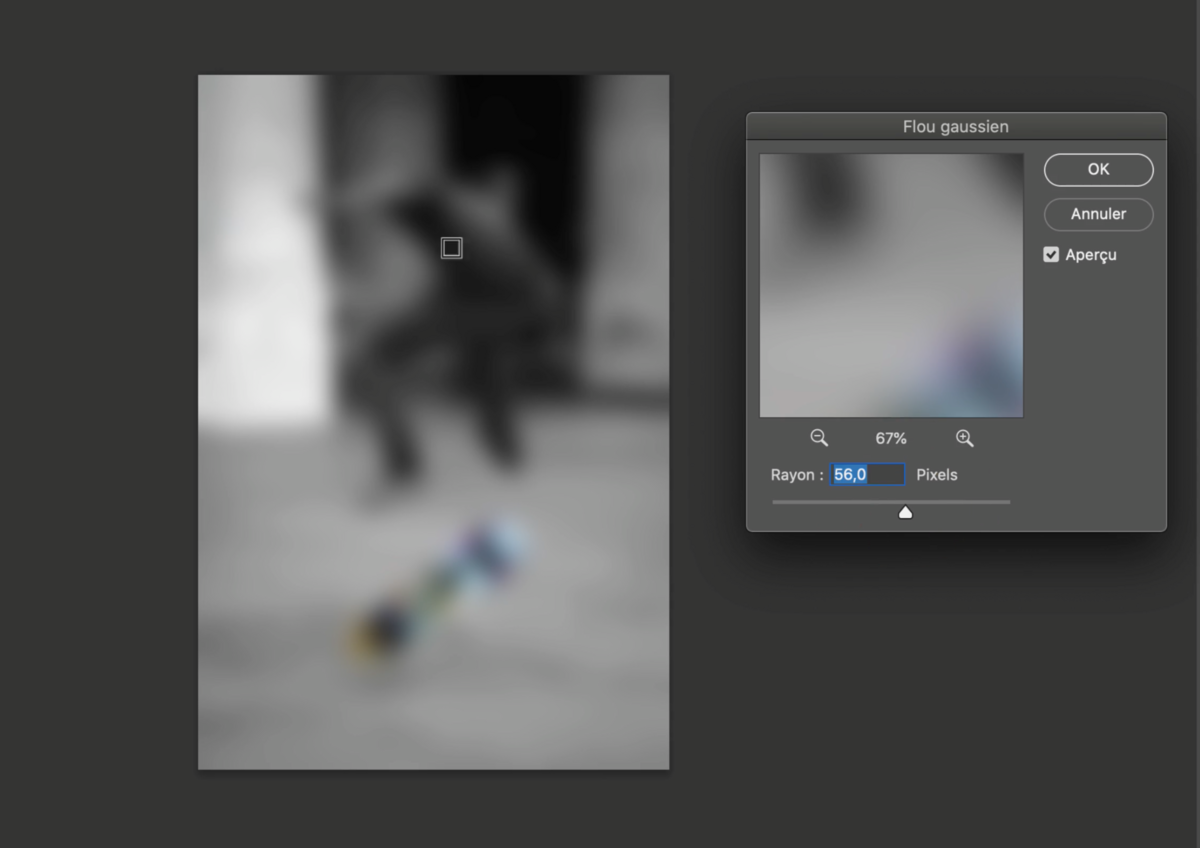
In this example the blur applies to the entire image because we have assigned it to the background layer.
How to blur only part of the image?
1. Select with your favorite tool the object or the part you want to isolate from the blur.
For the example it will be the skateboard.
Learn how to use the Quick Selection Tool.
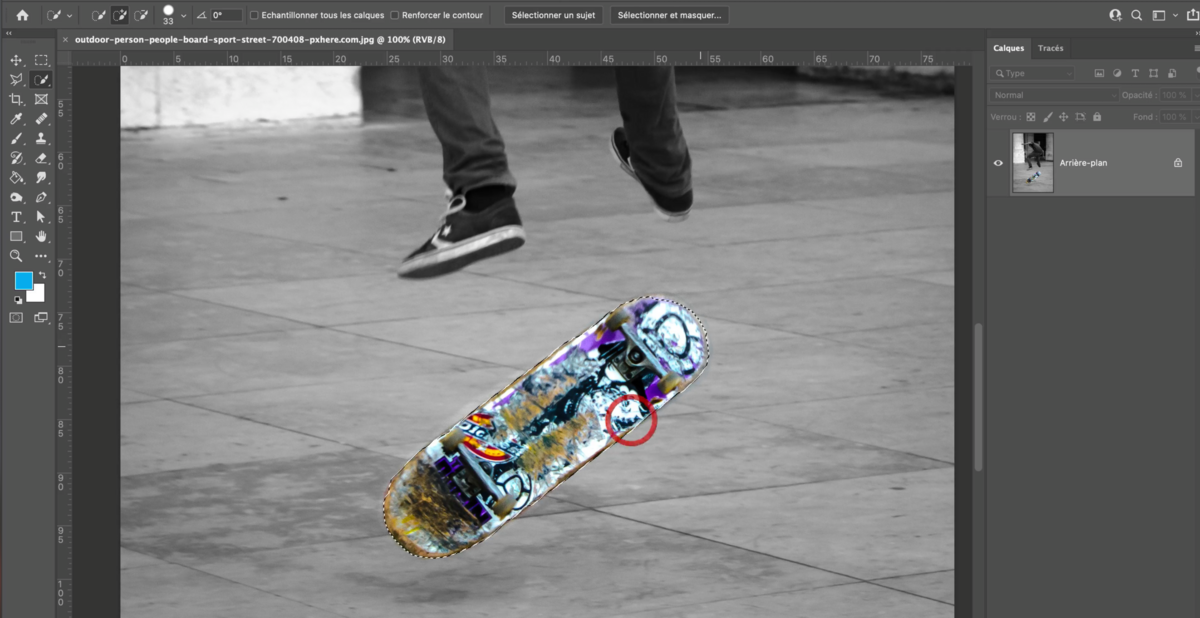
2. Invert the selection so that it is the background and not the object that is selected, otherwise the blur will be attributed to the skateboard
Go to the Selection tab > Invert
3. Window > Blur > Gaussian Blur
You will be able to interact with the parameters in the same way as before.
Now the blur applies to the background while the skateboard stays in focus.
Validate by pressing OK once you are satisfied.
.