Many times modified and improved over the course of system updates, Windows 11 notifications are now completely usable and, above all, customizable. In this tutorial, we explain what you can do and how to do it!
Now notified via a bell icon at the bottom right of the taskbar, Windows 11 notifications (message received, download, alert, etc.) are grouped in a dedicated box. But without settings on your part, by default any application can display content that is not always desired in this notification center or via less discreet banners. Fortunately, different options exist to fine-tune the behavior of these notifications. We will explain everything to you !
How to customize notification settings in Windows 11
1. Access notification settings
There are several methods to access the notification settings. From the settings, “System” section, or from a search in the start menu for example. But the easiest way is to go through the taskbar. Just right-click on the clock or the bell icon at the bottom right. In the context menu that opens, click “Notification settings”.
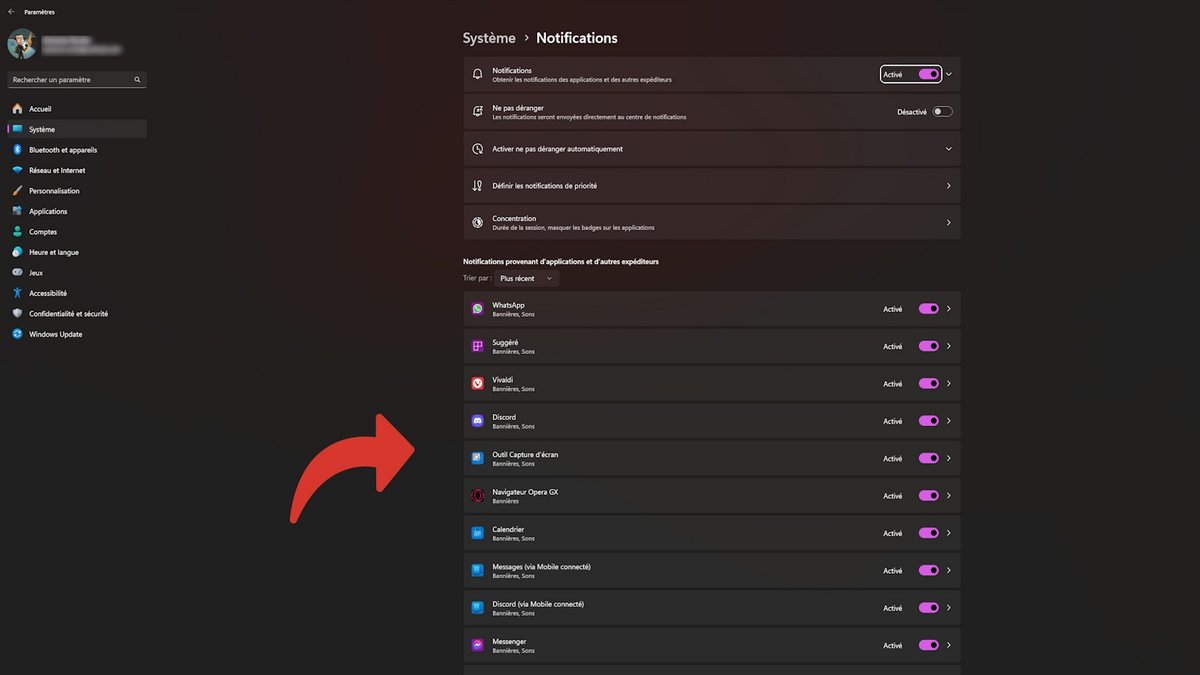
2. Configure notifications by application
In this menu, before exploring the submenus, you will notice at the bottom the list of applications which have or are not authorized to send notifications. A check mark simply chooses that, while clicking on an app’s row displays more options.
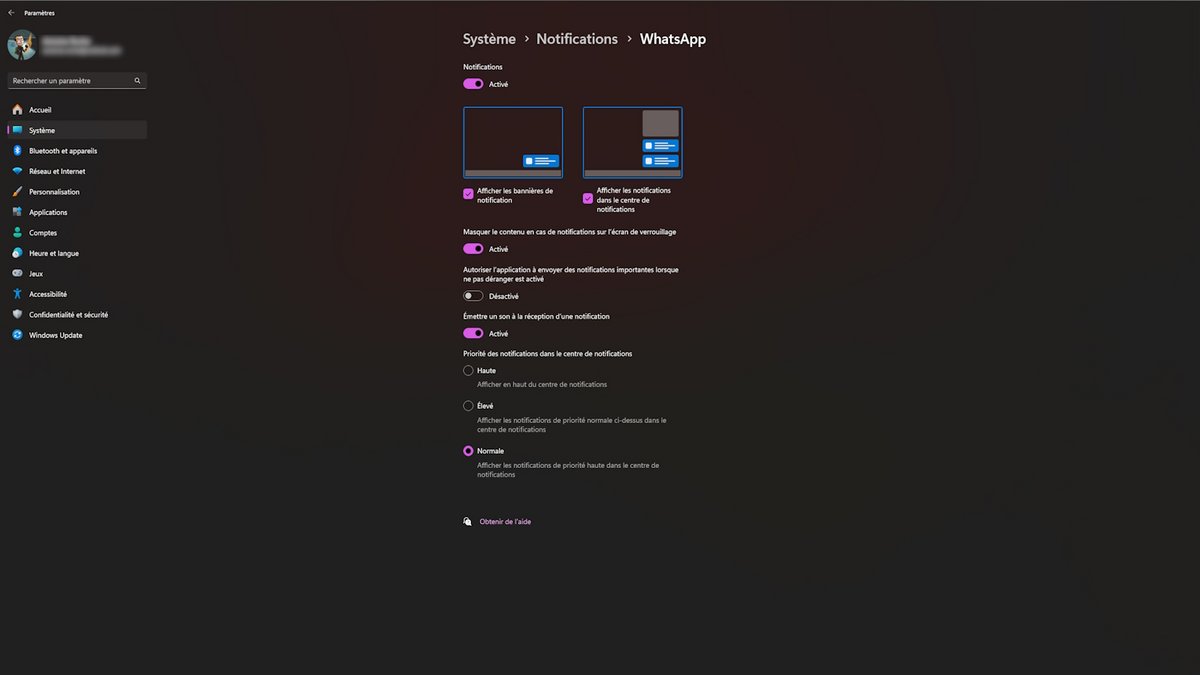
In this example, we have opened the WhatsApp notifications options. It’s up to you to choose how notifications are displayed (via a banner or just in the notification center), their priority level, whether or not they generate a sound or even whether they can display their content on the screen. lockdown. This is also where you can decide whether they appear even when do not disturb mode is activated. We’ll talk about the latter in a moment.
3. Configure notifications more generally
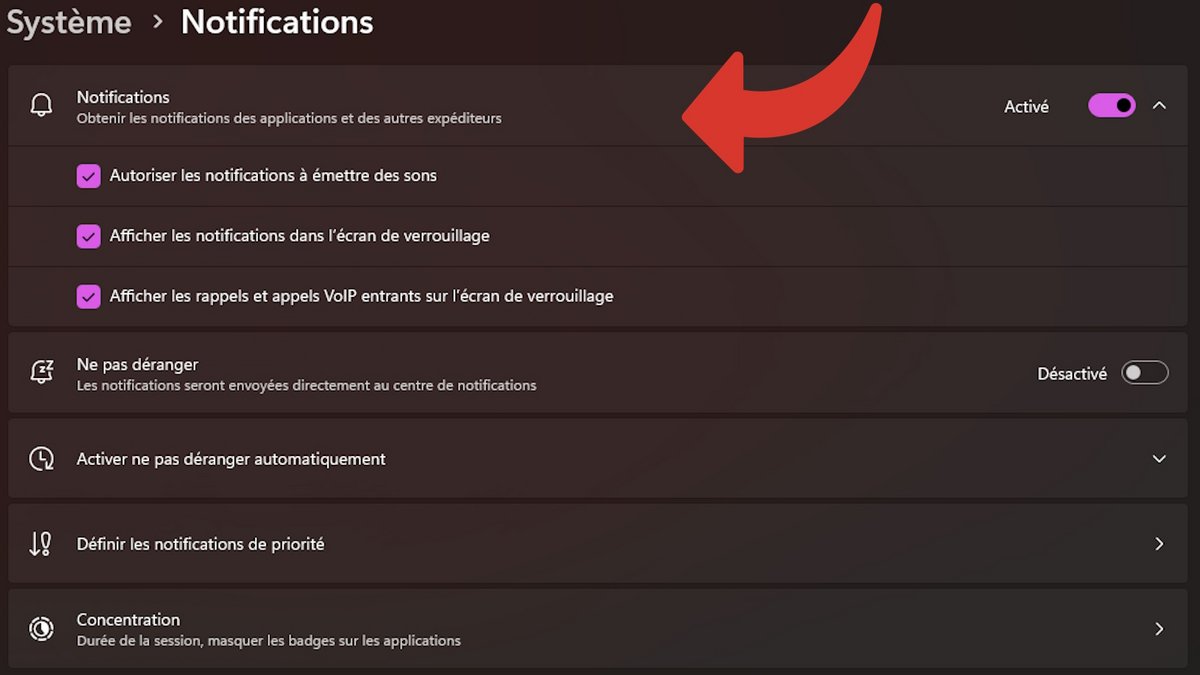
Back in the menu dedicated to all notifications, five submenus are offered. The first directly allows you to completely deactivate the notifications system. Clicking on this line opens three additional, finer-grained options for managing sound and display on the lock screen.
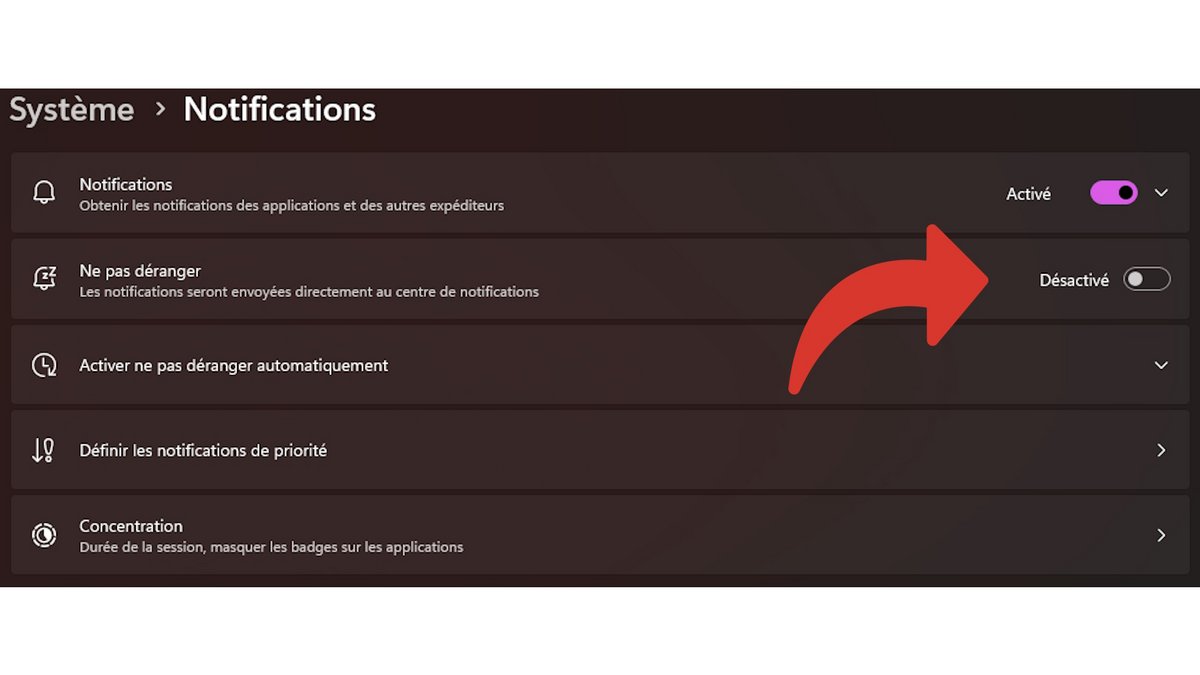
Want to activate Do Not Disturb mode? You can do this from the little bell icon that sleeps in the notification center, or from here in the options. This mode allows you not to display notification banners (which are however present in the notification center) so as not to be disturbed.
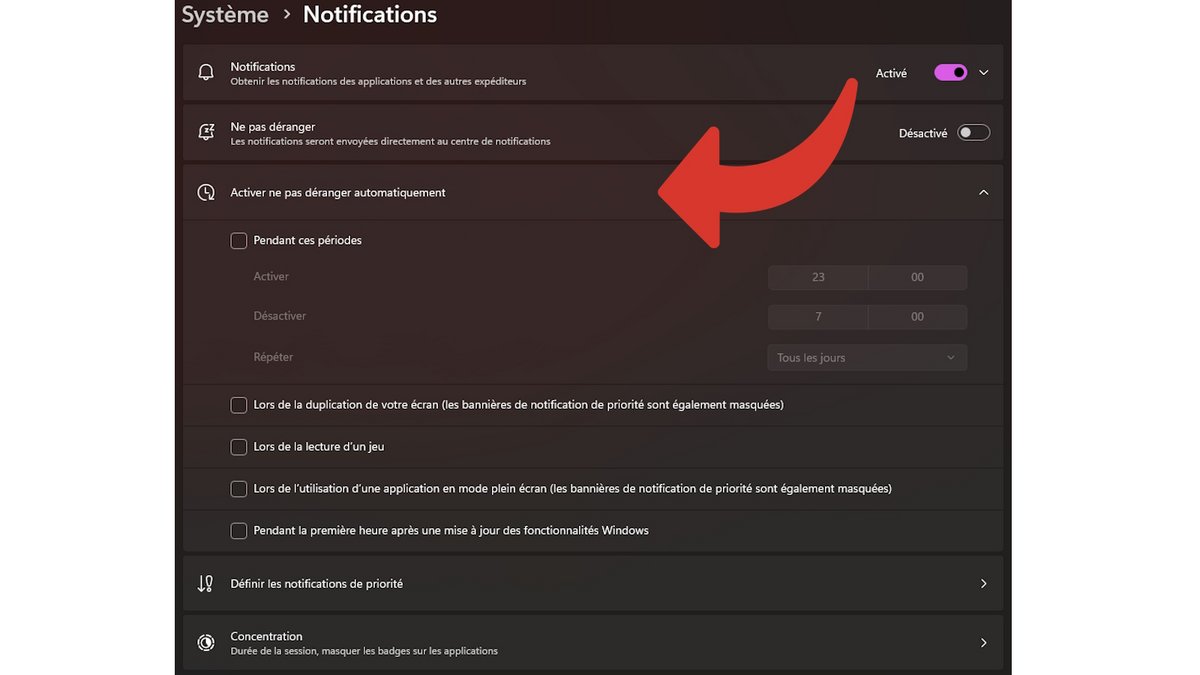
However, it may be more practical to let it happen. In the third submenu of the Notifications menu, you can automatically activate Do not disturb mode according to time slots, when a game or a full screen application is launched, if your screen is duplicated or even during the first hour after a Windows feature update.
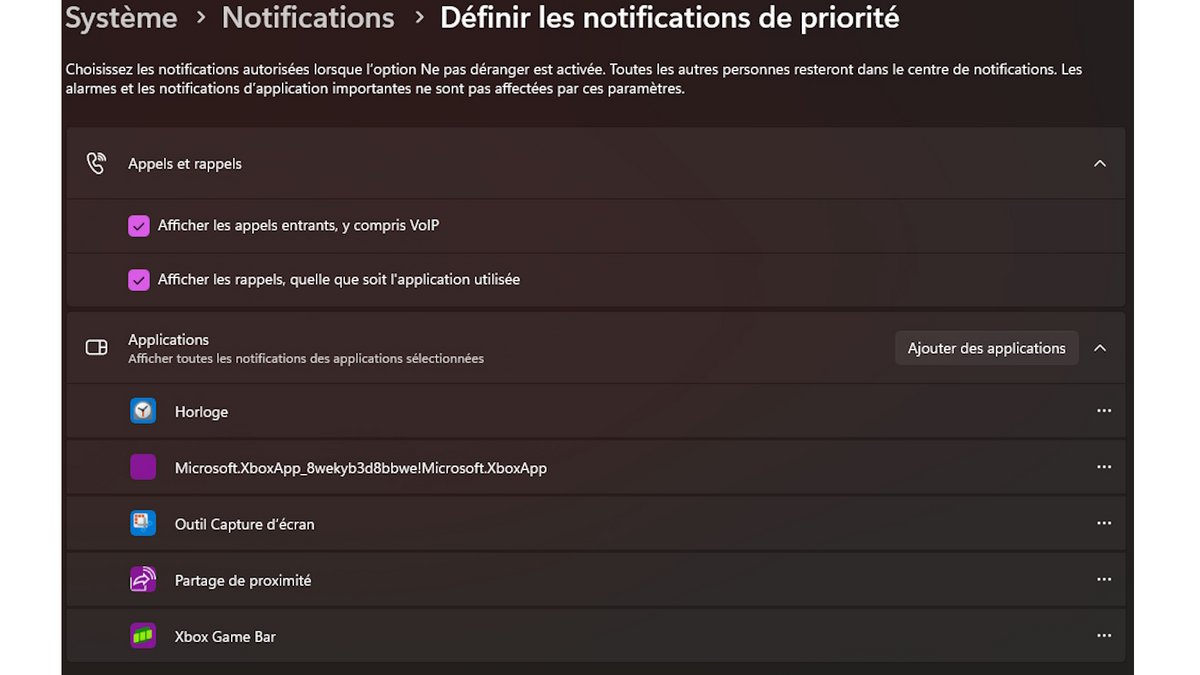
The penultimate submenu, “Set notifications by priority” opens a dedicated menu and not just a box like the others. This is where you’ll be able to manage the behavior of incoming calls, reminders, and which apps you want to see or not when Do Not Disturb mode is enabled.
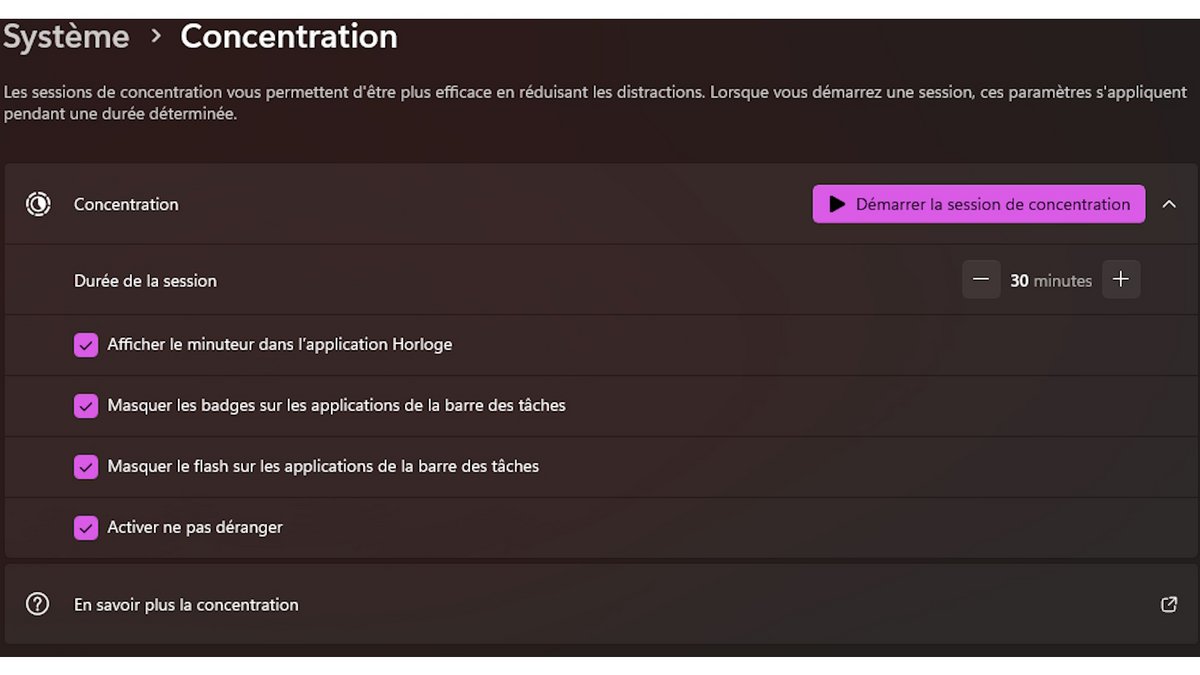
Finally, the last submenu focuses on the Concentration system. As its name suggests, this allows you to concentrate on your productivity during the period of your choice by limiting nuisances. After having defined a duration, as well as parameters (display or not of Do not disturb mode, badges and flashes on the taskbar applications and a possible timer in the Clock application), simply click on “Start concentration session”.
And There you go ! From now on you should only receive the Windows 11 notifications you need, in the form that suits you and only at the appropriate times!