Updating your iPhone from your Mac is an operation from another era, in today’s wireless age. However, this method has several undeniable advantages. We explain how to update your Apple phone in this guide!
For ages, your iPhone or iPad can be updated directly from a wireless network or your carrier’s mobile network. The different versions of iOS and iPadOS are in fact offered directly OTA (for Over The Air) and can be downloaded in a few minutes, depending on the speed of your internet connection.
Apple, however, allows the installation of an update on its mobile device from a Mac. From the release of the iPhone in 2007 to the iOS 5 version in 2012, using a computer was the only solution to install the latest iOS and iPadOS patches on your iPhone and later your iPad. Despite the advent of Wi-FI connections and very high speed, it is still possible to use a good old cable and a Mac to download the latest version available and update your smartphone or tablet.
A solution that is totally outdated today? Far from there ! A wired installation of iOS and iPadOS updates is even more than practical for certain special cases.
Why update your iPhone or iPad on a Mac?
You probably know this if you own an iPhone or iPad: the default storage offered by Apple is very limited. The top prices of each smartphone or tablet range only feature 64 or 128 GB of storage, and these can quickly fill up after just a few weeks of use. Installing applications and demanding video games will eat up many gigabytes. If you also tend to take dozens of photos every week, your storage will quickly become full.
Are iOS and iPadOS updates getting bigger and bigger? A simple routine version represents several hundred megabytes. For a major version, like iOS 17 and its many new features, the installation package represents several gigabytes to recover on your phone.
To avoid any download problems, and not have to uninstall some of your software for the occasion, it is possible to use your good old Mac, which will retrieve the file and decompress it on its own storage before sending it. on your iPhone or iPad. Using macOS to update your device can also speed up the operation, if your computer is connected to the Internet with an Ethernet cable.
New for several years: it is no longer iTunes which is responsible for the operation of updating the iPhone and its synchronization, but rather macOS through the Finder. Apple has in fact put an end to the development of iTunes for some time, to make way for new applications Apple Music, Podcasts or Apple TV.
On PC, iTunes is still available, but it is only a matter of weeks before Apple announces its definitive disappearance from Windows computers.
How to update your iPhone and iPad with a Mac?
1. Connect your device to your Mac
For iPhones and iPads, use the Lighting or USB-C cable that came with your device, or a third-party accessory that you subsequently purchased. Most current Macs today have USB-C ports to connect them to other equipment. Otherwise, you can use an adapter, Apple or not, to plug your phone into your Mac.
2. Allow connection with Mac
For security reasons, connecting your iPhone or iPad to the Mac will not be instantaneous. You will need to unlock your iPhone, then enter the 4 or 6 six-digit PIN code, and validate the connection. Once done, your iPhone will be added to Finder. You will find it in the list of connected devices, on the left side menu.
3. Back up your iPhone
This is the most important step before updating your iPhone software version. Indeed, a technical problem may arise, even if installation procedures are increasingly secure. In IT, we are never safe from a bug, and any precaution is a good idea to take.
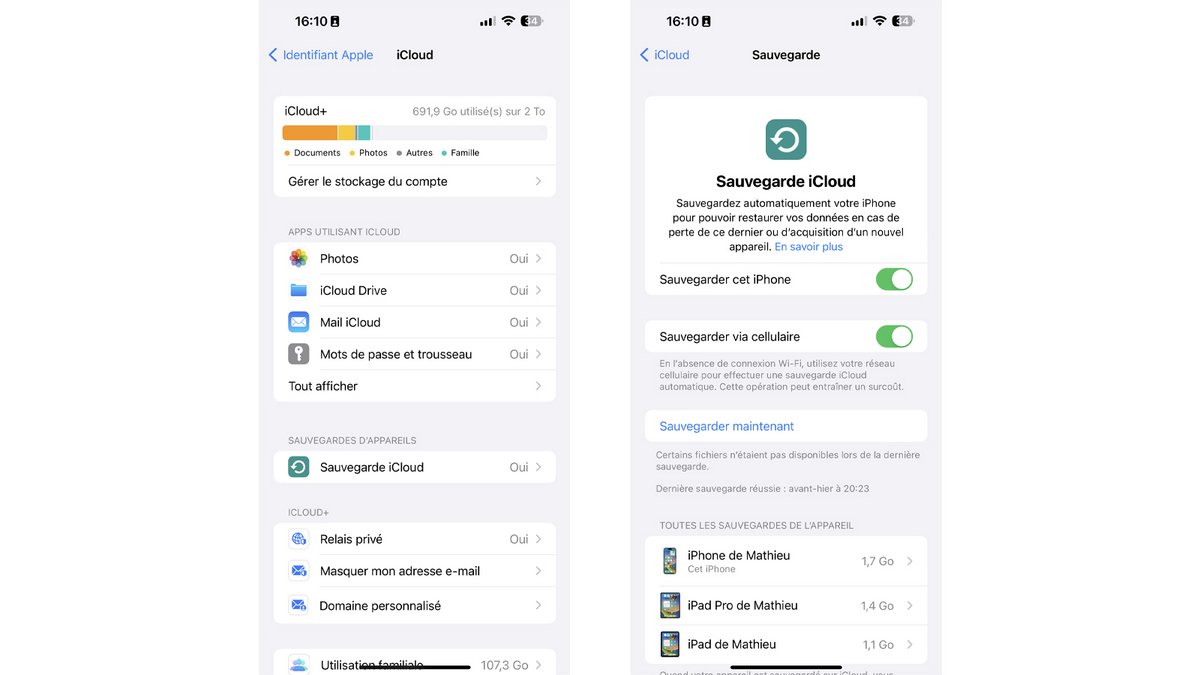
To back up the content of your iPhone, such as photos, videos or even messages, you have two methods. The first is to use your iCloud online storage. If you have automatic backup enabled, most of your data is safe. To make a recent backup of your iPhone, go to the “Settings” application, then click on the first section with your name written, “iCloud”, “iCloud Backup” and finally “Back up now”.
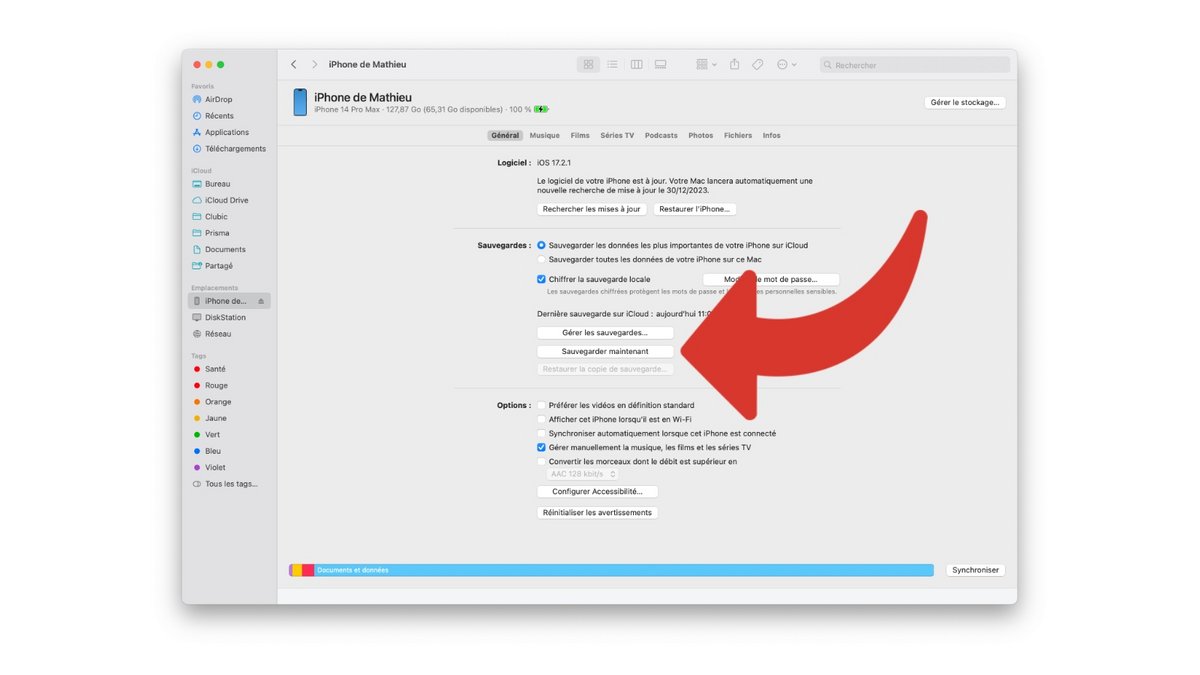
If you want to back up your data on the Mac, open a Finder window, then click in the sidebar on your iPhone, and finally on the page that appears, click “Back Up Now”. For more explanations on this subject, we have dedicated a complete guide to explain how to back up your iPhone on your Mac.
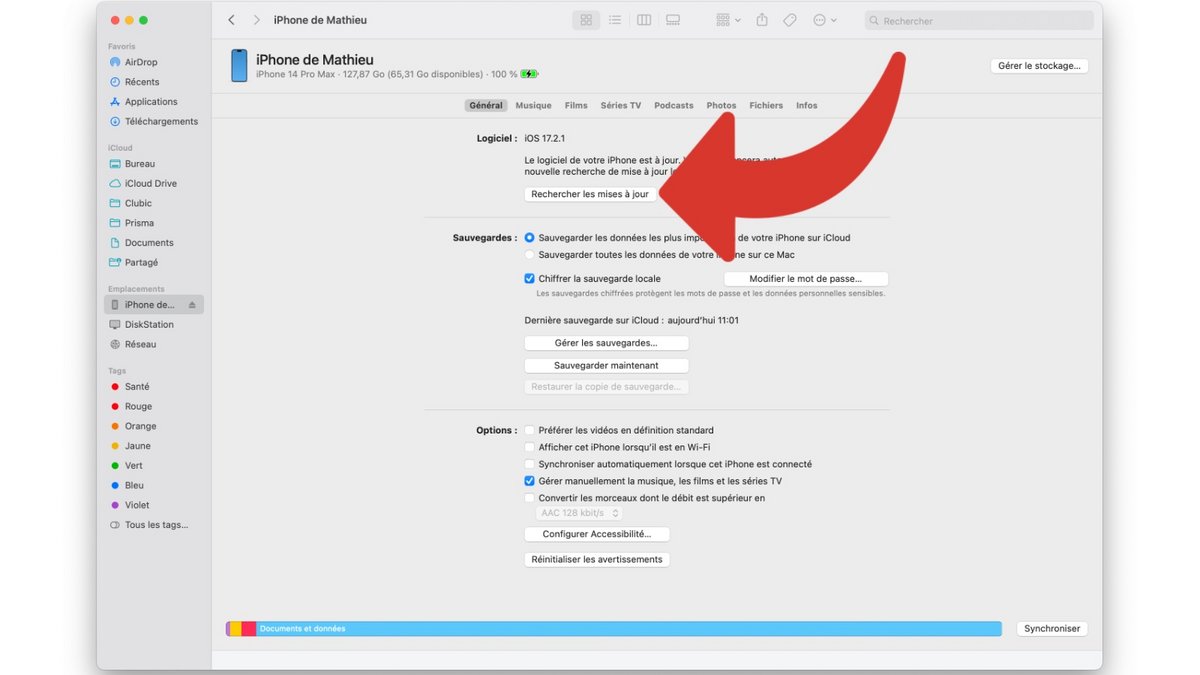
4. Update your iPhone
Once your phone data is safe, it’s time to upgrade. It could not be easier ! Simply, in the Finder window open on your Mac, click on “Check for updates”. You will then have to validate the download of the installation package, which can represent several gigabytes, then wait a few minutes for the installation. Your iPhone will restart several times during the operation, and must of course remain plugged in during the entire installation. Once the update is complete, you can unplug your device and get back to business.