The Steam Deck owes its great popularity to its compatibility with many games, but also to its great customization. It is possible to do what you want with it, and as long as you lack a PC controller, this portable console can manage the interim by carrying out a few operations that we cover in this tutorial.
In addition to its incredible compatibility with the vast majority of games accessible on Steam, the Steam Deck enjoys great popularity among fans of portable consoles thanks to its modulation and customization potential. This makes it a tool capable of doing just about anything one could hope for.
Certainly, the Valve console runs under Linux, which does not make it the most accessible object for DIY, but by looking a little, and this is the magic of the Internet, the console can, with a little help, carrying out a whole bunch of tasks that would have been difficult to imagine involving her. Among them, did you know that the Steam Deck can be used as a PC controller?
Use your Steam Deck as a PC controller using Remote Play
First of all, it is important to point out that Remote Play is undoubtedly the simplest method to transform your Steam Deck into a PC controller, but by its nature, this operation requires a good internet connection.
This is essentially a method similar to that of Steam Link, except that it requires less manipulation on the part of the user, and is therefore more practical to set up for ordinary people, especially since the Steam Deck UI now integrates it perfectly.
1. Connect the PC and Steam Deck on the same network
Since we are using Remote Play here, it is important to make sure that the two devices are connected to the same network. The PC can go through an Ethernet cable for a better connection, and the Steam Deck will be connected via Wi-Fi.
Note also that by using a Dock for the Steam Deck, it is possible to connect it via Ethernet as well, which will make the streaming experience almost perfect. Next, it will be necessary to download the game you want to play on your PC through Steam (it is not necessary to download it to your portable console).
2. Access Remote Play settings on PC
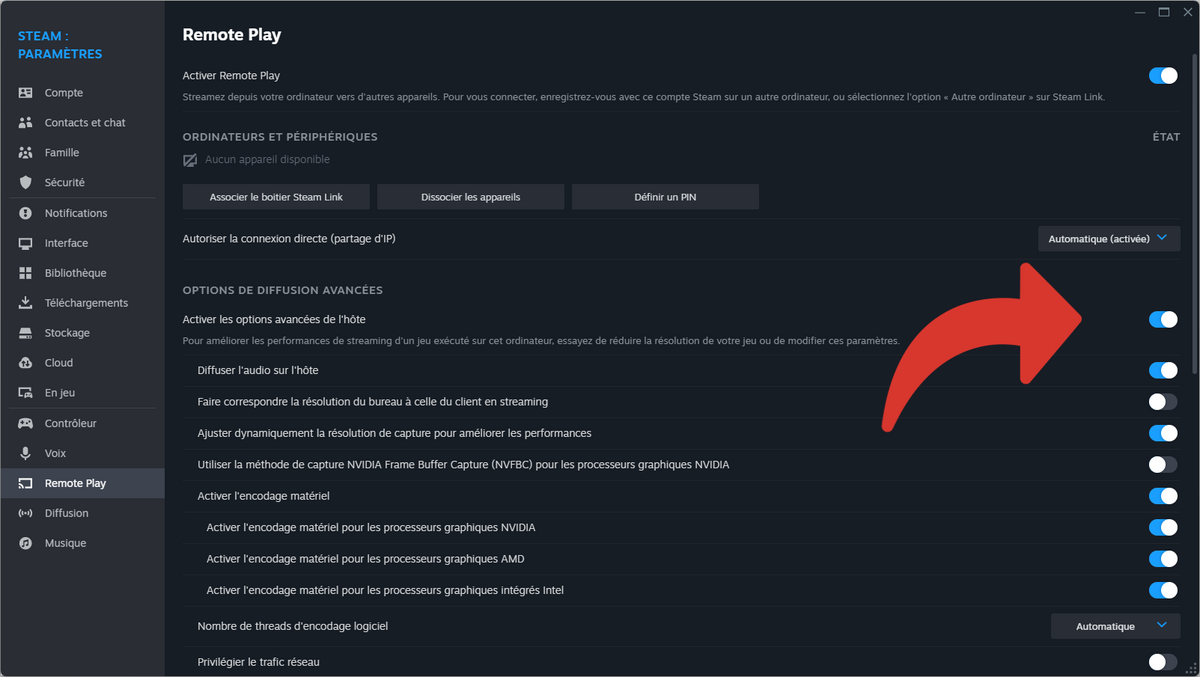
To access the Remote Play settings, simply click on the Steam button, located at the top left of the application window, then access Settings. In the new window, then click on “Remote Play”.
3. Apply the following settings
First of all, check that Remote Play is activated. Next, click “Enable advanced host options,” which will give you access to many new options. In these, make sure that the “Broadcast audio to host” option is enabled.
The idea is to remove any form of media appearing on the Steam Deck, since you are not going to use the latter’s screen to play, with the aim of minimizing the potential latency between controller input and the action on the screen.
4. Launch the game
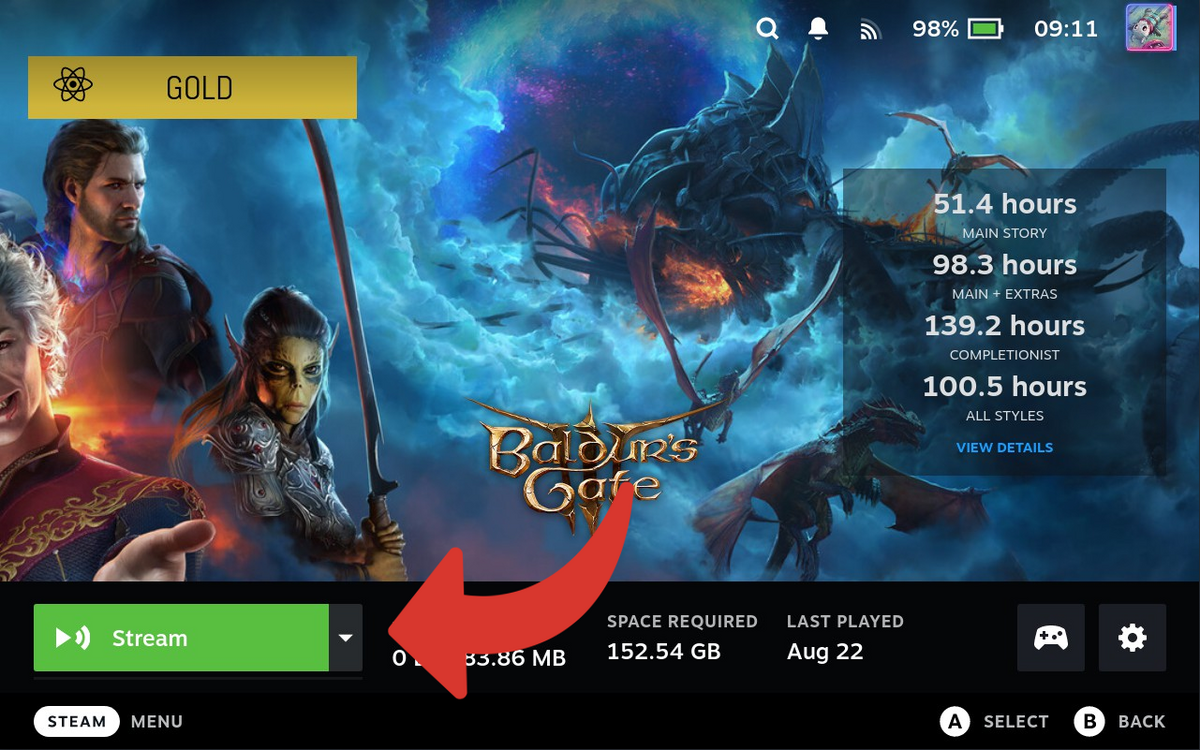
Now access your Steam Deck. On the latter, choose the game you want to play (checking that it is already installed on your PC), then choose the “Stream” button, displayed instead of “Play”. This will allow you to directly launch the game on your PC without having to go through your Steam Deck screen, while controlling the action from your PC using your portable console.
Advantages and disadvantages of this method
While the Remote Play method is certainly the simplest to implement, with the tools already put in place by Valve, it also has a major drawback: it requires a good internet connection.
Furthermore, it may happen that a certain latency time between an action carried out on the Steam Deck and its appearance on the screen obstructs the fluidity of the game. In other words, it is a good method for troubleshooting, but not necessarily the more optimal in a regular setting.