Installing the latest iPhone update can cause some pretty annoying problems on a daily basis, including charging issues. Don’t panic, we have the solution!
iOS 17 has finally been available for a few days, and millions of iPhone owners have the pleasure of trying the many new features included in this update. If for the vast majority of them, the installation of Apple’s latest operating system was carried out without incident, some may still have experienced some difficulties after a few hours.
Among the recurring problems, we often find excessive heating of the device, or some slowness, while iOS 17 carries out various background and indexing tasks. We were also able, and this is more serious, to read testimonials on the web from certain users who were no longer able to charge their iPhone after updating to iOS 17.
Don’t contact the Apple Store right away. We give you some tips to apply immediately, which could allow you to solve the problem and avoid battery dryness on your iPhone.
How to fix your iPhone charging issues in iOS 17?
1. Restart your iPhone
This advice might seem stupid, but in the majority of cases, a simple restart of the iPhone can solve many problems, such as your phone not charging. After several weeks of use, tabs and applications open, cache files created, a good cleaning is necessary. Restarting your iPhone will allow your smartphone to correct application errors, and could resolve the problem.
If you’ve never restarted your iPhone (which is the case for so many users), simply press the side button of the phone, on the right edge, and hold your finger until you see the power off button on the screen. Then swipe this button from left to right.
Wait a few seconds for the shutdown to take effect; the system may take a few moments before switching off. Then press the side button again for a few seconds. An apple appears on the screen, you can release the side button. The system is restarted.
Even simpler, you can also go to the phone’s settings, then click on “General”, and finally click at the bottom of the screen on “Turn off iPhone”. Slide the on-screen button from left to right, wait for the smartphone to completely shut down and finally press the side button to restart the device.
2. Perform a force restart of your iPhone
If a simple restart isn’t enough, you can try what’s called a force restart of your iPhone. To do this, you don’t need to go through a menu.
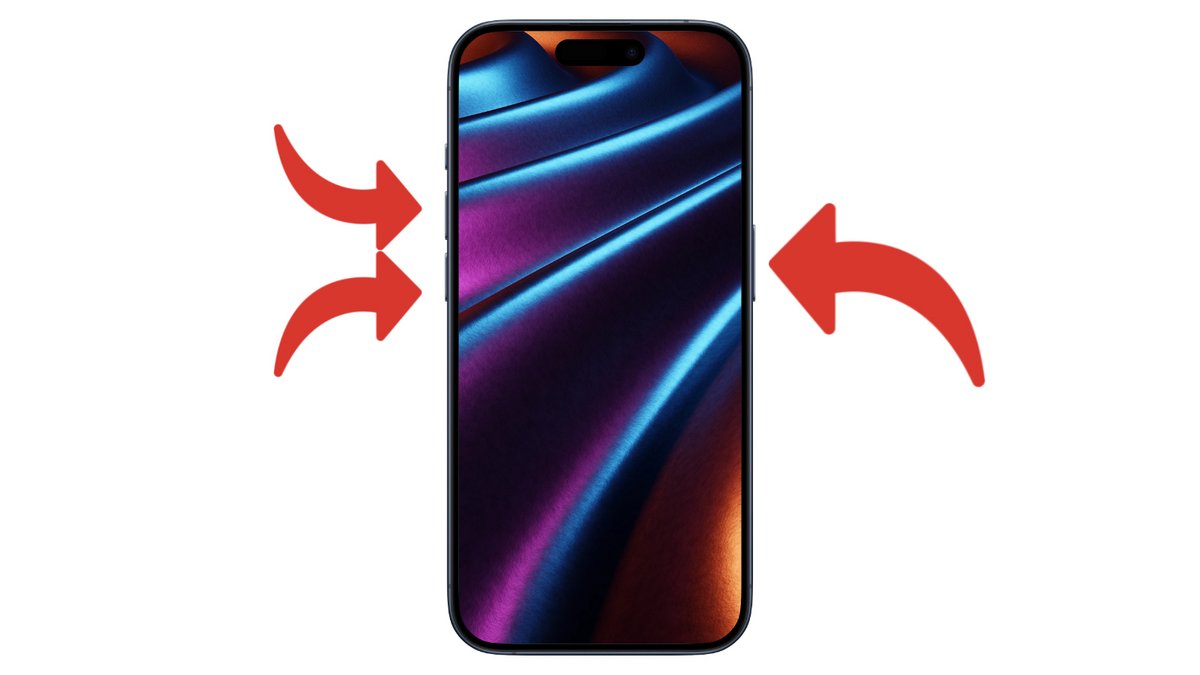
For iPhone 8, and then hold down the side button of the iPhone. Hold your finger on the button for several seconds until the iPhone turns off and displays the Apple logo. At this moment, and only then, release pressure on the side button.
For older models, all you need to do is keep your finger pressed on the On/Standby button and the main button. For iPhone 7, you need to keep the volume down button and the Sleep/Wake button pressed at the same time. Wait for the Apple logo to appear on the screen before releasing the buttons.
3. Update your iPhone
The launch of a new version of iOS brings its share of bugs and various software problems, and restarting problems can be one of them. For this type of particularly blocking problem, Apple quickly offers fixes, via software updates.
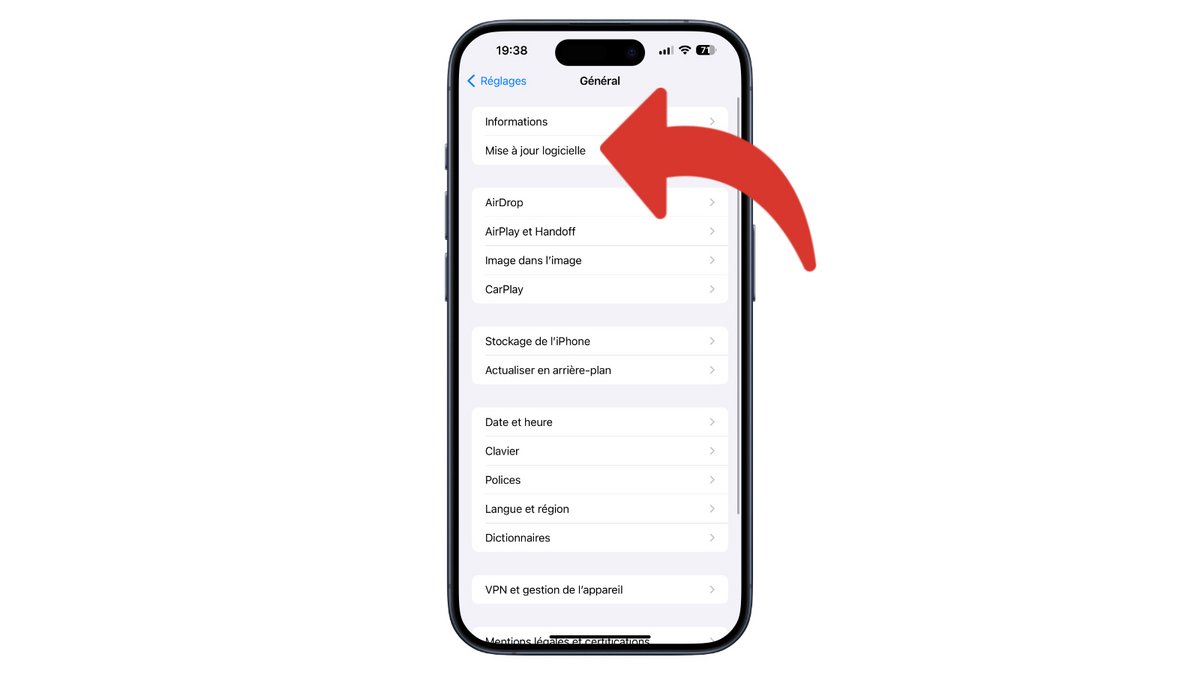
To check if you are up to date, go to the “Settings” app, then click on “General” and finally, click on “Software Update”. If a new version is available, click the “Update” or “Update Tonight” button to start downloading and installing when your iPhone is charging and you are sleeping.
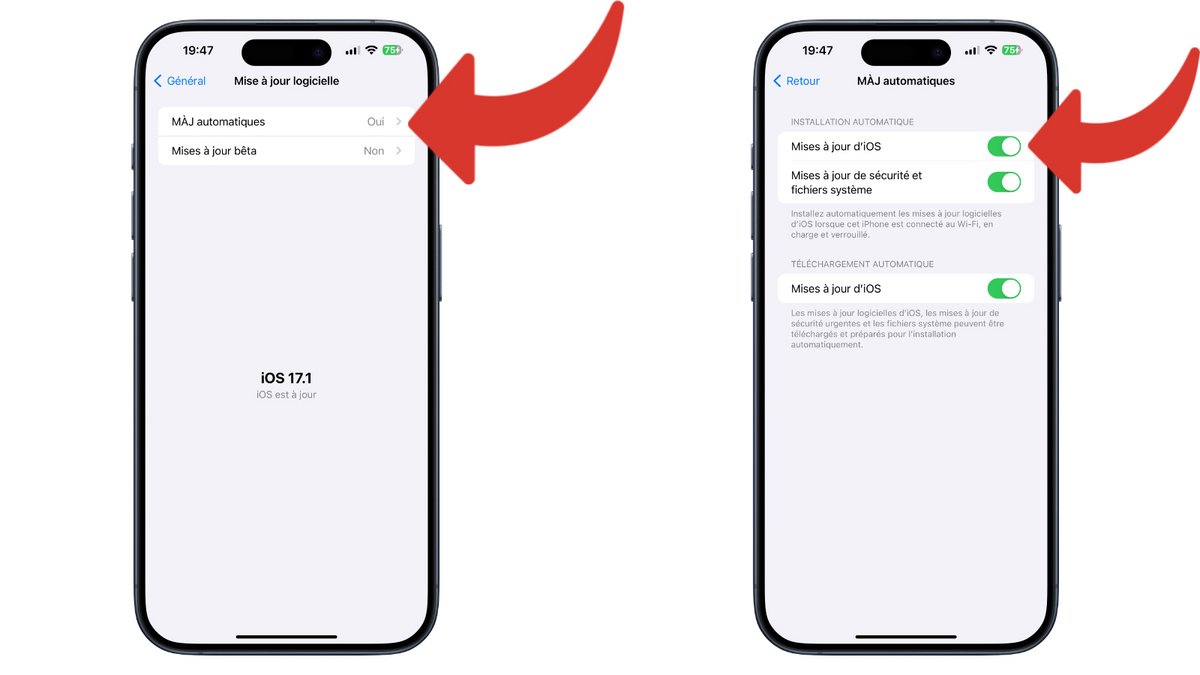
Did you know ? You can automate the downloading and installation of iOS updates so you no longer have to think about it. In the “Software update” section, go to the “Automatic updates” section, and check all the options present. When a new version of iOS is offered for download, as well as security patches, they will be picked up within a few days by your phone and installed overnight, when the latter is charging.
4. Clean your connector
If you charge your iPhone via a Lightning or USB-C cable, it may be that through handling and being in your pocket or bag, the ports on your phone are filled with dust or small textile waste. .
To clean it, we invite you to grab a toothpick to access the inside of the port and collect the waste found there. However, be careful not to force it, so as not to damage the connector.
5. Check your cable and charger
A Lightning charging cable, especially one from Apple, can become damaged over time. If yours shows some signs of wear, such as a worn coating, it’s time to replace it with a new model.
iPhone may also block charging if your cable or charger is of poor quality, and may damage your phone. So check that your accessories are certified by Apple, or come from a recognized brand. Avoid cables and chargers of dubious origin as much as possible, which could cause irreversible damage to your beloved phone.
6. Reset your iPhone
If all these tips have not worked, the last solution available to you is to reset your iPhone.
To do this, you will first need to make a backup of your data. To do this, you can either use your iCloud storage space, by going to the “Settings” application, then click on the section at the top of the page which displays your profile photo and your name. Then click on “iCloud”, then “iCloud Backup”. Finally click on “Back up now”.
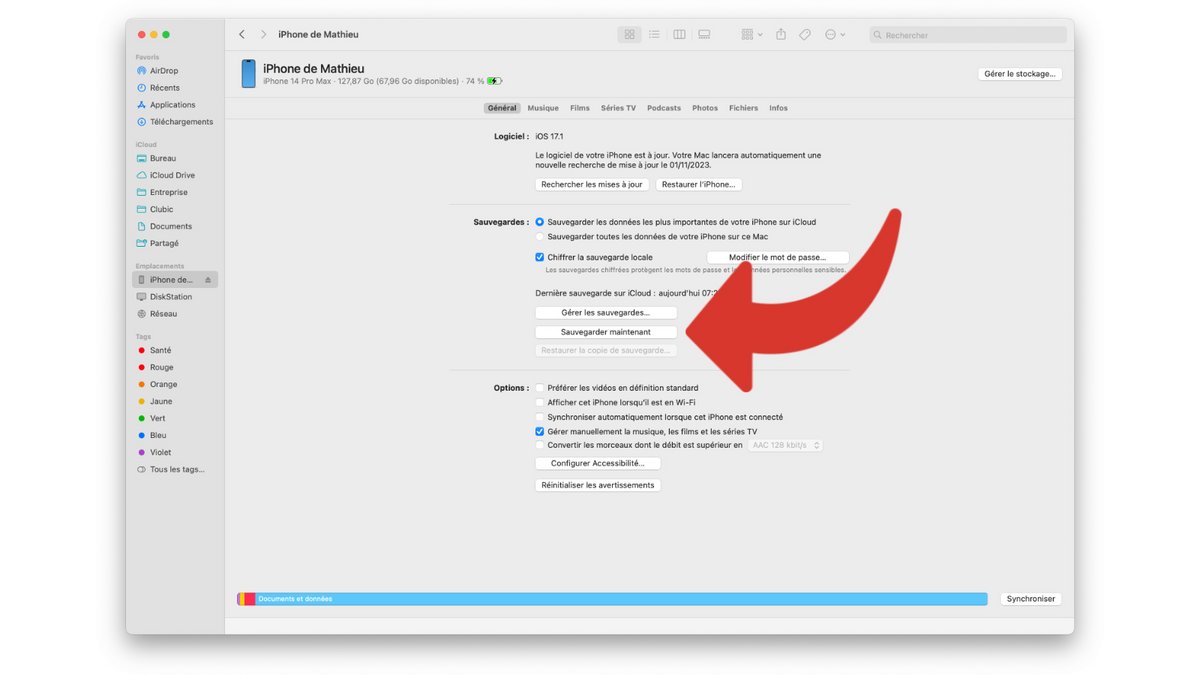
If you want to use your Mac or PC, connect your iPhone to your computer using a Lightning cable or USB-C for iPhone 15. The Finder (on Mac) or iTunes (on Windows) will open. open a window dedicated to managing your iPhone. Check the “Back up your iPhone data to this PC/Mac” option, then click “Sync” to start backing up all your data.
Once your data is safe, connect your iPhone to a computer, then click “Restore iPhone.” The operation takes around ten minutes, time for your PC or Mac to recover the latest version of iOS, erase all the data from your smartphone and reinstall the operating system. You can then recover your data and applications by restoring the backup created previously.
7. Contact Apple Support
If all these tips failed to fix your iPhone’s charging problem, the last possible option is to contact Apple’s support teams. You can contact them by phone, or can use the “Apple Support” application, available on the App Store. By connecting to your Apple account, you will find all of your devices, choose your damaged iPhone and initiate a discussion by phone or chat with an advisor to request a repair. Depending on the age of your phone or the status of your warranty, fees may be charged by the manufacturer.