.png)
Quickly crop or make a photo smaller, but preferably without installing a photo editing program first? This can be done online, for example with the free website fotokleinen.nl.
Edit photos with online tool
There are countless sites on the Internet where users can make simple adjustments to photos. Think of reducing the size or cutting something off the image. Handy, because installing a program or app is no longer necessary. On the website photo-reducing.nl you can easily reduce images to the desired size. Or crop photos to make them perfect as a profile picture on Facebook, picture on Twitter or photo on Instagram.
Disturbing advertisement

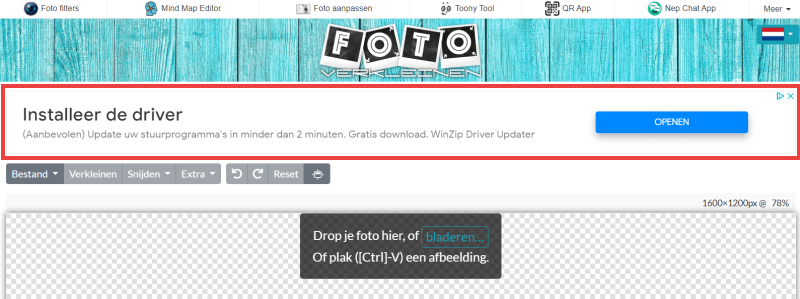
Please note: this page contains an advertisement in an inconvenient place, namely between the functions of the website. The ad has large text and an eye-catching button. This can be confusing. So just to clarify: You can ignore the ad. If you (accidentally) click on the advertisement, click away from the window that opens. Do you need to install something all at once? Also click this away via the cross.
If you are (more often) bothered by advertisements, you can also install an AdBlocker. This is a program for the browser that ensures that advertisements on sites are not shown.
Shrink image
Sometimes you want to upload a photo somewhere, but the file turns out to be too large. Reduce the dimensions so that the photo is accepted. In the following steps, we assume that the photo is already stored on the PC.
- In the browser go to www.fotokleinen.nl
- On the first visit, click OK, I agree to give the website permission to place cookies. Or click on No thanks > ok, agree to accept as few cookies as possible.
- Click on Close in the box ‘Crop & resize photos online’.
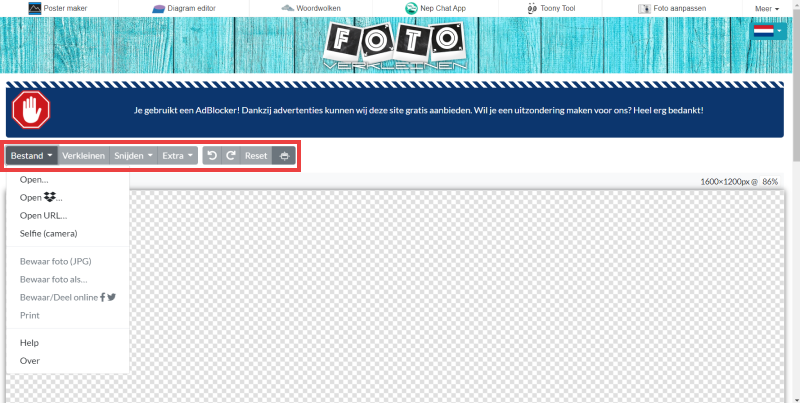
- Everything you need can be found in the menu above the checkered field.

- Click in the menu on File > Open.
- Navigate to the desired photo in File Explorer or Finder and click To open.
- Click in the menu on shrink. This will now turn blue and a few options will appear below.
Reduce or enlarge the photo. This can be done in several ways:
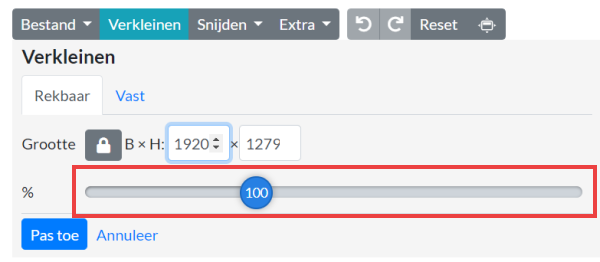
- A bar has appeared above the photo.
- The blue sphere shows how far the photo is zoomed in or out. In the beginning it says ‘100’, which means that the photo is at its original size.

- Move the sphere to the right to enlarge the photo or to the left to reduce it. If there is ’50’ in the sphere, then the photo has been made smaller by half. If it says ‘150’, the photo is enlarged by fifty percent.
- Behind W x H (width x height) is how wide and high the photo is in pixels.
- Satisfied? click on Apply.
- The blue sphere shows how far the photo is zoomed in or out. In the beginning it says ‘100’, which means that the photo is at its original size.
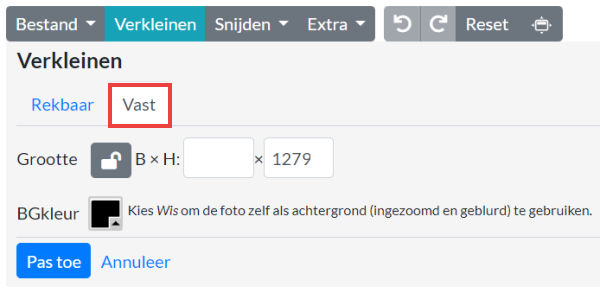
- Does the photo need to be a specific size? click on Fixed.

- Enter the dimensions behind W x H (represents width and height).
- Satisfied? click on Apply.
Crop image
Do you want to make a photo suitable as a profile picture on Facebook? Or do you want to remove that ugly corner of a photo? Fotokleinen.nl offers the option to crop a photo for various social media or at your own discretion. We explain how it works and assume that the photo has already been opened on the website.
Crop an image yourself
Crop a photo as you see fit:
- Click in the menu on To cut > Free.
- A dotted line frames part of the photo. Place the mouse pointer on one of the red spheres, click and drag the sphere inwards to shrink the frame. Or place the mouse pointer in the frame and drag the frame left, right, above or below.
- click on Apply to crop the photo. The part that is in the frame is kept.
Crop photo for social media
Crop a photo for a different platform:
- Click in the menu on To cut.
- Click on the platform for which the photo is intended. Choose from ‘Facebook’, ‘Twitter’, ‘Instagram’, ‘LinkedIn’, ‘Tumblr’ or ‘YouTube’.
- The website shows the options for each platform. For example, the photo can be cropped to a profile picture on Facebook or to a square for Instagram. Click on the desired option.
- A frame around the photo shows how the photo will be cropped. Click on the frame if necessary, hold down the mouse button and drag the frame.
- Satisfied? click on Apply.
Save or share photo
Save the photo or share it directly on social media.
Save photo
- Click in the menu on File > Save photo as….
- Type a file name and click save photo. The photo will be downloaded to the PC.
Share photo
- Click in the menu on File > Save/Share online.
- Next to the photo thumbnail, click save online.
- Click on the Facebook, Twitter or Pinterest icon to share the photo there. The next steps differ per platform.