 By formatting, you can quickly empty a USB stick or external hard drive and get it ready for a fresh start.
What is formatting?
The USB stick, external hard disk and memory card for the camera from the store are immediately ready for use. The manufacturer has already formatted them. They are made suitable for file storage. Then why start formatting at home? There are two good reasons for this:
- Formatting completely wipes out a device. So a full USB stick has the full storage capacity again after formatting.
- Formatting can be done in different formats. If you want to exchange files between the Mac and Windows computers, format in a format that is suitable for both.
Formatting with Windows
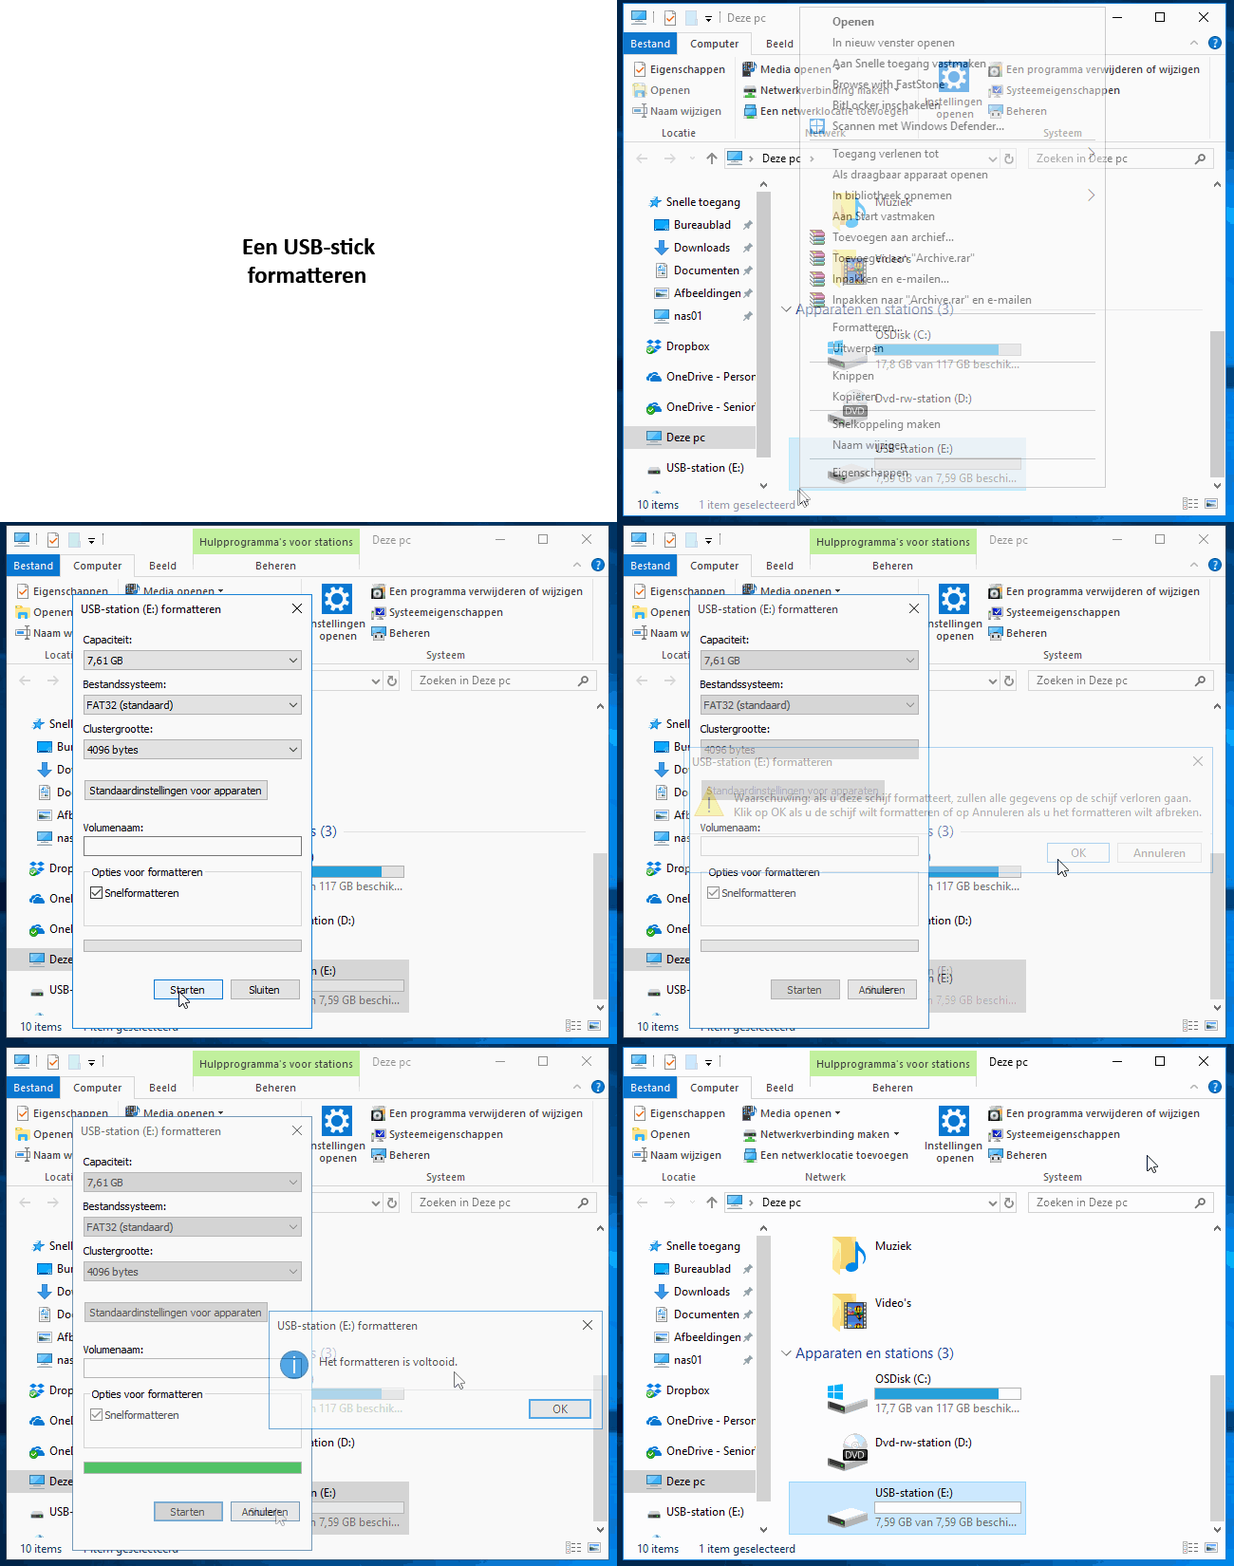
Format a USB stick (or other storage medium) on a Windows computer like this:
- Connect a USB stick.
- In Windows, the question ‘What do you want to do with removable drives?’ Ignore this message.
- Start the Windows Explorer with the shortcut Windows key + E or via the Start button > Explorer.
- Right click on USB drive.
- click on Format.
- click on Start.
- Windows will inform you that all files on the USB stick will be erased. click on OK.
- When the process is complete, the message ‘Formatting is complete’ will appear. click on OK.
- click on Close.
- In the Explorer, click on the cross at the top right to close the Explorer.

What is quick format?
If you format a storage medium with the default settings, you will see that ‘Quick format’ is checked. This is faster than regular formatting and is generally the best option. The main exceptions are:
- You want to sell the USB stick, memory card or external hard drive. Then it is nice that all files have been removed from the storage medium and can no longer be recovered.
- The USB stick, memory card or external hard drive no longer works properly. A thorough formatting can detect any storage errors and put those parts of the storage media out of use.
In those cases, follow the formatting steps, but uncheck quick format. Formatting now takes much more time.
Saving files larger than 4 GB
With the default settings, there is a 4 GB storage limit on the file size. If you want to be able to store larger files, choose a different file system. Follow the formatting steps above but under ‘File system’ select the option NTFS.
Naming storage medium
Each storage device can be given its own name. This is especially useful for those who use different USB sticks, although it might be even more convenient to label the sticks yourself. Follow the formatting steps but enter a name under ‘Volume name’. It can be up to 11 characters long.
Exchange Windows and Mac
Mac computers don’t like the file system Windows uses. Choose the file system ‘exFAT’ to be able to exchange files between both systems. Follow the formatting steps but select the option under ‘File system’ exFAT.
Formatting on a Mac
Format a USB stick (or other storage medium) on a Mac like this:
- Connect a USB stick.
- In the Dock, click finder.
- click on Programs > Utilities > Disk Utility.
- Click in the left column on the USB stick (of the two parts that describe the USB stick, choose the top one, which is also the one furthest to the left).
- Click on the tab partition.
- Under ‘Partition layout’, click the drop-down menu and click 1 partition.
- To give a name to the USB stick: click under ‘Name’ and type the desired name.
- Click behind ‘Structure’ on the drop-down menu > ExFat.
- click on Options > MBR > OK.
- click on Apply.
- The Mac indicates that files already on the USB stick will be lost. click on partition.