Is there a party or other special occasion coming up? Templates in Word allow you to quickly create a beautiful invitation. Print and send, and you’re ready for your party!
A Word Invitation
There are all kinds of options for inviting people to a special occasion. Send a card, compose an email or create an invitation in Word. The latter option combines the convenience of a template with personal information. Choose one of Word’s ready-made templates, customize it to your liking, and save the invitation. Print it, mail it and everyone will know when your party is being held.
Working with templates
This article is about working with a template with Word. The article uses Word’s default templates to create a party invitation. If you are going to work yourself, you can choose a template according to your wishes and supplement it with your own data. Although each template looks different, they work in a similar way. A template consists of individual parts. You can adjust this by clicking on it and entering your own details.
Will it be 2013 or 2010?
Earlier versions of Word offer similar options, although the buttons and actions are often slightly different.
Step 1: choose template
- Launch Word.
- Click the “Search Online Templates” box at the top of the screen. In Word 2019, first click New and then the box labeled ‘Search Online Templates’.
- Type the word: invitation.
- Press the Enter key on the keyboard.
Word will search the available templates. After some time, dozens of suggestions appear. There may be a list of topics on the right. Click on a topic to make the suggestions more specific. That makes searching a bit easier. Is there no such list? Then you can only scroll through the suggestions.
- Click on an image to get a closer look at the templates.
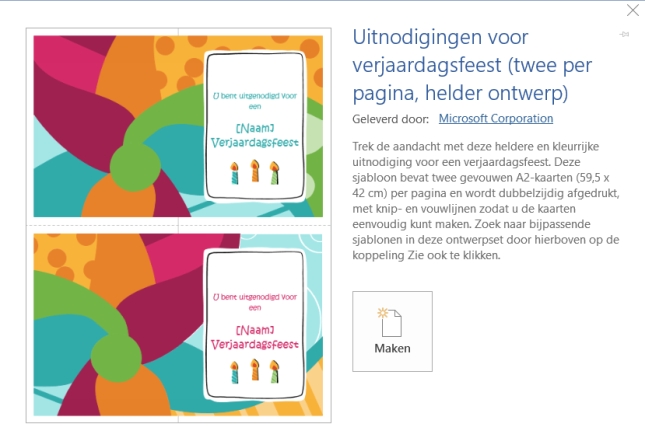
- This article uses a “Birthday Party Invitations” template.
- Click on the image for this template.
- click on To make:

Step 2: fill in the front of the template
The template is now open in Word. You can see that these are two invitations that have a front and a back. So they must be printed double-sided. You complete the invitations, save them and print them.
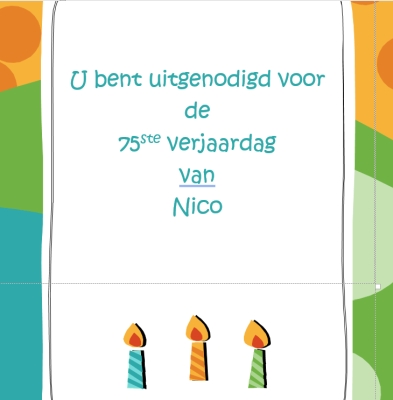
The default text is ‘You’ve been invited to a [NAAM] birthday party’. We’re going to change this to ‘You’re invited to the 75ste birthday of NICO’:
- Select ‘a [NAAM] birthday party’ on the top card.
- Type ‘the 75ste birthday of NICO’. Use the Enter key to start on a new line. You will see that the text immediately appears in the correct font and color. Don’t forget to take out ‘a’ and ‘birthday party’.
- By default, the template changes from ‘from’ to ‘From’. You adjust this with the keyboard.
This is the result:

- Repeat these actions for the second invitation on the page.
Tip: The word ‘from’ is now underlined in blue. You can ignore this, it is only visible in Word and not when you print the invitation.
Step 3: fill in the back of the template
Now it is important to fill in the other information on the invitation. You can do that on page 2 of the template:
- click on Select date.
- A menu appears to the right of this text.
- Click on the triangle.
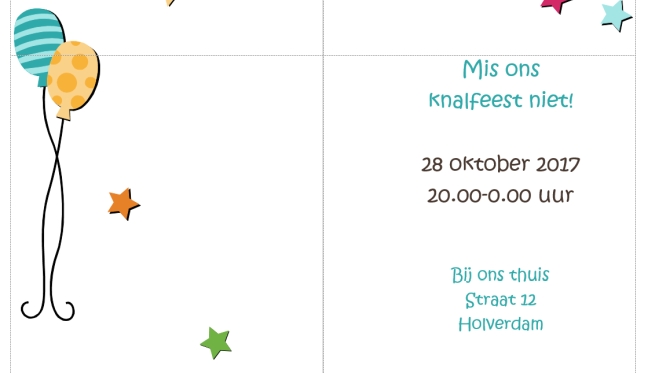
- A calendar appears. Click on the correct date. Use the triangles next to the month name to scroll to the desired month. Then click on the correct day. In this example, we choose Saturday, October 28, 2017.
- click on Time.
- Type the time of your party. In this example, we choose 8:00 PM to midnight.
- click on Location. The entire block for your address is selected.
- Enter the location and address of the party. Use the Enter key to continue on a new line.
The second invitation will look like this:

Step 4: Save Template
The invitation is now ready. It is important to save it with a clear name. This way you can use the invitation again at a later time or make extra copies if necessary.
- click on File > Save As.
- click on To leaf through.
- Browse to the folder where you want to save the invitation, for example ‘Documents’.
- Type the name of the invitation, for example ‘Nico party invitation’.
- click on Save.
Step 5: Print Invitation
For this step you need a printer that can print on both sides. If you do not have a printer, you may be able to distribute the invitation in another way, such as by email. Or you can ask someone you know to print the invitations. Two will fit on a sheet of paper, so divide the number of sheets needed by two to get the correct number of prints.
If you have a printer connected to the computer:
- click on File > Print.
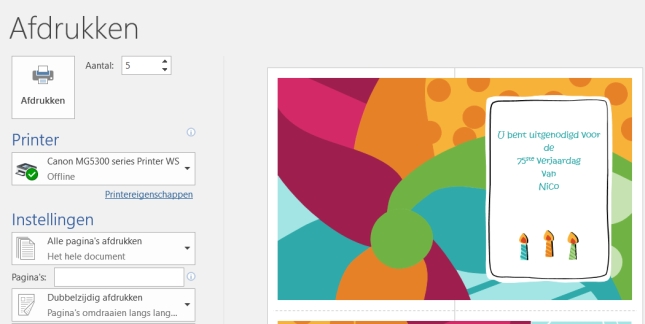
You will see a preview of the invitations with different options next to it. In any case, it is important to set the number of prints correctly, and the options for duplex printing (if possible):
- Click in the box next to ‘Quantity’.
- Type the correct number of invitations needed. Tip: Print one first to see if everything comes out right.
- Click on Simplex Printing > Duplex Printing.
- Click at the top Print.

- Your invitations come out of the printer.
- When you are done, close the invitation via the menu File > Close.
Is the double-sided printing not good? Then read the article ‘Double-sided printing in Word’.