Create the most beautiful presentations in PowerPoint. That can be anything from the holidays to something for the hobby club.
PowerPoint
PowerPoint is a program from the Microsoft Office package. This includes Word and Excel, for example. PowerPoint 2019 is the latest version and is included with Office 365, Microsoft’s subscription to Office. It is used for presentations.
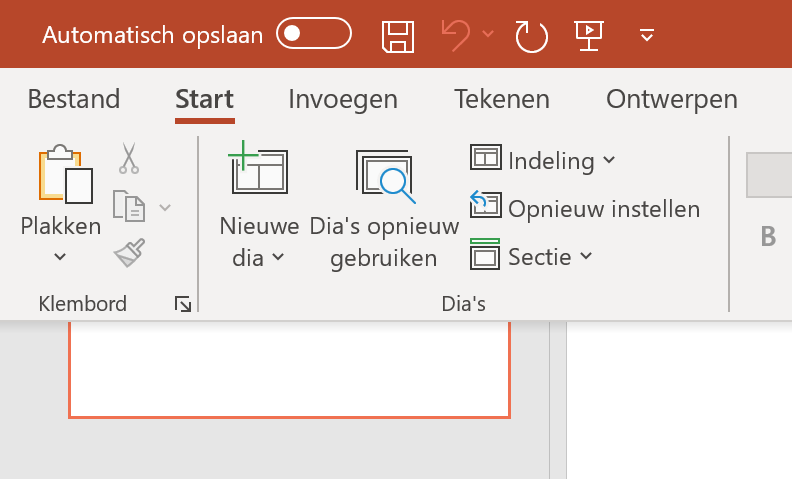
Just like in Word, many actions are done via the Ribbon. That’s the bar at the top of the page that contains the tabs such as ‘Home’ or ‘Insert’, and all the menus. In the image below, the ‘Home’ tab is active, and below it are a number of options available on this tab. For example, click on ‘Insert’ to see which options are included.

Parts of a PowerPoint presentation
A PowerPoint presentation is similar to a slide show, but with more options. A page can contain several parts, for example texts, photos, graphs and tables, audio fragments, videos and links to web pages. So you can give it your own twist.
Create presentation
To start, create a file. Do this as follows:
- Launch PowerPoint. This can be done, for example, by clicking the Start button and searching for PowerPoint in the list of programs.
- click on Empty presentation to create a completely blank presentation. The alternative is to opt for one of the templates. A design has already been set in it that you can further fill in and adjust yourself.
- Write the title of the presentation on the first slide.
- click on Click to create a title.
- Type the title.
- The text box automatically adjusts to the amount of text typed. Want to resize or move the text box? Then click on the edge of the box. Drag the lines to move the title or use one of the white circles in the corners of the text box to resize.
- click on Click to create a subtitle to add a subtitle as well.
- Don’t want a subtitle? Then click on the edge of the box and press the Delete key.
Design page
The first page still looks a bit bare, with only the title text and possibly a subtitle. Of course you can set up this page completely to your own taste. This can be done with a number of ready-made themes or by determining the colours, style and fonts yourself.
To choose a ready-made theme:
- In the Ribbon, click on the tab To design.
- Click on one of the themes in the ‘Theme’ section.
- Use the arrows to the right of the themes to scroll through even more themes.

- To the right of the themes, in the Variants section, click one of the available color variants.
- On the far right of the screen, the design ideas have now appeared. Click on one to choose that layout for your page.
- Would you like to further customize the design yourself?
- In the Ribbon, click on the tab Start.
- Click on a text box.
- Select the text you want to adjust.
- Customize the text with options in the Home tab. For example the font, the font color.
Create next page
A presentation consists of several pages or slides. After you have made the title page, the content pages follow.
- In the Ribbon, click on the tab Start
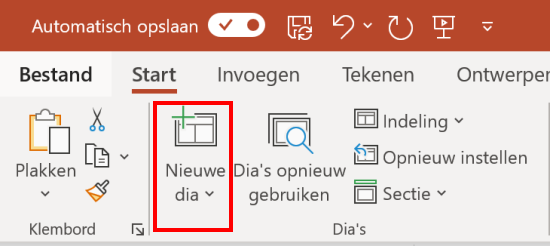
- In the ‘Slides’ section, click New slide.
- Clicking on the slide icon will bring up a master page.
- If you click on the text ‘New slide’, additional templates will appear.

- The new, blank slide appears immediately. In the left part of the screen are numbered thumbnail versions of the slides. To quickly go to a specific slide later, click on one of the mini slides there.
- Click again and again New slide to create new pages.
Add elements
You can add all kinds of elements per slide. When a new slide is created, eight small pictures appear in the middle of the slide. These are different elements. If you don’t see these elements, you can also insert them via the ‘Insert’ menu in the Ribbon.
 Insert table
Click on this icon and then choose the number of columns and rows. A table appears on the slide that you can then fill in.
 Insert chart
Click on this icon and a menu will open with all kinds of charts such as bar charts, pie charts and many other options.
 Insert SmartArt Graphic
Click on this icon to open a new menu with all kinds of schematic views, such as a hierarchical structure or a process view with arrows.
 insert 3d model
Click on this icon to insert a 3d model.
 Insert an image
Click to select an image from your computer.
 Insert an online image
Click to search for an image on the Internet and insert it.
 Insert a video
Click this icon to select a video on the computer.
 Insert an icon
Click to insert an icon. That is a small symbol that simply represents something.
Insert picture
The option ‘Insert image‘ will need you more often, especially if you mainly use PowerPoint for slide shows. Inserting an image can be done in two ways. By clicking the ‘Image’ icon on a blank page as described above. Or so:
- Click on the tab Insert.
- click on Pictures.
- An Explorer window opens. Click on the desired photo > Insert.
- Dragging one of the spheres in the corners resizes the image.
- Click in the center of the image and drag to move the entire image.
Choose transitions
In PowerPoint it is possible to make the different slides flow into each other nicely with all kinds of effects.
- In the Ribbon, click on the tab transitions.
- The “Transition to this slide” box contains a variety of options. Click on one to see an example.
- The selected transition is applied to the current slide. Want to give the next slide a different transition? Then right click in the overview of the pages on the next page and set a transition in the same way.
- Want to give all slides the same transition? Then click on the tab transitions in the ‘Time settings’ section on Apply everywhere.
- Still no transition? click on No in the top row of the transitions and then on Apply to everything.
Play presentation
When you’ve inserted all the slides and chosen transitions, it’s time for a test run.
- In the Ribbon, go to the tab slideshow.
- Click on the leftmost option: From the start.
- The slideshow will now start. A mouse click takes you to the next slide. With a right click > Previous you can optionally go to the previous slide. By pressing the escbutton exits.
Save presentation
Is the slideshow ready? Then it’s time to save the presentation.
- click on File > Save as.
- click on To leaf through.
- Browse via the Explorer to the folder where the presentation should be located.
- Type a meaningful name behind ‘File name’.
- click on Save.
Tip: When saving, you can choose a different save format in the ‘Save as’ box below the ‘File name’ box. These are the most important:
- If you save the slideshow as ‘PowerPoint presentation’, the person opening the presentation will need PowerPoint and the slideshow must be started manually.
- If you save the slideshow as a ‘PowerPoint Show’, whoever opens the show will immediately see the slideshow. So nice!