When you think of Word, you probably immediately think of creating all kinds of text files, but you can also draw with it! Of course not as extensive as with special drawing programs, but it lends itself perfectly for simple shapes and objects.
Step 1: Temporary Tabs
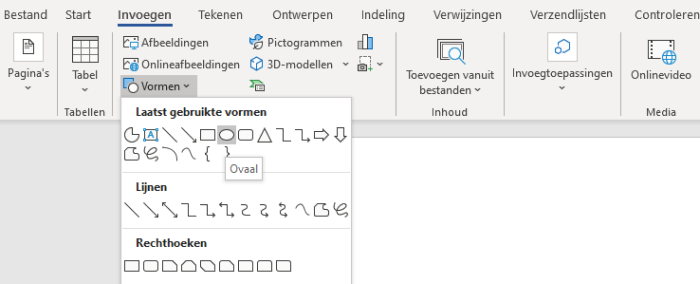
In Word, the menu bar is a ‘ribbon’ with several fixed tabs. Here you can find most of the desired options. For drawing with Word you need the ‘Insert’ tab.
In addition, there are also extra tabs that only appear when you are working on a certain element. Such as the temporary tabs ‘Shape Layout’ and ‘Image Layout’ for editing drawings and images respectively. In older versions of Word, these extra tabs are called “Drawing Tools” and “Picture Tools”.
Step 2: ‘Insert’ tab
To draw in Word, you must of course open a new (empty) document before you can get started with it. Then click on the tab Insert. You then have many options. We discuss these below.
 or
or 
Insert image. You can insert any image that is on your computer.

Insert artwork. Via a search menu you can find many drawings and photos that Microsoft has collected in one file. This feature does not exist in Word 2016 or newer.
 or
or 
Insert drawing objects. You can start drawing with one of many shapes, such as lines and squares.
 or
or 
Insert data presentation objects. You can present data in a beautiful way with one of the many options.
 or
or 
Insert charts. You can display figures in various graphs.
Step 3: Draw Shapes
Under the button ‘Shapes’ there is another menu with all possible form. You create the shape with the mouse and you can make it as big or small as you want. To practice we make an oval:
- Open a new document and click on the tab Insert.
- click on Form and then the oval icon.

- Your mouse pointer will now change to a cross.
- Click anywhere on the empty sheet and hold down the left mouse button.
- Drag the cross until the oval is to your liking and then release the mouse button.
Step 4: Colorize a shape
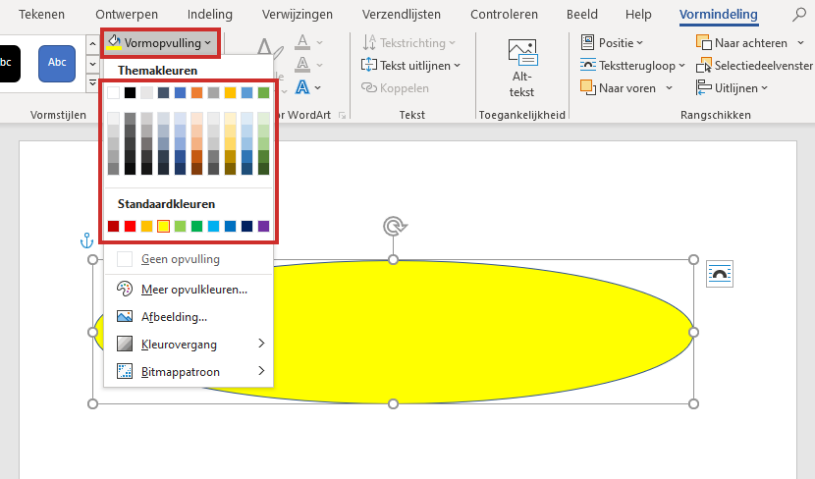
Now that the oval has been drawn, you can start to format it. The oval already has a layout by default. We are going to adjust this and give it a different color:
- Make sure that the oval is selected (again) by clicking on it.
- Click the “Shape Layout” or “Drawing Tools Format” tab if it isn’t already open.
- Click on Shape Fill or Filling shape. Click on the desired color.

Step 5: Adjust the Shape
When the shape is selected, it is surrounded by a box with small circles in the corners. With these circles you can adjust the shape.
- Hold the mouse pointer still over such a circle. The pointer changes to an icon of two opposing arrows.
- Press the left mouse button. Hold and move the mouse to resize or reshape the oval. Release the mouse button when you are satisfied.
Step 6: Draw a Second Shape
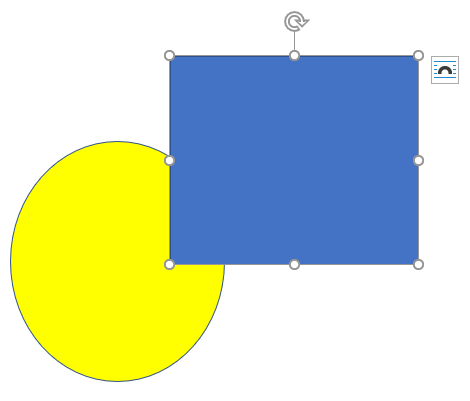
Now we’re going to draw a rectangle, just over the circle.
- Click on the tab Insert > Form > icon of a rectangle.
- Press the mouse button and drag the mouse until the rectangle is the way you want, then release the mouse button.

Step 7: Formatting the Second Shape
We have drawn a rectangle that falls half over the oval. We are now going to format the rectangle using a ready-made shape style. In older Word versions this looks different, but the operation is almost the same.
- Make sure the rectangle is selected and the ‘Shape Layout’ tab or ‘Drawing Tools, Format’ is open.
- In the Shape Styles group, click the white button with the letters ABC in it. The rectangle changes color immediately.
- For more of these shape styles, you can press the arrow next to the ABC buttons.

In the ‘Shape Styles’ group, besides the ready-made styles, there are many more options to adjust the shape. For example, you can give the line around the object a color and thickness. You will also find options to give the drawn shape a shadow or 3D effect. When you get started, try out different options.