
G’Mic is a very extensive and also free plug-in which is especially interesting for users of the photo editing program GIMP but that too standalone can be used. We show you some examples of the otherwise very many editing options.
Wessel Sijl
The plug-in G’mic stands for Greyc’s Magic for Image Computing. It was initiated and largely made by David Tschumperlé, researcher at the Greyc Institute (Groupe de Recherche and Informatique, Image, Automatique et instrumentation De Caen) in Caen, France. The maker of this plug-in has not developed all parts (in fact filters) itself, there are also contributions made by a number of other people.
The word plug-in Is somewhat confusing in this context. You quickly think of one extra tool or application with which a photo editing program can be expanded. But G’mic offers a large number of applications for photo editing. More than 500 even! In fact, it is a program that functions within a program. G’mic can also be as if desired standalone-Application (not integrated in a photo editing program) are used. The possibilities are almost limitless, and the writer of this article has still not been able to deepen all possibilities after years of use.
 |
| Gmicky, The mascot from G’mic |
Start
If you open the website of G’mic (https://gmic.eu), then the tiger will immediately stand out. That is Gmicky, the mascot of G’mic (designed by David Revoy). Because G’mic is well integrated into Gimp, Gmicky is good friends with Wilber, the famous mascot of Gimp. And undoubtedly Gmicky will also be able to go through one door with Tux, the well-known Linux mascot. On the website you can read how G’mic can be downloaded and activated: as a standalone application and (the most interesting option) as a plug-in for the image editing programs GIMP, Krita and Paint.net. Finally, it can also be as an online tool are used. The website explains how to install or activate all those options. Installing the downloaded plug-in for GIMP proved to be childishly simple; It is an EXE file that you only have to activate. So just like unpacking an average program. Then restart Gimp and G’mic is ready for use.
G’Mic is under in Gimp Filters. Just click on this and G’mic opens.
 |
| Part of the G’Mic starting window |
On the left you see the filters, classified in groups. By clicking on the pijtje, all filters are opening below. On the right you see the photo on which the operations are performed (this means that you first have to open the photo when working under GIMP and only then open G’mic). You can organize the screen differently as desired.
If you have opened the G’mic starting window, you will see a group of filters, rubbled under the top left (at least in this example) Paves. This abbreviation stands for favorites. At that location you can put your most used, favorite filters together. This saves searching in the enormous list of available filters underneath. In this example you see the favorite set of filters that the writer of this article frequently uses.
Making a list (frame) to your photo
 |
| The choice of lists |
G’mic offers a series of options to provide your photo with a list. You can find this one Frames. It seems like a limited number, but with the setting options per list you can make countless types of frames to make your photos or even integrate them.
Whether you like it is of course very personal, but it can add something to experimental photos. In the example, for a fairly classic list (with the name Painting) chosen. So a picture frame. With the sliding beams shown, the frame can be adjusted or refined, such as the thickness of the frame and the color. But the brightness and contrast of the list can also be adjusted, and even the degree of vignette (shade over the image, such as with a real painting) is adjustable.
Some examples of lists have been shown below. Because of a good comparison, I always use the same photo, even already matching The choice of the type of list may not always be with the photo.
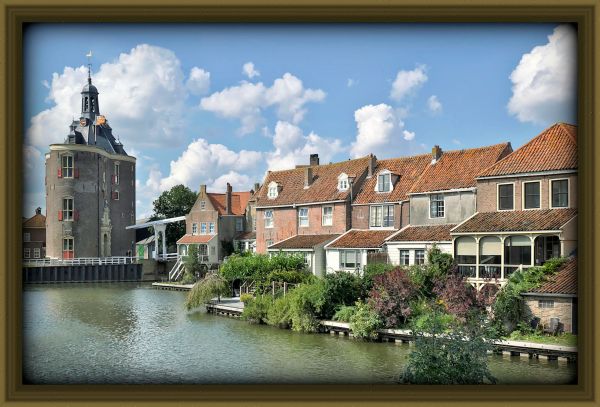 |
A classic painter’s list. |
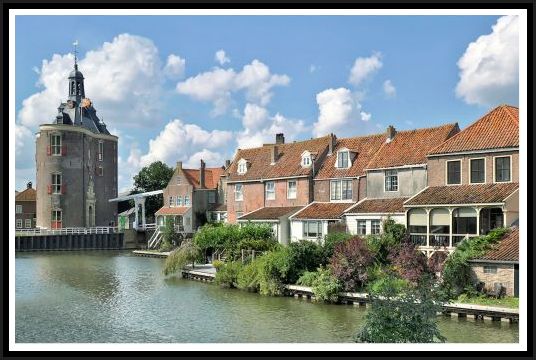 |
This is a very different one |
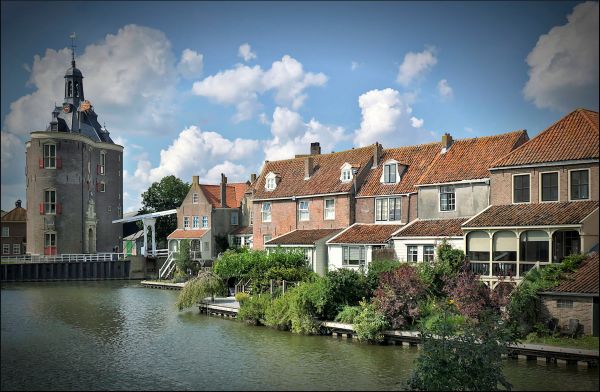 |
This is a list |
Copyright mention
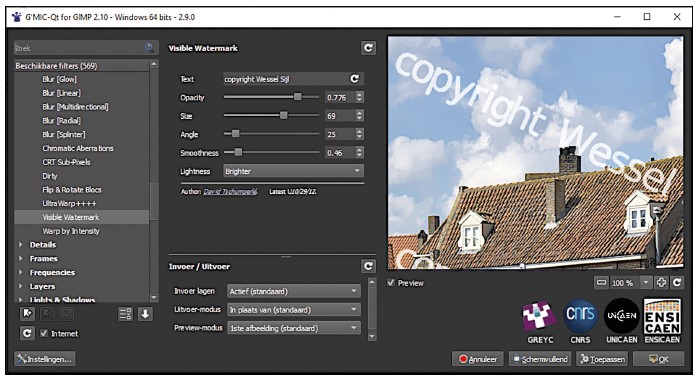
With G’mic, a (transparent) copyright mention can be added to your photo in various ways. That can be useful for professional photography, if you want to share a photo and to make a choice by a buyer/buyer of a photo, without the risk that the photo will be shared in its full size without payment.
This option, with the name Visible Watermark is under the series of filters Relegations. See the images below with the settings and the result.
|
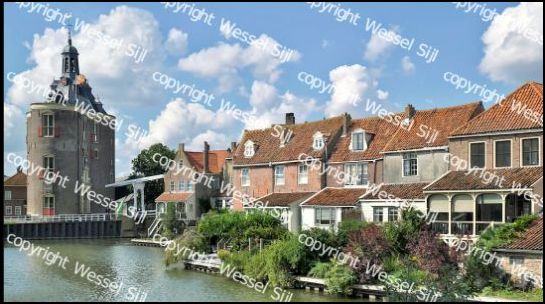
The settings and
the ultimate
result
The copyright quotation, including the size and the transparency (“opacity”), can be adjusted in all sorts of ways.
Creative excesses
 |
| The choice for Vector Painting and the final result |
G’Mic offers a huge number of opportunities for a creative conversion of your photo. That can be a certain style of a well -known painter (for example Andy Warhol), another known effect from painting (such as Cubism) but also many other types of creative conversions. Most can be found among the group of filters Artisticbut also with other groups of filters you will find numerous options for creative excesses. The example shown below is a Vector Painting From the filter group Artistic. As with almost all G’mic filters, the effect can be changed or refined with one or more scroll beams.
Another nice creative application is a conversion of the photo into a (monochrome) embossing-style. This filter with the name Emboss can be found under the filter group Black & White.
See the setting and the final result below.
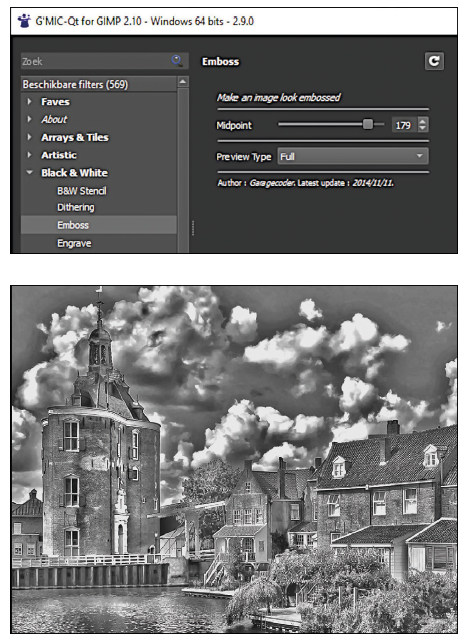 |
| The choice for Emboss and the result |
Improve a photo
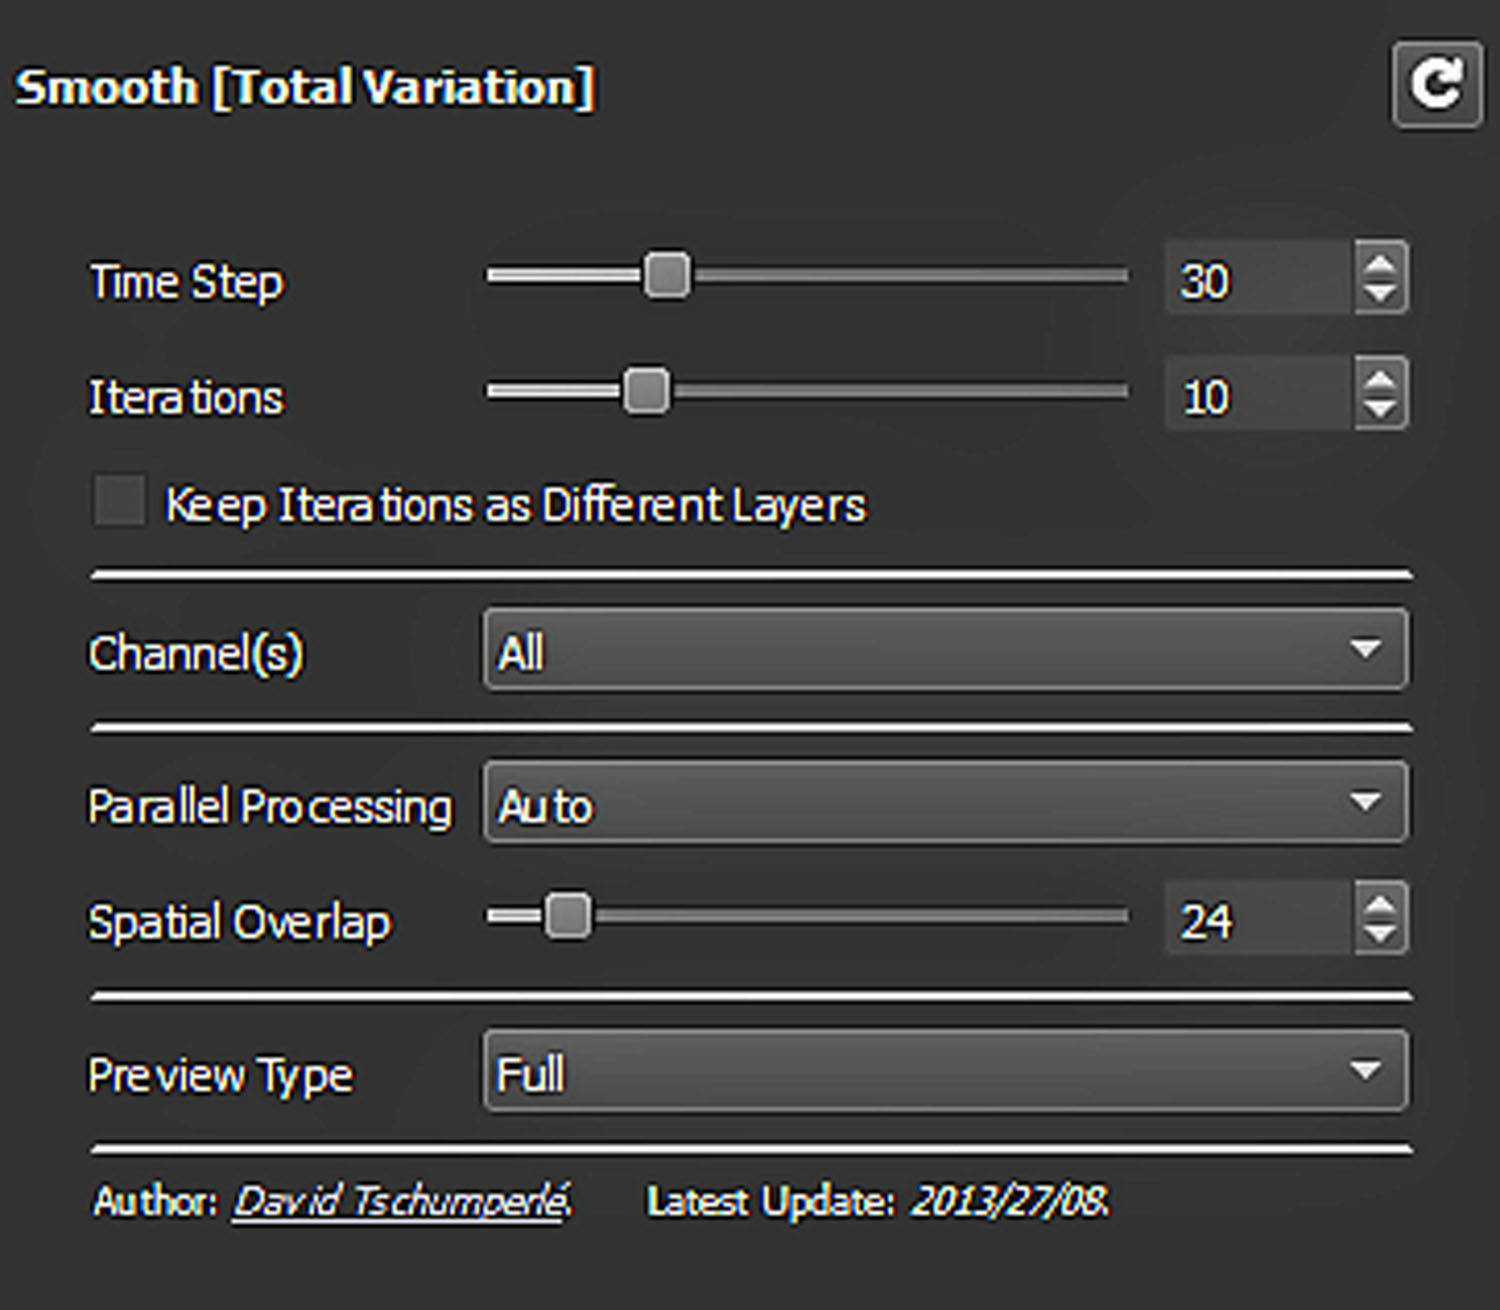
The filters described for this are mainly for creative, additional or useful things. But G’mic is also very suitable for improving photos. Think of improving exposure and contrast, adjusting colors, more or less dynamic range, improving sharpness, modification of texture, removing color swimming, and so on. And G’Mic is doing very well. Also for that type of (improvement) filters it applies that countless adjustments are possible to refine. The search for the correct or desired setting is perhaps a bit difficult, especially at the first times, but simply by practicing a lot can be learned.
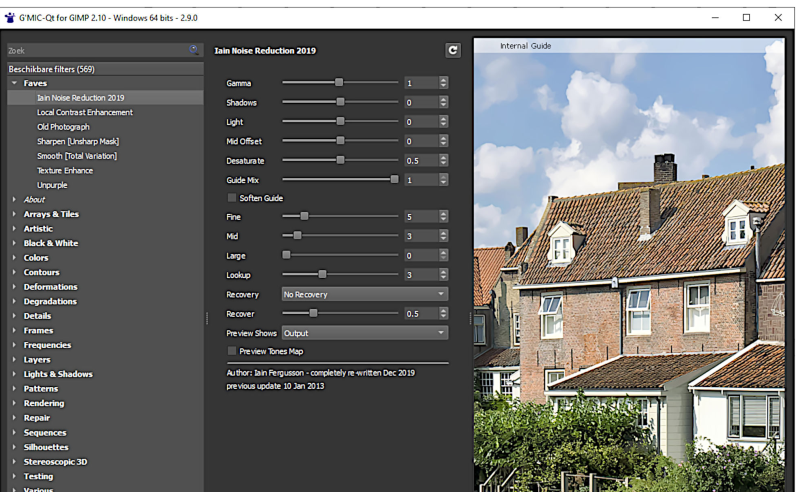
The improvement options can be found under the group Detailed (such as adjusting the sharpness) and among the group Repair (such as for removing noise). I personally have good experiences with the improvement filters that in Favor are placed (see the earlier image). Especially reducing noise with the filter Iain Noise Reduction 2019 Works very well.
It goes a bit too far for this article to show the improvements with sample photos on (detail) level, but the reader can assume that the end result is very good. Below are a number of cut out details of screenshots, which are extremely useful for improving your photos.
 |
This is the filter |
 |
Iain Noise |
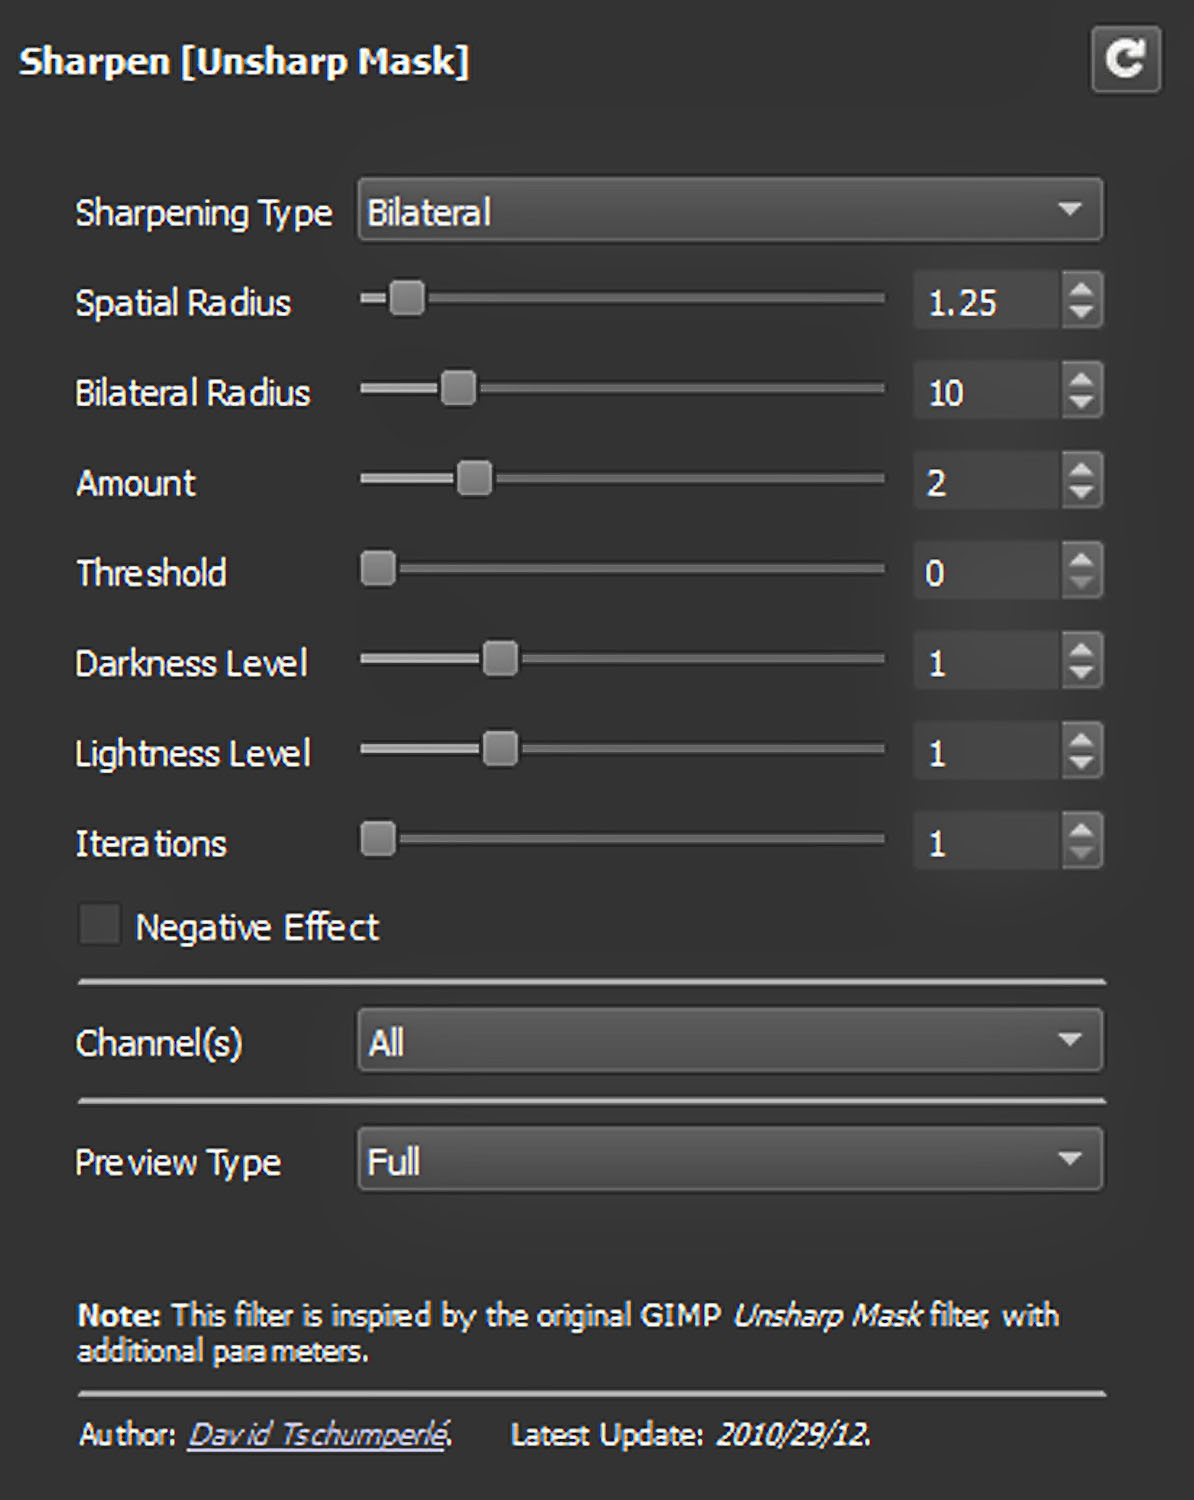 |
Sharpening |
 |
This is the filter |
Finally, an example of using a filter to convert a photo to black and white. This has been achieved with the filter Black & White That you will find under the group of filters with the same name. This filter works as a channel mixer (such as that is also standard in GIMP, Photoshop and other photo editing programs), but is very detailed per channel. Such that also contrast, brightness, high and low tones, and a smooth softening can be set. It takes some getting used to and effort, but then you also have something. The photo shown now hangs enlarged and framed on the wall.
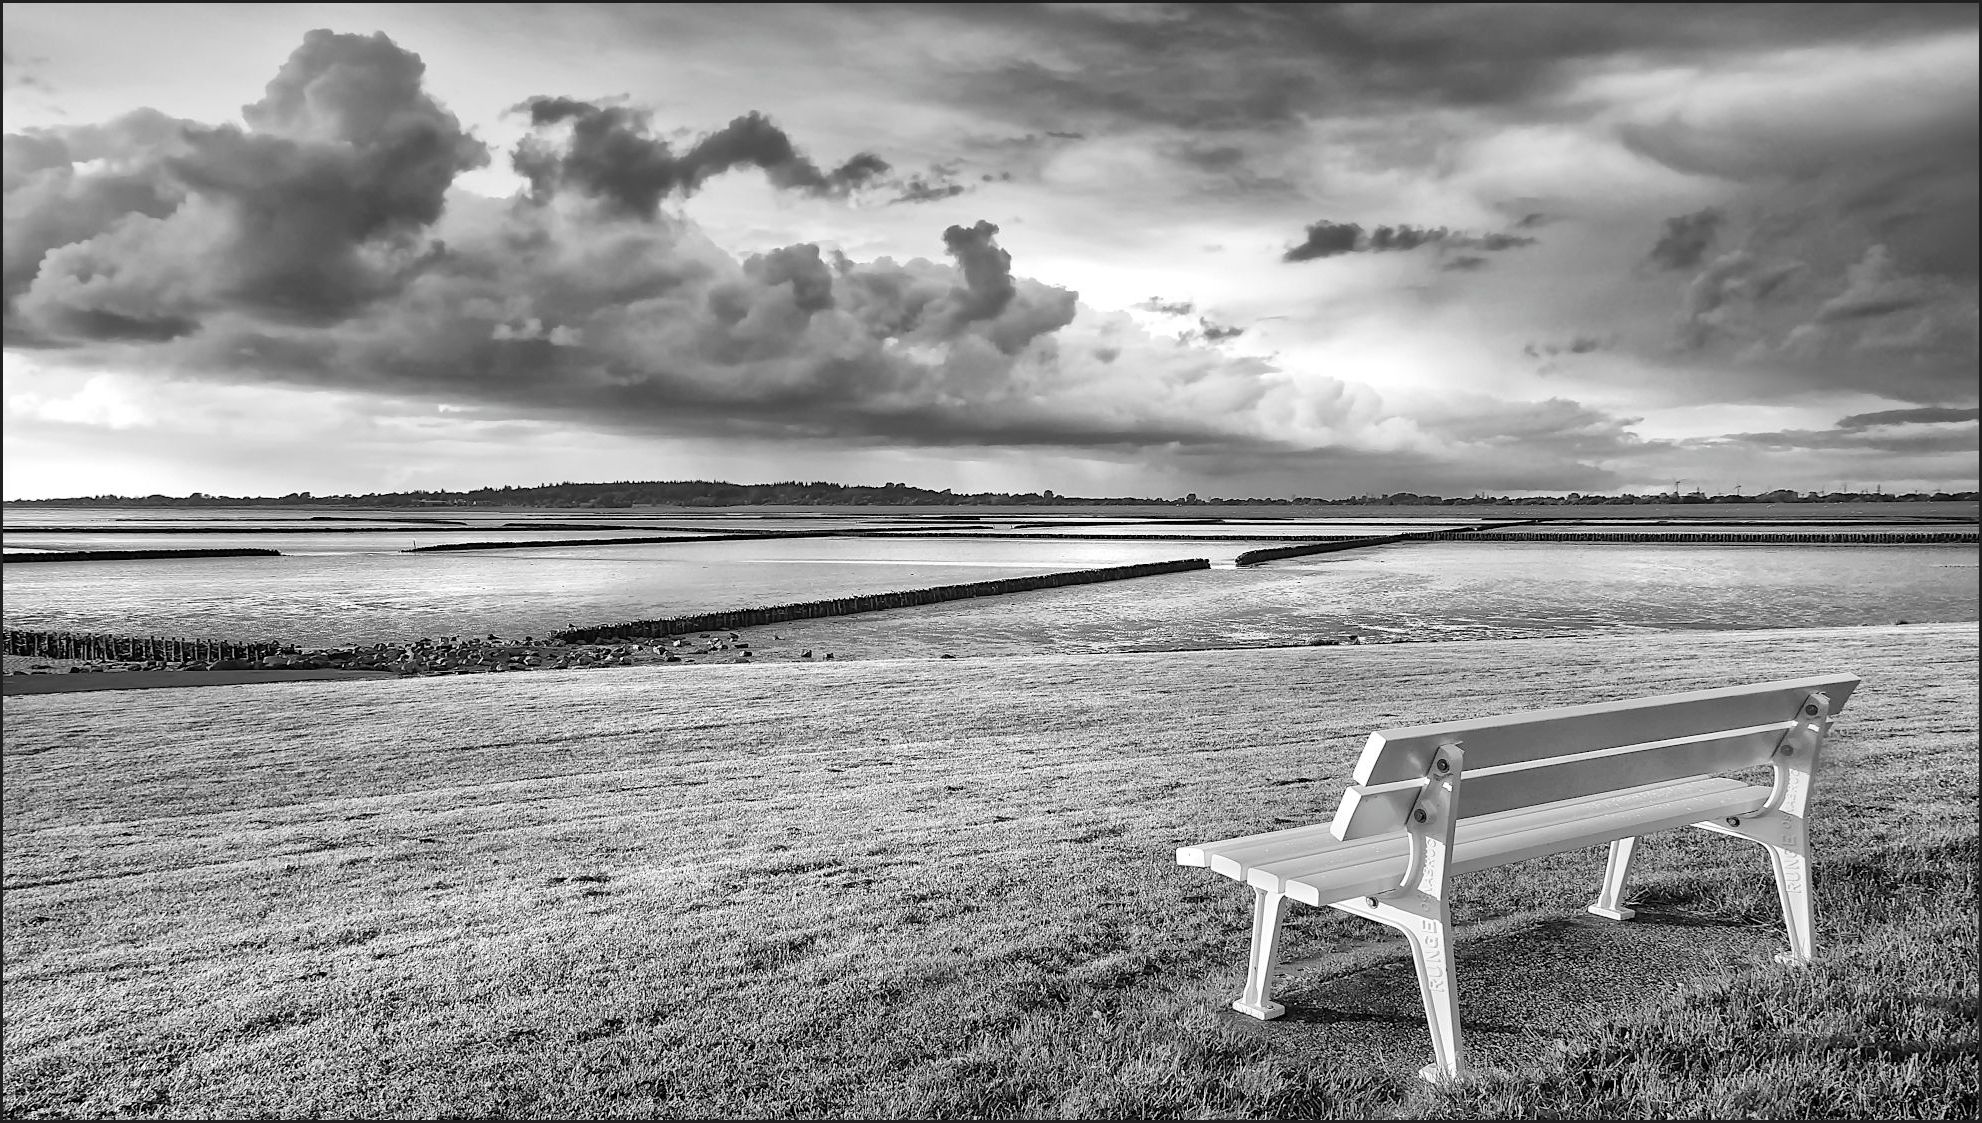 |
| A beautiful, exhibition-based landscape photo of the German Wadden Coast, converted into black and white with G’mic |