Need to hide a file or folder on Windows 11? Not only will we not judge you, but we will help you!
There is a very simple procedure to actually hide elements on Microsoft’s OS. Beyond stuffing them into improbable files, obviously.
How to hide files on Windows 11
1. Go to the properties of the file or folder to hide
First, after choosing the file or folder you want to hide, right-click on it. Then go to Properties, in the context menu.
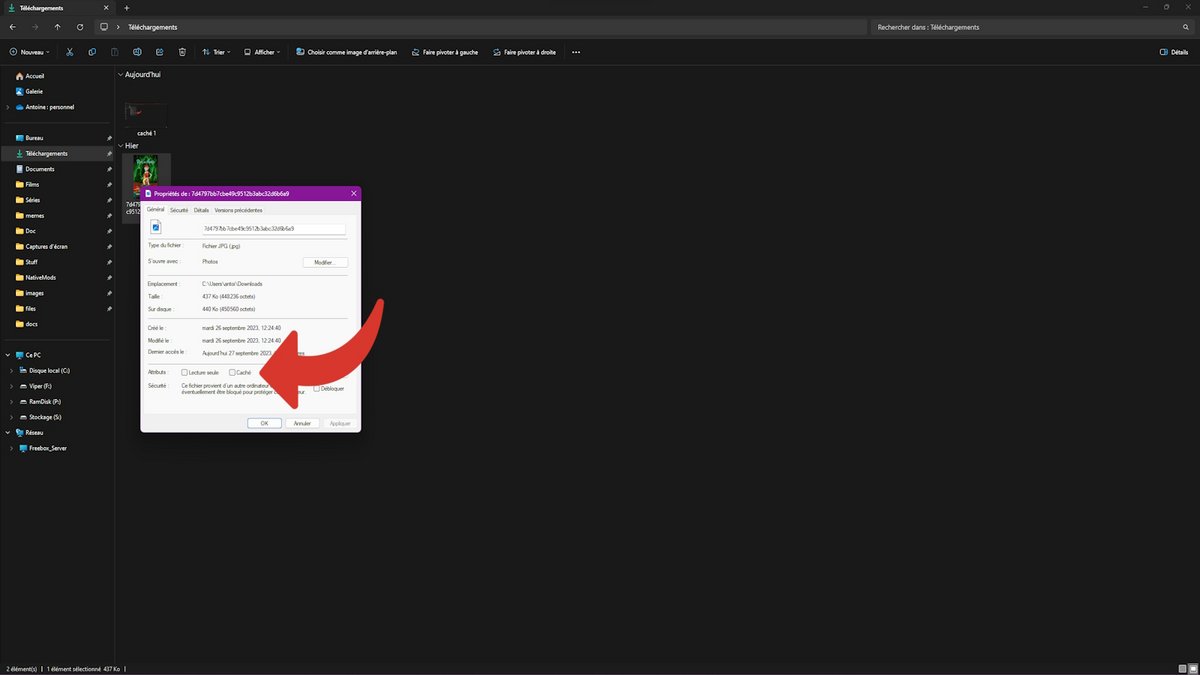
2. Hide your file or folder
In the window that opens, simply check the “Hidden” box at the bottom, then apply or click directly on “Ok”.
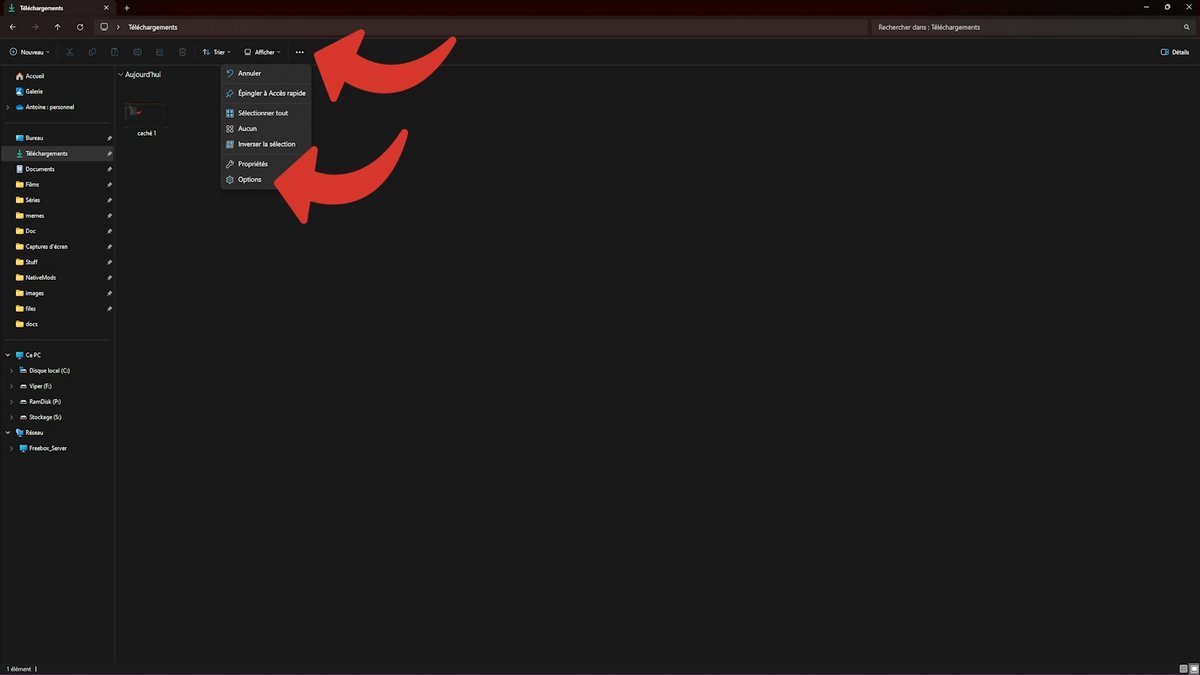
3. Find your hidden elements
Now the items you have hidden are invisible. To find them (they will be visible again in File Explorer, but slightly transparent), head to the File Explorer settings. To do this, click on the “…”, then on “Options”.
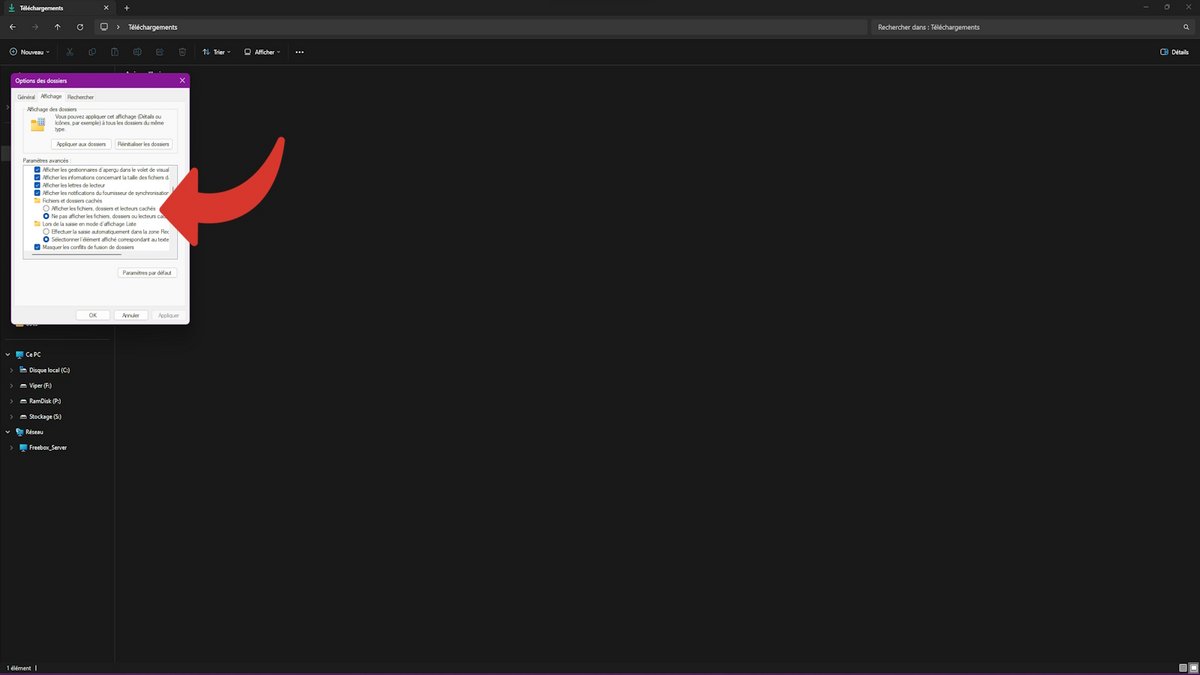
In the window that just opened, click on the second tab, View.

There, go down until you find the entry “Hidden files and folders”, where you just have to choose “Show hidden files, folders and drives”. Don’t forget to validate with “Ok” or “Apply”. And that’s it, you can see your hidden files or folders again.
And there you have it, you now know how to hide (and find, which can still be practical) files and folders on Windows 11! Unsurprisingly, to return a hidden element to its normal state, simply uncheck the same box from the properties.