The Halo effect in Photoshop will allow you to give more depth to your shots and your creations.
It is a reflection that is created in your lens when the photographed subject is generally backlit.
This basic tutorial shows you how to give your images an intense glow using the halo or Lens Flare effect.
How to make a halo of light on your photo with Photoshop?
1. This effect can be applied either to the whole image or to a selected layer.
Warning: this does not work on an empty layer.
Here an example with the Halo of light added.
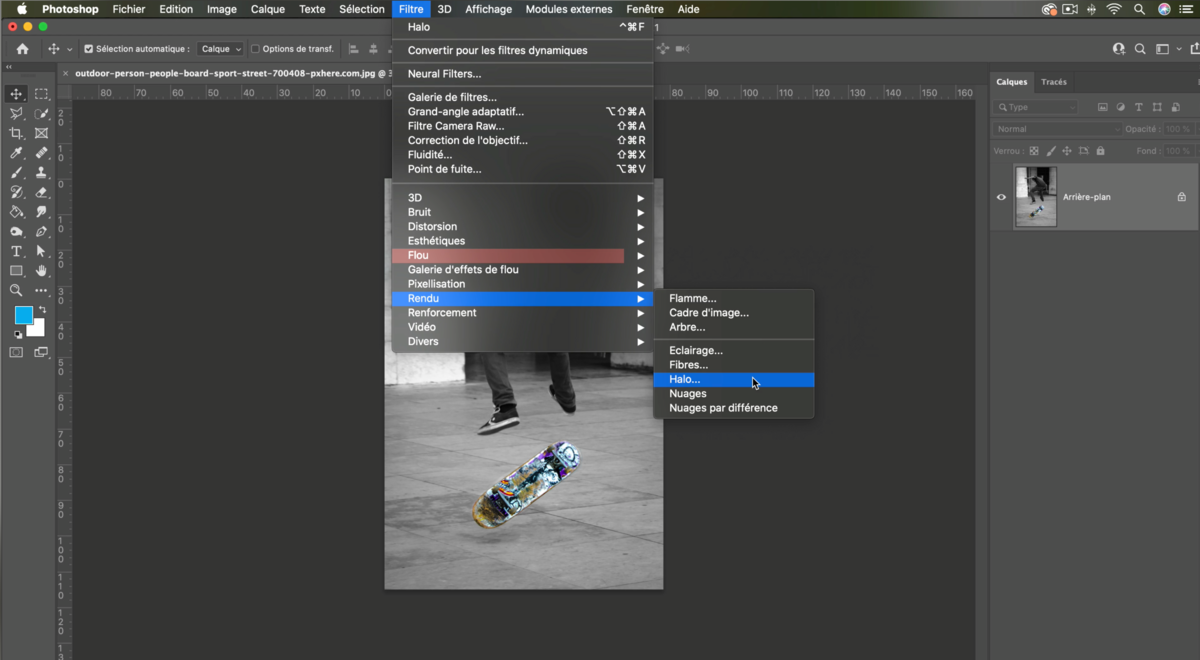
2. Select the layer on which you want to assign this effect
Click on the tab: Filter > Render > Halo
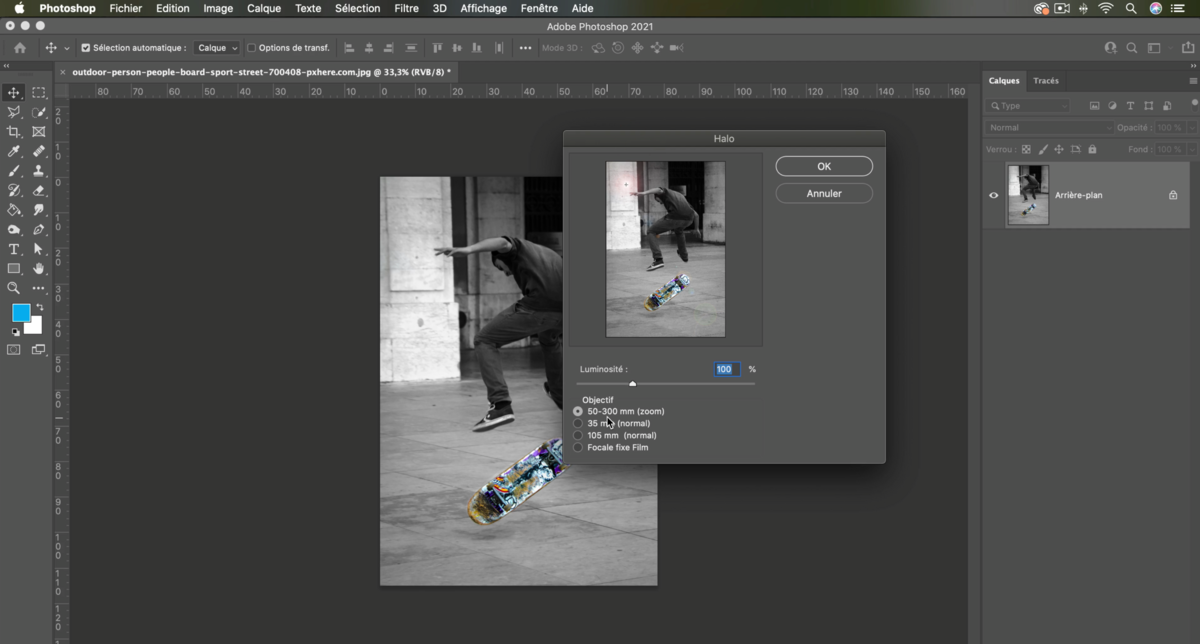
3. In the window that now opens, you will see a small preview of your design with a position cross. This cross is the starting point of the Halo or Lens Flare effect. It can be placed anywhere on the image by holding down the left mouse button.
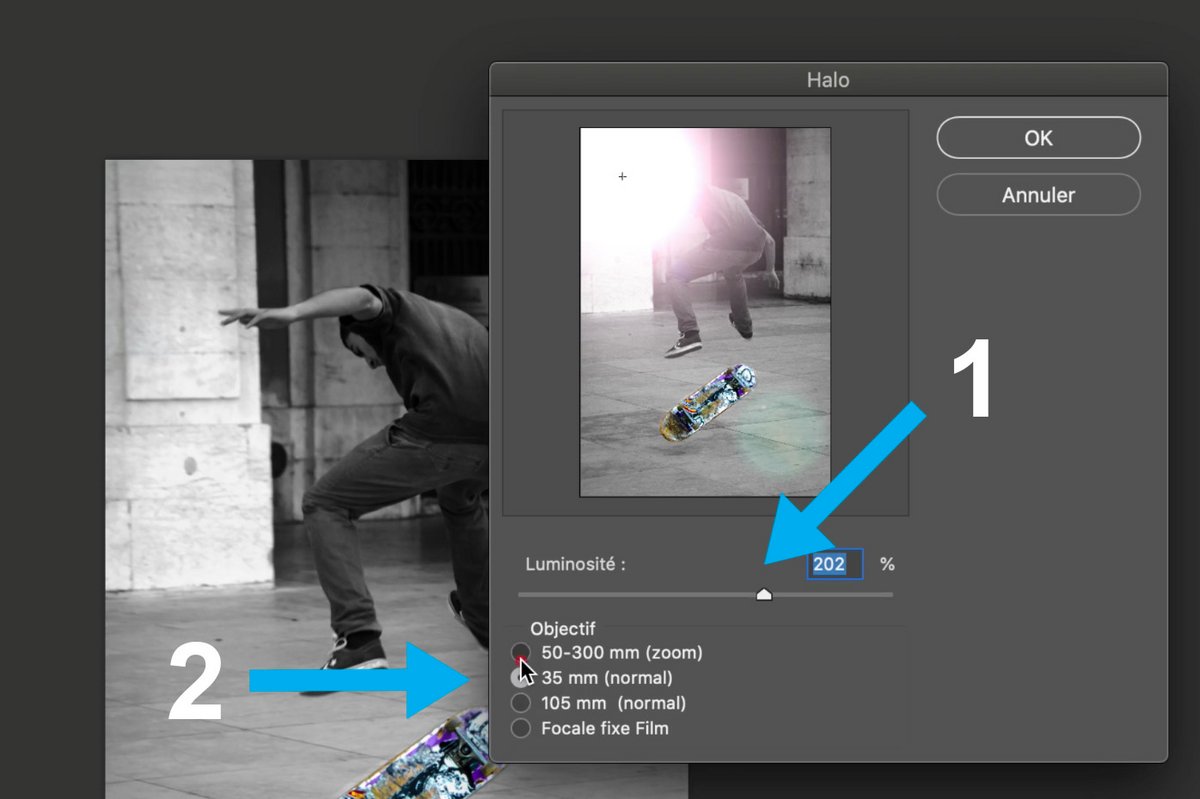
4. In the next step, the brightness of the Halo effect can be increased or, if necessary, reduced using the brightness control (1). You can also create a Lens Type with which the effect should be simulated. (2)
Each type of lens can represent the Halo effect differently.
Just experiment with the different lens types available and select the one that produces the most realistic result for your image.
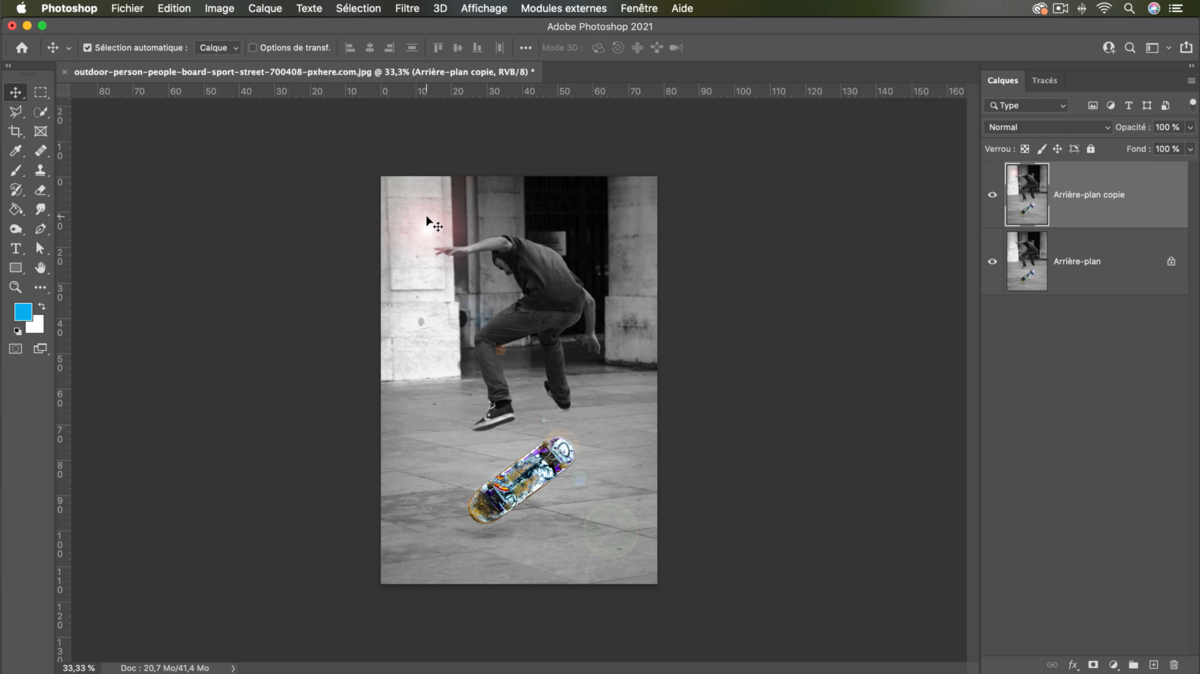
5. When all settings are correct, click [ OK ] to validate your effect.
Your image will have the Halo assigned to the desired location.
.