
When you think of an online office suite, you quickly think of Google Docs or Microsoft Office. If you’ve had enough of these greats, you can easily switch to an alternative like Zoho Docs. We already give you one advantage: for the home user, most Zoho services are free.
Tip 01: Registration
If you have the website Zoho you soon realize that this producer focuses mainly on a business audience. However, in this article we will ignore such specific business-oriented services and will immediately go on to www.zoho.com/nl/docs. Before you can start using Zoho, you have to register first. Click the big red button in the middle of the window Sign up for free, find at the top Zoho Docs (for indidivuals) Enter your details or sign in with your Google account and check the box I agree […]. Click in the confirmation email Confirm account, enter your password again, click Verify and on Go to your account. Zoho may now ask you to enable two-step verification via OneAuth, Mobile number or Google Authenticator. An excellent idea, although you can also set this later in your profile.

Tip 02: Dashboard
After you have logged in and logged in, you will end up on your dashboard. This is the place where all your documents are stored and can be found. Zoho offers you 5 GB of storage. If you run into that and want more space, click on top right Evaluate other versions. An upgrade to 100 GB amounts to 48 euros per year.
In this article we mainly work from the browser, but there are also mobile apps available for both Android as iOS. We would like to point out the desktop application now Zoho Docs Sync. It ensures that your Zoho documents are neatly synchronized in two directions. For example, if you create a local subfolder or place files in it, they will also be available in your online dashboard moments later. If you place a check mark on a file in your dashboard, you can share, move, copy or delete the file. below More you will find many more options. Also notice the buttons at the top left. Next upload (also directly from Google Drive) you also see here Create. With this button you can create a document, worksheet or presentation.
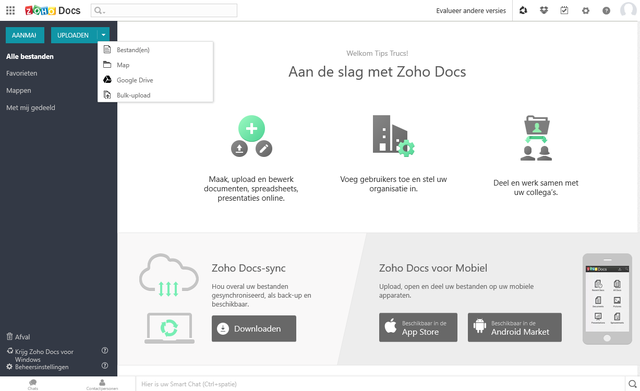
Zoho Docs Sync ensures that your Zoho documents are synchronized in two directions
Tip 03: Documents
We will be the first to introduce you to the Writer, Zoho’s word processor. On your dashboard, click Create / Document or surf to www.zoho.com/nl/writer, where you can create a new document or choose via the button with the three dots Upload Document or Import from Cloud drives (Google Drive, OneDrive, Dropbox, Box and Evernote).
Zoho works with its own file format, but also works well with docx and odt files. You can also use File / Save As save your documents in various formats, so you can easily open them in another application. With the option Download as you can download the document in the desired format to your own device.

Tip 04: Settings
There is a chance that Writer may not detect the correct language in which the document is written, causing the spell checker to function incorrectly. You can adjust this per document by clicking on the current language in the status bar and Netherlands – Dutch select. There is also Belgium – Flemish-Dutch, but unfortunately the spell checker does not work with this language variant. Click on Suggestions for writing (bottom left of the status bar) you can turn the spell checker on or off at any time. Normally you can also check the Grammar and on the Quality of writing but they only work in English for the time being.
If you want to change the language settings at once, click on the gear icon at the top right and choose Settings. Go through all the sections and adjust some settings where necessary. For example, change the units to mm instead of inches, adjust the language, time and time sin and have sentences corrected automatically (for example in “Computer Totaal” if you type “CT”). Confirm your choices with Save.

Tip 05: Interface
Zoho is not a copy of MS Office, and that is especially evident from the lack of the ribbon. Namely, when you’re typing, two semi-transparent buttons follow your cursor in the left line: Insert and Paragraph. The first allows you to insert an image, table, link, text box and so on at the cursor location. The second determines the appearance of the paragraph. Both buttons also contain the item More. There are many more options behind this, which are divided into six sections. You can also bring up this menu by clicking on the hamburger button. Very useful, we think, when you are used to it.

Zoho is not a copy of Microsoft Office, and that is especially evident from the lack of the ribbon
Tip 06: Forms
From Zoho it is also quite easy to create a form to fill in – something that is not so easy in Word. Open the section Automate and click Merge when submitting form / Click here. Writer now automatically enlists the help of another Zoho service: Zoho Forms – a way of working that you often find in Zoho. Click on this Create a new form. Choose a blank form or use one of the forty (mostly business) templates. Now all you have to do is drag the required form fields into your document. You can adjust a field that has been dragged to your document in the right-hand pane as desired. Confirm with Save.
Back in Writer open again Automate / Merge when submitting the form, but now you select the created form. click on Link form and set the desired options in Choose output. Finally click Share form for an (optionally shortened) url that you can share. The responses to your form can be found at Listings in www.zoho.com/en/forms.

Tip 07: Visualizations
An office suite would not be complete without a calculation program. You can find that on your dashboard via Create / Worksheet or by surfing to www.zoho.com/en/sheet. You can effortlessly import worksheets that you have created in another program, with a different file format. If you are familiar with Microsoft Excel, you will quickly feel at home in this environment. To get started with Zoho Sheet, click on top right Try new version. You can then use artificial intelligence, or “Zia” (Zoho intelligent assistant) to clearly visualize all kinds of data. Click on the lamp icon at the bottom right to see various graphs based on entered figures. Use the buttons at the bottom of such a graph to call up other views and the plus button to add a graph to your worksheet. Press it Filtericon to determine which columns you want in your graph and click edit to indicate the desired cell range.
Incidentally, you can also generate graphs and diagrams in a more classic way. You then select the range, click in the toolbar Insert diagram and indicates the desired type. From the right-hand pane you can design that in many ways.
Tip 08: Live data
Suppose you have encountered interesting live data somewhere and want to include it in your own worksheet. Then copying and pasting doesn’t make much sense, because then you only copied a snapshot. However, Zoho Sheet can create a live link and refresh it automatically. Open the tab data and choose Link / Create external data. Choose HTML page and enter the url where the live data will appear (for example data from fairs). Confirm with Next one and enter all the desired information. Press again Next one and indicate where the data should be placed in your worksheet. In the next step, click Now and schedule periodically and set an appropriate frequency; the highest frequency is every 15 minutes. After your confirmation, the data will appear in your worksheet.

What is really striking is that you can also stream your presentation live to an online audience
Tip 09: Show
Over to Show, Zoho’s presentation package. You can create a new presentation via Create or you go to www.zoho.com/en/show. Show is also compatible with the other presentation formats ppt (x) and odp. The possibilities in the field of design and collaboration are certainly very extensive. Although the interface is in English, the tool is user-friendly and has many similarities with Microsoft PowerPoint. There is also one Chrome extension with which you can easily add text and images directly to your presentation.
What is really striking is that you can also stream your presentation live to an online audience. Click on it File / Broadcast. You give the corresponding url to all interested parties or you enter their e-mail addresses. Click on at the agreed time Start Broadcast. You decide which slide to view when – although viewers can return to previously shown slides – and you have a pointer, pen and marker at your disposal. During the presentation you can simply communicate with the participants and at the end you decide whether your audience can download your presentation.

Showtime!
While Show’s broadcast feature is only for presentations, Zoho ShowTime allows you to hold interactive face-to-face presentations. surf to www.zoho.com/en/showtime or click ShowTime via the waffle icon.
Once you have created or uploaded a presentation, you can start it with the button Launch. Incidentally, this is not necessary from a browser. With the app, ShowTime Presenter from Zoho, you can also start and manage presentations. Your audience will then surf to the corresponding URL or use the viewer app ShowTime Viewer from Zoho, after which they can participate in your presentation. Participate, because they can ask questions. You will then see a question mark on such a slide, after which you can project that question over the slide with a click. You can also fill in questions yourself to which the audience can then answer (poll). You can then show the number of votes and answers on your screen. After your presentation you will receive extensive statistical information about your presentation.
Zoho ShowTime is unfortunately not free (except for a trial period of 15 days) (costs: 100 euros per year).

Tip 10: Notebook
Those who use Google Keep to keep track of their notes will quickly find their way around Notebook. Use the plus button to create a new notebook. To change its cover, right-click on it and choose Change Cover. With Custom Cover you can upload your own design. In your notebook you can store everything, images, videos, to-do lists, attachments, nothing is too crazy.
Depending on how you add notes, Notebook will create a suitable so-called card type for it. For example, if you drag an image into your notebook, Notebook will turn it into a “photo card” and you will see a thumbnail of that photo. If you drag a video URL from YouTube or Vimeo to your notebook, the link will turn into a video with thumbnail and you can play it with a single mouse click.
There are also certain types of information that Notebook itself attempts to interpret. For example, if you drag a recipe from a supported site (such as tasteofhome.com) to your notebook, both a photo of the recipe and a description of the dish with the accompanying ingredients will appear in the form of a to-do list. If we can believe the producer, smart card types will be added systematically.
