 Order a photo card at HEMA.nl. The paper card with your self-made photo will arrive at the recipient on the chosen day. A fun way to let us hear from you in a personal way.
Photo cards via HEMA.nl
HEMA sells everything via the site, from clothing and care items to articles for the home. A popular part is the photo service. It is well known and supplies quality products. Order photo prints, gifts with photos or a nice personal photo card via the online photo service. This article is about ordering a photo card via the HEMA website. In addition, it is important that the photo that will be on the card is on your PC or on one of your social media sites such as Facebook. In this article we start from a photo that is on the PC.
Would you rather order via an app on your tablet or smartphone? Then read our article ‘Order a photo card via the Greetz app’.
Getting started with the photo card
- Open HEMA’s photo site.
- Click on ‘Photo card’ on Make now.
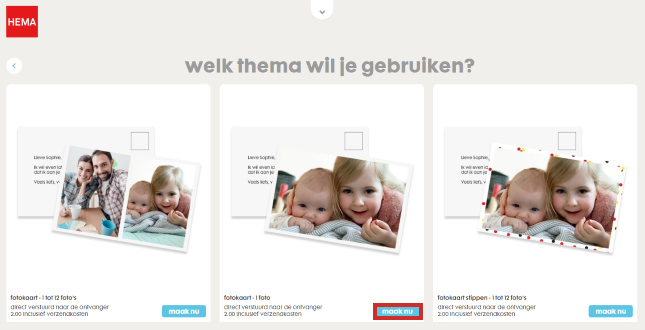
- An overview with the different types of photo cards opens. Each version states how many photos fit on the card and how much the card costs, including shipping. We make a neutral card with a white border. The procedure for other cards is the same. Click on ‘Photo card – 1 photo’ on Make now.

- The site asks whether you want to log in with your HEMA account or create an account. It is not possible at HEMA to send a card without an account. Please log in or click Register and follow the steps.
Add photo
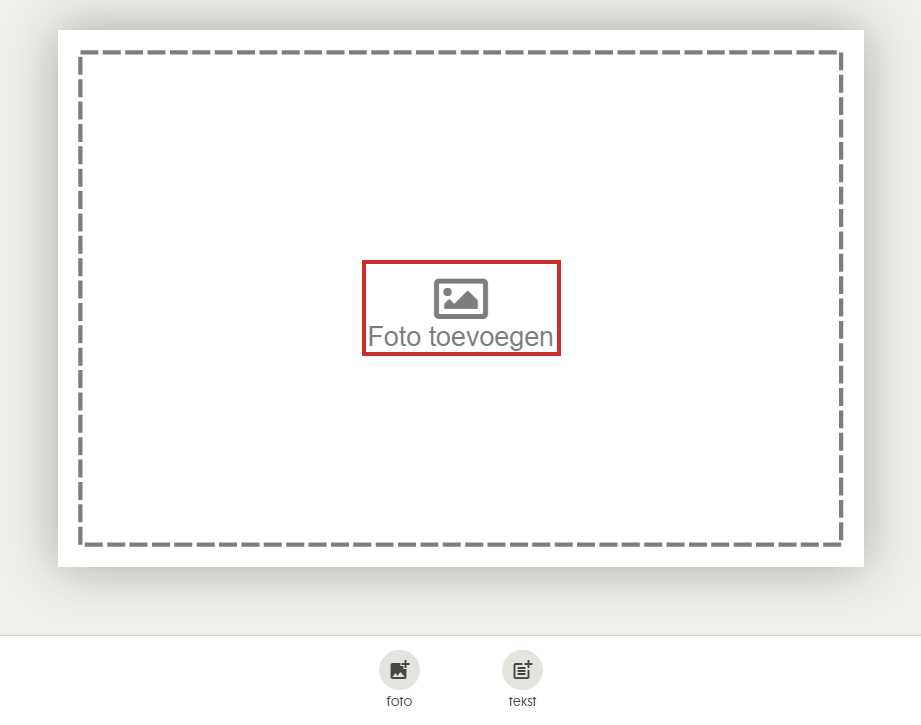
A clear window appears. You can see the outline of the map and below it two buttons for photo and text. There is also a button on the card itself to add the photo.
- click on Add photo.

- Indicate where the photo that will be placed on the map is. click on My device.
- Browse to the folder containing the photo.
- Select the photo.
- click on To open.
- The photo appears. Do you want to use this photo? Click at the bottom Use photo.
- You will see the card with the photo in it. The photo is probably not quite in the right place. Drag it with the mouse to the right place.
- Below the photo card are a number of buttons to edit the card. Use the different options to edit the photo card until you like it. Does the toolbar disappear after performing an operation? Then click on the photo to call it up again.
- Back: go back to the overview.
- Delete: delete the photo and go back to the overview.
- Filter: Use a filter to give the photo a different look. The choice is from original, boost (colors are enhanced), gray, sepia or vice versa.
- Clippings: Set the photo into a specific shape, such as a heart or a star.
- Zoom: bring the photo closer (zoom in) or reduce it on the map (zoom out).
- Rotate: Rotate the photo relative to the map.
Add text
Is the photo to your liking? Then you can add text to it. This is not mandatory. In this article, we’ll add text to show you how. You can skip this section if you don’t want text on the front of the card.
- Click the three dots icon above the photo.
- click on Add text.
- Below the photo card is a white box. Click in the box and type the desired text.
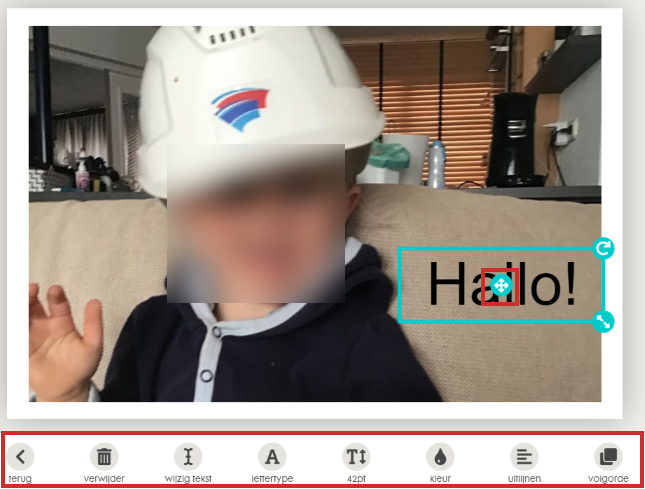
- The text will initially appear in black letters in the box. Drag the text to the correct position on the photo card using the arrow button in the text box.
- Below the photo card are a number of buttons to edit the text. Use the various options to edit the text until you like it.
- Back: go back to the overview.
- Delete: delete the text and go back to the overview.
- Change text: change the text to appear on the photo card.
- Font: Choose a different font from one of six options.
- Pt: adjust the size of the letters via a slider.
- Color: Choose a different color for the text and for the background of the text box. To do this, use the scroll bars.
- Align: Control how the text aligns in the text box on the photo card: left, center, or right.
- Order: place text behind the photo (the text almost disappears). These options are not interesting.

- Are you performing an operation? ‘Back’ takes you back to the map and the toolbar. While editing the text, the toolbar may disappear. Then click on the text to call up the toolbar again.
Edit card back
Now put a text on the back of the card.
- Click the button at the top right Flip card.
- The card turns over. click on Add text.
- A text box appears. Type and text.
- The font resembles handwritten text. Adjust this to your liking. Click on the text box on the map, and the toolbar (see above) reappears. Edit the text until it is the way you want it.
- click on address.
- Enter the recipient’s address details.
- click on Save.
Finish and send card
The card is ready. You can have it shipped.
- Click on the top right Send card > To order.
- In the next window, click on the top right To shopping cart.
- You will see an overview of the order. click on Continue.
- Are you ordering for the first time? Then HEMA will ask for some additional information for your account. Fill in the required information and click at the bottom Continue.
- Here you choose a payment method. Click on the desired option and click on Pay now.
- Follow the instructions to pay.
The photo card will be printed and you will receive an e-mail with the overview of the order.