Paint 3D is the drawing program in Windows 10. Get to know the extensive possibilities of the new Paint.
Paint 3D
Paint 3D is the successor of the trusted program Paint. The new program has a more modern look and feel and includes more options, including working with 3D. The app is standard on computers with Windows 10. If not, download it from the Microsoft Store:
- click on Start > Microsoft Store.
- Click on the magnifying glass icon, type ‘Paint 3D’ and in the search results click Paint 3D.
- click on To download or to install.
Start a drawing
Open a drawing like this:
- click on Start.
- Scroll down the list of apps (programs).
- click on Paint 3D.
- The program starts. click on New.
The parts of Paint 3D
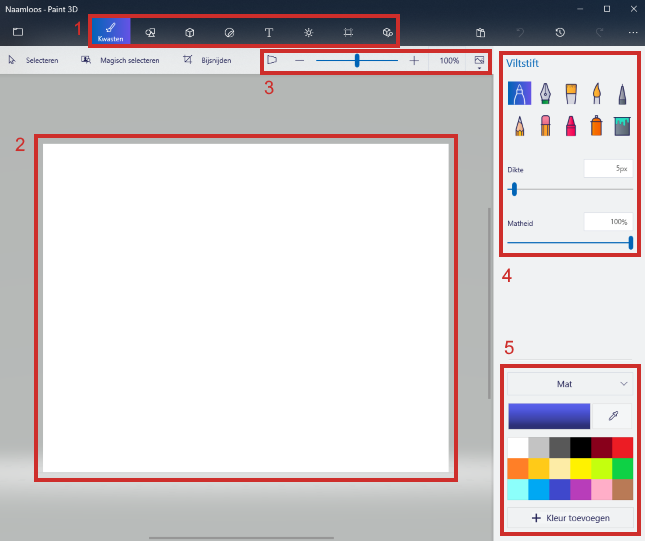
This is what the Paint 3D overview window looks like after creating a new document:

1: The tabs. By default, the leftmost tab ‘Brushes’ is open.
2: The drawing sheet, which is still empty. This is where you make the drawing.
3: The display options. Here you can zoom in or out or view drawings in 3D.
4: The tools. Here you select which tool you use to draw.
5: The colors. In this section you choose the color with which you draw. In the drop-down menu at ‘Mat’ you select the representations of the colors.
Insert shape
Paint3D has fixed shapes for users to use. Think of a triangle or square. This is how it works:
- Click on the tab 2D shapes.
- At the bottom right of 2D shapes, click on the shape you want, for example Square.
- Click with the mouse in the white area and keep the mouse button pressed.
- Drag the shape out. Satisfied? Release the mouse button.
- Right click on the slider under ‘Thickness’. Drag the slider to the left to make the lines of the shape thinner or to the right to make it thicker.
- Under ‘Line thickness’, click on the set color and choose a color.
Insert lines
Sometimes it is more convenient to insert lines yourself. Do this like this:
- Click on the tab 2D shapes.
- Under ‘Line and curve’, select the desired option, for example Rule.
- Click in the white area where you want to place the line. Hold down the mouse button and draw the line. Satisfied? Release the mouse button.
- Drag the slider under ‘Thickness’ to the left to make the line thinner and to the right to make it thicker.
- Under ‘Choose a color’, click on the already set color and choose the desired color, for example Black.
.png)
Draw yourself
Prefer no fixed shape? Make a drawing yourself.
- Click on the tab Brushes.
- Under ‘Felt-tip pen’, select which tool you want to draw with, for example Felt tip pen or Chalk.
- Click on a nice color at the bottom right, for example Dark gray.
- Click on the digital paper and hold down the mouse button.
- Draw an object.
Fill a plane
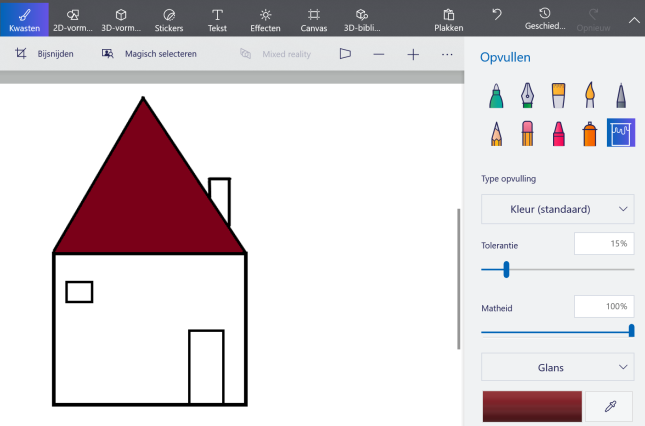
A handy tool is the paint can, or the ‘Filling’ tool. This fills in defined areas.
- Click on the tab Brushes.
- Click on the tool Filling up
 .
. - Click on the desired color at the bottom right. We choose Dark red.
- Give the color a glossy glow or make the color matte. For example, click Mat > shine.
- Click in the drawing on the shape you want to color. We have drawn a house and click in the roof to fill it.

Other useful tools
There are many other tools, such as a Calligraphy Pen or a Spray Can. Add parts to the drawing with this. We use the example of the house.
- click on calligraphy pen
 .
. - click on Gloss > Dull metal.
- Click on the color Gray.
- Draw some smoke circles above the chimney.
- Click on the tool Chalk
 .
. - click on Dull metal > Polished metal.
- Click on the color Yellow.
- Draw a yellow sun at the top right of the screen. Move the mouse over the lines several times to make the chalk line thicker.
- Click on the tool oil paint brush
 .
. - Click on the box behind ‘Thickness’ and type ’25’.
- click on Polished metal > Matt.
- Click on the color Green.
- Draw some grassland under your cottage.
- Click on the color Brown.
- Click on the tool Filling up.
- Click on the door of your house.
You have now seen how to work with some of the tools, how to choose a different effect, how to choose a color, and how to adjust the thickness of a tool..png)
Back in time
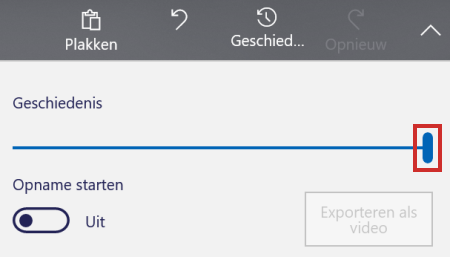
Paint 3D has a very handy feature: a scroll bar to go back in time. Dragging the dash on the slider left or right shows you earlier or later stages of your drawing. Very handy to go back in time if you are not satisfied with a part of the drawing:
- Press the button History.
- A window with the scroll bar will appear. Drag the slider to the left to go back in time.

- Drag it all the way to the right again to end up in the ‘now’.
- Click in the gray area next to the drawing to close the scroll bar.
Add stickers
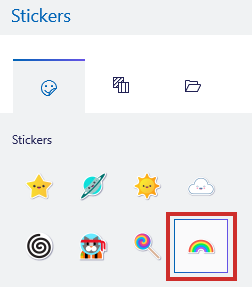
Stickers are pre-drawn pictures that you can add to a drawing. That gives a nice effect. This is how you open the section with the stickers and ‘paste’ one on your drawing:
- Click on the tab stickers.
- Right click on the tab with the smiling face
 .
. - You will see all kinds of nice pictures. For example, click on the image of the rainbow.

- Move the mouse pointer to the white part under the sun.
- Hold down the mouse button.
- Draw a triangle with the rainbow in it from top left to bottom right.
- Release the mouse button when the rainbow is big enough.
- Move the mouse pointer to the center of the rainbow.
- Hold down the left mouse button and move the mouse to move the rainbow.
- Release the mouse button when the rainbow is in place.
- The square buttons at the corners make the rainbow larger (drag out) or smaller (drag in).
- Click outside the rainbow to close the selection box.
- In the tabs area, click the brush button to return to the Tools window.
Save drawing
- Are you proud of your creation? Then save it:
- Click the button at the top left Menu.
- click on Save as.
- click on Paint 3D project.
- Give your drawing a name.
- click on Save to Paint 3D.
- You can now close Paint 3D via the cross at the top right of the window.
- Through Menu > Open open the saved drawing at a later time.