You probably recognize it. You need to print something from an Excel file, but it comes out of the printer differently than you wanted. Prevent this by adjusting your page settings.
View print preview in Excel
It can be difficult to print pages properly in Excel, because you cannot immediately see where one page ends and another begins. So you don’t see what fits on the print paper. To prevent unhelpful pages from rolling out of the printer, you can do three things. Before we discuss these three options, it’s helpful to know what your document would look like if you printed it without changing any of the settings. If it happens to fit exactly on the printing paper, then of course you don’t have to change the settings. To check this:
- Make sure you have opened the Excel worksheet you want to print.
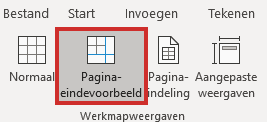
- Select the tab Image and in the ‘Workbook Views’ group, click Page break example.
- A blue dotted line indicates which part of the worksheet fits on one A4. You will now see how many pages you need to print the current table.

- Click on Normal to get out of the Page Break example.
The part you want to print does not fit properly on the printing paper? Then you can use one of the following three settings to make it fit.
Make worksheet landscape
By default, your page layout is set to portrait. If you have a wide table, the last columns will probably not fit on the printing paper. By adjusting the page layout from portrait to landscape, the table may fit. This is how you do it.
- Click on the tab Page layout.
- Then, in the ‘Page Setup’ group, click Orientation and choose that landscape.
Check the Page Break Preview (above) to see if changing the page layout has had the desired effect. If so, you can now print the worksheet.
Adjust width and/or height
You can also shrink the entire table to fit on one page. Here’s how to adjust the height and width.
- Click on the tab Page layout.
- In the ‘Fit to page’ group you can now adjust the width and/or height.
- Click on the arrow behind ‘Width’ and then click on 1 page.
- Now click on the arrow behind ‘Height’ and click on 1 page.
- A closed blue border is now placed around your table. This means that your table will be printed on 1 page.
- In the ‘Fit to page’ group you can see how much the table has been reduced in size behind ‘Scaling’. If the text is no longer legible after printing, you can always indicate behind ‘Width’ and/or ‘Height’ that the table can be printed over several pages.
Partial Printing
It is also possible to print only part of the table. You do this by determining the print range:
- Select the part of the worksheet you want to print.
- Under ‘Page Setup’, click Print Range.
- Then click Determine print area.
- You will now see a green line around the section you have selected. Everything within this green line will be printed.
Video: Print worksheet
The above steps are clearly demonstrated in the video below.