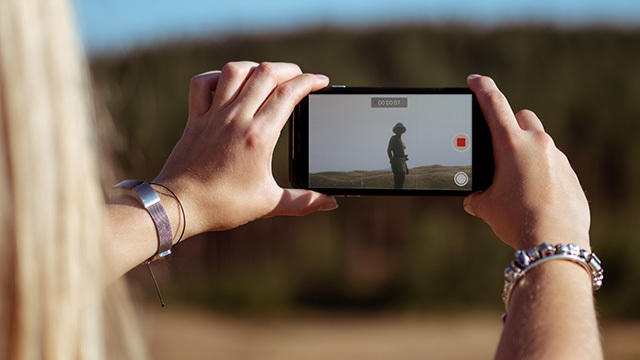
Recording videos has never been easier, as everyone now has a powerful camera in their pocket to capture events at any time. But whether the images are also pleasant to watch is the question. Stable filming with a smartphone, how do you do that best?
Current smartphones have excellent cameras for capturing HD video. Think of 4K resolution, a dynamic range and a lot of cool options for shooting live footage. And yet the most important factor for the quality of the movie remains the person holding the device. That is why in this article we will consider something that is typically a problem with smartphone recordings, namely choppy images.
Tip: Also check out our course bundle Smartphone photography.
Digital or optical stabilization
Even if you have the steady hand of a brain surgeon, small camera shakes are unavoidable. These small movements are especially disastrous in poor lighting conditions.
Smartphones have built-in image stabilization. There is optical image stabilization (OIS: optical image stabilization) and digital image stabilization (EIS: electronic image stabilization). Both techniques compensate for vibrations, but digital image stabilization suppresses vibrations via software.
In practice, EIS will make the frame of the video smaller to simulate movement in the opposite direction in that frame. With OIS, gyroscopic sensors measure the vibrations and the lens moves in the opposite direction with small motors.
Optical image stabilization makes the picture cleaner. Even better is the combination of optical and digital stabilization, such as with AIS: that combines both techniques by means of an AI algorithm.
Invest in a tripod (you)
If you are taking a picture from one point of view, use a tripod. A small table tripod costs little money and easily fits in the travel case or backpack. Always place such a tripod on a stable surface. It makes no sense to place the tripod on a table that vibrates when a truck passes by.

Consider purchasing a mobile stabilizer or gimbal (between $ 75-130). With such a lightweight stabilizer, you can film from one hand, because the mobile assistant works as a camera gyroscope. The electric motors in three rotating axes (pan, roll and tilt) ensure that the smartphone is perfectly centered and that the horizon always remains flat.
Such a hardware stabilizer provides a shock-free and smooth result.
Correct attitude
Do you want to shoot video freehand, so without a tripod? Then hold the device with both hands around the edge, as if you were looking through binoculars. This will prevent a blurry close-up of your finger.
The further you keep the phone from the body, the more you risk a choppy result. Place the elbows against the body or find support for the arms.
Of course you don’t have to stand rigid. You can make a pan or a tilt. Controlled movements add a lot to a video project, for example when you depict a landscape. In any case, make sure that the camera movement is smooth and not too fast.
Zoom in moderately
Most smartphones have a digital zoom. That’s just a software trick that makes it look like the subject is getting closer. To zoom in while recording without losing the sharp, vibrant quality, you need a good optical zoom. On a smartphone with more than one camera on the back, one of the lenses is often a special telephoto lens that is used for optical zoom.
Even then, you need to be careful with zooming. In professional films, the cameraman rarely uses the zoom lens. The director chooses a wide shot and then a close-up. No matter how good the lens and sensor may be, it never really looks good. The more you zoom in, the greater the risk of a choppy image, even with image stabilization.
The solution is obvious: get closer as far as possible.

Composition and rule of thirds
Not vibrating is one thing, but then it is still important not to display the subject skewed. On the smartphone screen, you can use the auxiliary grid to make sure the horizon is always straight. In addition, these lines provide a graphic support to maintain a good image composition.
You must activate this grid in advance. On the iPhone, go to the Settings, then to Camera and there you toggle the option Grid in. On an Android device you go to the camera app, where you switch on the grid via the gear wheel. With some brands this function is called Guidelines.
To get a nice composition, do not position the subject in the center, but just on a guide line of the grid and preferably at the intersection of two guides. For example, if you want to take a picture of a bird, try to place the bird’s head at the intersection of a vertical and horizontal line.
Leave space behind the subject so that the shot can breathe a little. Avoid movements in the background that will distract your viewers’ attention. And when taking a close-up of a person, it is better to cut off the top of their head than the chin.

After all, the rule of thirds is a rule of thumb that often makes for a more interesting composition. After all, it is predictable and boring to always keep the subject in the center of the frame. The grid divides the image into nine equal planes by means of two horizontal and two vertical lines. You are supposed to place the focus on one of the four intersections.
Position the horizon of a landscape on the bottom horizontal line to draw more attention to the sky or on the top horizontal line to draw more attention to the landscape. By this rule of thirds you force the viewer to take a composition into account.
.