
People with disabilities also like to use the computer and the internet. It makes them independent and less dependent on others. Microsoft has made the accessibility of its products a spearhead of development. As a result, there are more and more useful aids in Windows and Office in particular, which are not only useful for people with a disability. No, they make Windows 10 more accessible to everyone.
Microsoft calls the functions it builds into its software especially for people with disabilities ‘accessibility functions’. For example, they help with low vision, hearing problems, neurodiversity such as dyslexia, ADHD and autism, concentration problems and physical limitations. While clearly developed for these limitations, the features are available to everyone and often surprisingly useful. Moreover, there are also functions that you can use for example Officemaking documents more suitable for people with disabilities. And why not take that into account, especially when it is as easy as it is now thanks to Microsoft?
More accessible
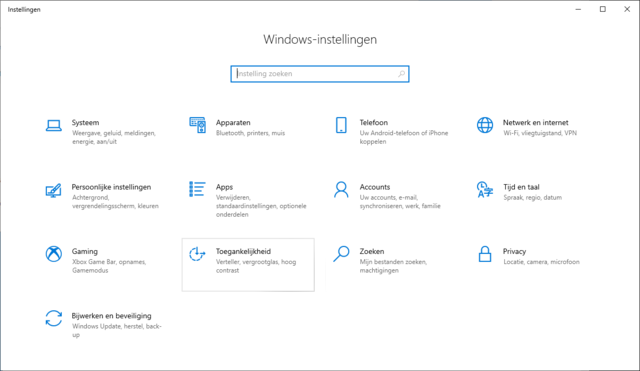
Also in Windows there are several options to make the software more accessible. A number of these were already present in earlier versions of the operating system, but clearly less well developed and, above all, very difficult to discover. Not in Windows 10, where Microsoft has brought them together and given prominence, right at the main settings. Open the Windows settings via Start, Settings (or Windows key + I) and click Accessibility. Here you will find settings for working with high contrast, the font size, you can activate the magnifying glass and the narrator. These are all useful functions that people without disabilities only appreciate when they get to know them better. If you are now sitting at the computer with reading glasses and you still cannot see it properly, then enlarge the text in Windows via Display, Make text bigger. At first only the sample text is enlarged, but that changes after clicking To apply. If you would rather see everything bigger, you can also do that via Make everything bigger.
Magnifying glass
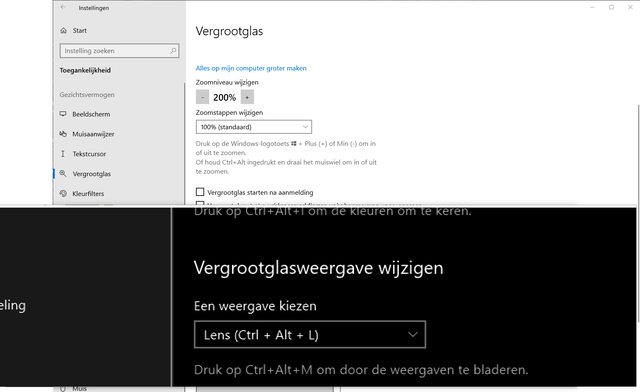
But there are more options that help when vision is deficient, such as the magnifying glass. You switch it on via Windows key + plus sign and off again via Windows key + Esc. Bee Settings, Magnifying glass you will find many configuration options for the magnifier. With the magnifying glass turned on, you can toggle between the different usage methods by pressing Ctrl + Alt + M, such as a lens that moves with the mouse, enlarging the entire screen or using a fixed part of the screen to display the magnification. Also handy: via Ctrl + Alt + I you can invert the colors in the magnifying glass, which often makes the readability and visibility of the options even better.
Color filters
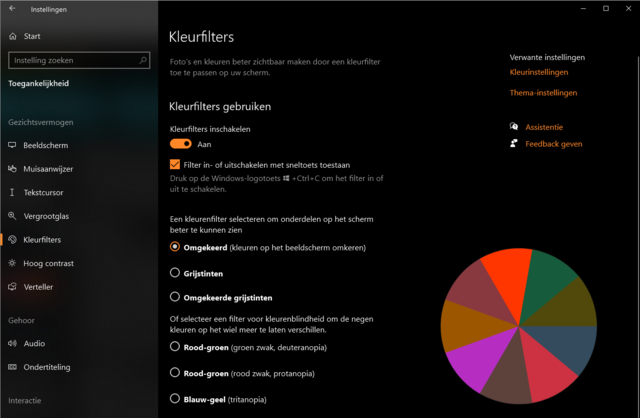
If it is difficult to see what is on the screen because of the colors used, you can apply a color filter. A color filter changes the color palette and changes the distinction between the different colors. To activate the color filter, choose at Color filters the option Enable color filters. The default filter is that of grayscale, so all color disappears from the screen. But you can also enable one of the other filters, such as Other way around, Inverted grays or one of the color filters specific for color blindness: Red Green (of which there are two versions) and Blue-yellow. If you simply want to enable or disable the color filter, activate the option Enable or disable filter with Allow shortcut. If this option is activated, you can use Windows key + Ctrl + C to switch between color filter or not.
Hear and speak
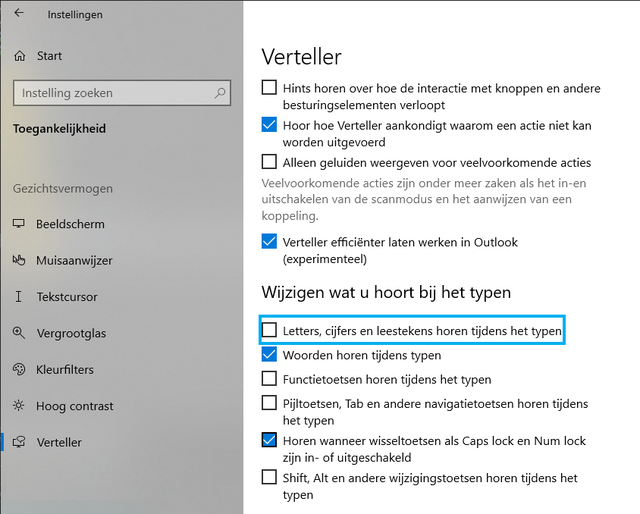
If it remains difficult to read properly, you can also have Windows read aloud. For this there is the Narrator, which in Windows 10 also reads neatly in Dutch. Through Narrator, Turn on Narrator activate Narrator or use Windows key + Ctrl + Enter to turn it on or off. The Narrator can be controlled by scrolling through the screen elements with the Capslock + arrow key left or right. The selected screen part is read aloud. When a document or web page is open, the Narrator reads its title first and then reads the text. When you are entering text, it will be read aloud. So for every letter you type, you will be told which letter it is and whether it is a capital letter, for example. This takes some practice, but can be a useful help with visual problems. Via the options at the Settings you can adjust the speaking speed, but also pitch and volume. In addition, there are Change what you hear when reading and editing and Change what you hear when you type options to hear more or less details.
Office too!
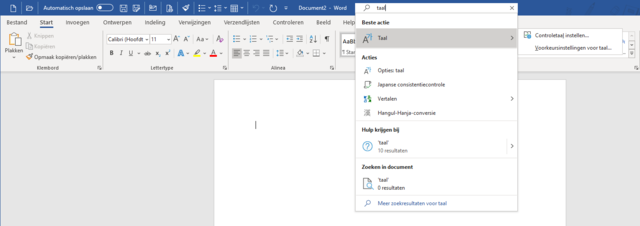
If the use of the accessibility functions in Windows is mainly aimed at operating the computer, in Office it goes a step further. There they really have to help to be productive. Then it is immediately noticeable that some functions are also very useful for everyone. Like the Search box at the top of the title bar of Word, for example, which is still in earlier versions of Word Indicate what you want to do as inviting text. If you find it difficult to remember where a certain function is in Word, use this box. Click in the box Search and type something; a menu immediately appears with from top to bottom first the actions, ie the functions of Word, then the link to the Help function for the topic and then the results of the classic search function for word or words within the opened document.
A useful aid is also the Concentration Aid. Again a part of Windows, but very useful when reading documents because distracting messages are no longer displayed. Click with the mouse on the symbol for it Action center to the right of the clock in the taskbar and then toggle the Concentration aid in. In Windows Settings (Windows key + I) you can access System, Concentration aid indicate which notifications you do and do not want to see. You can even automate the activation and deactivation of the Concentration Aid and link it directly to your working hours, for example. By clicking the button in the Actions screen more often, you can also switch between turning off Focus Assistance and showing only priority messages or only alarms.
Dictate
If you have the latest version of Office 365, you can now also dictate text. You no longer have to type. click on Dictate and select the desired language. Then click on Dictate and the red button makes it clear: the recording has started. If you now quietly record the text, Word will type it out for you. You can also pronounce punctuation marks such as period and comma; these are neatly included in the typed text.
Easier reading
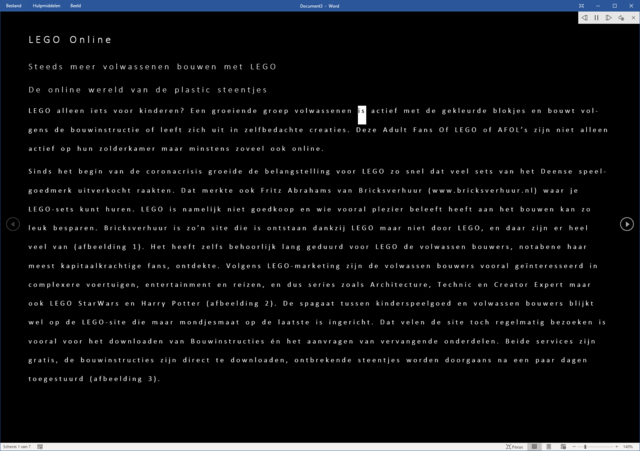
You can also tailor the rendering of Word to read with more concentration. Through Statue, Reading mode switches Word to a purely reading-oriented view of the document. All editing options are gone. Through Statue, one of three menu items that remain visible, you can completely customize the view. For example, choose Page color, Sepia or Other way around to increase the emphasis on the text and make reading less tiring. Through Column width switch between continuous text across the entire width or in multiple columns.
There is even more reading help through the options Syllables, separating the syllables in all words by showing a period between them, or Text spacing, widening the space between syllables or words. Through Read aloud enable the well-known Windows Narrator and have the document read to you.
Focus
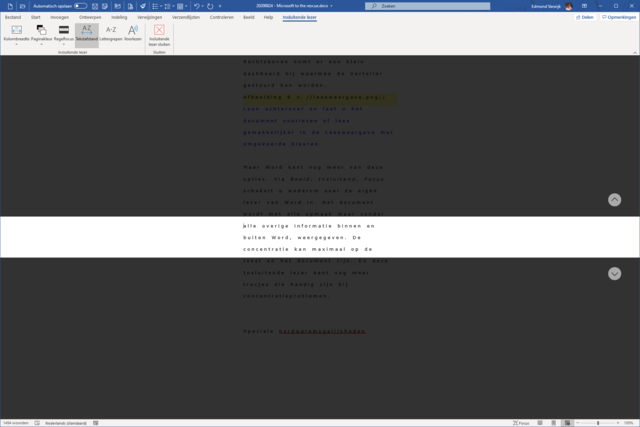
But Word has even more of these options. Through Statue, Including, Focus you switch to Word’s own reading view. The document is displayed with all its formatting, but without the other information inside and outside Word. The concentration can remain maximum with the text and the document. This Immersive reader knows even more tricks that are useful for concentration problems. One option we haven’t seen yet is the Control focus. This will make the entire document dark, except for one, three or five lines. You determine the latter by clicking the arrow below Control focus to click. You can now use the mouse or the arrow keys to scroll through the document and focus on the text.
Create accessible documents
If you have created a document and want to share it with others, check before sharing it whether it helps people with disabilities or makes it more difficult to read and understand the document. Through To check, Check accessibility lets you check the document for a number of important things, such as the use of color, that all columns in tables have clear column headers, that images are in line with the text, that negative numbers in Excel are actually displayed in negative and not only have a red color , and images have alternate text describing the image for people with visual impairments. These and many more checks are performed very quickly by Office as a kind of spell check. All errors and areas for improvement are then shown in the side window, along with advice on how to solve those problems. You don’t have to do that only afterwards; leave the window open while you create the document and you can correct most mistakes right away.
.