
Almost every website has a contact page. Useful if visitors want to contact you. Of course you can do this with an e-mail address, but a form looks a lot more professional.
Alex White![]()
With a contact form you can indicate exactly what information a visitor can or must enter. This way you avoid a confusing story in an email, in which all kinds of important information is missing. Moreover, a form on your site simply looks good.
1. Create a contact page
Log in to your WordPress website. This can be done via the control panel of your hosting provider or directly via the link of your WordPress site: www.jedomeinnaam.nl/wp-admin
If you don’t already have a contact page on your site, create one first. Click in the main menu Pages | New page. If you get a pop-up Help window see, then close it. Type the title Contact in the text box Add title. You can immediately enter your address details in a text box below if you wish. Then click To publish | To publish.
 2. Contact form plugin search
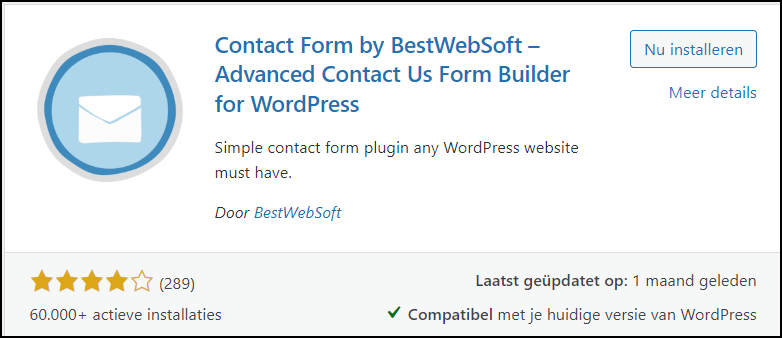
You can now create a contact form plugin add. Return to the dashboard with a click on the W top left. To search for a plugin, click Plugins | New plugin. Then type in the search box Search plugins: contact form bestwebsoft. There are many more contact forms, but in this case we are going for an easy-to-use form.
3. Add contact form plugin
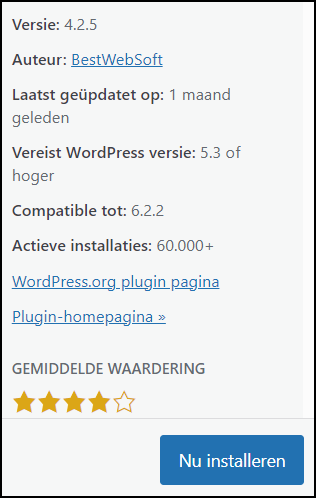
Click at Contact Form by BestWebSoft on the name or More detail for some additional information about the plug-in. It is always wise to do this before choosing a plugin. This way you know better what you are dealing with. This is the free basic version of the contact form, which is sufficient for simple forms. For more options you need paid pro version.
To install the plug-in, click the button Install now. Then activate the plugin with Activate. If you don’t, it will be installed but in pause mode.
4. Set up contact form
The contact form has been added to the overview of your installed plugins. To use it, you need to set up the form. Click on the plug-in Contact Form by BestWebSoft on Institutions. A pop-up with a tip may now appear. Then click on it Close.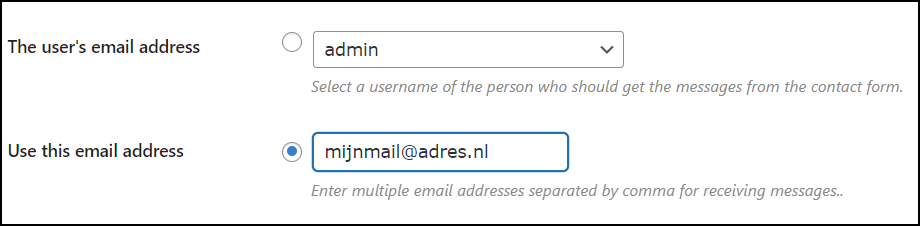
Setting up the form is quite easy because part of your data has already been filled in. The plugin gets this info from your WordPress settings. On the tab Institutions behind Use this email address already contains the email address to which the form data will be sent. Would you rather use a different email address? Then enter it in this box. Please note that the circle in front Use this email address has been clicked.
5. Specify other settings
You go to the next tab with a click Additional Settings. Here you specify additional settings for the email sent from the form. Usually these options are already filled in correctly automatically. Bee Sending method states the shipping method. Bee ‘FROM’ field contains the sender name and address of the email. You can usually leave this as is.
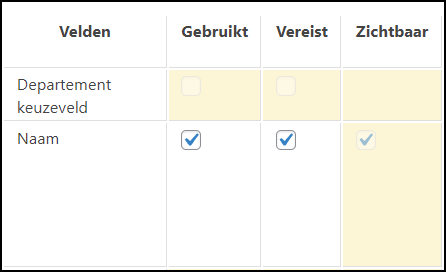 Lower on this tab are the fields for the contact form, such as name and email address. This determines which information a visitor must enter. Indicate which fields you want on the form with a check mark. Also pay attention to the columns. Used means that the field must appear on the form. Required means that the field must be completed by the visitor. Indicate which fields you want on the form.
 There are even more options lower on this tab. You can just leave it as is for a simple form. Click on the button at the bottom Save edits.
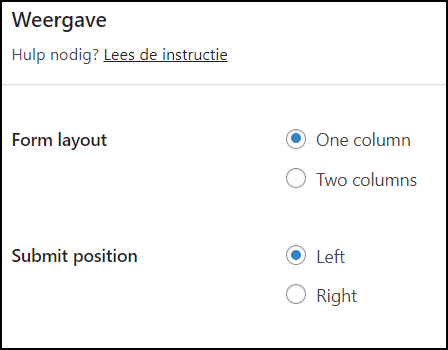
6. Specify view
Finally, go to tab Display. Here you set what the form should look like and where it should be located on the page. With the pro version you have many more formatting options. Usually the formatting you set is okay. At the very bottom of this tab you will see the example of the form. Everything done? Then click Save edits.
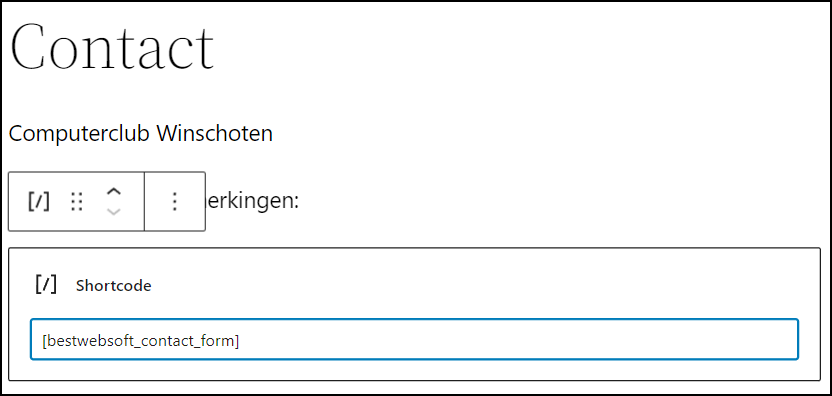 7. Add contact form
Once you have set up the contact form, all that remains is to add it to the contact page using a so-called shortcode. Click in the main menu Pages and after that Contact. If necessary, first add a paragraph block with text such as: For questions or comments. Press Enter.
 Click on the top left +. Click at Widgets on Shortcode. Type in the box below Shortcode: [bestwebsoft_contact_form]. Note the underscores and square brackets.
8. Test contact form
You can now view the form. Click at the top right Update. click on Example | Preview in new tab. The contact form is ready. It is wise to test it out by completing it and sending it.
|