PC-Active 335 contained the article ‘Build your own sensors’. Many readers have purchased a DIY kit that HCC offers specifically for this purpose. In the article below we address some of the problems readers encountered and provide the solutions in this FAQ article.
Other sensor: AM2301/AM2302 sensor also measures outdoor temperature
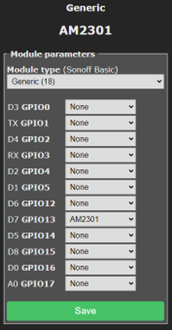
Unfortunately, the DHT11 sensor mentioned in the article had delivery problems. It was replaced with an AM2301/AM2302 sensor. This has the advantage that it can go down to -40°C where the DHT11 stops at 0°C. An additional advantage and also nice is that you can measure the outside temperature in the winter. In Tasmota it must be set slightly differently, see the correct settings in the image below.
(article continues below image)
Second adjustment AM2302 sensor
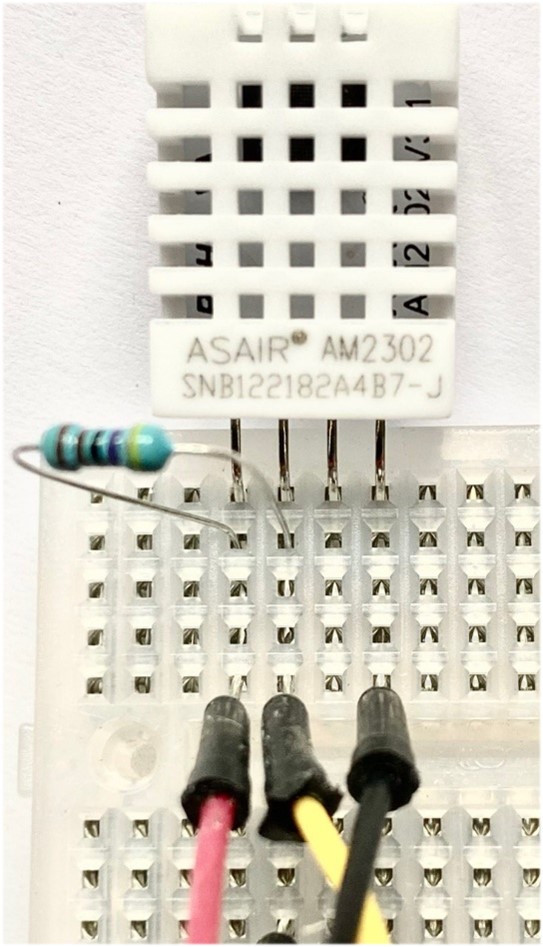
A second adjustment with the AM2302 compared to the DHT11 is the need to place a 4700 Ohm resistor between the Vcc pin and the Data pin. It was already in the text of the previous edition, but for the sake of clarity, here is an image of what it should look like.
For clarity, in the figure Pin 1 = Vcc, Pin 2 = Data, Pin 4 = Gnd. (Pin 3 does nothing)
(article continues below image)
Solve connection problem
Are you not getting any data from the sensor? Then replace the three wires to the sensor. We have seen during workshops that it sometimes happens that the pins are not properly connected to the wires and therefore do not make contact.
Serial port problem
Another problem that may arise is with the serial port: Windows does not recognize the chip on the ESP8266. Supplier TinyTronics delivered a model with a CP2101 communication chip where we assumed they would deliver a CH340 model. We had already written how to install it for the CH340, but not yet for the CP2101. You can download the correct driver at https://www.silabs.com/developers/usb-to-uart-bridge-vcp-drivers?tab=downloads
Select the top download here (CP210x Universal Windows Driver)
(article continues below image)

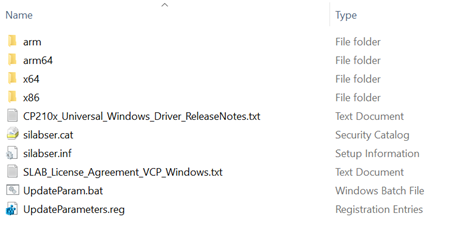
and unzip (extract) this information to a folder. Below you can see the contents
(article continues below image)
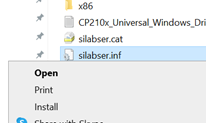
Now right click on the “silabser.inf” file and select Install. The correct driver should now be installed.