Put files in Dropbox. So you can access it everywhere, you can easily share files with others and you have a backup.
Supplies
Dropbox is a free-to-use cloud service that allows you to store files away from your computer, USB stick, or external hard drive. Dropbox can be used on any device with internet via the browser, for mobile devices there is an app and for the computer there is a special program. In this article, we’ll cover using the Dropbox computer program. You can find out how to do this in the article ‘Install Dropbox on Mac’.
To use Dropbox, a (free) account with the storage service is required. Explanation on how to get an account is also in the above article.
Dropbox folder
If Dropbox is installed on the Mac, it will have its own folder in the Finder. Everything in the Dropbox folder is also stored online once the computer is connected to the Internet.
View file in Dropbox folder
The Dropbox cloud service allows the user to store and view all kinds of files. Open a file like this:
- Open the Finder. To do this, click the smiley face icon on the Dock
 .
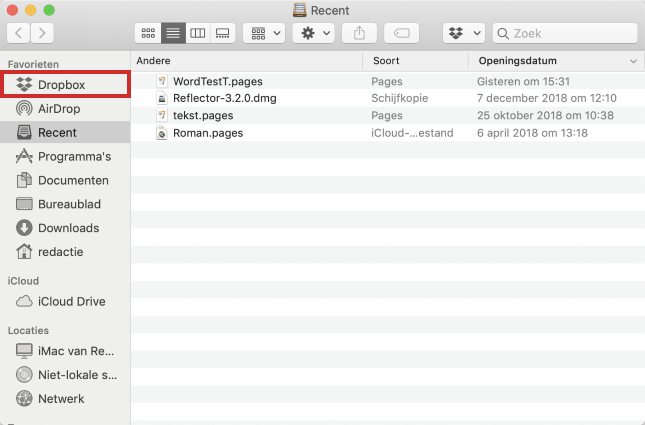
. - On the left side of the Finder window, click Dropbox.

- Double click on a file to open it.
The document opens in the associated program.
Create folder
Folders are useful for organizing files. Create a new folder like this:
- Open the Finder.
- Click on the left side of the window Dropbox.
- Click in the menu bar on Archive.
- click on New map.
- Type the name of the folder and press the Enter key.
- The folder has been created. Double-click the folder to open it.
Upload copy of file or folder
To save a file to Dropbox online, simply drop the file (or a copy of it) into the Dropbox folder in the Finder. Copy a file or folder from the Finder as follows:
- Open the Finder.
- Click on the file or folder.
- Click in the menu bar on Change.
- click on Copy ‘XXX’. Where XXX stands for the name of the file or folder.
- In the Finder on the left, click Dropbox.
- Click in the menu bar on Change > Paste part.
The file or folder is now also in Dropbox.
Move file to Dropbox
Move files to a folder in Dropbox like this:
- Open the Finder.
- Click in the menu bar on Archive > New tab.
- An additional tab opens in the Finder. Both tabs allow you to browse folders in the Finder. In the first tab, navigate to the desired file.
- At the top of the Finder, click the second tab and click Dropbox.
- Click again on the first tab and then on the file you want to move (hold down the mouse button).
- Drag the file to the second tab.
- The tab lights up and opens. Place the file in the folder and release the mouse button.
The file is now in the selected folder.
Delete file
Delete files from Dropbox that you don’t want to keep. This frees up space for other files.
- Open the Finder.
- Click on the left side of the window Dropbox.
- Right click on the file.
- Click in the menu on Move to Trash.
- click on Delete everywhere and the file has been removed from Dropbox.
The file will remain in the Deleted Files folder on Dropbox.com for 30 days. It is also in the Trash of the Mac.
Recover Deleted File
Do you still want to keep a deleted file? Then restore the file as follows:
- In the Dock, click the Trash icon
 .
. - Click on the file.
- Click in the menu bar on Archive.
- click on put back.
The file is now back in the Dropbox folder.
Share file
In Dropbox, you can share a file with someone else. This is only possible via the Dropbox website. There is a shortcut on the computer for this.
- Click the Dropbox icon at the top right of the menu bar
 .
. - Click on a globe icon
 .
. - Dropbox opens in the browser. If necessary, click on Back to account. The article “Working with Dropbox over the web” explains how file and folder sharing works.