")
In PC-Active 334 the data backup solution as present in the standard Linux Mint Cinnamon distribution was discussed. In this second part it is explained how to save the files of the operating system and the subsequently added software in a backup and how to restore this data afterwards. We use the standard system backup solution present in Linux Mint Cinnamon.

Peter de Bruin
There are two different solutions that I want to discuss in this article. The first one is to back up and restore self-added programs that came from the Repository via a program list copy. Then I’m going to explain how to secure and restore your Linux Mint Cinnamon operating system using the System Backup.
1: Reinstall installed programs from a program list
We will now first make a program list copy. This is a list of all custom added programs outside of those included in the Linux Mint Cinnamon Distribution.
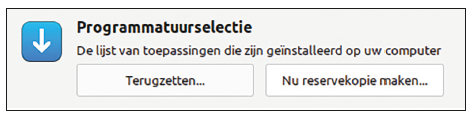 |
| Backuplist installed programs |
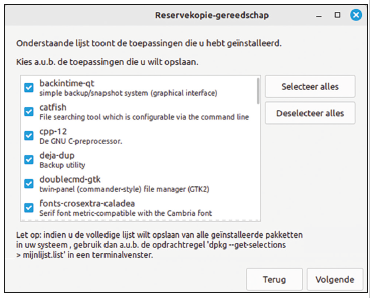
Additional installed programs
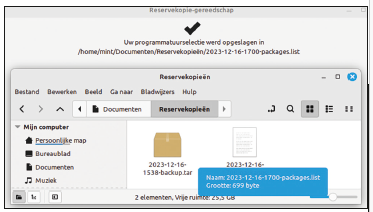
The list of programs is saved in the Documents folder in the Backups folder
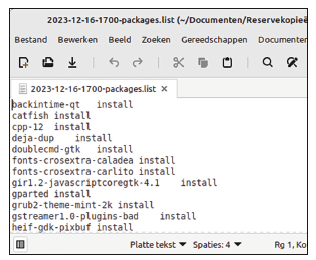
The names of programs in the list are provided with the installation instructions for restoring
2: Restore installed programs via a program list
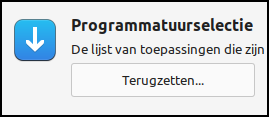 |
| Restore installed programs |
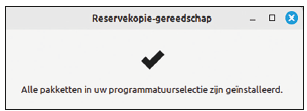
To restore programs, use the saved program list. The correct version of the program associated with the Linux distribution is obtained from the Repository retrieved and reinstalled. This works very well if you have installed a new version of Linux Mint Cinnamon and you want to reinstall all your own extra programs. With normal ‘updating’ to a new version the extra installed programs are also updated.
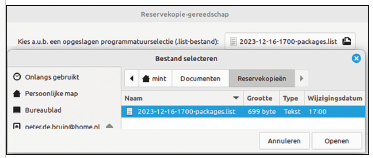
Choose the correct program list in Documents – Backups
Your system will be checked for any installed programs that are listed but not in your Linux system. You can now influence what will be installed via the check boxes.

The list of programs to install
3: Set up Timeshift System Backup
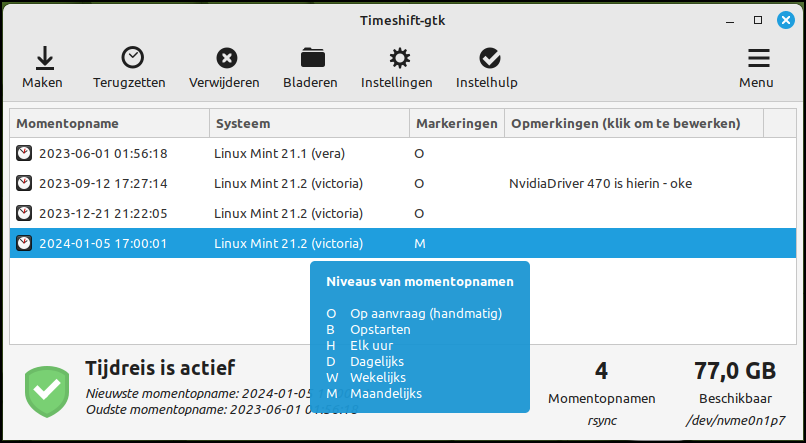
To secure the Linux Mint Cinnamon operating system, use the program Time shift. Timeshift allows you to create restore points for your system. They are incremental (accretive) backups that create an accurate picture of your system at the time of the backup. You can restore your system to the exact state it was in when you made the backup. Due to their incremental nature, they take up relatively little disk space after the first full backup. With Timeshift you can also make backups to external or network drives. This protects you against hardware problems. Timeshift can be run automatically to create backups at different times.
You find Timeshift in the menu in the category Management.
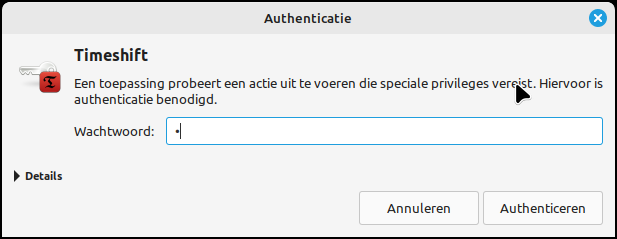
click on Timeshift to start the installation. This is only necessary the first time. After that, you can simply start making every subsequent backup.
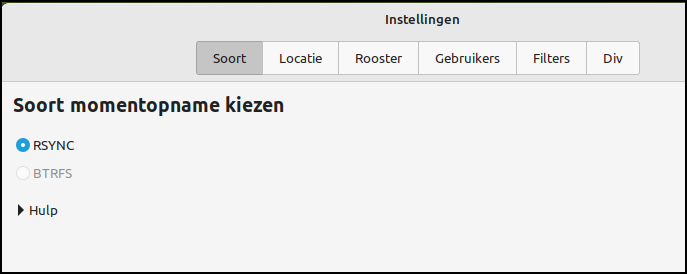
The first thing we are going to set is the type of backup: Rsync or BTRFS. Unless you have formatted the hard drive for BTRFS, Rsync is the way to go and the default within Linux Mint.
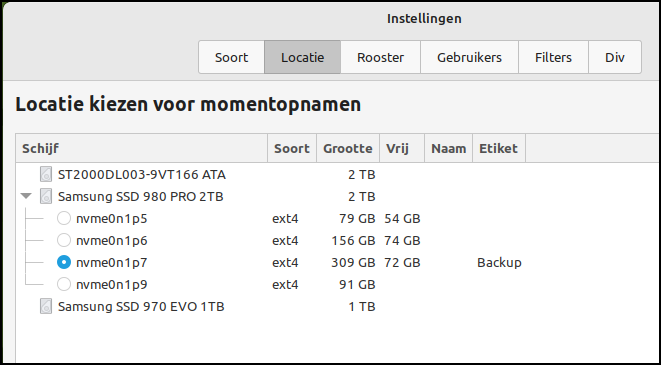
 Next, you specify where the backup will be stored. In this example, I use a separate partition within my computer, but it is better or safer to use an external storage medium for this. In any case, make sure that you have formatted the medium with the EXT4 format.
 |
| Location where the backup should be saved |
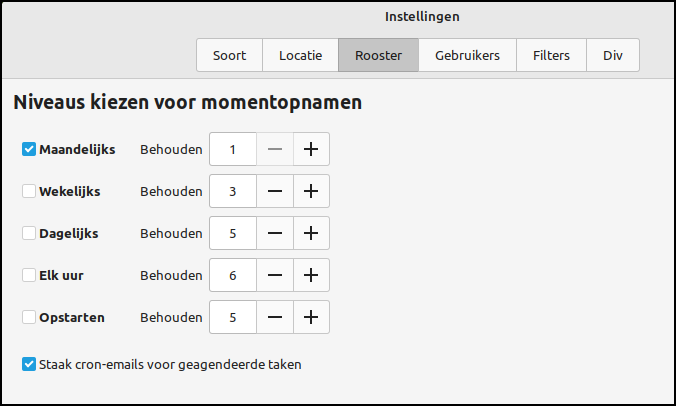 |
| Recording when backups are made and which ones are retained |
By default, user files are excluded from the backup. You can take them with you, but when you restore a backup you will also restore your own data to the backup moment. As a result, you will lose all interim adjustments in your documents, images, etc. It is better to use the method described in Part 1. Later I will discuss even better backup solutions.
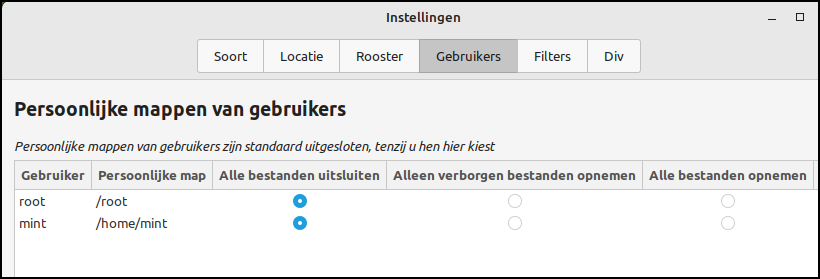 |
| Exclude user data from system backup |
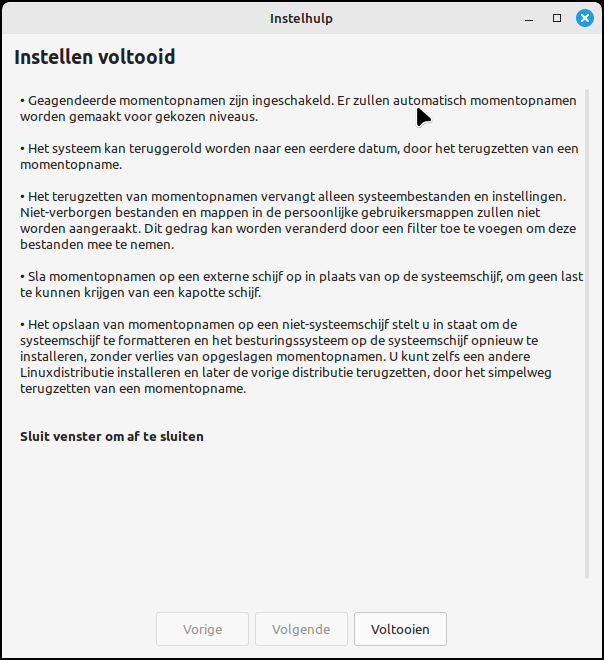
Via the Setting help you pass the same settings as described above. It then ends with an additional explanation of the settings made.
4: Create Timeshift System Backup
Backing up your system is easy. After setting Timeshift make a backup immediately. This way your system has an initial restore point. To start the backup, click the button To make. During the backup process Timeshift the progress to show.
 |
| The letter markings show you how the backup was created |

The progress is shown
 |
| You can give the created backup your own description |
5: Restore Timeshift System Backup
Concepts
|
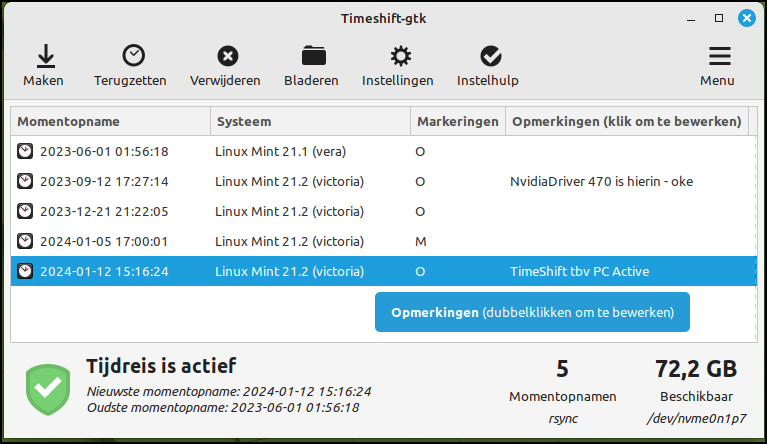
Once you have created the backup, you can see it appear on the home screen. Timeshift creates a list of all saved restore points. If you want to restore any of these, you can click the button To recover click to start the recovery process. Remember that restoring your system will destroy any changes made after the restore point. This means that you can lose files if you haven’t excluded your home folder in the settings.
But what do you do if your Linux Mint system won’t boot anymore? How can you Timeshift-start the recovery process? For that you use your Linux medium. Usually this is a bootable USB stick. This will start the Live version of your Linux Mint system. Please note: you will not be reinstalling, but you will now go through the menu System Unpleasant Timeshift and start it up. Just as described above in 3 Set Timeshift System Backup indicate the location where the system backup is located. The list of restore points will then become visible and you can start the restore process by clicking on the selected one
restorepoint.