
With the Parental Controls feature on Windows computers, you ensure that your children can surf the Internet safely, so that they are not confronted with issues such as sex or violence. Read in this workshop how to do that.
Niels Brouwer
The internet is usually great, but it also has a downside. For example, there is a lot of sex and violence to see, things you may not want to expose your child to. In this workshop we will teach you how to create your own account for your child, so that he or she can use the internet safely. For this you have to create a separate Microsoft e-mail address per child, after which you can get started with setting up Parental supervision† 
CREATE AN ACCOUNT
Open Settings by clicking the Windows logo at the bottom left and then the gear icon above it. Then click Accounts† Here you can see the information about your profile. You must be logged in as an administrator to continue. This is below your email address. Click now Family and other users in the left menu. Then click on Add a family member† Here you have the option to enter your child’s existing Microsoft email address or to create a new account. If your child doesn’t have an email address yet, click Create an account for a child (see image above). To do this, enter a new email address. You can choose between @outlook.com and @hotmail.com. Enter a password you created yourself and remember it well. You will then be asked for your child’s first and last name. Once you have completed this, enter your country/region and your child’s date of birth. By entering this date of birth, Microsoft automatically sees this as your child’s account and adjusts the next steps accordingly. 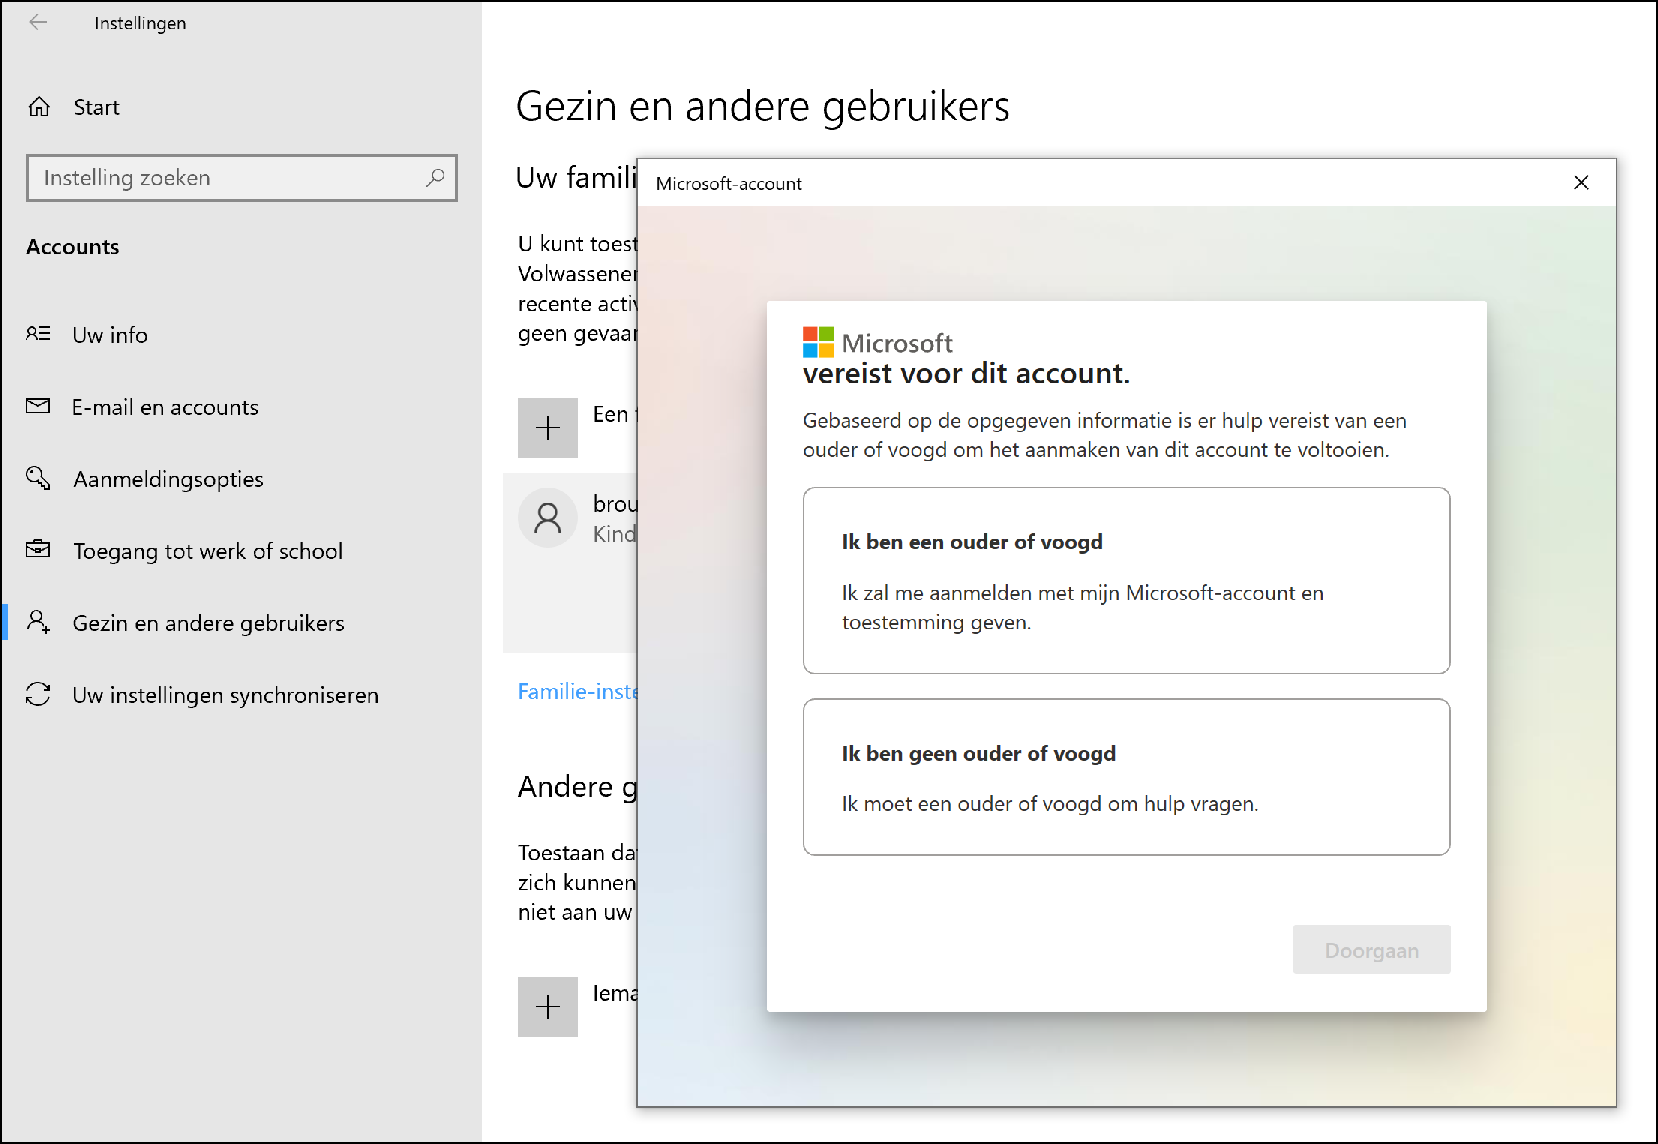
When the account has been created, you will automatically receive a confirmation by e-mail.  You must now log in again with the new account. When you do that, you’ll get the message you see in the image above. click on I am a parent or guardian to give permission for the creation of this account. When you do that, you as a parent or guardian must enter your own email address and password for extra security. Once you’ve done this, you’ll be giving your child’s Microsoft account permission again. Here you will find information about what information Microsoft has about your child. Scroll down and enter your signature. Then click on Yes, I agree† You will now be given the choice of whether your child can sign up for non-Microsoft apps. Make your choice and click Get on† In this case, we do not choose this. Then click Yes I’m sure† Your child’s account has now been created.
You can now set various options, such as an age limit for apps and games, whether you want to monitor activities, filter websites and whether or not to grant permission when your child wants to install an app from the Microsoft Store.
PARENTAL SUPERVISION
Everything is now set up correctly. You will now see your child’s account on the screen. We are now going to set up the parental controls. Click on Manage family settings online, under your child’s account. A window will then open in your browser. This is the home screen of the Parental supervision† This means the same as Family Safety, which you see at the top left of the page. You will see yourself as an administrator with the option to add a family member. When you scroll further down, you will see an overview with all the options that you can view and manage. You can see here screen time stand. Here you can set time limits for your kids’ devices, apps, and games to monitor and manage their screen time.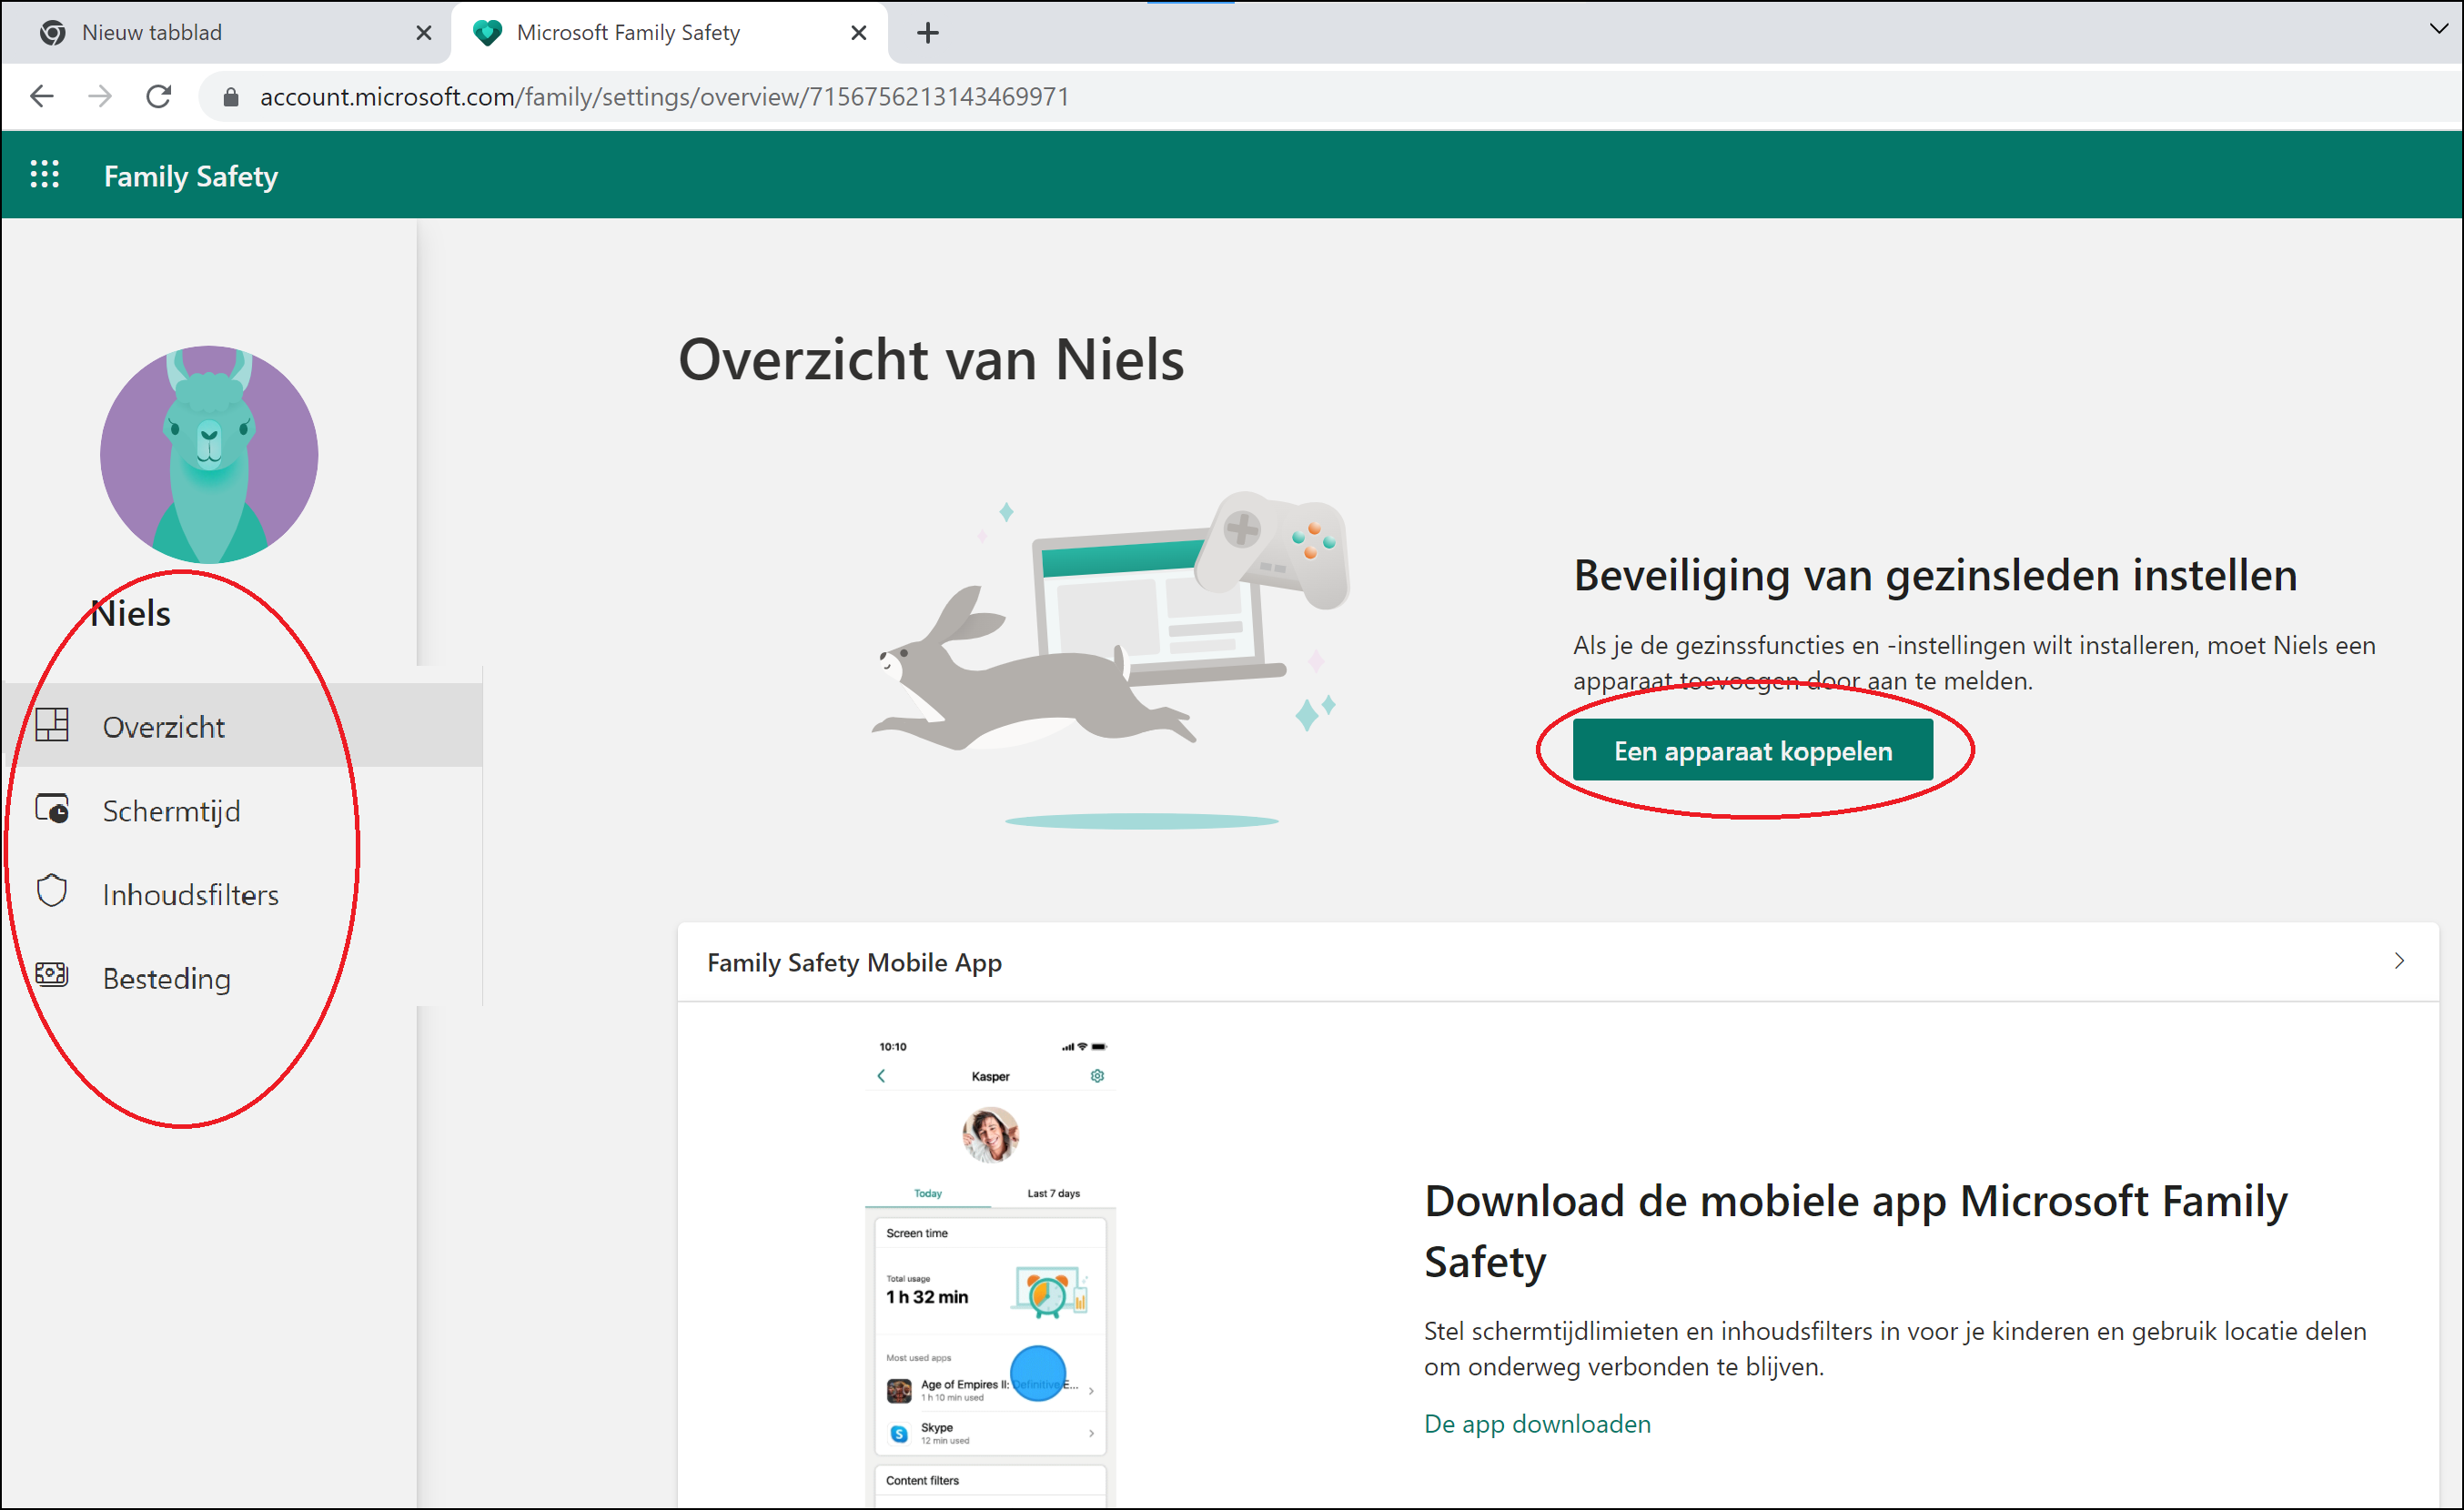
To access your child’s account settings To access your child’s account settings, click on his or her account profile. You will then be taken to the page shown above. Here you will find individual settings for the account in the menu on the left. You will first arrive at an overview page. Here you can connect an external device, choosing from a Windows device, an Xbox console, an Android phone or an iPhone. Follow the instructions to pair the device. 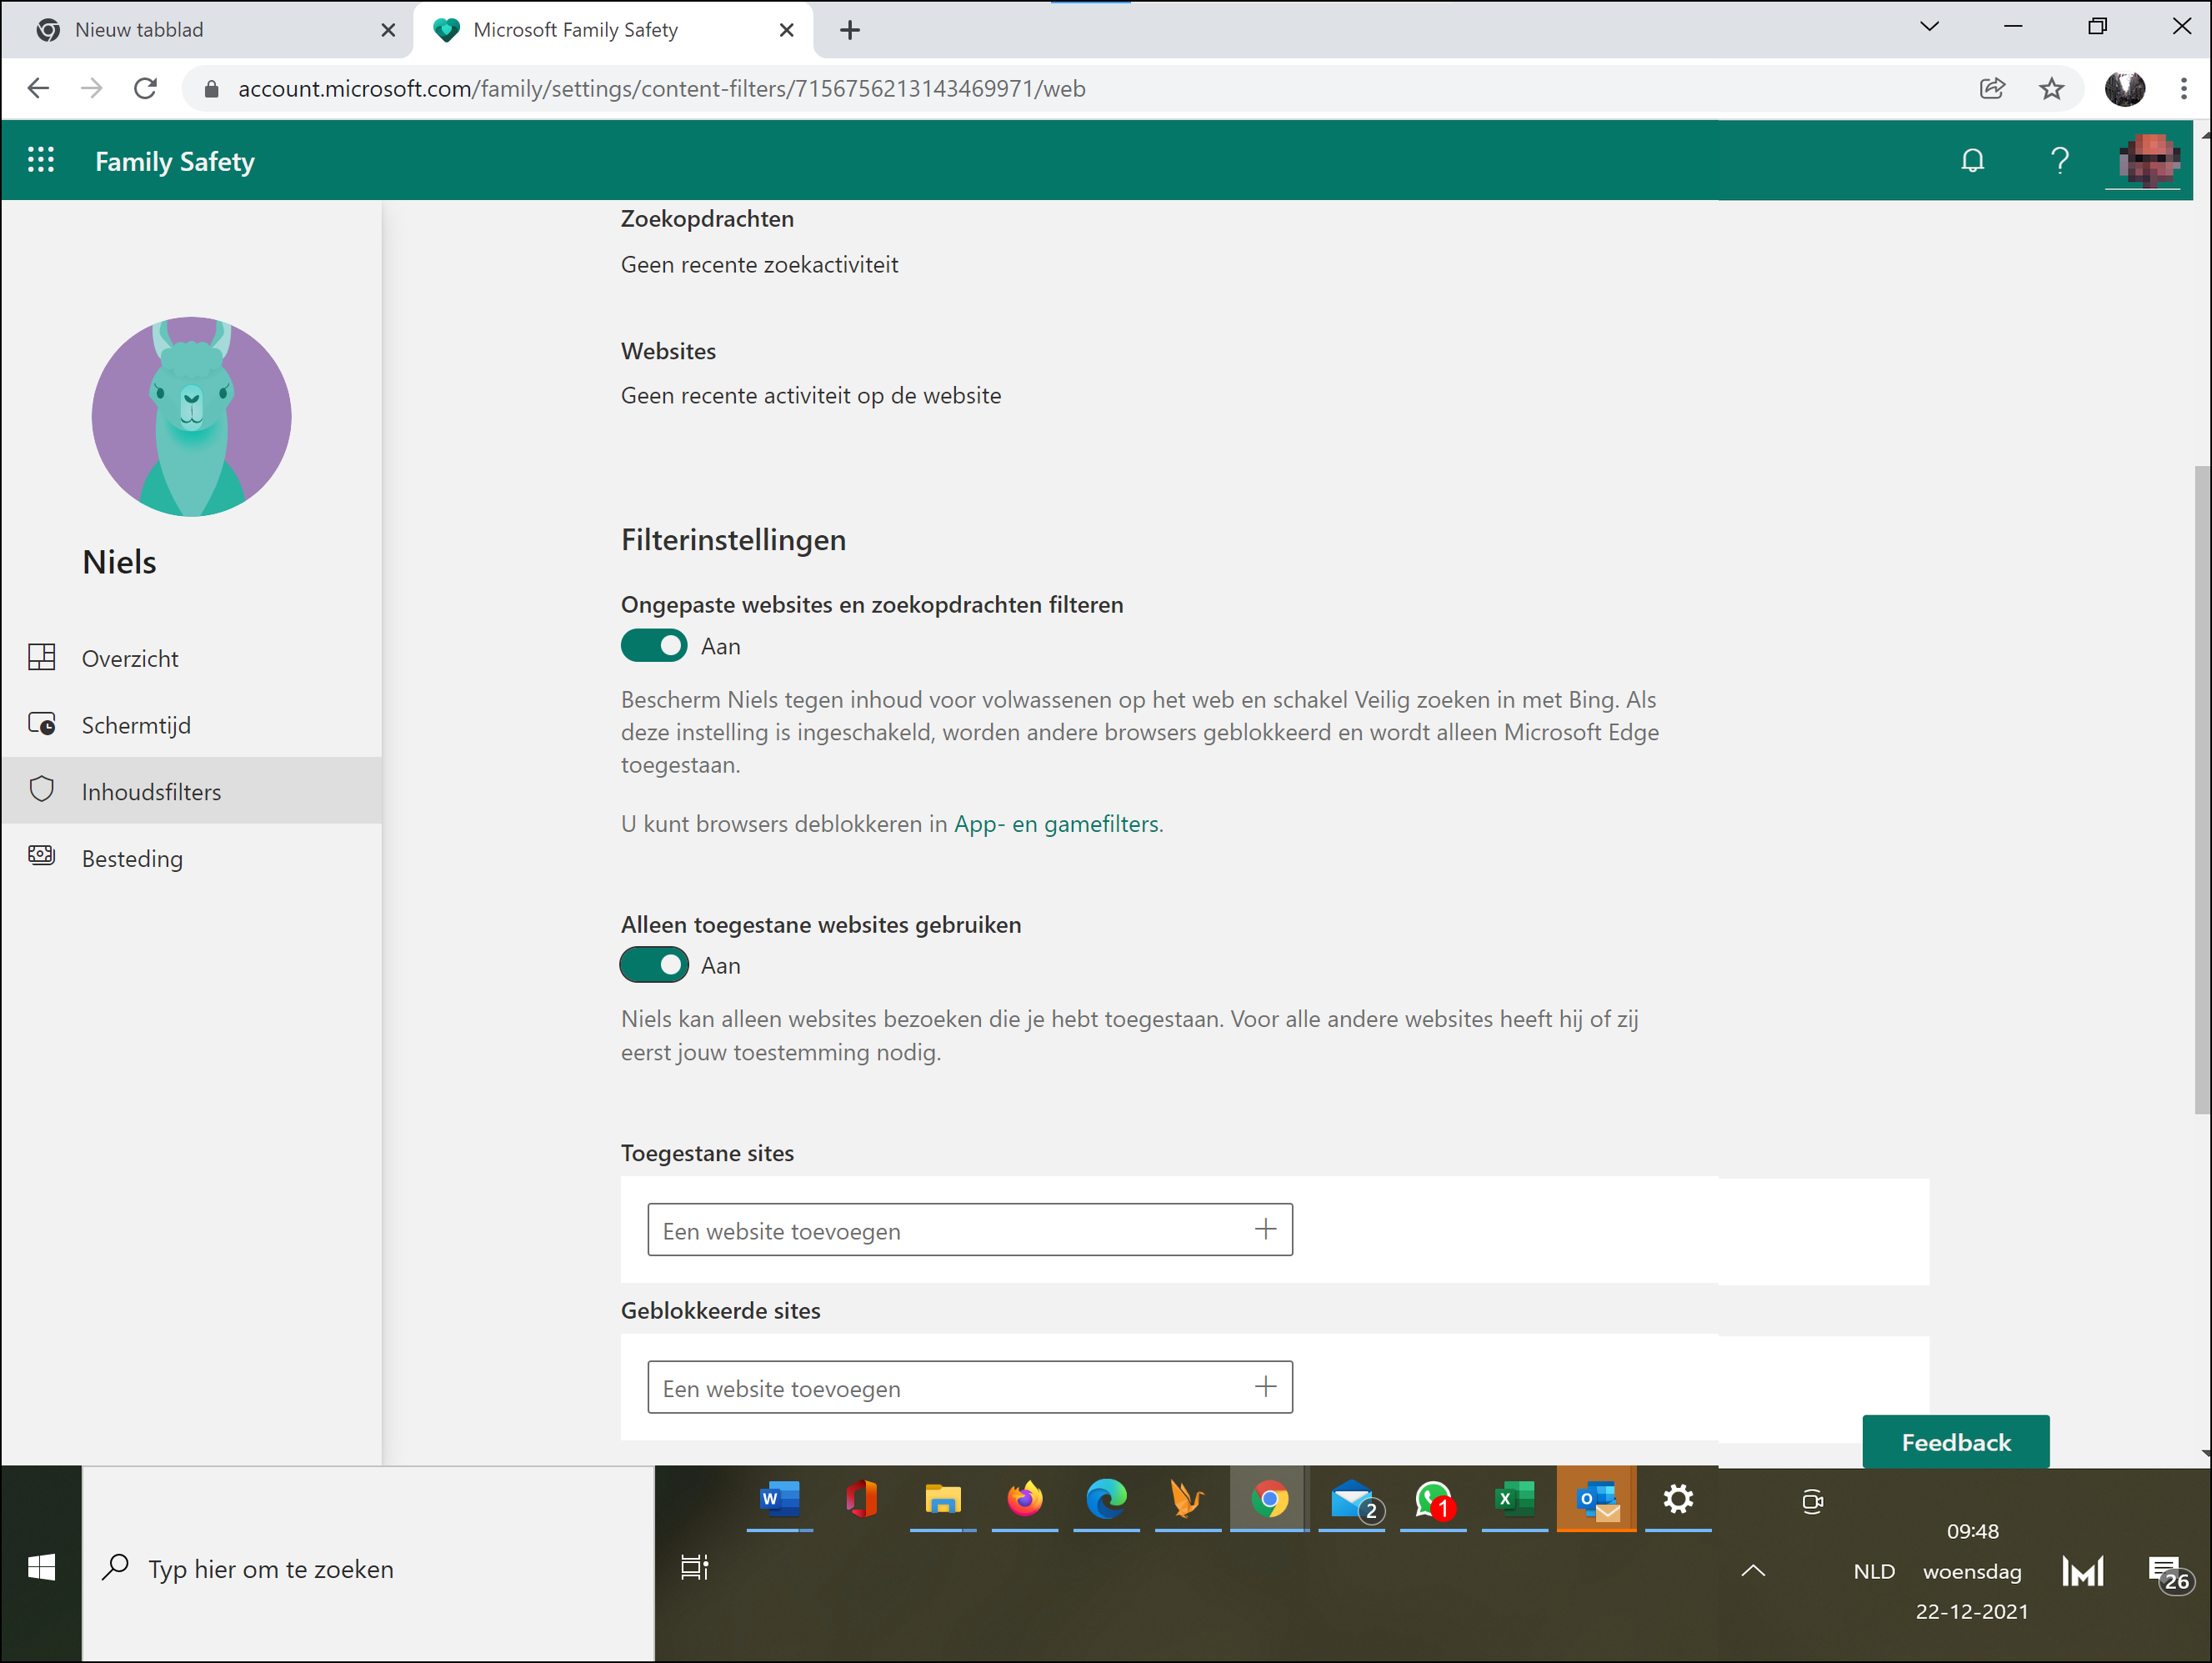
Once you’ve paired it, you can go through screen time In the menu on the left (see image above) you can set how long your child can sit behind the paired device per day. You can easily set a schedule for all paired devices or create a separate schedule for each connected device. You see the days lined up. Specify here your preferences for how much time per day your child can sit on the device.
Also left in the menu below screen time do you find the function content filters† Here you can set that, for example, searches only show results that are suitable for children. You can also choose to allow a limited number of websites, so that your child cannot access other websites. Note that this option only applies to the Microsoft Edge web browser and the Bing search engine.
DIGITAL POCKET MONEY
Finally, you can link payment options to your child’s account here. You do this under the heading Spending† For example, you can digitally deposit the pocket money into the account here (see image below). To do this, you must first add a payment method to your own account. This is possible with a credit card, debit card and via PayPal. You can also choose to receive a notification every time your child makes a purchase. This way you know whether he or she is downloading appropriate apps.