 Word has many functions. It is logical that especially the commonly used ones are known to users. But there is much more to discover in this text program. We collected seven fun and useful functions in Word.
Word version
The tricks below work in Word 2016 and Word 2019, unless stated otherwise.
1. Choose different background color
A page in Word normally has a white background. You can also give a page a different background color. This is a simple way to make a file more attractive. It does consume a lot of ink when you print colored pages. In that case, buy colored paper. Choose a different background color in Word like this:
- In the Ribbon, click on the tab To design.
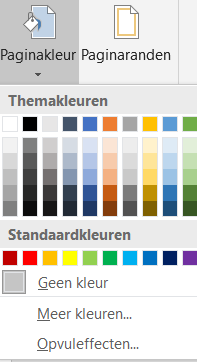
- Click on the right side of the ribbon page color.
- Some of the available colors are listed under the headings ‘Default colors’ and ‘Theme colours’. Pick a color to see its effect.
- When you come across a suitable color, click on the box with that color. The background of the Word document changes immediately.

- Would you like to see other colours? In the ‘Page Color’ menu, click More colors.
- There are more colors to choose from in the ‘Colors’ window. You can mix colors yourself on the ‘Custom’ tab.
- If you want to get started creatively, click in the ‘Page color’ menu Fill Effects. There you can set color gradients and the use of multiple colors.
- The page color can of course also be returned to white. If you want to, follow the steps above and choose . in the menu No colour. The page will then turn white again.
2. Move text super fast
Most people move text with the keyboard shortcut Ctrl+X and Ctrl+V. But it can be faster.
- Select the desired text.
- Click F2.
- Click where you want the text to go.
- Press the Enter key.
3. Save Word file as PDF
In principle, a PDF can no longer be changed. For that reason, it is widely used to send out newsletters or official documents, for example. From Word 2016, users of documents can also create a PDF. No additional program is required for this. Keep in mind that you can no longer change the PDF yourself. If there’s a mistake, you’ll need to edit the original Word file and create a new PDF from it. So first save the document as a Word file. Then turn it into a PDF:
- In the Ribbon, click on the tab File.
- click on Export.
- Under ‘Export’, click Create PDF or XPS > Create PDF or XPS.
- Browse to the folder where the file should be saved.
- Optionally, type a different name for the file.
- click on To publish.
The file is now saved as a PDF in the chosen folder.
4. Have text read aloud
Word has an unknown feature that is unfortunately not available in all versions, but it is useful. Reading Dutch text in a file comes in handy at all times. The computer voice sounds a bit unnatural, but the text is easy to understand. How to have a text read aloud:
- Click where the voice should start reading.
- Click on the tab Check.
- Press the button To read aloud in the ribbon.
The voice begins to read. If you click again To read aloud click, the voice stops. It also stops when you press a key on the keyboard.
5. Sort list in alphabetical order
Sorting lists is a feature you probably don’t expect. Yet this is possible in Word, for example to put a list in alphabetical order. This is useful for example with a list of all your records or books.
- Select the typed list.
- Click on the tab Start.
- Click the ‘Sort’ button
 .
. - Leave the settings as they are.
- click on OK.
The list is arranged in alphabetical order. If it is a numbered list, then the numbering is also correct.
6. Insert Icons
In Word, use icons (drawn pictures) to playfully format documents. If you have a Microsoft 365 subscription, you have access to the entire collection. The images are royalty-free, so you can use them as you see fit.
- Place the mouse pointer where you want the icon to be.
- Click on the tab Insert.
- click on Icons.
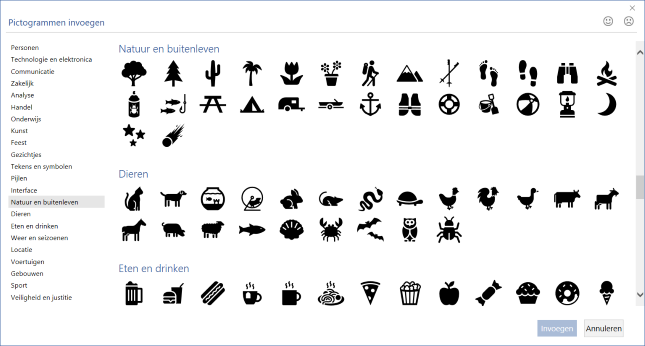
- A new window opens with the available images. Scroll down to see them all. Or click in the row on the left on the desired category.

- Click on the picture you want to insert. You can also click on multiple images to select them.
- click on Insert.
- The icon is added to the file. There are lines around it with dots in the corners and on the four sides. By dragging these spheres, you make the image larger or smaller. This is most useful at the corners. Click outside the image to stop editing.
- Do you want to adjust the size again later? Click on the icon and the guides and dots will reappear.
7. Type anywhere
It can be difficult to type texts in Word exactly in the right place. At least: if you don’t know this trick yet. Text can be placed in all kinds of places in a file without sliding spaces and the Tab key. All you need to do is double-click where you want to type. The cursor will then be positioned exactly right. By the way, if you press the Enter key, the cursor will jump directly to the next line on the far left.