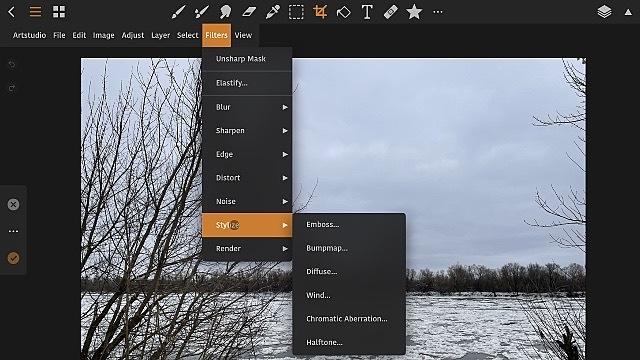
There are very few really good photo editors for the iPad and iPhone. Or better: few good photo editors that feel like a desktop program. However, ArtStudio Pro is exactly that last one!
Admittedly, for quick bite-snap photo editing, an app that is optimized for a smartphone is most useful. Quickly applying a filter or cutting out a piece while on the road should be possible without much thinking. But if you want to use a tablet as a more serious replacement for a laptop, then such apps often fall short. Sure, for the iPad there are some great photo editors, including Photoshop and Affinity Photo, of course.
The point, however, is that to master it properly, a rather steep learning curve has to be followed. Not least because of the user interface that is still optimized for touch. The biggest downside of all such apps is the lack of a menu bar. Indeed: a clumsy thing for a smartphone. But for a tablet that is in landscape position in front of you, and to which a wireless or wireless mouse and keyboard are linked, a great loss.
ArtStudio Pro for iPadOS and iOS does have such a menu bar. Plus a toolbar. In short: a much more traditional-looking app that every desktop user will quickly feel at home in.
Extensive possibilities
Of course, it is not only the appearance of ArtStudio Pro that makes it a particularly interesting app for photo editing and drawing. The software has been running for many years and is very actively maintained by the makers. To be very honest, this has been the standard app for photo editing of the undersigned for a long time. Not for nothing, because not only can all daily tasks be carried out in an instant, but the more complex work is also no problem. It is not the cheapest app in the app store, but an amount of € 12.99 is certainly not a disaster. Not at all when you consider that you will not be stuck with an expensive subscription – as with Photoshop. A nice extra is that – if you want it – there is also a macOS app available that looks suspiciously like its mobile counterpart in terms of user interface.
Working
Anyway, let’s get started! When you start the app, you will be the first to enter the document management window. All your (edited) photos are stored here. Remember – as with all iOS– and iPadOS apps – that when you import a photo from the Camera Roll, it produces a copy within the app.
No drama for a few photos, but annoying if you’ve collected a lot of them over time. Especially if your i-device does not have a large sea of free storage space (anymore). So look every now and then with a critical eye at the collected images here. And export finished photos to the camera roll or a folder, and then transfer them to, for example, a nas. Saves a lot of space.
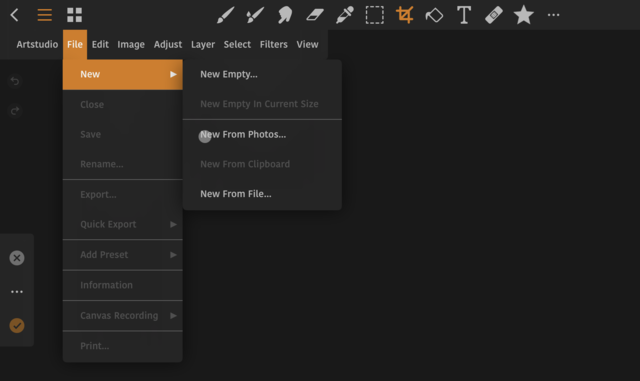
To get started with a photo from the camera roll, click the + button in the top right. Or – if the app starts in edit mode (it will be after the first start), click on the menu File below New on New from Photos. Select a photo in the overview and click on it.
Cutting out
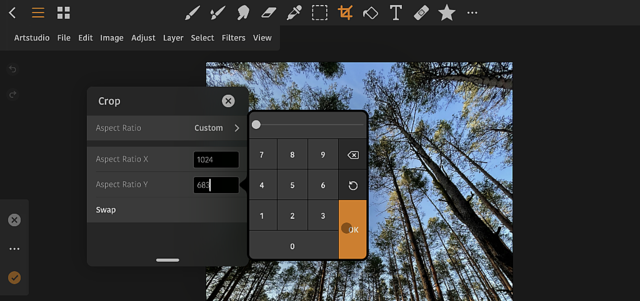
In this example you see a portrait photo. Suppose you want to use a part of it with an aspect ratio of 1024: 683, then you click the crop tool in the horizontal toolbar. Then click in the vertical toolbar that appeared on the button with the three dots. Enter the desired resolution (aspect ratio) in pixels. Click on OK and drag a selection (you can also close the possibly obstructing crop window first, the settings will be saved); you see that the relationship is being maintained. Click on the round, orange button with the check mark on the left and the crop will be made.
Reduce or enlarge
If you then want to reduce or enlarge the crop to a different resolution, click in the menu Image on Resize Image. By the way: we deliberately use the word click here: the iPad is linked to a mouse and keyboard at the time of writing. Tapping on the screen is of course also allowed! With the Resize Image window open, enter the desired width and height in the appropriate fields. Leave the switch Keep ratio (keep ratio) on. You will then see that if you fill in either height or width field, the other will be automatically calculated. Choose behind Interpolation for one of the calculation methods offered.
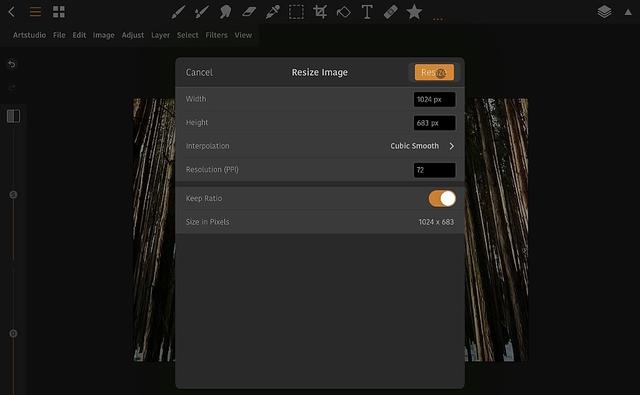
What often works well is Cubic Smooth. This results in slightly less razor-sharp images, but has the advantage that you can get that sharpness later via the menu Filters, Sharpen and Unsharp mask completely according to your own insight. The other Cubic algorithms may produce a picture that looks too ‘harsh’. However: that’s a matter of taste and trying!

Save and (or) export
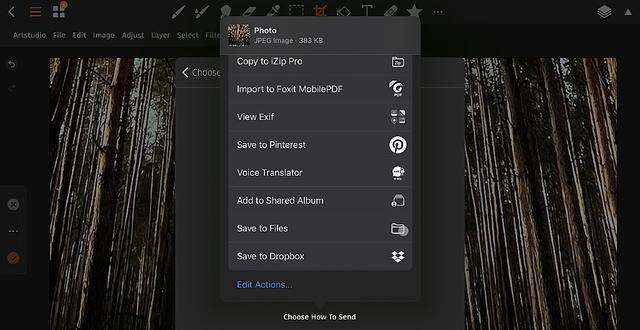
To save your creation, you can go to the menu File on Save click. In that case, the edited image will only be saved in the app, in its own file format. To make it more universally applicable, click in the menu File on Export (if you have used layers, please click in the menu first Layer below Merge on Flatten image for a more final result). Choose one of the available file formats, for example JPEG and click on Next. Set the desired compression value (the well-known story: a higher compression results in a smaller file that, however, loses detail) using the slider and click again Next. To save the image on the camera roll, choose the option in the now standing list Save Image. Or you can save the file in a folder of your choice, you choose the option Save to Files and browse to a folder where you want to keep the image.
The principle is clear
In the process, we’ve been introduced to the ArtStudio Pro user interface with this common editing job. The principle is clear. If you choose a tool from the toolbar at the top, a subset of options associated with the tool will appear in a vertical toolbar on the left.
With this, specific properties of the chosen tool can be adjusted as desired. Think of brush thickness and type and much more. Layers and layer effects are available for more advanced photo editing.
Experience shows that you quickly feel at home in ArtStudio Pro. It looks and feels like an average photo editor Windows or macOS, which is an absolute breath of fresh air. Hopefully the makers of the app will never be tempted to demolish the menu bar, because that would mean a huge plus (and in fact the reason to put this app in the limelight). Fortunately, the chance that this will happen seems very small, because the menu bar has been the central pivot of the whole for years. So discover the many menu-based options, including filters and more.
.