
In Windows 11 you can easily back up your files, which is safe and convenient. We also show you how to restore those files if you want.
 |
|
Member benefits This article is from the latest version of the special The Complete Guide to Windows 11. Look here. |
Edited by Petra Waaijer and Rob Coenraads
Everyone has experienced how nice it is to have a backup file of a document. With Windows 11 they know this too and you can back up your files or create a restore point. With the backups you keep your files in the default folders (and more if you want) protected from accidents.
When having a backup made, you can have a number of folders included as standard, or choose what you want to protect. Protect your libraries containing your photos, movies and music, desktop items, contacts, favorites, saved games, links, downloads, searches and more. Before you can create a backup, you must indicate where it should be placed. This could be an external hard drive, but also a shared location in your network. Onedrive can also be used as a location to safely back up your files and make them immediately available at multiple locations.
We also show how you can restore the files.
Make backups
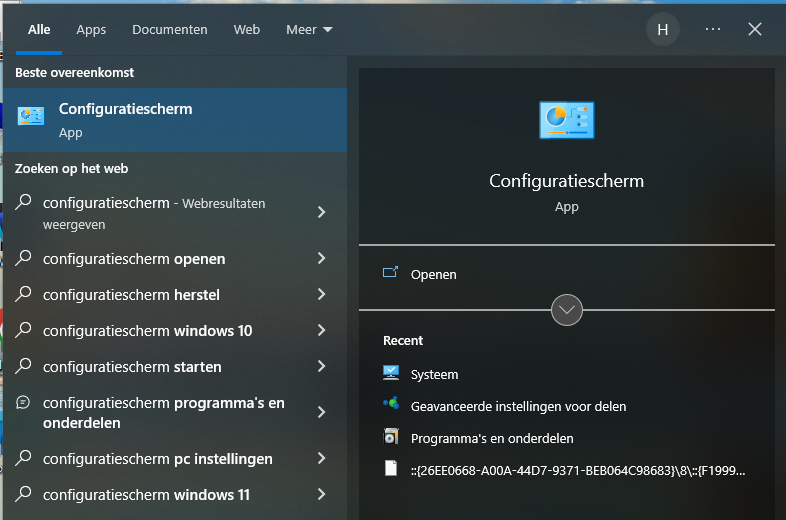
1 First go to the Control Panel
To get to the backup option most quickly, enter the search box (with the magnifying glass) at the bottom left Control Panel and then click on it in the search results.
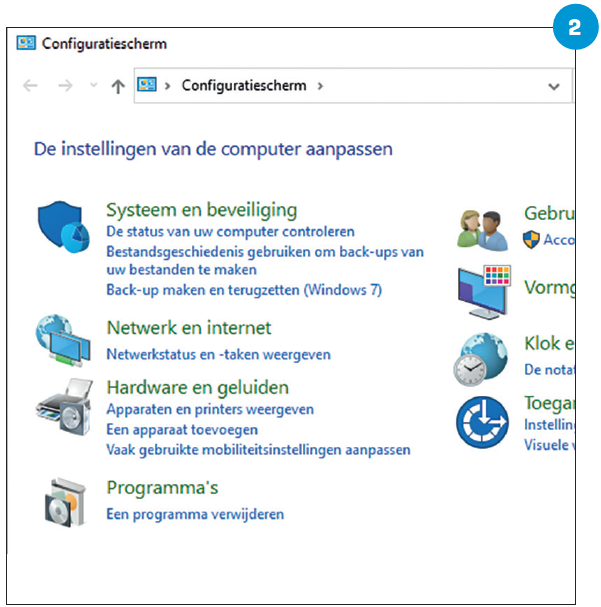
2 Select backup option
Underneath the head System and security you have to scroll down for the option you need: Backup and restore.
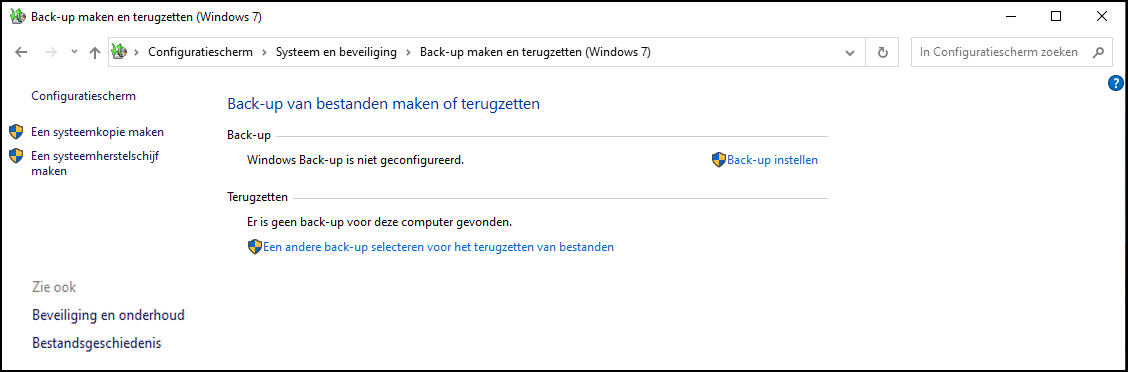
3 Getting started
A summary window will appear showing the status of the backup configuration: Windows Backup settings not configured. Choose right set up backup.
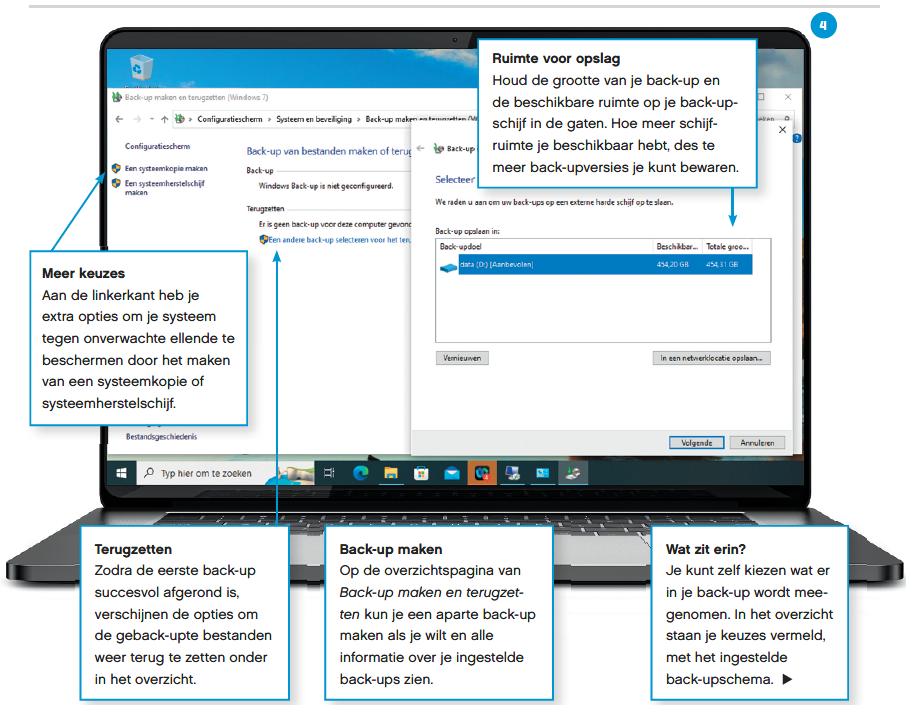
4 Where to store?
You will be asked for a storage location for your backups. This could be a DVD drive, (external) hard drive or network location. Choose a location and click Next one.
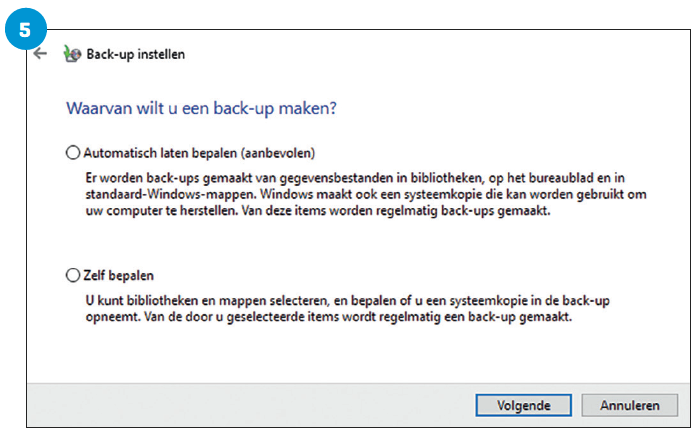
5 Choice of backup type
You can choose from a backup of standard folders such as your desktop and more, or you decide which folders and whether a system image is part of your backup. Choose Decide yourself.
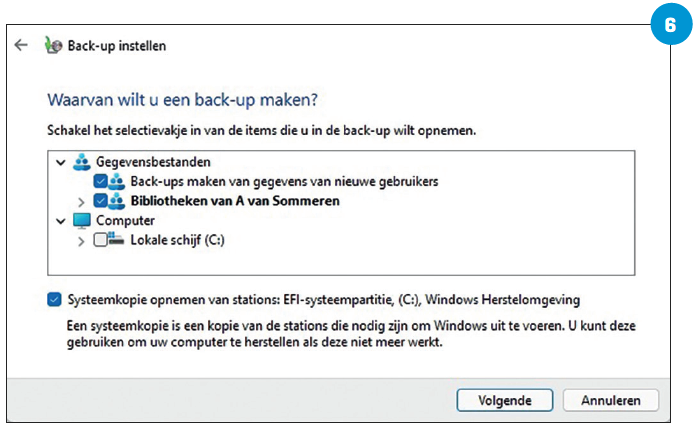 6 Check options
By default, a number of options, including your own libraries, are already checked. At the bottom there is a separate option for creating a system image.
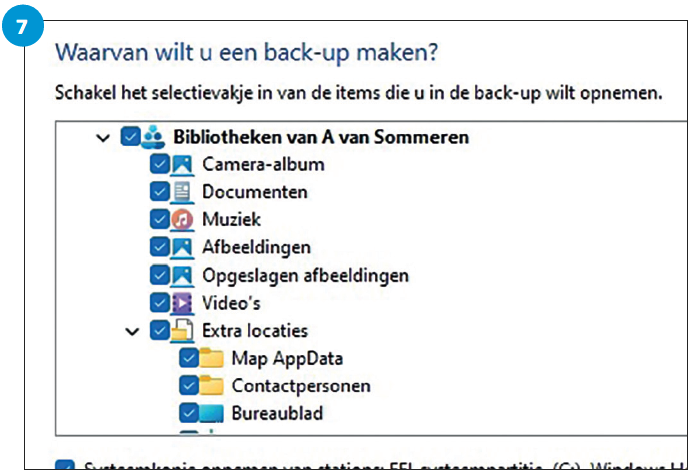
7 Subfolders
Your libraries, and if the C drive is checked, its underlying folders, can be expanded. Select the subfolders you want to include in the backups and click Next one.
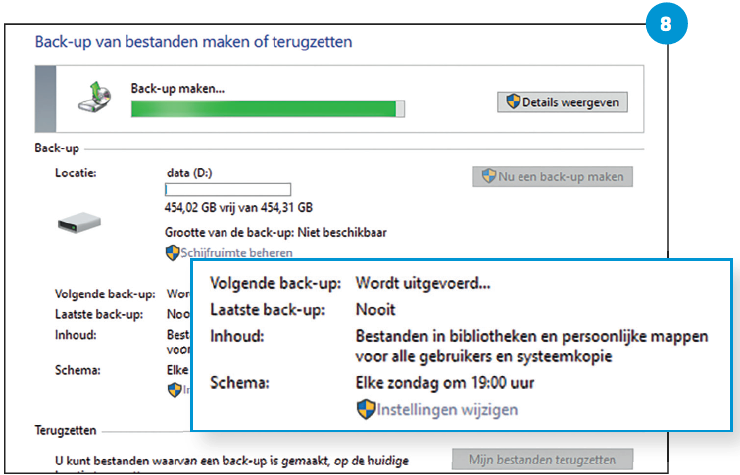
8 Monitoring and backup plan
You will receive an overview of the choices made. The default backup schedule in the middle of the screen is every Sunday at 7:00 PM.
9 Adjust backup schedule
click on Change schedule to customize the default backup cycle to your own needs. Make a selection, choose OK and after that Save settings and run backup.

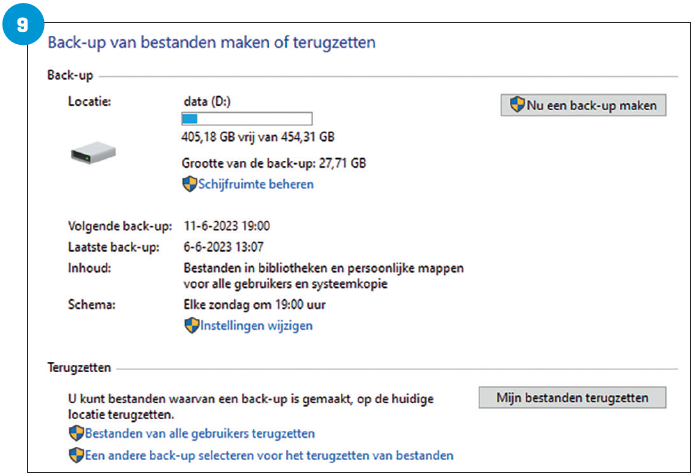
10 Backup is in progress
An initial backup is being made, which may take a while. The overview page shows the progress, how much disk space you have left, the backup schedule and what is being included.
Restore files
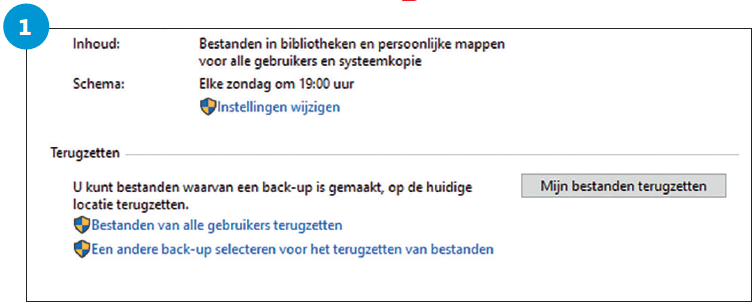
1 Restore
On the overview page of Backup and restore after completing the first successful backup, the subheading appears Restore my files. You can click this subheading to restore your files.
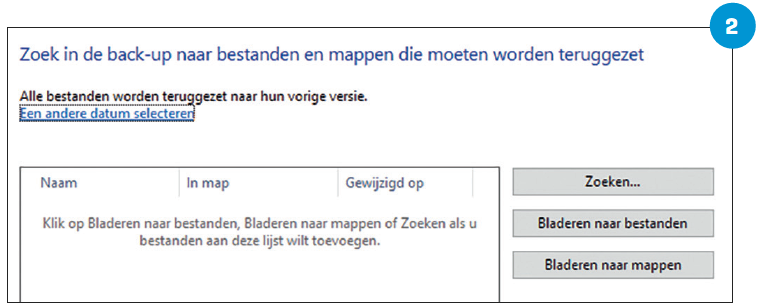
2 What do you want
put back?
Then it is asked which files and folders you want to restore. On the right side you can browse files and folders. Choose Select a different date.
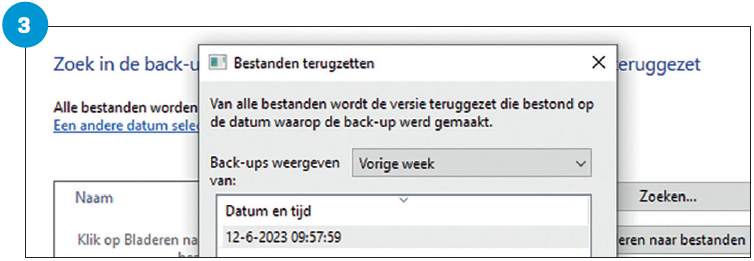
3 Backup choice
You will then see a list of available backups. Choose the backup from which you want to restore your files and confirm your choice with OK.
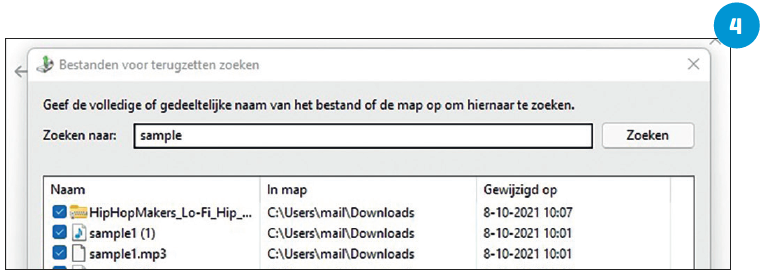
4 Exact choice
On the right you will see a number of choices to select files. Choose To search for a specific file, enter a search term and select one or more files and confirm with OK.
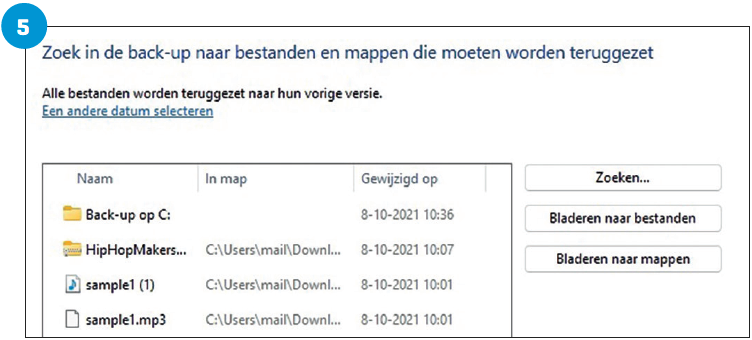
5 Restore overview
The selected files appear in the selection window. Add other files or folders if necessary. Once you are satisfied with your choice, click Next one.
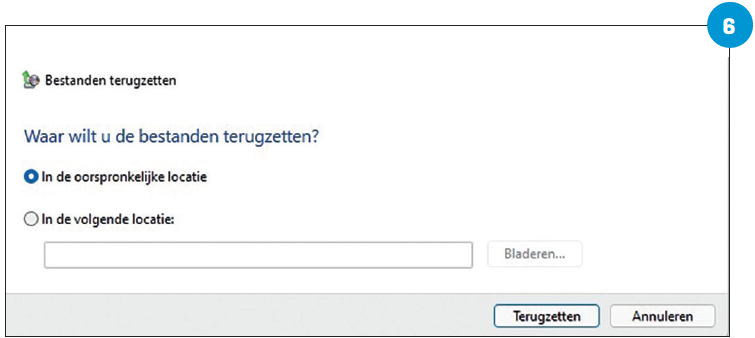
6 Return location
You can choose from In the original location or a location of your choice with To the next location. With the latter choice, the subfolder structure is neatly preserved. Make your choice and press Put back.
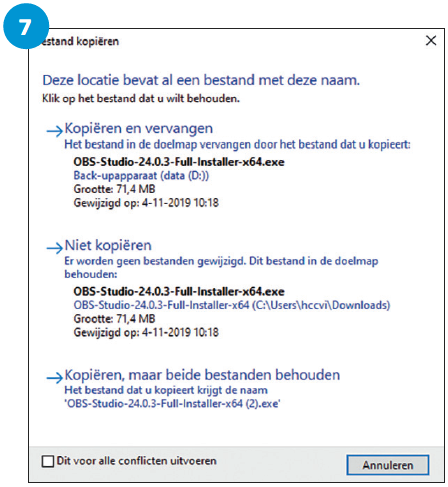
7 Possible conflicts
If you restore files that are still in the original location (as an older version), you will be given the choice of what you want to do. At the bottom you can have this applied to all conflicts.
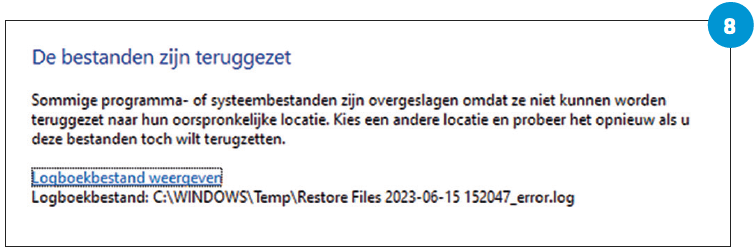
8 Completed
Was the restore completed successfully? Nice. If there is still something wrong with the restore, the last confirmation page will show the reason for the failed restore attempt.