
Many people leave their monitor at factory settings. A missed opportunity, because with a number of adjustments you can significantly improve the image. This way you can ensure colorfast photos, videos and games.
Maikel Dijkhuizen
Anyone who regularly edits media files will benefit from a screen that displays the images as faithfully as possible. When you then print a photo, for example, you can be sure that all the colors are correct. If the monitor is still set to the factory settings, the snapshots may look warmer (too much red) or cooler (too much blue) than reality. It is therefore important that the color reproduction is completely correct. You may also want a perfect image when watching films, series, documentaries and TV programs, as the director originally intended. In addition, avid gamers attach great importance to a realistic representation. In short, enough reason to set the brightness, contrast and colors correctly, among other things.
COLOR CALIBRATION PREPARATION
It doesn’t matter whether you work on an external monitor of a PC or laptop screen. You can calibrate the colors on both devices. It is important that the system is switched on for approximately half an hour. The screen has then warmed up sufficiently so that the display no longer changes. Furthermore, make sure there is enough ambient light. So don’t make the room too dark or too light. PC monitors almost always have a menu button on the front. If possible, select the default color display settings.
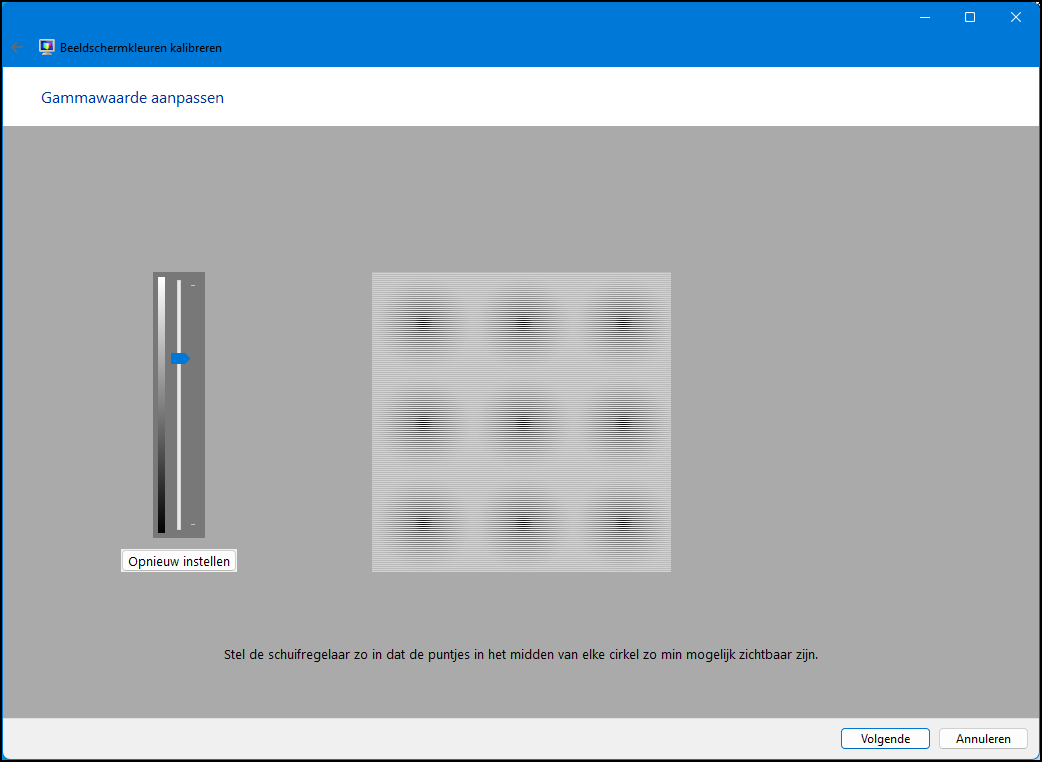 |
| With the slider on the left you can adjust the gamma value in Windows |
GAMMA VALUE
Although there are all kinds of free and paid programs to calibrate your monitor, the integrated application of Windows 11 is sufficient for most users. Type in the start menu search bar Calibrate screen color and click on the corresponding search result. A will appear wizard. If you work on two screens, drag the window to the monitor you want to calibrate. Click twice Next one. You will first adjust the gamma value so that the video card sends the correct values to the screen. This affects the amount of light that the monitor emits. In the next step, move the slider up or down. You choose a value where the small dots in the center of the circle are no longer visible. Confirm with Next one.
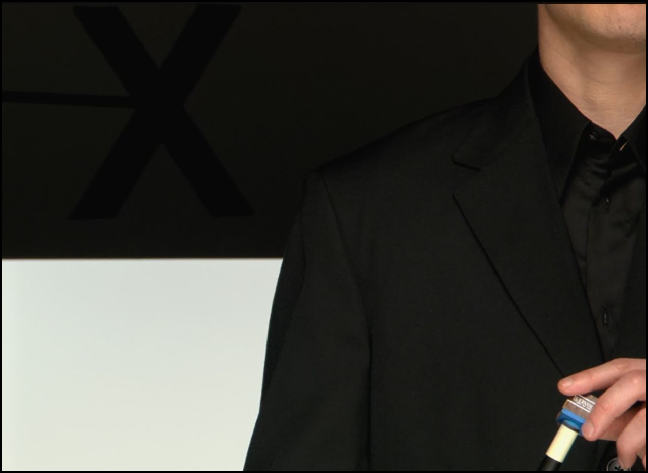 |
| Once the X at the top left of the image is barely visible, Have you set the brightness correctly? |
BRIGHTNESS AND CONTRAST
PC monitors usually have a menu button. This allows you to adjust the brightness and contrast. Is there no menu button or are you working on a laptop? In that case, click Skip adjusting brightness and contrast. If there is a menu button, click twice Next one and adjust the brightness. This is important, among other things, for a realistic representation of shadows. Use the screen button(s) to increase or decrease the brightness. The idea is that you can still clearly distinguish the black suit and the shirt in the image. This way you can observe details in dark fragments. Furthermore, the X at the top left should only just be visible. Confirm twice with Next one to continue optimizing the contrast values. This ensures that details of lighter fragments are clearly visible. Adjust the contrast using the monitor button(s). When increasing the contrast, concentrate on the image. All folds and buttons of the white shirt must be clearly visible. Finally, click twice Next one.
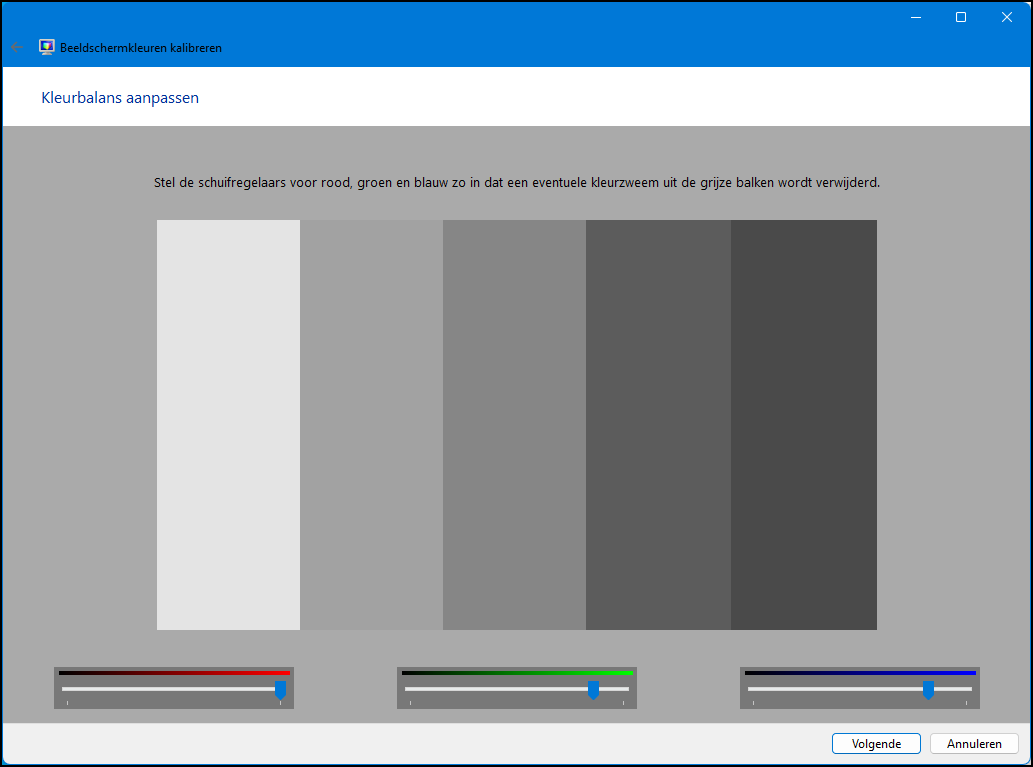 |
| For a true-to-life representation of gray tones you can easily adjust the color balance with sliders |
COLOR BALANCE
Are you planning to print a photo with grayscale? Obviously, you want the printer to actually print gray as gray. A correct color balance is essential for this. If a certain color is set too brightly, an ugly color cast lurks when printing grayscale. Fortunately, you can easily prevent that. If necessary, use the red, green, and blue sliders to remove any colors from the gray bars. click on Next one. You have the wizard Display colors changes now almost completed. It is useful that you can compare the old and new screen settings. To do this, click on it according to your own wishes Previous calibration or Current calibration. Do you want to use the new screen settings? In that case, confirm with Complete.
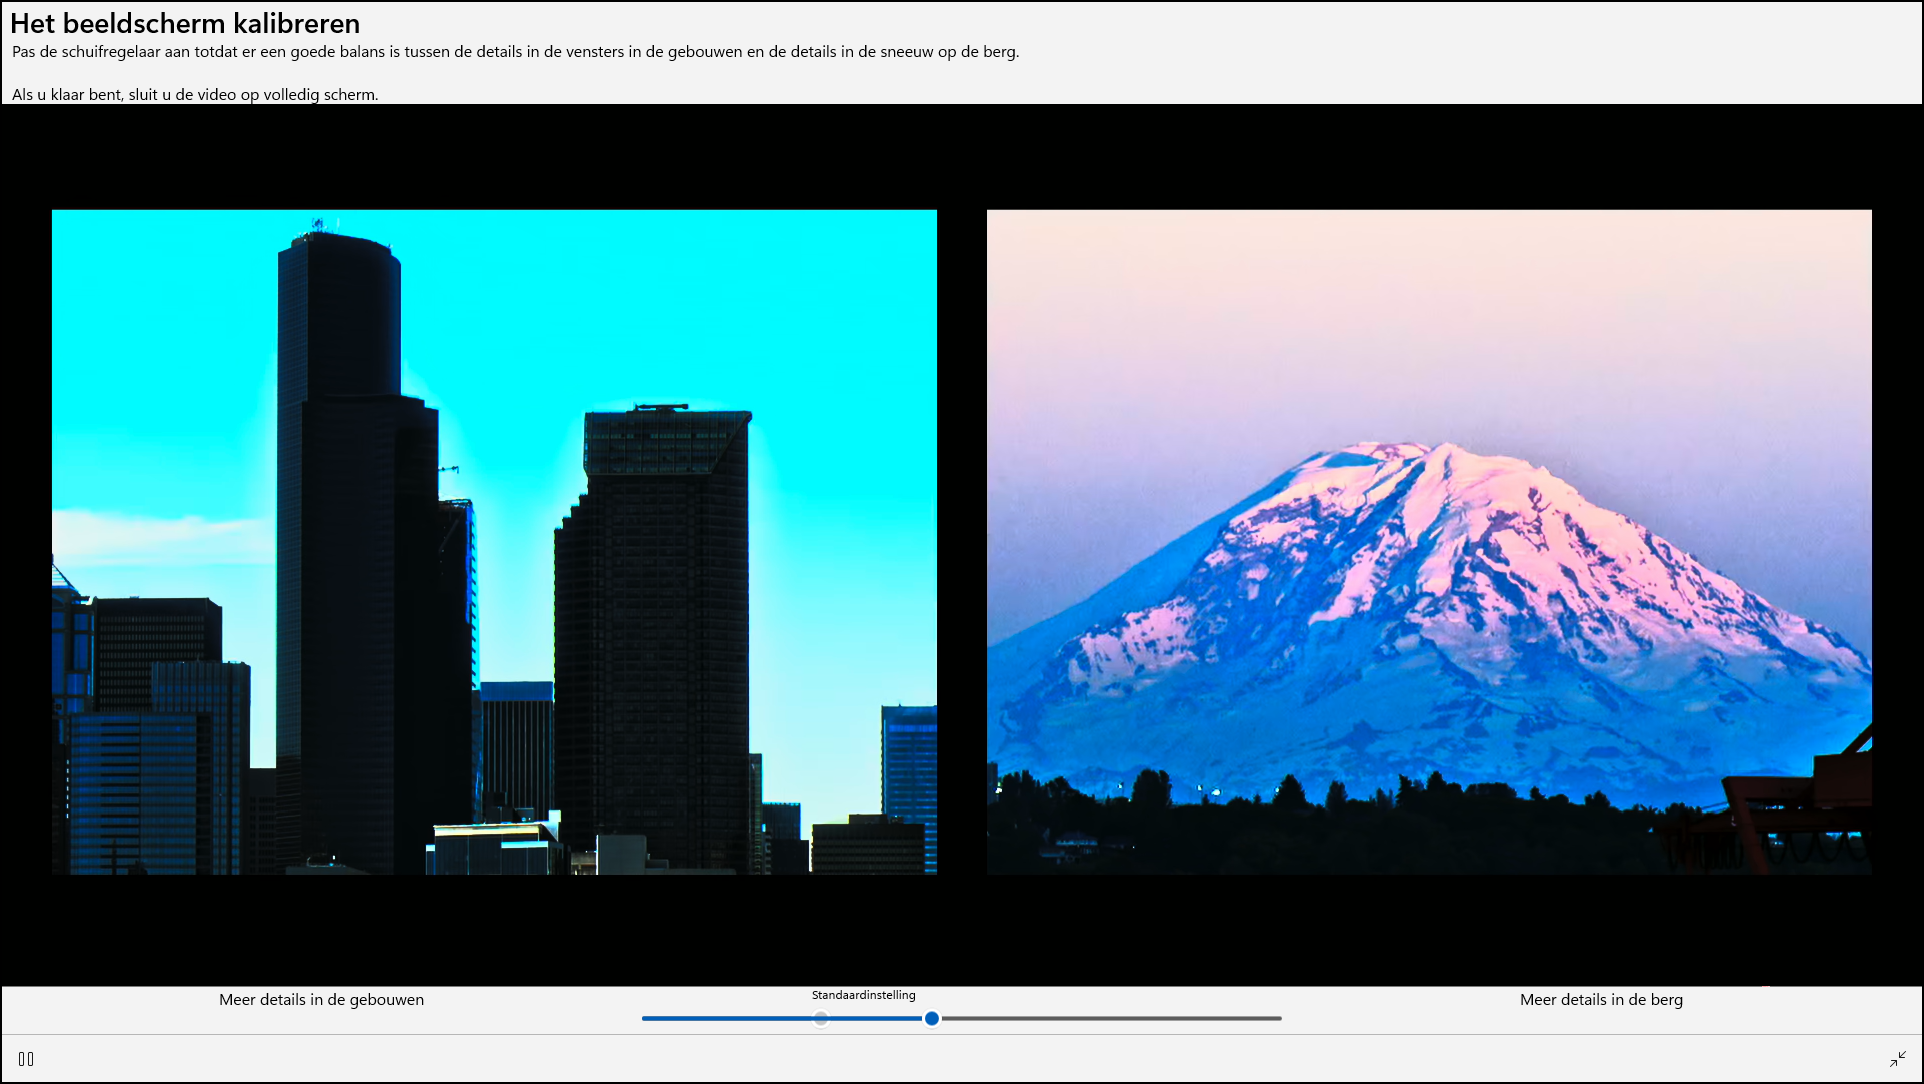 |
| Anyone who ever looks at HDR images on their laptop optimizes the screen for such videos |
DISPLAY CALIBRATION FOR HDR VIDEO ON LAPTOPS
In addition to the standard calibration tool, Windows 11 has another interesting feature in store. Depending on the laptop used, you may be able to calibrate the built-in screen for HDR content. Many contemporary films and series from well-known streaming services support the so-called technology High Dynamic Range. In short, it means that suitable video streams from, for example, Netflix, Amazon Prime Video and Disney+ look more realistic. Open the Institutions and then navigate to Display and HDR. If your monitor supports HDR, activate rear HDR video streaming the slider if necessary. Through Show calibration for HDR video then click on Calibrate. Images of a dark, backlit building and an iceberg appear. Once you move the slider to the left, more details of the building become visible. If you drag the slider to the right, the screen will show more details of the iceberg. Try to find a good balance here. You close the window via the two arrows at the bottom right. Do you want more extensive calibration options for your (external) HDR screen? Then install the app Windows HDR Calibration from the Microsoft Store.
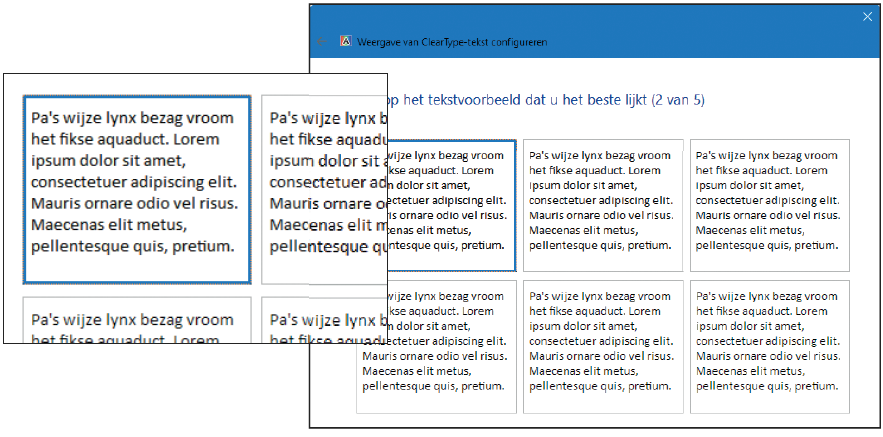 |
| Improve the readability on your screen with the ClearType feature |
//05-Monitor-calibration.png//
INCREASE SCREEN READABILITY
Anyone who often reads online articles or the digital newspaper will benefit greatly from clear letters on the screen. Windows includes a handy tool that can improve the text display. Just type in the search bar of the start menu Adjust ClearType text and click on the search result of the same name. First of all, check the option Enable ClearType is checked and then click Next one. Windows now checks whether the monitor is set to the original resolution. Click again Next one. You then select the text that you find most readable. Repeat this action for the next four steps, always confirming with Next one. Close the utility with Complete.
NIGHT LIGHT, RESOLUTION AND SCALE
Windows 11 has a number of useful monitor options. To do this, open the Institutions and navigate to Display. With the function Night Light reduce the amount of blue light, so that you fall asleep better in the evening after a computer session. Please note that this setting is at the expense of a true-to-life color display. So do not use it for photo or video editing. Windows automatically activates the function after sunset at your request. To do this, click successively Night Light / Set night lamp and select the option Sunset to sunrise. Another important setting is the Screen resolution. The higher this value, the sharper the image. Most contemporary screens support a Full HD resolution of 1920 × 1080 pixels. A warning is in order regarding razor-sharp Ultra-HD monitors. Due to the high resolution of 3840 × 2160 pixels, they have four times as many pixels as full HD screens. This means that icons, windows and texts in Windows 11 look very small. You solve this problem by increasing the scale to, for example, 200 percent. First click Dish and type in the box below Custom scale the value 200. The change will only take effect once you log out of Windows.
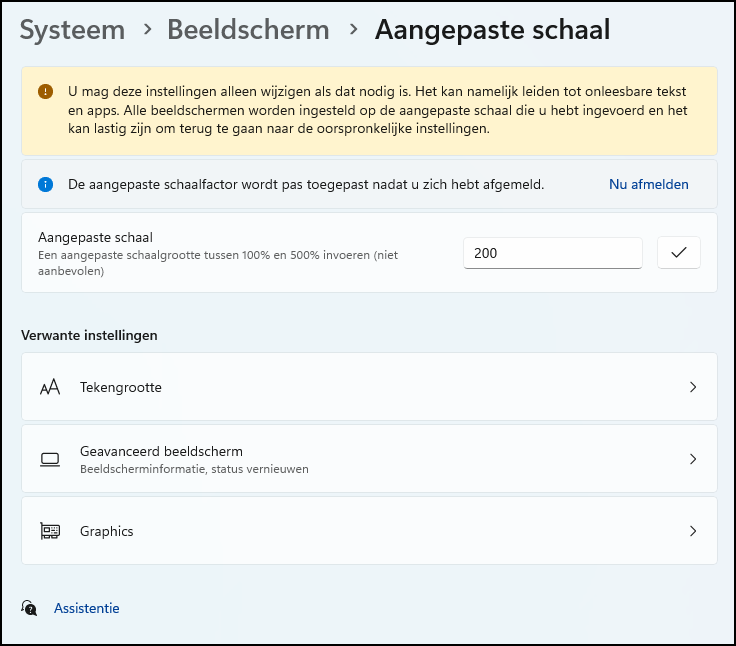 |
| Windows offers the option to set a custom scale |
CHECK PIXELS AND PREVENT BURN-IN
Have you bought a new PC monitor or laptop? Then quickly check the screen for any pixel errors. That’s very simple. Go to YouTube and type in the search bar white screen, so that you are continuously presented with a white image. Open the video in full screen and look for dead pixels. You usually recognize this as a red or black dot. Keep in mind that you often cannot claim a warranty on a single pixel error. It is possible to return items purchased online within a statutory cooling-off period of two weeks. Finally, OLED monitors deserve special attention. These screens are a feast for the eyes because of the high image quality, but they do have an important disadvantage. OLED screens are sensitive to burn-in. This especially happens when elements remain on screen for a long time, such as the Taskbar in Windows. In this example, after burning-in, the Taskbar permanently visible. Therefore, always turn on the screen saver when using an OLED monitor. Type in the start menu search bar Change screen saver and click on the corresponding search result. Now choose a screensaver.