Are you on a Mac and you can’t decompress an archive? Rest assured, this is not a compatibility problem between a Windows computer and a Mac.
Indeed, macOS can natively compress and decompress files, but only in ZIP format. To open up more possibilities, you will be able to install WinRAR on your Mac. Yes, the famous WinRAR on Windows has its equivalent on Apple computers: RAR.
In this article, we will show you how to install WinRAR on Mac, or rather RAR, so that you can handle more archive formats.
Install WinRAR on Mac
1. Download RAR and locate its location
The first thing you need to do is download RAR for Mac.
Find this file in Finder. By default, it will be in the “Downloads” folder. You will need, for the rest, to know its location and its exact name.
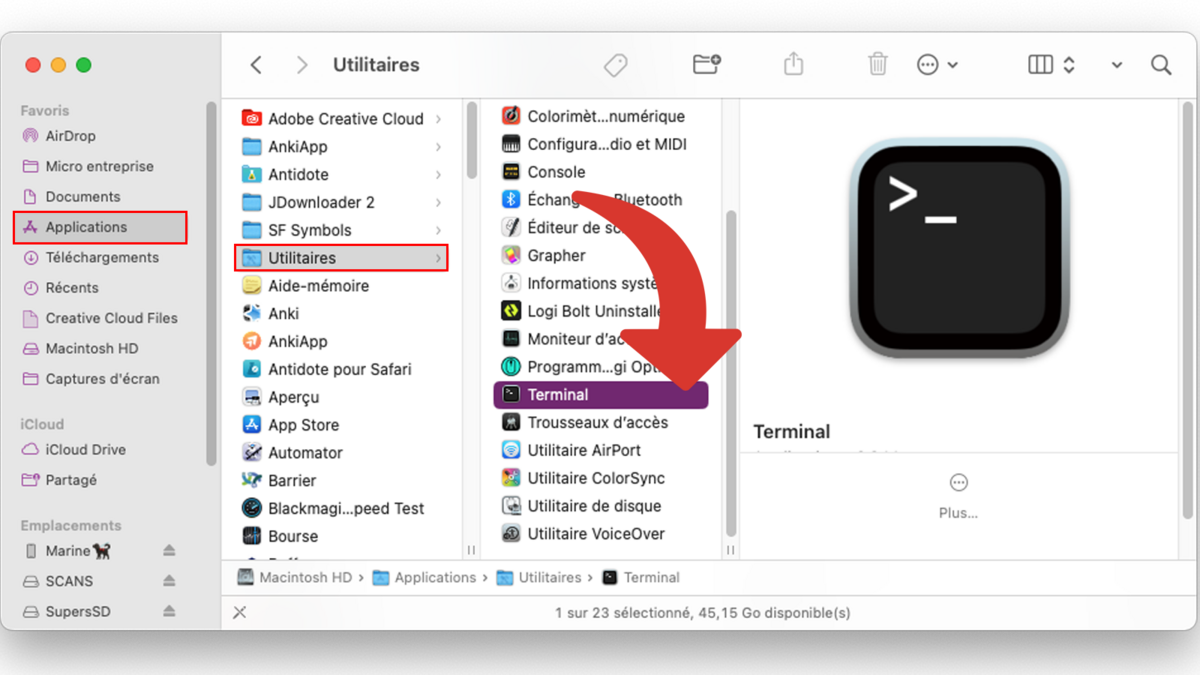
2. Open Terminal
Installing WinRAR, or rather RAR, on Mac is done from the command line, so you will have to use the Terminal.
To launch the software, open “Finder” and go to the “Applications” folder, then “Utilities”. Double-click “Terminal”.
3. Navigate to the folder
With the Terminal, you will enter the folder where the RAR tool is downloaded.
Enter the following command by customizing it, that is to say by replacing “User_Name” with your user name and “RAR_Download_Location” with the path where the file downloaded in step 1 is located:
cd /Users/Nom_Utilisateur/Emplacement_RAR_Telecharger/
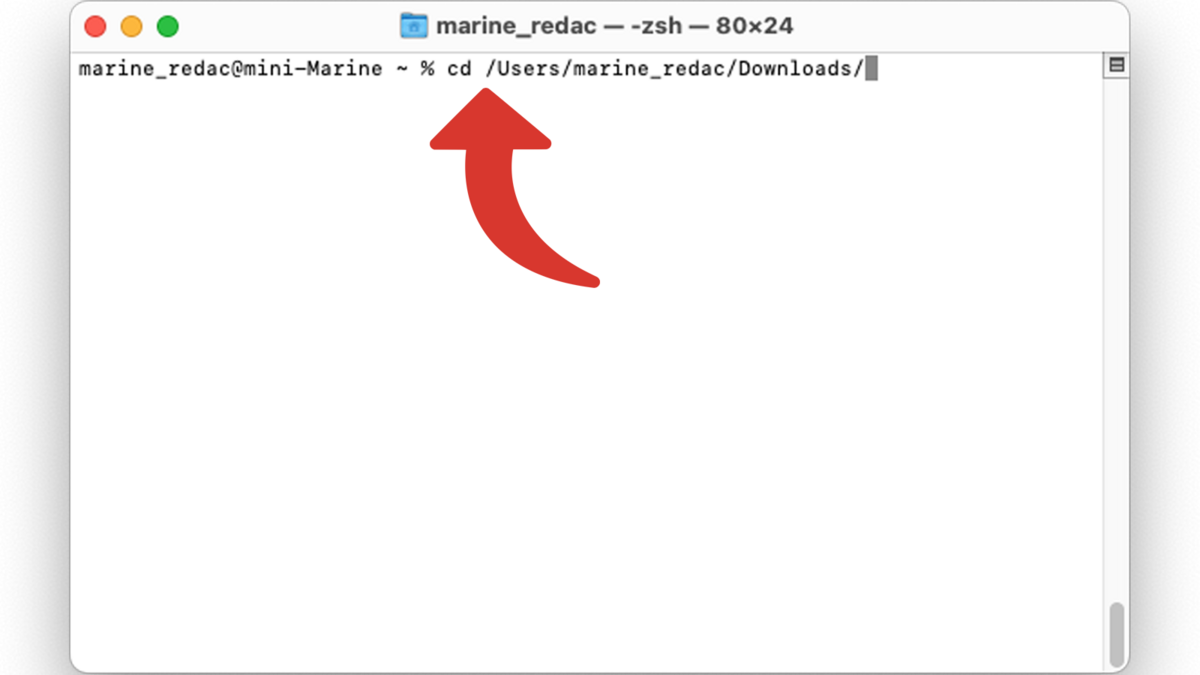
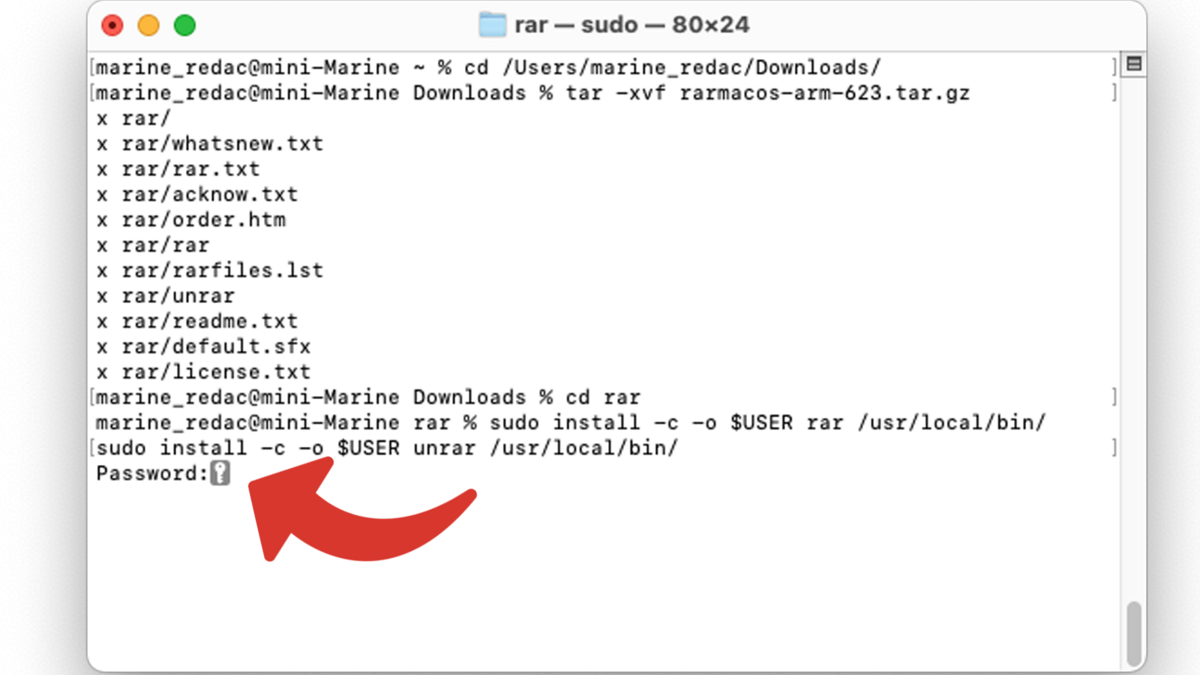
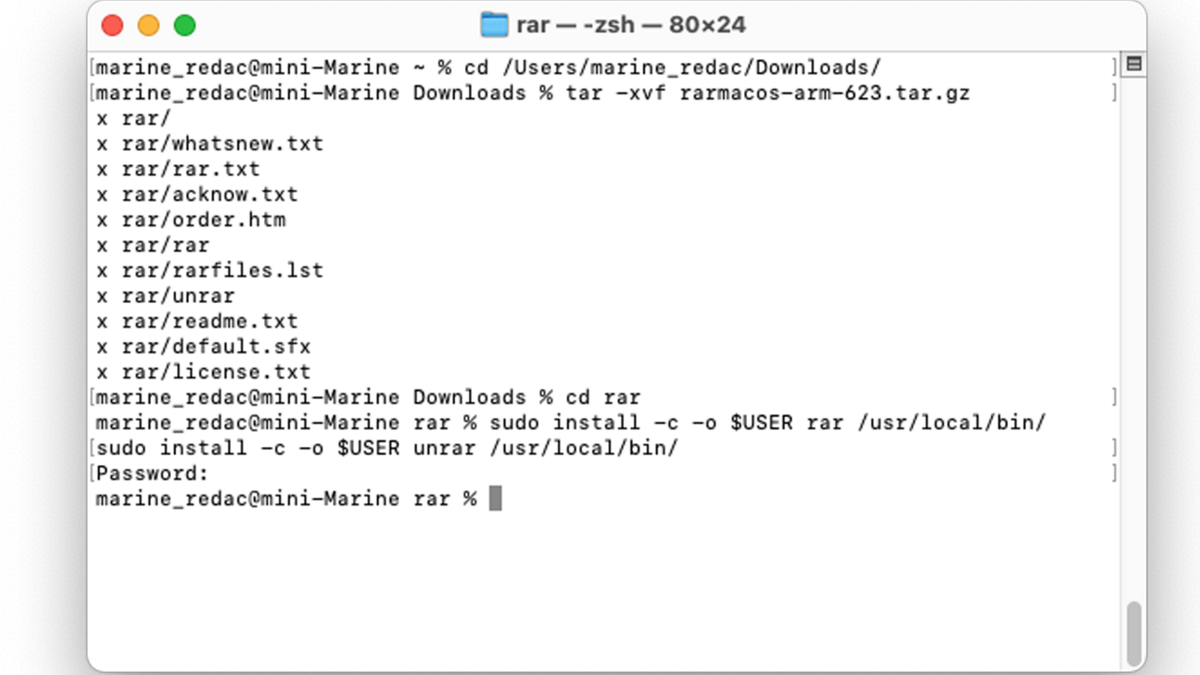
Note: you must keep “Users” in English and if it is in the default “Downloads” folder, the one created by macOS, you will have to write “Downloads” and not “Downloads”. In the example, in the screenshot you can see that the user name is “marine_redac”, in the default folder “Downloads”, therefore “Downloads”. The command is therefore:
cd /Users/marine_redac/Downloads/
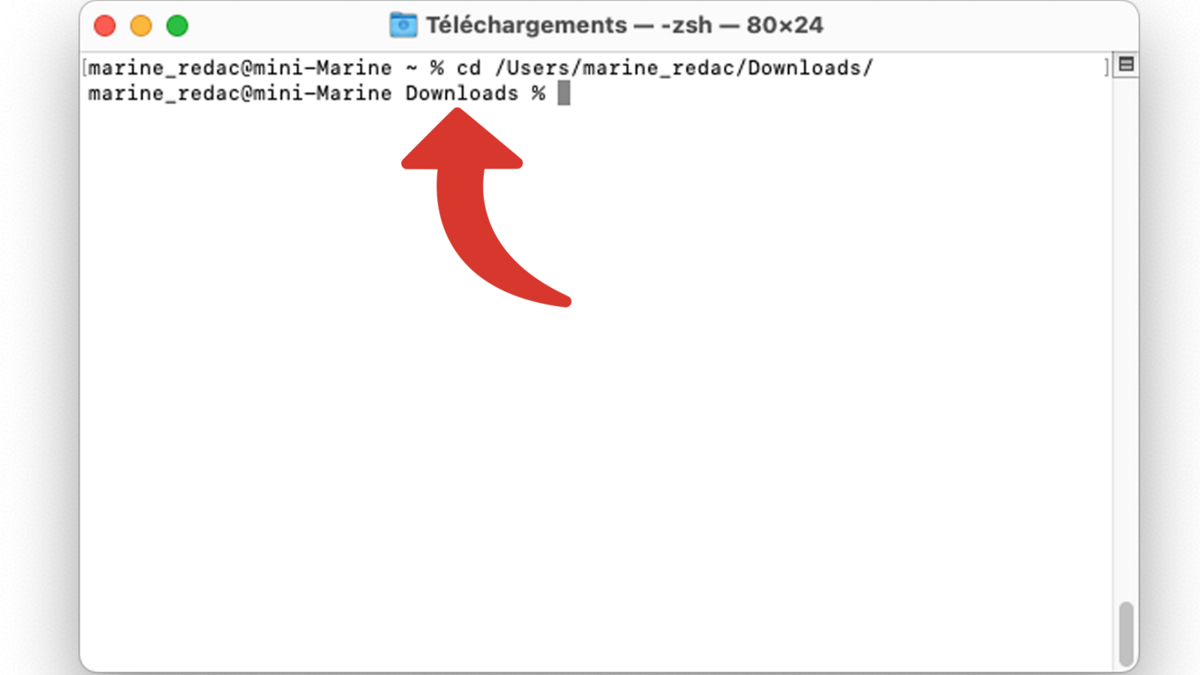
Validate the command line by pressing the “Enter ⏎” key on your keyboard.
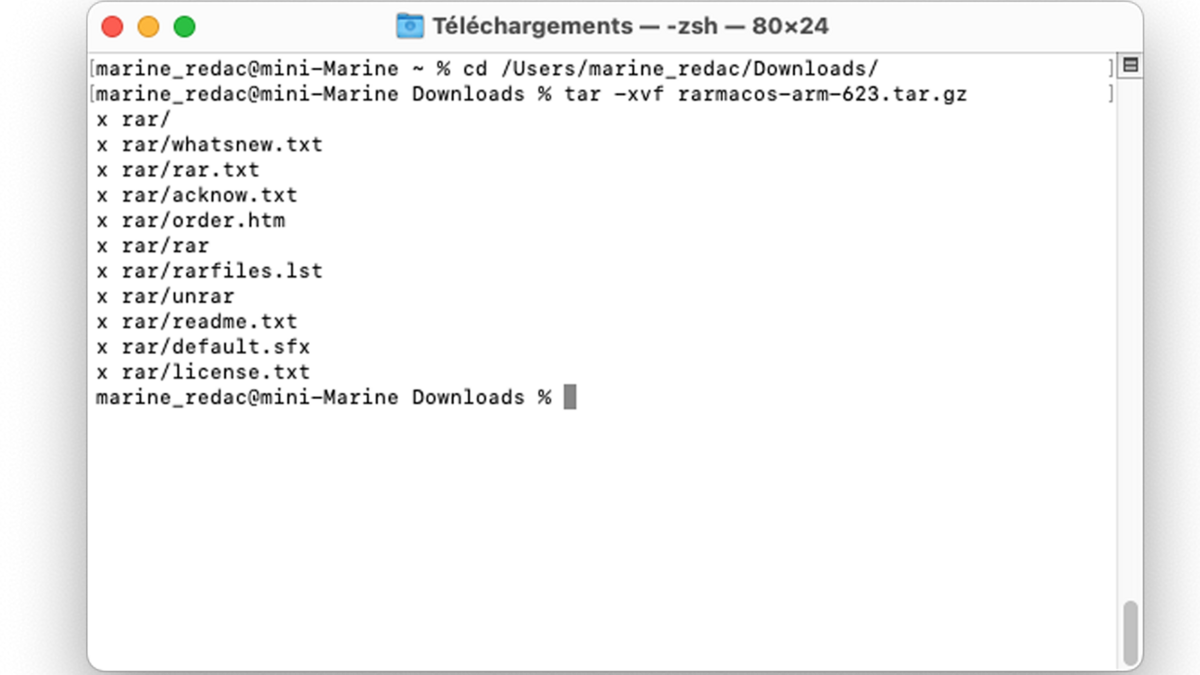
4. Extract the files
Now that you are in the right folder, enter this command replacing “File_Name” with the full name of the file downloaded in step 1, it must end with .tar.gz:
tar -xvf Nom_du_Fichier
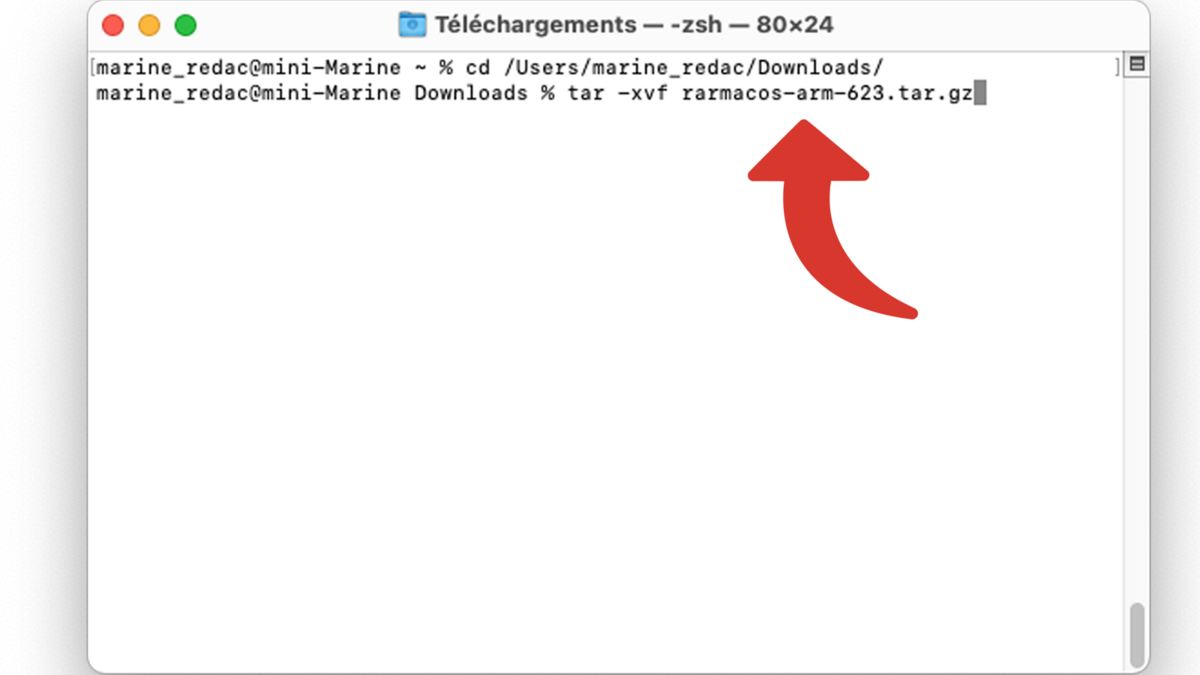
In the screenshot, the file is named “rarmacos-arm-623.tar.gz”. Therefore, the command is:
tar -xvf rarmacos-arm-623.tar.gz
Press the “Enter⏎” key to validate the command.
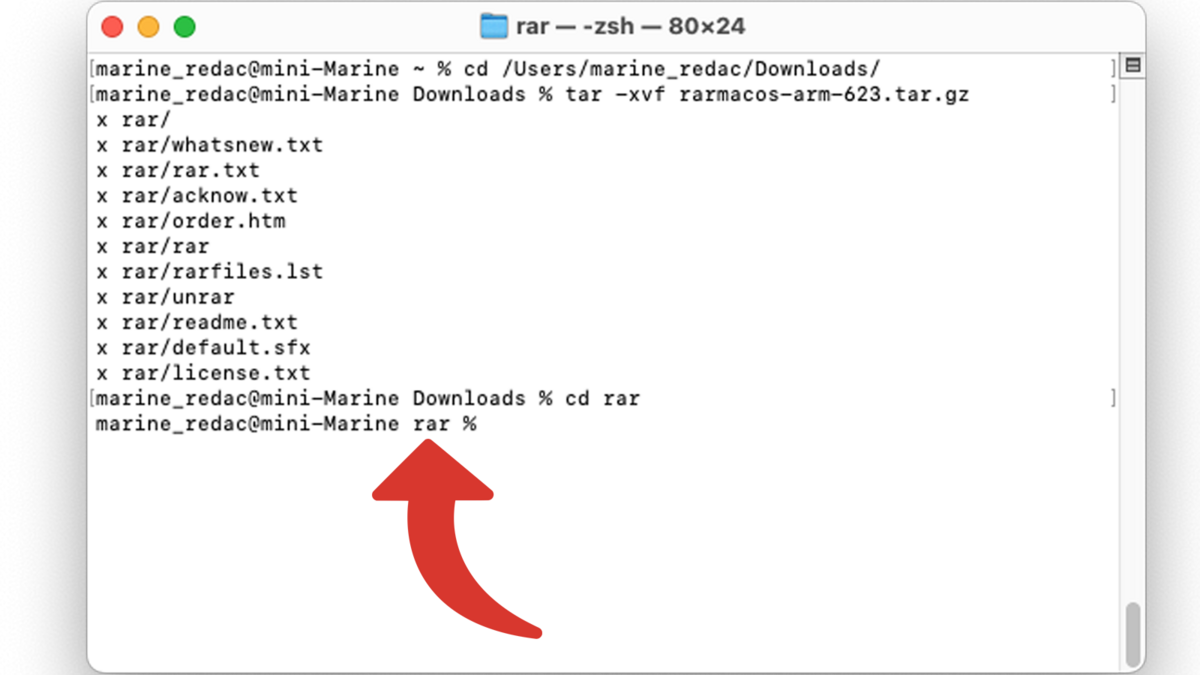
5. Navigate to the rar folder
The extraction created a rar folder, we will enter it with this command:
cd rar
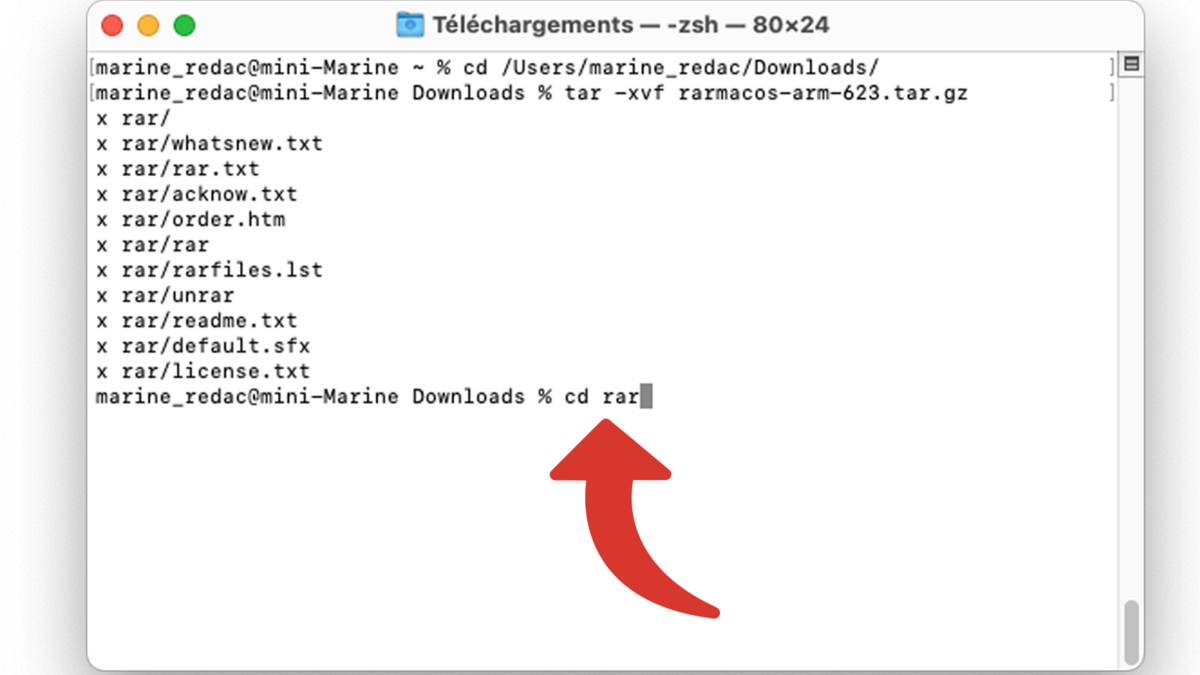
Validate with “Enter ⏎”.
6. Install rar and unrar
Everything is ready to install rar and unrar. The first is used to create archives in RAR format, and the second is used to decompress them. You can install them separately or together by entering this exact command (or copying and pasting):
sudo install -c -o $USER rar /usr/local/bin/
sudo install -c -o $USER unrar /usr/local/bin/
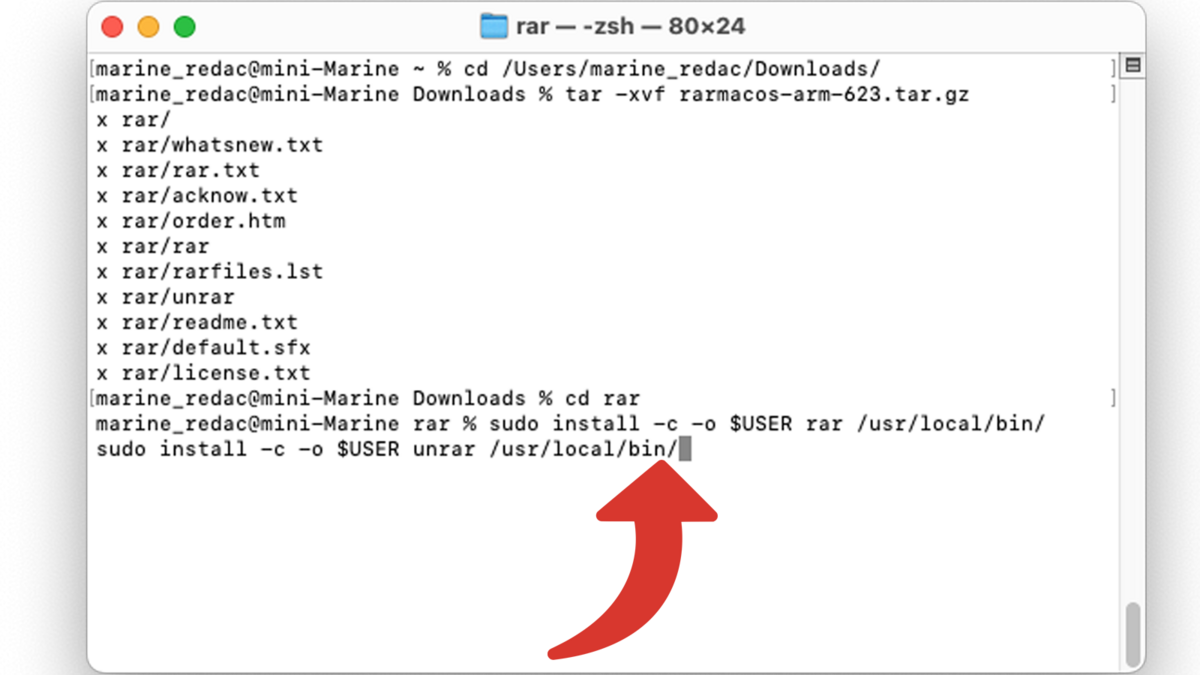
Press “Enter⏎” then enter your session password. No star appears, you have the impression of writing in a vacuum, this is normal.
Validate with “Enter⏎”.
You have successfully mastered the command lines to install WinRAR (RAR) on your Mac. To unpack an archive in RAR format with this tool, you will also need to use Terminal. If you are looking for a tool that does not require you to open Terminal, there is also Keka to compress and decompress on Mac via an interface.